My tri-hull transom replacement w/ pics

Status
Not open for further replies.

drewpster

Commander
Joined
Oct 17, 2006
Messages
2,059
Re: My tri-hull transom replacement w/ pics

I got the first coat of primer all sanded. The way this stuff sands out is why I like it so much. After some passes with 150 grit and some hand sanding in the corners the surface feels like talcum. Baby butt smooth! I did see some flecks of roller sponge in the cured surface of the primer. If you look closely you can see them in the pic below. Well no big deal, I'll sand it out and use the right rollers for the paint.
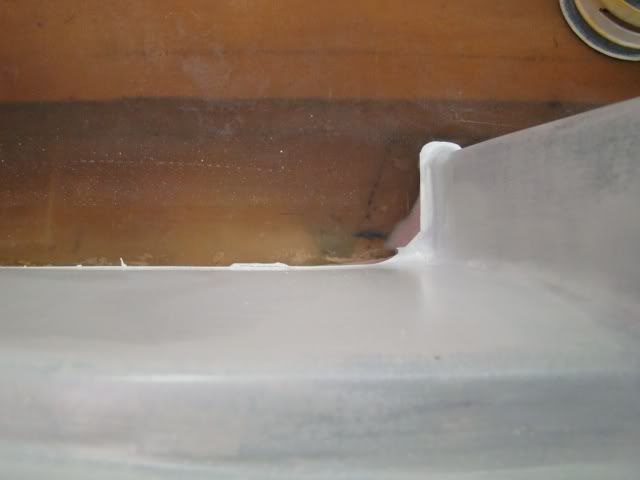
DSC05783.jpg


I used a pretty aggressive grit to do the initial sanding. I know 150 is a bit steep. The primer calls for 220 but this stuff was curing a week before I started to sand it. I was careful but 220 was just going to slow. Here is how it looked after a little work with a sander and by hand. If you use care speed is possible. I sanded all of the primered areas out and had a second coat on in just a few hours.
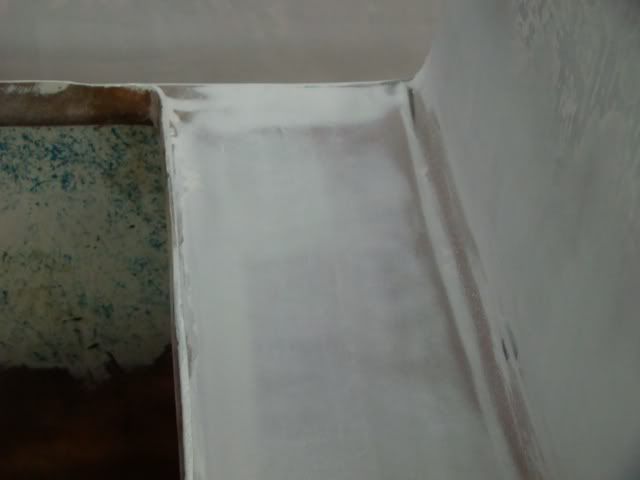
DSC05786.jpg


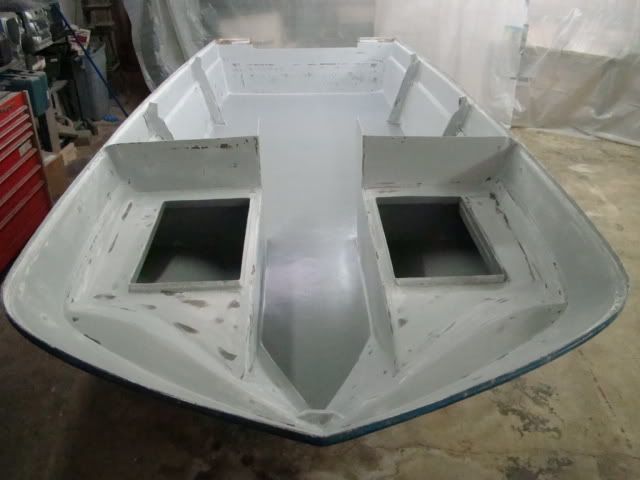
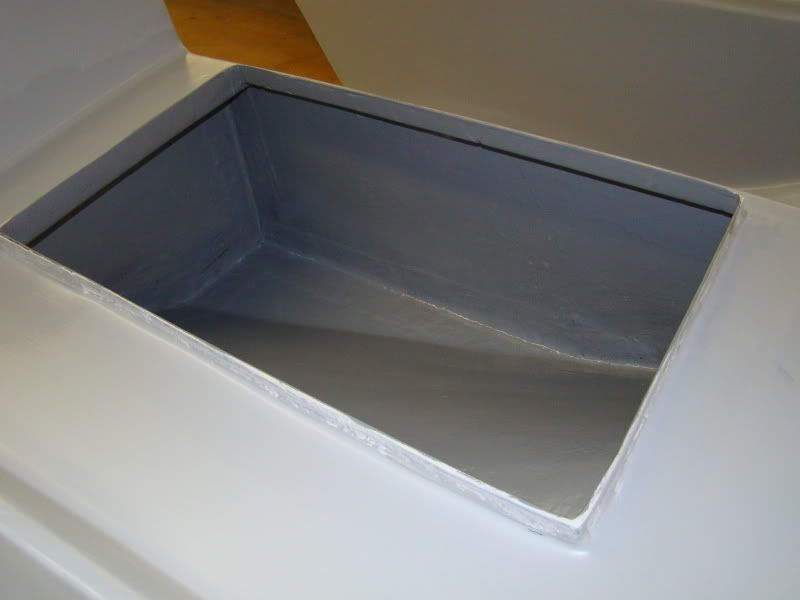
Before starting the application of the second coat of primer I decided it was time to get some gelcoat inside the seat boxes. This was a bit of an experiment to see how the US Comp gelcoat was going to tint and roll down. The small pint can of tint should go a long way. Just a few drops in the batch of gelcoat yielded the gray color I was looking for inside the boxes.
DSC05825.jpg

It will need a second coat so I did not add any wax or use PVA on the first coat. I kicked the gelcoat with the normal amount of mekp, instead of the recommended double amount. It made the gelcoat stay in the pan longer which gave me more time to get it rolled in all those tight corners. Again I used a plain old roller and a cheap brush. I left the insides rough anyway so the gelcoat is for protection rather than finish.

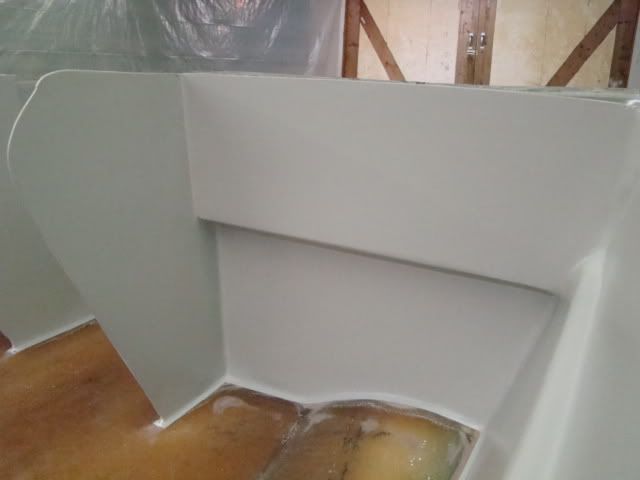
Since I was playing around with the tint anyway I decided to add a little gray tint to the next primer coat. I would have worked better as a guide in the first layer, but this will do. The second coat of primer went on much smoother and covered much better than the first coat. If the paint goes this well I will be more than happy.
DSC05824.jpg


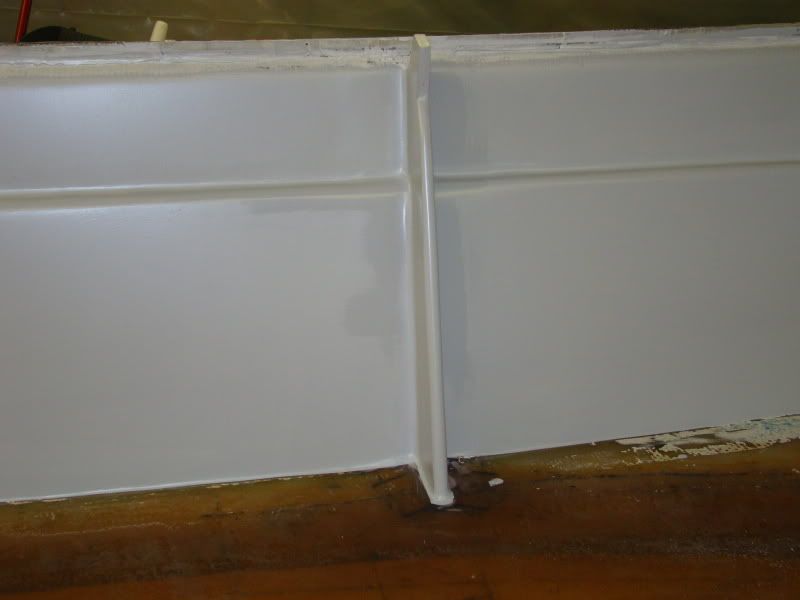
You can see some variations in the color here because I just eyeballed the tint in the two batches of primer I mixed up. I will try to be more accurate when I tint the gelcoat for the deck.
DSC05831.jpg


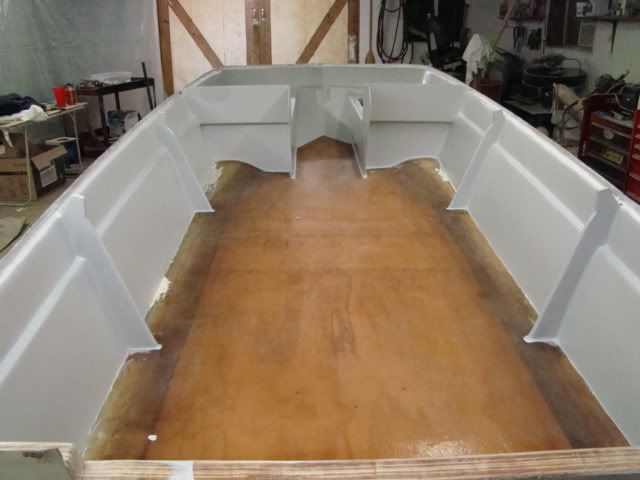
This stuff covers great. I still had some small pin holes in the first layer of primer. After the second went on those holes are gone. I will be glad to avoid the filler for awhile. Lets hope those pin holes don?t show back up after this coat gets sanded.
DSC05822.jpg


So far I have not seen any major defects I cannot live with. I did not say there aren't any, just that they are livable.
 

drewpster

Commander
Joined
Oct 17, 2006
Messages
2,059
Re: My tri-hull transom replacement w/ pics

This should be a huge weekend Kids! I hope to have the deck gelcoat down and the cap back on before I go back to work Wednesday. Cross your fingers.
 

BobsGlasstream

Commander
Joined
Sep 11, 2009
Messages
2,128
Re: My tri-hull transom replacement w/ pics

Hey drewpster,
As always it really looks great. I hope that you hit your plans. I would love to see it and the cap back on.
It really looks smooth.
Keep up the great work.
Bob
 

drewpster

Commander
Joined
Oct 17, 2006
Messages
2,059
Re: My tri-hull transom replacement w/ pics

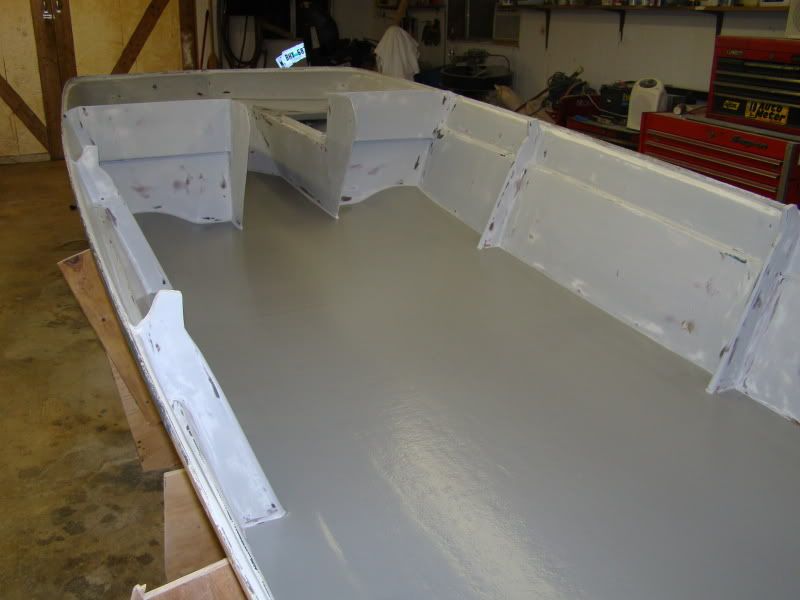
Unfortunately I did not get the cap back on as planned. I did manage to get the final coat of primer sanded. I also taped it off and got the deck gelcoated.

DSC05867-1.jpg


I left the deck rough. I will eventually cover the deck with either carpet or a vinyl covering like Merideck. It all depends on my mood at the time I suppose.

DSC05874.jpg


I again used a plain foam roller and a throw away brush to coat the deck with gelcoat. I started with neutral gelcoat and added tint to get the gray color. I would have liked it a little lighter. It will need another coat, and I will try a little less tint in the next mix.

DSC05866-1.jpg


I am going to give the cap another shot soon. It needs some work to get it going. I will have to prep the splashwell to mate it with the new transom. I look forward to it. The inside of the hull is ready for paint it this point. After fitting the cap and glassing the splashwell, the outside of the boat will start. I am not going to do the final coats of paint until everything is prepped. That is unless my mood changes.
 

BobsGlasstream

Commander
Joined
Sep 11, 2009
Messages
2,128
Re: My tri-hull transom replacement w/ pics

drewpster,
It's really coming along. The gel looks great. At least the deck doesn't have to be sanded. :)
Nice work.
Bob
 

tallcanadian

Captain
Joined
Sep 7, 2006
Messages
3,245
Re: My tri-hull transom replacement w/ pics

Wow..it looks awesome. Keep up the good work. Cannot wait to see it done, as I'm sure you are.
 

Erik4e

Cadet
Joined
Jan 10, 2010
Messages
16
Re: My tri-hull transom replacement w/ pics

Hey Drewpster, grest posts. I have a question, and I am sorry if you stated this but I couldnt find it. What kind of wood did you use for your transom and deck? I know I have read many different posts on here with many of Ideas. I am just curious what you used. Thanks!
 

drewpster

Commander
Joined
Oct 17, 2006
Messages
2,059
Re: My tri-hull transom replacement w/ pics

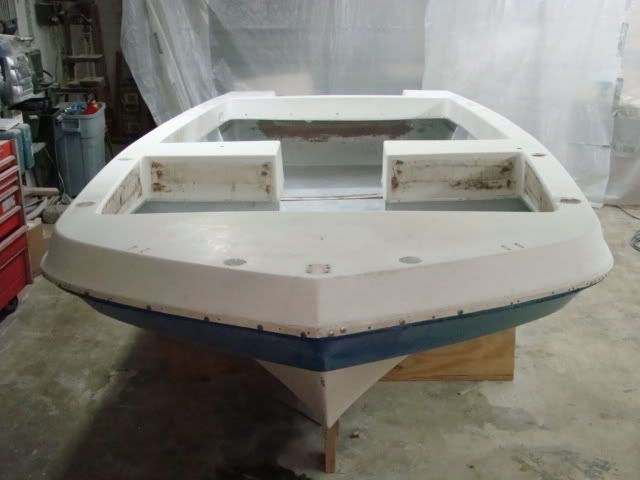
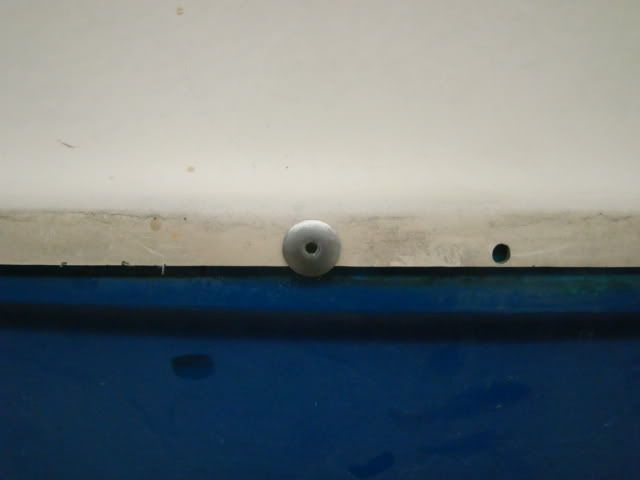
I finally found some time so I made a little progress. The cap is now permanently on! I decided to use rivets to reattach the cap to the hull. I found some rivets that have larger heads on them to cover and secure the original holes.

DSC05978.jpg


The rivets were perfect to cover the holes and were long enough to make it all the way through the flange.

DSC05979.jpg


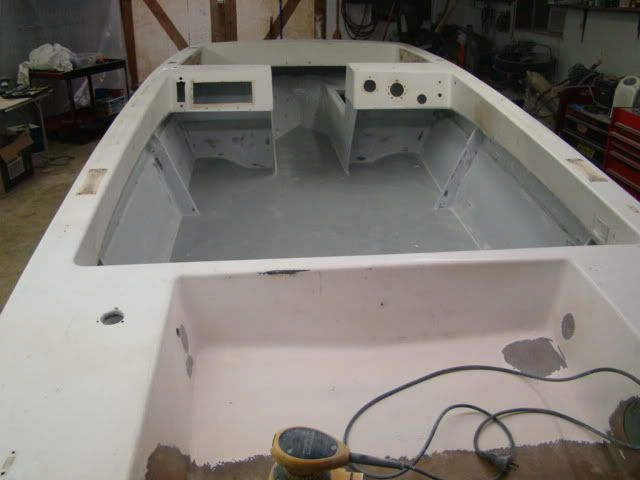
Adding the aluminum strip to the inside of the lip of the hull was a real help. Everything pulled up nice and secure. I was a little concerned about the fit of the dash boxes over the original placement of the seat boxes. But I must have made a good guess because they fit just right.

DSC05977.jpg


Overall I cant complain about how everything has gone back so far. I am really looking forward to finish paint and rigging.
 

BobsGlasstream

Commander
Joined
Sep 11, 2009
Messages
2,128
Re: My tri-hull transom replacement w/ pics

Hey drewpster,
Looks great.
Glad to see it coming back together.
Again great job.
Bob
 

92excel

Chief Petty Officer
Joined
Oct 6, 2008
Messages
477
Re: My tri-hull transom replacement w/ pics

Looks great.. are you planning on doing a sealant to the entire hull cap joint?
 

drewpster

Commander
Joined
Oct 17, 2006
Messages
2,059
Re: My tri-hull transom replacement w/ pics

The joint had no sealant from the factory, but I will be using something to seal it off. The rub rail I selected has a lower lip that covers the lower part of the flange.. I will use some 4200 under the rubrail to seal it off.
 

boatflipper

Chief Petty Officer
Joined
Jun 16, 2009
Messages
500
Re: My tri-hull transom replacement w/ pics

Drewpster-
That deck is looking great! Also happy to see your cap get back on, hopefully mine will be on this weekend!
When you put your cap back on, in the area around the transom, did you do anything before you put the cap down? I was thinking of laying a bead of silicone down atop the core before laying the cap down to seal things up a bit but wasn't for sure...Also, once you got the cap fastened back down, did you put anything along the seam between the splashwell and hull? (Does this make any sense?)

Thanks
 

redfury

Commander
Joined
Jul 16, 2006
Messages
2,655
Re: My tri-hull transom replacement w/ pics

In case anyone was curious, my hull had a thin strip of foam between the cap and the hull...glued to the hull. The cap must have just been a perfect fit going on over the hull when it was built, because I have to shoe horn it back on every time I take it off...I dunno how I could get a strip of foam, no matter how thin...to stay in place and intact during the cap refit. :confused:
 

tinkeringwackyone

Chief Petty Officer
Joined
May 2, 2008
Messages
415
Re: My tri-hull transom replacement w/ pics

glad to see the cap back on. you're making great progress.
 

MTribe08

Senior Chief Petty Officer
Joined
Oct 25, 2008
Messages
680
Re: My tri-hull transom replacement w/ pics

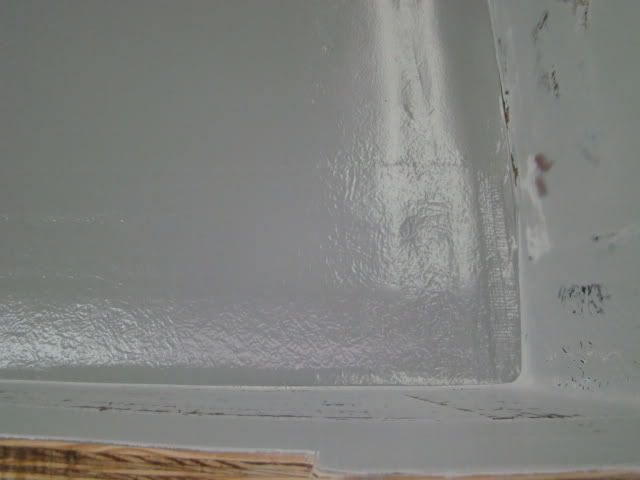
I left the deck rough. I will eventually cover the deck with either carpet or a vinyl covering like Merideck. It all depends on my mood at the time I suppose.

DSC05874.jpg


I again used a plain foam roller and a throw away brush to coat the deck with gelcoat. I started with neutral gelcoat and added tint to get the gray color. I would have liked it a little lighter. It will need another coat, and I will try a little less tint in the next mix.


Hey Drew..couple questions about laying down the Gel Coat. I'm going to be laying snap in carpet over the Gel, so mine is a little rough too. I've gone over it with 80 grit to rough it up a bit and sand down any obvious high spots. In this picture you can see the outline of glass, is that CSM showing through? Will the second coat cover that up, or will it always be there? Not a huge deal, just wondering.

Also, I'm going to be using a Vinylester Gel Coat, and the shop I bought it from says to only put down one coat, does that sound right? For your first coat, was it a just a regular coat, not too thick, not too thin?

I was planning on and have purchased a fabric roller and some cheap paint brushes for the job..will the fabric roller produce a different finish than the foam?

One last question..how many sq/ft of deck do you think you have?

Thanks
 

drewpster

Commander
Joined
Oct 17, 2006
Messages
2,059
Re: My tri-hull transom replacement w/ pics

boatflipper-
I did not put anything between the cap and hull joint. The joint should stay well above the waterline so I did not take any special steps in sealing the joint. However I will seal it from the outside using 4200 under the rubrail at the seam. My splashwell is a little different. I had to cut out the aft end of it to accommodate the thicker transom I installed. I will outline that in a later post.

MTribe08-
That is CSM you see printing through the gelcoat. That picture was taken of the area just forward of the transom and is covered by the splashwell. So I did not grind out the seam you can see. The gelcoat will not cover unless you use multiple coats. The surface you see in the pic has two coats on it. I plan to do at least one more. I use poly gelcoat and have never used vinylester. It may cover differently. I suggest you use foam rather than a fabric roller. Either will work, but I think foam wastes less and you can control the coverage better. Even after three coats I doubt the gelcoat will cover much roughness. Since you are covering the deck anyway I would not sweat it too much. The gelcoat is there mainly just for protection anyway. Keep in mind that gelcoat is designed as the first layer in a mold, not as a painted on coating. It will work as one, but I doubt you can get too thick using hand tools. The best idea is to mix the catalyst very accurately. Poorly mixed gelcoat will fracture eventually. I used the same amount of catalyst in the gelcoat as I would in the same amount of plain resin. I was working in room temps (around 70) and I was able to work with it longer and it cured just fine.
US Comp recommended twice the amount of catalyst and the gelcoat cooked in the pot before I could get it applied. I think that amount is only used if spraying a mold, not using a roller. Or I am just way too slow.;)

To apply it load the roller with just enough that it does not drip off the roller. Spread it evenly and reload the roller anytime you see it leave dry spots on the surface. Keep a dry brush handy so you can tip off the surface and blend it as you roll it on. If the brush leaves strokes in the surface your applying it too thick. Dont worry if the color is transparent, it more important to get an even coat than to make it cover. By the time you finish the first coat and mix the next batch it will be ready for another coat. Once you have it down it will kick really quickly so blend it with the brush as you go.
I poured three 3/4 quart batches and kicked them one at time as I used them. I used about a gallon for two complete coats. I plan to use another gallon, and call it done.
 

MTribe08

Senior Chief Petty Officer
Joined
Oct 25, 2008
Messages
680
Re: My tri-hull transom replacement w/ pics

boatflipper-
I did not put anything between the cap and hull joint. The joint should stay well above the waterline so I did not take any special steps in sealing the joint. However I will seal it from the outside using 4200 under the rubrail at the seam. My splashwell is a little different. I had to cut out the aft end of it to accommodate the thicker transom I installed. I will outline that in a later post.

MTribe08-
That is CSM you see printing through the gelcoat. That picture was taken of the area just forward of the transom and is covered by the splashwell. So I did not grind out the seam you can see. The gelcoat will not cover unless you use multiple coats. The surface you see in the pic has two coats on it. I plan to do at least one more. I use poly gelcoat and have never used vinylester. It may cover differently. I suggest you use foam rather than a fabric roller. Either will work, but I think foam wastes less and you can control the coverage better. Even after three coats I doubt the gelcoat will cover much roughness. Since you are covering the deck anyway I would not sweat it too much. The gelcoat is there mainly just for protection anyway. Keep in mind that gelcoat is designed as the first layer in a mold, not as a painted on coating. It will work as one, but I doubt you can get too thick using hand tools. The best idea is to mix the catalyst very accurately. Poorly mixed gelcoat will fracture eventually. I used the same amount of catalyst in the gelcoat as I would in the same amount of plain resin. I was working in room temps (around 70) and I was able to work with it longer and it cured just fine.
US Comp recommended twice the amount of catalyst and the gelcoat cooked in the pot before I could get it applied. I think that amount is only used if spraying a mold, not using a roller. Or I am just way too slow.;)

Ok, I'll take back the fabric and get foam. I plan on mixing 32oz of Gel at a time in about 70ish degree weather and 16ml of catalyst. I'm thinking I might mix less just to make sure I get it out of the pot. Maybe 16oz at a time with 8ml of Catalyst?

Once this stuff starts to kick on the deck, will it look funny if I role new Gel up to it? What I'm saying is..is it important to keep a "wet edge" like it is when laying regular resin on glass? I'm probably overthinking this whole thing..but I don't want to flub it up.
 

MTribe08

Senior Chief Petty Officer
Joined
Oct 25, 2008
Messages
680
Re: My tri-hull transom replacement w/ pics

To apply it load the roller with just enough that it does not drip off the roller. Spread it evenly and reload the roller anytime you see it leave dry spots on the surface. Keep a dry brush handy so you can tip off the surface and bled it as you roll it on. If the brush leaves strokes in the surface your applying it too thick. Dont worry if the color is transparent, it more important to get an even coat than to make it cover. By the time you finish the first coat and mix the next batch it will be ready for another coat. Once you have it down it will kick really quickly so blend it with the brush as you go.
I poured three 3/4 quart batches and kicked them one at time as I used them. I used about a gallon for two complete coats. I plan to use another gallon, and call it done.

Sorry..didn't see this part.

Ok, I have a gallon as well, and really don't want to buy any more. I"m going to call the shop and get clear on how the vinylester should go down..he says 1 coat.

If I do more than 1 coat, after it kicks on the deck I can stand on it without making marks in the surface? I obvioulsy won't have wax in it if I'm doing more than one coat. I can't really paint my boat with out being "in" the boat, so I don't want to stand on the gel and jack up the surface I'm about to pain over.

With your boat, are you planning on putting carpet on the sides of the hull, right up to where it meets the deck? I saw you taped it off nice, but I'm putting carpet there, so I'm going to run some gel up the sides too.

As far as the brush you go over the surface with..did you use a foam brush like you would use to roll and tip, or a regular paint brush?
 

drewpster

Commander
Joined
Oct 17, 2006
Messages
2,059
Re: My tri-hull transom replacement w/ pics

If you have to do more than one coat use an extension handle on your roller frame. I used a short step ladder to reach over the sides to get the second coat.
The brush is there to do a little blending and to wipe out mistakes. You do not have to tip the whole surface like you would paint. I used a cheap paint brush, chip brushes are a little too stiff.
My boat is 16 over all. The deck surface is maybe 4 1/2' at its widest and 12' long. (guessing from a bad memory) If the vinylester covers well, a gallon should be fine.
 

MTribe08

Senior Chief Petty Officer
Joined
Oct 25, 2008
Messages
680
Re: My tri-hull transom replacement w/ pics

If you have to do more than one coat use an extension handle on your roller frame. I used a short step ladder to reach over the sides to get the second coat.
The brush is there to do a little blending and to wipe out mistakes. You do not have to tip the whole surface like you would paint. I used a cheap paint brush, chip brushes are a little too stiff.
My boat is 16 over all. The deck surface is maybe 4 1/2' at its widest and 12' long. (guessing from a bad memory) If the vinylester covers well, a gallon should be fine.

Spoke with the guy I buy my supplies from and he was adamant about laying down only one coat..he's been in the business for 50yrs.( I thought it was less, but whatever) He's seen the industry evolve over time and the products used today are far different from before. What I didn't know was that he is a chemist also, and this is his stuff. He has tested it for many years in very harsh conditions. Constant exposure to Sun Light and salt water and its bullet proof and will not yellow or chalk. He hasn't steered me wrong and has been very good about only selling me what I need, even when I thought I needed more, or thought I needed other "things".

He said one good heavy coat and not to let the roller run low and let it go. I'll lay it down tomorrow. Thanks for the help Drew.

One last question, not related to Gel Coat, while I see you online. What is going to be a stronger bond? A Poly/Glass sandwhich or PL heavy duty? I'm going to be securing the the wood seat base to the deck and I want the bottom of the base to be bonded, as well as laying glass over it and extending the glass out around the perimeter. Not sure if I should do the glass/resin or PL on the bottom..Thanks
 
Status
Not open for further replies.
Top