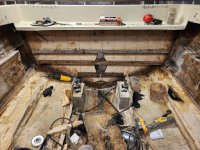
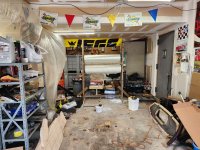
My 84 4winns horizon 195 project.

Pmt133

Chief Petty Officer
Joined
Jan 6, 2022
Messages
571
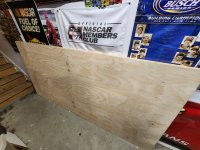
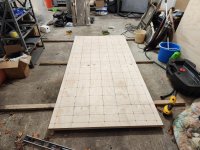
Plywood was delivered today. Moved it inside. This is the "worst" c rated side.
20240321_191849.jpg
I think they did good by me.

Also recieved notification that my glass order should be here Monday for freight pickup.
 

Pmt133

Chief Petty Officer
Joined
Jan 6, 2022
Messages
571
So I have to ask as I've seen differing opinions... should I be adhering the transom wood to the transom with some thickened resin/peanut butter or just using PL adhesive. I feel like the PL would be a little easier to work with but I think the PB would be better for taking up the voids I may have...
 

briangcc

Commander
Joined
Jul 10, 2012
Messages
2,360
From what I've seen in other resto threads, if you go with PL, you need to allow sufficient time to off gas. Some are saying up to a week's time before you can coat with glass.

Something to consider if you're under a time crunch.
 

Pmt133

Chief Petty Officer
Joined
Jan 6, 2022
Messages
571
Yes. It doesn't seem to be as much an issue on small pieces, when I rebuilt my engine mounts it was good after two days but it was also in the 90s out. While I can get the garage that hot I don't want that bill lol.

And like, I have 35 gallons of poly. Why buy PL on top of that.
 

Pmt133

Chief Petty Officer
Joined
Jan 6, 2022
Messages
571
So, I'm working tomorrow today and yesterday again. Original plan was to get jamming on Monday but dad is officially having surgery so I have to take him for that. My plan was to pick up the US composite order and get the transom templated and possibly the ply laminated but that'll have to wait. Wanted the transom in before the weekend so I could order my gimbal housing parts and measure everything but oh well. Family first.

What does suck is he will be totally stuck on the bench now so it is going to be me and probably only me from here out. Not that anyone else was helping but the occasional visit for moral support was nice. If I can get her done by memorial day he'll have a couple weeks between where he can enjoy it before surgery 2 though so that'll be fun. Time is ticking.
 

Pmt133

Chief Petty Officer
Joined
Jan 6, 2022
Messages
571
While I'm thinking about it... I have some old holes in the transom that are no longer used that I'd like to seal up... would over drilling them to say 1/4 inch and just doing a marine-tex plug be sufficient. They are screws that the heads broke off of from the PO. They have marine tex over them on the outside but the lumps are unsightly... if I can smooth them out I'd like to.

I figure that with the peanut putter bonding layer and glass on the wood should keep anything sealed, right?
 

Pmt133

Chief Petty Officer
Joined
Jan 6, 2022
Messages
571
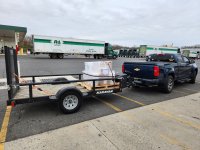
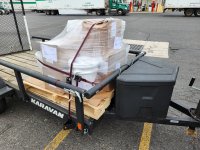
Picked up my order today. Dad's home from surgery so I had some time to get out...
20240326_180115.jpg
20240326_180121.jpg
Not my best strap work... but we made it.
20240326_191850.jpg
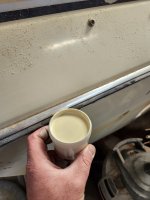
I'll also add. The off white tint for the gelcoat is reasonably close. I just want the bilge to look close enough lol.
 

Pmt133

Chief Petty Officer
Joined
Jan 6, 2022
Messages
571
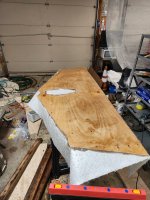
Probably all I'm going to do this weekend. Got the transom laminated so I can cut it. It dried just slightly warped... if you throw a straight edge across it it proud by maybe 1/16 in the middle. I figure I'll put that side out and let the clamps pull it flat when I bed it to the transom.
20240329_123528.jpg
I'll also add, trying to move an inch and a half sheet by yourself sucks. Figure it's about 120lbs. Not heavy, just awkward.
 

Pmt133

Chief Petty Officer
Joined
Jan 6, 2022
Messages
571
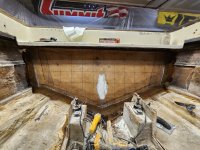
So I learned a little yesterday. First, even with the garage at 70 degrees it takes a couple hours for the poly to kick off. Second, inside the bubble I can keep it at 80 easily... I will be doing that for speed of layup. At any rate, the transom is adhered to the skin.
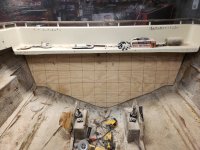
20240403_125125.jpg
Shown above is the test fit. looks really good.
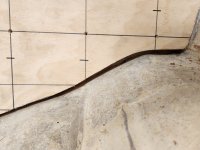
20240403_125156.jpg
This is my worst gap that needs to be bridged. Again, very good.
20240403_165320.jpg
I opted for a layer of CSM on the back side between the wood and peanut butter. I do believe if I were to do it again this really wasn't needed... I don't think it hurt to do it?
20240403_201132.jpg
All clamped in. I did have some slight separation up at the very top of the wood between it and the transom The peanut butter was still bridging the gap. Maybe 1/16 of an inch at most. I don't believe this will cause any issues? All around the cutout was solid with good squeeze and I believe that is where most the strength is. Looking at other builds, it seems most transoms aren't even full height with wood in a lot of cases so I am already pretty good and probably overkill. I also believe a lot of the strength comes from the tabbing and glass itself. Again, should be fine.

Any thoughts otherwise?
 

todhunter

Canoeist
Joined
Sep 15, 2020
Messages
1,308
Looks good. PB and tabbing will make that gap nonexistent and cover all your sins. I never had to worry about poly working time until mid-80's in the garage, and even then, by reducing the MEKP ratio, I could get the working time I wanted.

Keep up the good work!
 

Pmt133

Chief Petty Officer
Joined
Jan 6, 2022
Messages
571
Looks good. PB and tabbing will make that gap nonexistent and cover all your sins. I never had to worry about poly working time until mid-80's in the garage, and even then, by reducing the MEKP ratio, I could get the working time I wanted.

Keep up the good work!
Yes. My first batch I mixed at exactly 1% MEKP... That took 3 hours to kick off. My subsequent batches I mixed at more like 1.2% and I was still getting almost 45 minutes working time before it started to even gel. I understand I can go hotter but being a noob, I prefer the longer working time. The 435 recommends 1% when used as straight resin. IIRC you get enough for about 1.25% from us composites...

I've only really done epoxy so having a little more wiggle room is nice. I have a little 1mL medicine dropper I have been using for the MEKP. I will probably get a measuring bottle as that is way easier.

And same as when I weld... a grinder and paint makes anything look nice. Same with fiberglass and resin. šŸ˜†
 

todhunter

Canoeist
Joined
Sep 15, 2020
Messages
1,308
Yeah, do whatever you're most comfortable with. But, if you want to bust out several layups in a weekend, you can go up to 2% or even slightly higher than that and be OK. I did my restoration in a climate controlled garage, so I kept it about 63F in the winter and 73F in the summer, and almost never had an issue with resin going off faster than I wanted.

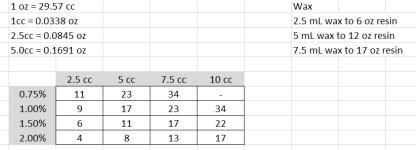
I tried the measuring bottle and didn't like it - too messy. I ended up just using the small measuring cups that came with the resin and MEKP from US Composites. I actually made and printed this chart out and stuck it on the wall by my mixing station:

catalyst chart.jpg

This goes with the graduations on the small mixing cups from US Composites. I did it this way because it's easier to fraction out the resin than it is the MEKP since its 100X the volume. Grey numbers on the left are the mix ratio, grey numbers across the top are cc of MEKP. Chose the desired mix ratio and MEKP volume, then at the intersection in the middle (white cells), read off how much resin to add.
 

Pmt133

Chief Petty Officer
Joined
Jan 6, 2022
Messages
571
I'm glad I'm not the only one who makes spreadsheets. I actually forgot the measuring cups on my order hence the syringe.... That chart is nice and very similar to how I've set up dosage charts in the past. I appreciate it. I have just been doing the math in my head or using a calculator but it would be a great idea to make a chart, laminate it and just keep it around.
 

todhunter

Canoeist
Joined
Sep 15, 2020
Messages
1,308
One thing I forgot to mention - the chart shows ounces of resin to cc of MEKP, so the conversions are already in there.
 

Pmt133

Chief Petty Officer
Joined
Jan 6, 2022
Messages
571
So I have one more question to ask everyone. I will be bedding the stringers but I was just wondering, how in the world to join the 2 sheets of ply together to get my full ~14 foot length. I originally planed to scarf them together but seeing how the ply was just in there to support the fiberglass more than being completely glued in... Do I need to bother with a scarf or can I just butt glue them and be fine... I don't want any issues down the line but if I could avoid the time required to scarf that would also be nice...
 
Top