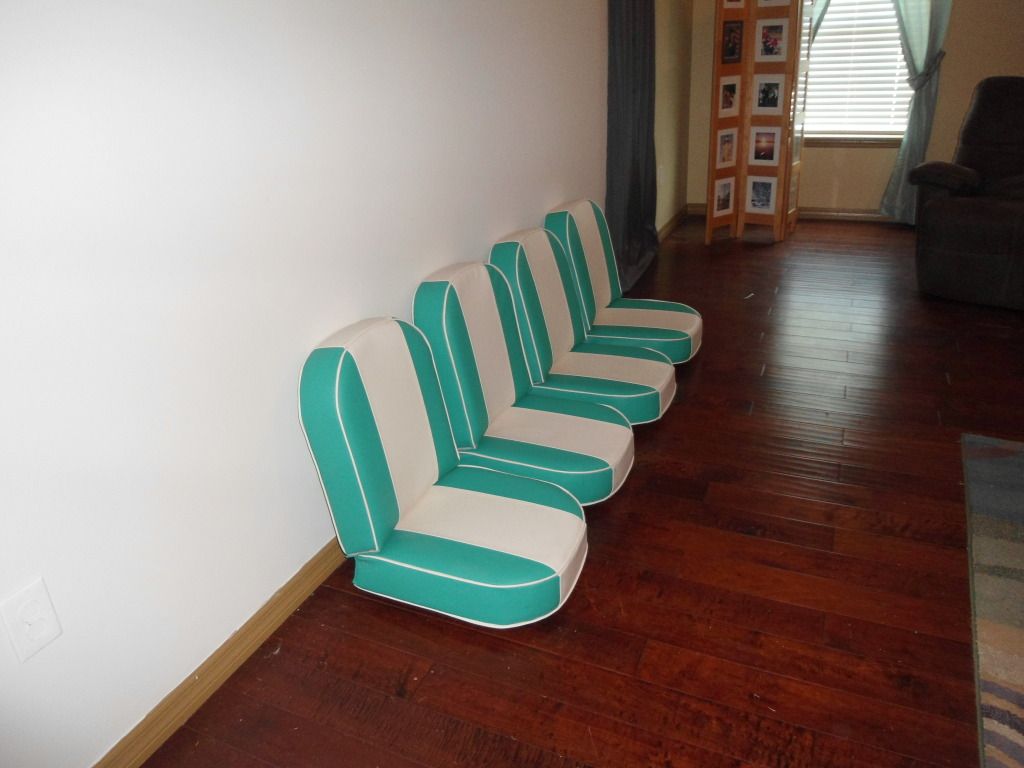
MFG rebuild getting started pics

sphelps

Supreme Mariner
Joined
Nov 16, 2011
Messages
11,470
Re: MFG rebuild getting started pics

Thanks everyone with the kind words and idea,s on the sharpy marks ! My son gets the credit for the video editing . I guess if I didn,t offend anyone with the Tull maybe next time we can lay down some Jimmy Hendrix ! LOL!
OK this is all the stuff I have tried on the sharpy..
DSC00837.jpg

The most effective was the acetone.. And here is what I got ..
DSC00838.jpg

Almost all gone but you can still see it some ..
 

Trooper82

Commander
Joined
Nov 21, 2011
Messages
2,648
Re: MFG rebuild getting started pics

Maybe put some of that vinyl dye on it now? make it invisible...
 

GT1000000

Rear Admiral
Joined
Jul 13, 2011
Messages
4,916
Re: MFG rebuild getting started pics

I hate to even suggest this, but I have found that Lacquer Thinner is one of the few things that dissolve Sharpie Ink...most of the time...I do not know how it will affect the vinyl, however...:confused:
 

GT1000000

Rear Admiral
Joined
Jul 13, 2011
Messages
4,916
Re: MFG rebuild getting started pics

Oh Carp!...I forgot to mention...use Q-tips, LOTS of them if you want to contain the damage the Lacquer thinner might do, to just the area with the sharpie marks...dip the Q-tip in L T, dab, absorb some color, repeat with fresh Q-tip...:redface:
 

sphelps

Supreme Mariner
Joined
Nov 16, 2011
Messages
11,470
Re: MFG rebuild getting started pics

That may work but I will try it on some scrap first GT ..
I don,t know if you guys are interested but here is a kinda cool tool that we use at work for framing round or curved soffits ..

That was FSIL Chris using the tool . Sorry about the noise it was them dang duct guys cutting and beating on the ductwork ..
click on the pic ..
 

sphelps

Supreme Mariner
Joined
Nov 16, 2011
Messages
11,470
Re: MFG rebuild getting started pics

Those seats are looking good sp ...... I want to redo mine and you make it look so easy but I know with my clumsy fingers that it would be a struggle ... lol. You and Woody sure have it figured out. I can't wait to see her on splash day ... starting to look like a cover shot for the calendar. Great job!
How do you want to redo your seats ? With the great work you did on your boat I know you could do the sewing with no problem !
Just thinking if it were me to free up some space . Maybe install 2 small reg bass boat pedestal seats in the front and build a rear bench type removable seat in the back like Woody built for the BF ..Just thinking ..:)
 

Pmccraney

Lieutenant Commander
Joined
Jul 26, 2011
Messages
1,734
Re: MFG rebuild getting started pics

Yep, I'll take credit for the acetone recommendation...Until that portion of your vinyl shrivels and dies and then I'll disclaim having anything to do with it... :facepalm::p

Again, great vid: I can honestly say that is the first time I ever watched a man sew with interest... :)
 

Jon Sob

Master Chief Petty Officer
Joined
Jun 11, 2011
Messages
827
Re: MFG rebuild getting started pics

Just thinking if it were me to free up some space . Maybe install 2 small reg bass boat pedestal seats in the front and build a rear bench type removable seat in the back like Woody built for the BF ..Just thinking ..:)

It must be an MFG thing because that is exactly what I was thinking. I love Woody's idea of the removable bench but not sure about adding more weight to the stern with the bigger motor, fuel tank and battery already there. I may be moving some things around in the spring.
 

tallcanadian

Captain
Joined
Sep 7, 2006
Messages
3,245
Re: MFG rebuild getting started pics

Nice cleanup on the seat. I was a bit worried that it was ruined. Looking awesome.
 

sphelps

Supreme Mariner
Joined
Nov 16, 2011
Messages
11,470
Re: MFG rebuild getting started pics

Pmc,
I was careful with the acetone . I would rub some in and then clean it off with the purple cleaner real quick. I did rub some of the vinyl texture flat a little but no worse than my big behind is gunna do ..:rolleyes:
Sewing ain,t to bad you still get to do manly things like clean and oil it and curse it out when it starts screwing up on ya ! Wish I had a better machine it would have been waaay easier ..

Jon,
I think Woods bench seat was mostly open framed with some type of strapping holding the cushions. It couldn,t have weighed to much..
I,d like to put some weight further up front on mine also ..

TC ,
Thanks ! I was a little worried myself !
 

sphelps

Supreme Mariner
Joined
Nov 16, 2011
Messages
11,470
Re: MFG rebuild getting started pics

SP rookie lunchtime sewing tip for the day..
The plastic zipper foot I bought was being a real pain because the front of it was very blunt and square .. Every time I tried to sew over a multi layered seam it would get hung up and I would have to lift the foot to get it to bump over. Real PITA !! So the hamster finally got the idea to sand a bevel on the edge ..
DSC00839.jpg

This helped quite a bit .. I also sprayed it with a dry lube to help it glide some..Wish I had thought of it a few seats ago ..
I bought a couple pairs of these scissors from h/f .
DSC00840.jpg

I really like them cuss of the large loop handles and their pretty darn sharp. Less than 2 bucks ..
 

Trooper82

Commander
Joined
Nov 21, 2011
Messages
2,648
Re: MFG rebuild getting started pics

Cool tip...I removed one side of the wife's plastic foot to use for making piping...shhhhh don't let her know....
 

Woodonglass

Supreme Mariner
Joined
Dec 29, 2009
Messages
25,928
Re: MFG rebuild getting started pics

Try some of that dry lube when your sewin on the vinyl side. It'll make it feed soooo much easier. Good thinkin on the bevel. My metal foot has a good bevel on it. Also don't forget to adjust and lessen the presser foot pressure when going over 4-6 layers
 

sphelps

Supreme Mariner
Joined
Nov 16, 2011
Messages
11,470
Re: MFG rebuild getting started pics

Troop ,
Your secret is safe here ! Watch out she may wack you with a square spoon or something !:eek: :D

Wood ,
Yep I took your advise and picked some dry lube up . It does help the sticky vinyl feed better . And I have learned to adjust the pressure foot pressure . Sometimes I feel like I could use another 2 or 3 sets of hands though ! LOL!
I was sewing the last seat back together While watching my Gators hand it to LSU and my bottom tension got off somehow .. Sewed almost the whole panel on one side before I discovered what was going on . Seems funny I have not had to touch it since setting it the first time ..
 

Woodonglass

Supreme Mariner
Joined
Dec 29, 2009
Messages
25,928
Re: MFG rebuild getting started pics

That is kinda strange about the bobbin. Maybe it was cuz the GATORS chomped down on Tigers!!!
 

sphelps

Supreme Mariner
Joined
Nov 16, 2011
Messages
11,470
Re: MFG rebuild getting started pics

Yep LSU really beat us bad last year so it was good to get a little revenge ...
I got the lower tension fixed . It seems I had the bobbin thread wound up to tight on the spool and it was getting stuck on the corners.. Rewound it stuck it back in and sewed fine after that ..:)
Finally got all the backs done . Still need to pull the bottoms tight and staple , and also install the little air grommets in the bottom of the backs.. I picked up a set of curved upholstery needles to tighten up a few spots by hand here and there ..
DSC00842.jpg

Gotta stop on the boat stuff for a while so I can work on my pool problems .. I borrowed a fish tape from work to try and get that line unclogged Woody . If I run into any problems I may give ya a holler !!
 

GT1000000

Rear Admiral
Joined
Jul 13, 2011
Messages
4,916
Re: MFG rebuild getting started pics

Those seats look marbelus...{kind of like how Billy Crystal used to say it as "Fernando"}...:D!!!!
 

jbcurt00

Moderator
Staff member
Joined
Oct 25, 2011
Messages
25,080
Re: MFG rebuild getting started pics

Yep, from pix, it doesn't look like you've got any stitching or stapling left..

Great looking seats! The white piping & inset really look great against the Seafoam Green (Teal? BlueGreen?)
 
Top