MFG rebuild getting started pics

sphelps

Supreme Mariner
Joined
Nov 16, 2011
Messages
11,468
Re: MFG rebuild getting started pics

GT take your time my friend . I gunna take woods advice an let it cure good before I wax or buff it out. But when I do I,ll sure need some good tips on how not to burn the paint.

Wood,RFN,
Good video ! The only thing I did differently was I used a 24" roller frame to knock it down and could do long strokes. You don,t put any pressure on the knock down roller just the weight of the roller itself smooth slow delicate strokes and man it lay.s flat nice!
 

sphelps

Supreme Mariner
Joined
Nov 16, 2011
Messages
11,468
Re: MFG rebuild getting started pics

Has anyone used one of those HVLP spray units that come with there own compressor? The painter at work said they work pretty good and some guys even paint cars with them. H/F has one for 119$.
Also decided to build a rolling cart for the hull.I got an old set of casters that I used on a garbage cart I made few years ago. The tire,s and rims are bad . H/F has the same size t and r but are solid rubber so they,ll never go flat.
 

jbcurt00

Moderator
Staff member
Joined
Oct 25, 2011
Messages
25,057
Re: MFG rebuild getting started pics

I've never used it but we have a self-contained HVLP & compressor setup that we use at work. It seems to work pretty good, but hose seems much heavier of a setup then most paint spray guns, esp regular auto spray booth style. It's @1" dia, heavy & can be cumbersome.
 

sphelps

Supreme Mariner
Joined
Nov 16, 2011
Messages
11,468
Re: MFG rebuild getting started pics

The one I saw was had small maybe 1/2" hose with a canister type gun attached .
 

jbcurt00

Moderator
Staff member
Joined
Oct 25, 2011
Messages
25,057
Re: MFG rebuild getting started pics

Our's has what looks like a regular spray gun w/ canister below. HF usually will have 1 out for display. Plug it together & give it a test drive before you buy it. BTW, HVLP fittings get hot at the compressor end...
 

Woodonglass

Supreme Mariner
Joined
Dec 29, 2009
Messages
25,928
Re: MFG rebuild getting started pics

They work Great for Low viscosity material like Varnish, Poly Urethane etc. Never tried shooting paint with one so I can't say. $120 bucks for the one @ HF? I think I'd rather Rent a good compressor for a day and buy a $40 dollar GOOD HVLP gun to shoot my boat with. Cost would be about the same.
But hey, I'm Just an
OldDumbOkie.jpg
 

jbcurt00

Moderator
Staff member
Joined
Oct 25, 2011
Messages
25,057
Re: MFG rebuild getting started pics

Hey WOG, the internet smiley library called, they want their yellow back! Couldn't find a bigger, brighter or more yellow gif? I had to wipe that drool off my screen....
 

sphelps

Supreme Mariner
Joined
Nov 16, 2011
Messages
11,468
Re: MFG rebuild getting started pics

Yep your probably right about the hvlp. Still searching for compressor .I always worry about buying used but it feels like you don,t get a good bang for your buck when buying new.
 

GT1000000

Rear Admiral
Joined
Jul 13, 2011
Messages
4,916
Re: MFG rebuild getting started pics

Before my arthritic brain fails me...here's the goods from our Detailing Guy, the Painter, and one of the Preppers...


All agreed that for a hobbyist, use 3M Products...Compound, Polish and Glaze...the known quality of the products far outweigh the cost...

The sandpaper should be of good quality, not some cheap stuff...the grits aren't as carefully applied and they don't last or cut as well...some of the better brands are Norton, Mirka, 3M...the better stuff is usually available at an auto body supply house.

You should definitely try and beg, borrow, rent, buy or steal a Variable speed polisher...HF, HD, Lowes, Northern, etc...shop for a good deal, but make sure it is variable speed...

The pads for the polisher are listed at the end of the this...the product numbers are 3M, but good quality substitutes will work just fine...well taken care of they can last for many uses...

Sandpaper...you can use wet or dry...They are completely interchangeable throughout the process, it is up to you to determine which seems to work best...
Dry cuts faster, but leaves more scratches, usually used in the first couple of sanding courses...
Wet Paper cuts slower, but leaves a cleaner finish, usually used in the last couple of sanding courses...
Have a supply of compressed air and blow the surface off frequently when dry sanding
Use Soapy Water when wet sanding and rinse frequently...
As soon as the sandpaper no longer comes clean, discard and change to fresh paper...when it clogs, it doesn't cut well and can even scratch the finish badly...

If at all possible, paint a separate panel, 2ft.x2ft. or 2ft.x4ft., to practice and test your procedures on...IMHO, it is cheap insurance...

Try and create the same finish as that on your actual painted panels...This "practice panel" pays HUGE dividends in letting you get comfortable with all of steps involved and the use of all of the products and supplies, plus if youscrew this up, it will tell you what you are doing wrong...as the old addage states...We learn from our mistakes...

Sandpaper grits can start out as low as 400 grit, if you have a lot of build up and a LOT of orange peel...
Usually 600 grit is a good starting point, but go light.
If possible use a rubber backing block, or a stiff sponge to back up the sandpaper...if you are working on a specific contour, you can cut a stiff sponge to the shape and use that as a backer.

You should try and work on an area no larger than 2x2 or 3x3 feet...

Between each of the grits and during the actual sanding it is imperative that you keep it blown or washed off, depending on whether you are using wet or dry...

800 or 1000 grit is the most common starting point...go over the panel, until you have removed about half as much as you think you need to...

then go to 1000 grit, same, remove about half as much as you need to...

then 1200, repeat above...

then 1500 grit...

By this time, you should be getting a pretty hi gloss on the WET panel...when dry it will be silky smooth but still somewhat flat looking

Clean and dry the panel...

You can take it to the 2000 grit, but unless it was really bad, you can start compounding at 1500...

OK, now with the variable speed polisher, set it to approximately 1000-1200 RPMS, probably setting 2 or 3...

You should get a hairy lambs wool wheel with backing plate...first step, compounding...then you will need 2 each sponge waffle wheels, one for the polish and one for the glaze...

apply a squirt of compound directly to the paint, start the polisher, then release the trigger, while it is slowing down, place it on the compound, lightly, and spread it out with the slowing wheel...

As the wheel becomes clogged with compound and removed paint, remove it from the polisher, wash it thoroughly with soap and water, wring it out, remount it, and spin dry it with the polisher...

Same thing applies to the sponge waffle discs...

From now on, you will be using this start and release method of powering the polisher and applying very, very light pressure to the machine... the weight of the machine is more than enough pressure, as a matter of fact, you actually want to get used to supporting the majority of the machine's weight, maybe let about 1/3 to 1/2 of the weight rest on the surface...

use the compound until the panel starts to get a nice shine, but don't worry about the swirl marks for now, just try and get everything nice and evenly shined... you can take each section close to completion before moving on to the next section, or you can take the entire panel, side or boat to complete the compounding step, then move on to the polish , then glaze...your choice...whatever you feel comfortable doing...

The polishing step, is basically the same as the compound step, you will switch to the sponge waffle disc, but this time you will still have some swirl marks left, but much, much less, and the shine should begin to "mirror-up"...

Then repeat the same procedures with the Glaze, again using the sponge waffle disc... this will remove 99% of all swirl marks and give the finish a very high luster...

You can finish up by hand rubbing any spots with Glaze or even go back and polish, then re-glaze...

Finally, pick your favorite choice of top quality carnauba wax and give the entire surface a good protective finish...by hand.

After all is said and done, take some pictures, post 'em here, let us all see the fantastic finish you got, crack open your favorite frosty beverage, and stare at your beautiful job...just make sure you are wearing sunglasses, or you could go blind
28_1_19.gif


I have a copy of this in my notebook, plus access to the sources if you need any additional info...
I was taking notes as they were telling me all this information and then translating all that info into what is written here...
I believe it is all here, but if you notice anything that doesn't seem right or if you have any questions, PM me or post, I'll get back ASAP.

Notes; 3M products or equivalent...
Compound=3000 Perfect-it Compound
Polish=3000 Perfect-it Swirl Mark remover
Glaze=Perfect-it Final Glaze
The following can be substituted with good quality equivalents...
Compounding Pad=05703 or 05704, Super buff compound pad, either 100% wool or Blended Wool
Polishing Pad= 05705 Superbuff Yellow Pad
Polishing Pad adaptor=05710
Glazing Pad=05725 Perfect-it Black Foam Polishing Pad
 

Trooper82

Commander
Joined
Nov 21, 2011
Messages
2,648
Re: MFG rebuild getting started pics

Fantastic write up GT1M - I say this needs to be a Sticky....saving it to hard drive so I don't misplace it.
 

sphelps

Supreme Mariner
Joined
Nov 16, 2011
Messages
11,468
Re: MFG rebuild getting started pics

Wow GT I asked for a few tips and you gave me an encyclopedia! That is some very detailed information there . Do you think the slick side of a piece of masonite would be good to paint for practice? There sure are a lot of steps!
Thanks so much for all your efforts!! Gunna have to read that a few times to absorb!
 

GT1000000

Rear Admiral
Joined
Jul 13, 2011
Messages
4,916
Re: MFG rebuild getting started pics

Fantastic write up GT1M - I say this needs to be a Sticky....saving it to hard drive so I don't misplace it.

Wow GT I asked for a few tips and you gave me an encyclopedia! That is some very detailed information there . Do you think the slick side of a piece of masonite would be good to paint for practice? There sure are a lot of steps!
Thanks so much for all your efforts!! Gunna have to read that a few times to absorb!

Yeah, agreed ^^^.

Thanks guys, but I am just the messenger...took some notes from the guys who do this stuff... and just wrote it down the best I could...my personal experience doing this is limited at best, I can pull it off, but not like these guys can, they do this kind of stuff in their sleep...I'll pass on the KUDOS to them...

And yeah, S.P., you could prolly do it on a piece of masonite, but the only problem you might have is sealing the masonite, so it doesn't suck up the paint, maybe prime it with some kind of varnish to seal it up...??? I am not really sure...do a small test in a corner and see how many coats it takes to get a good finish, then if it works, go to town...

L8r,
GT
 

sphelps

Supreme Mariner
Joined
Nov 16, 2011
Messages
11,468
Re: MFG rebuild getting started pics

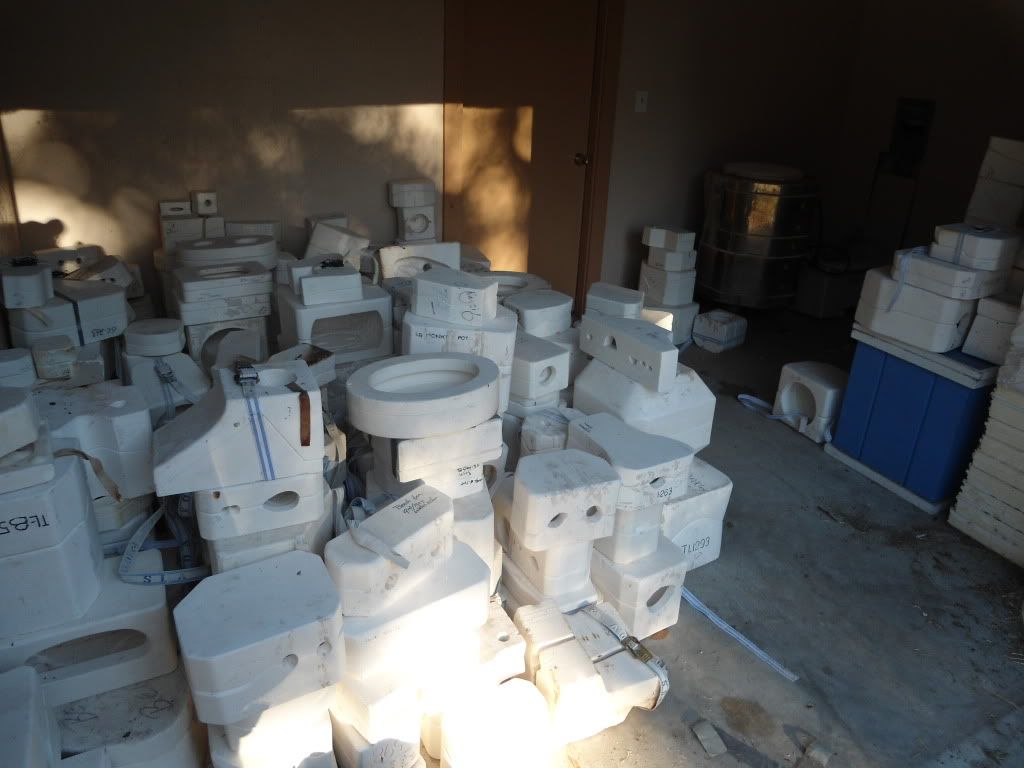
I,ve got the most wonderful loving , caring ,will do almost anything for me wife! She did the greatest thing for me today. She allowed me to go pick up from a co-worker of hers something I have always wanted. A ceramic starter kit . I,ve got a kiln a slip machine and all of the easter and Christmas figurines any man could ever want ! So if any of you guys need some nic nac,s just let me know I got you covered !
Here is where my lawn mower used to sit...
DSC00142.jpg

:facepalm: Help me please!!!

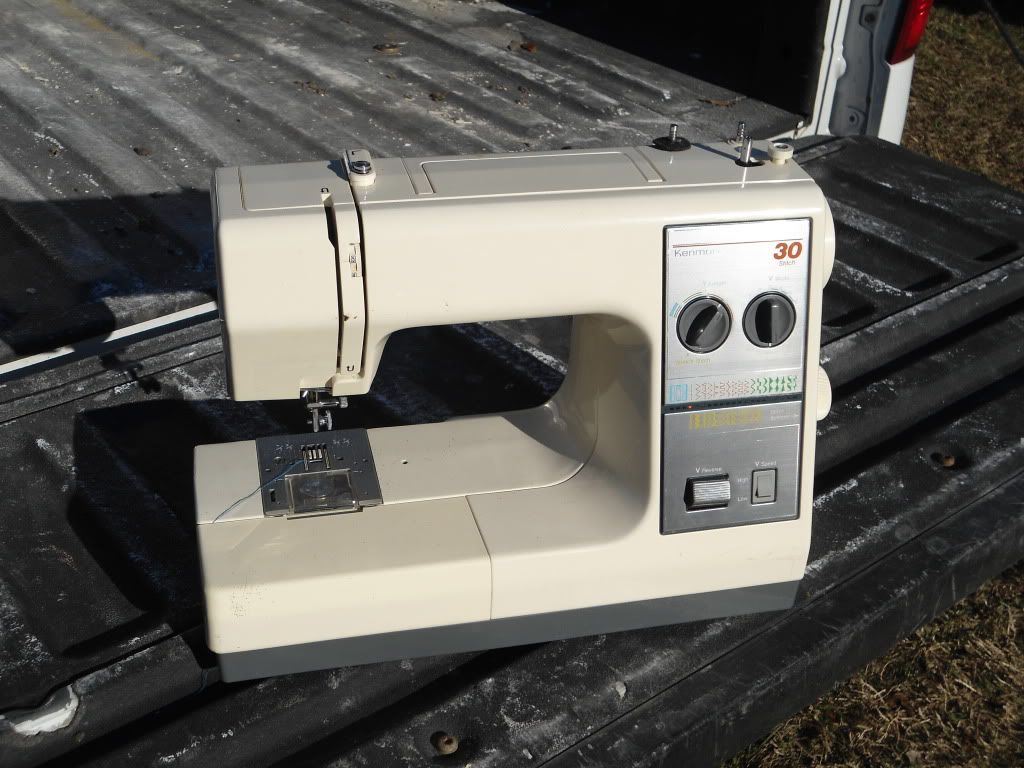
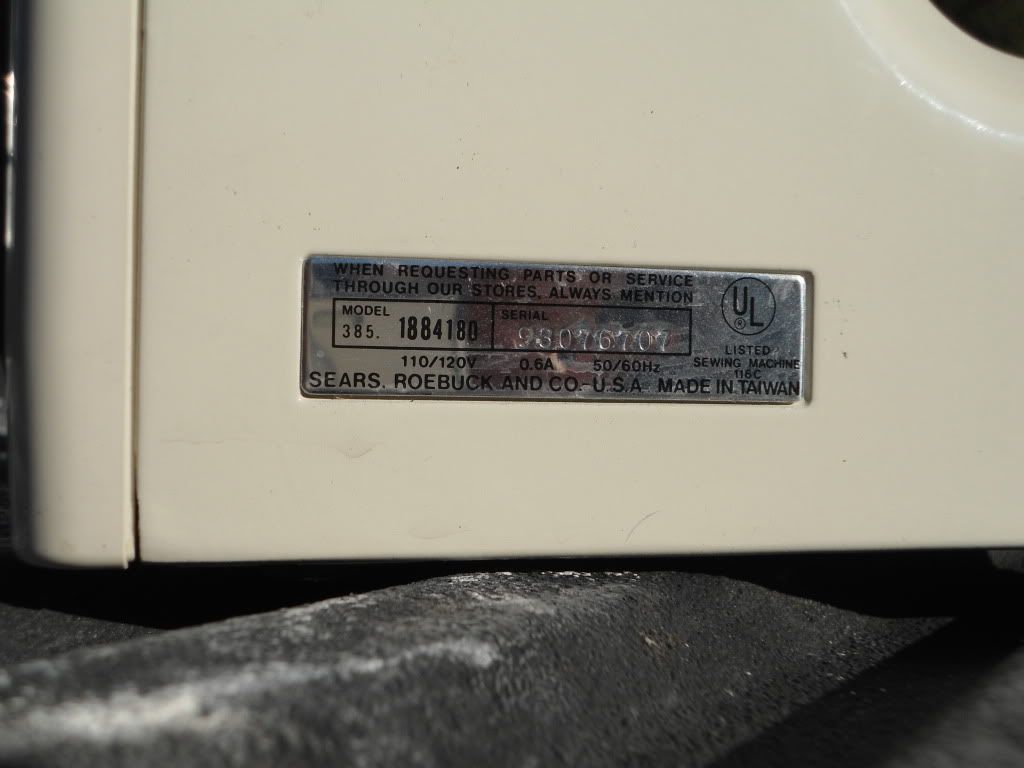
The day was,nt all bad. The lady also gave my wife this kenmore sewing machine.
It,s pretty heavy duty it may good enough to make seats with ..
DSC00139.jpg

DSC00141.jpg


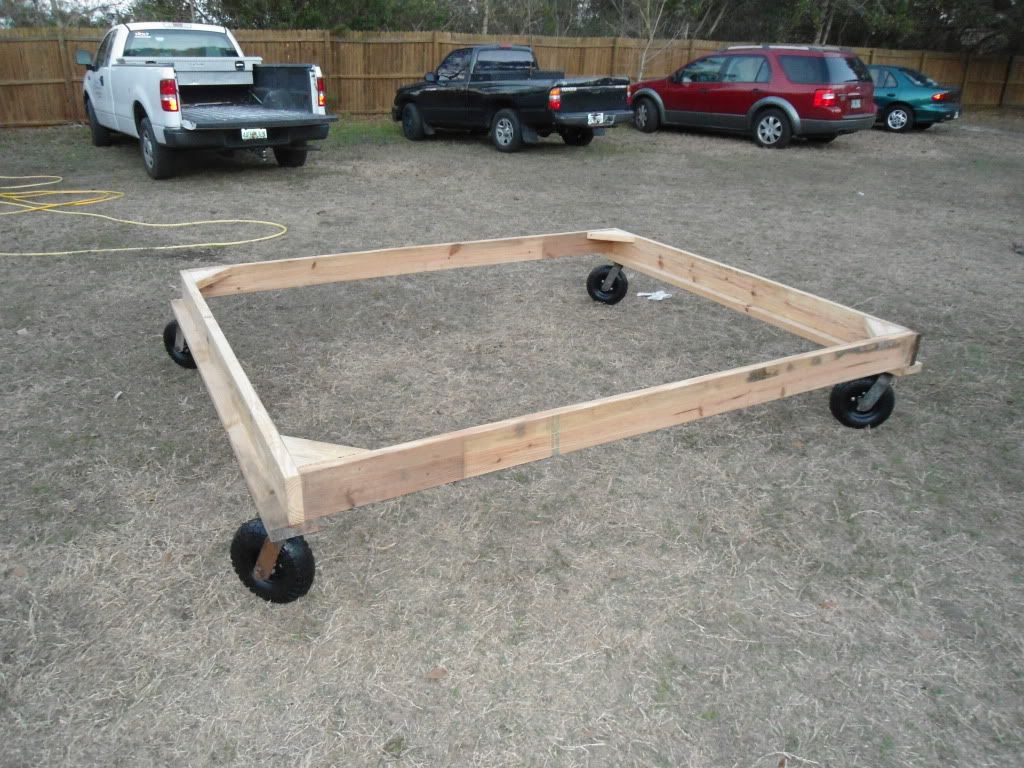
I also had time to throw my boat cart together!
DSC00143.jpg

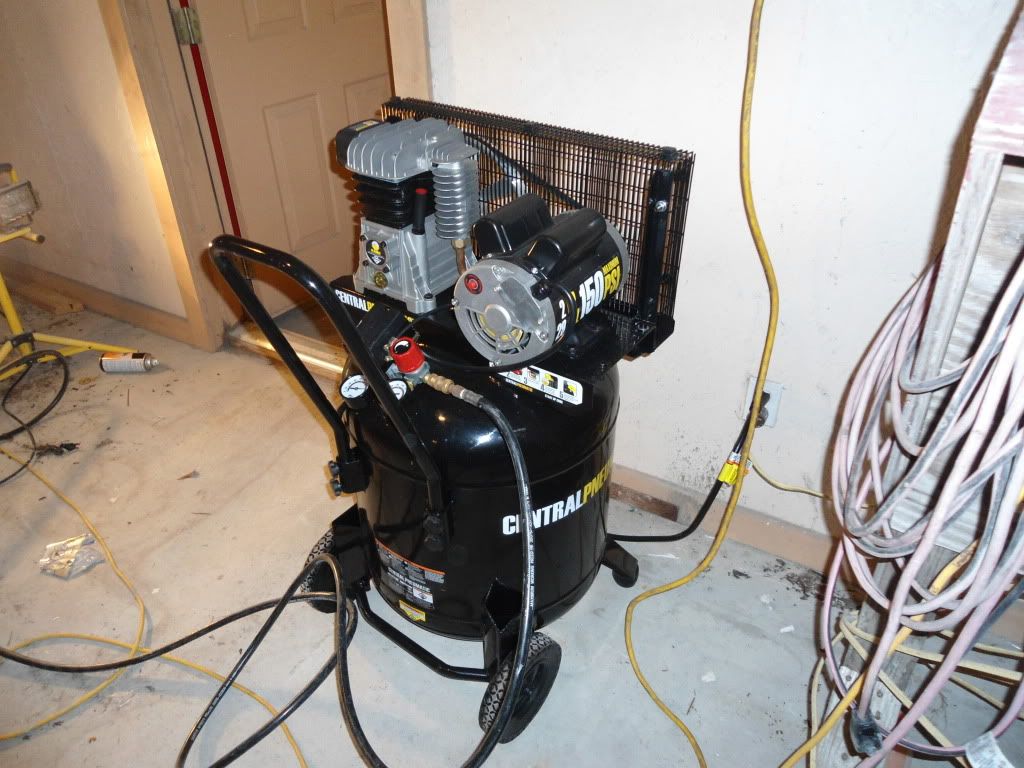
I recycled some alum curtain wall system we tore out at work and had enough $ for a new compressor.
It,s a H/F special on sale I think it will do ok..
DSC00144.jpg


Hope you guys had a good weekend!
 

Trooper82

Commander
Joined
Nov 21, 2011
Messages
2,648
Re: MFG rebuild getting started pics

Nice day indeed! I think you should do like Wood did and put a tongue on the cart. Looks good though.
 

jbcurt00

Moderator
Staff member
Joined
Oct 25, 2011
Messages
25,057
Re: MFG rebuild getting started pics

Somebody had a great weekend! Congrats on the ceramics, sewing machine, compressor & cart! At 0.6 amps, the Kenmore may not be heavy duty, but until you give it a shot, who knows... Besides the price was righ

Nice score on the new gear & good job on the cart frame.

Have a good week!
 

Decker83

Commander
Joined
Apr 5, 2011
Messages
2,593
Re: MFG rebuild getting started pics

Looks like you really scored big this weekend.
Nice looking sewing machine and compressor.

My wife did alot of the ceramics a few years back. She loved doing them.
 

Woodonglass

Supreme Mariner
Joined
Dec 29, 2009
Messages
25,928
Re: MFG rebuild getting started pics

The Sewing Machine is like my first Kenmore. It will work but... Not rated for heavy duty and WILL give you some problems when you try to sew 6 layers of vinyl, which is what you will be doing if/when you sew on your piping. I did my Captain seats with it and they took 3 times longer than my bench seat due to the machine. Learning the tensioning was a bit harder too. Not trying to be a party pooper just telling you my experience. Your's is a bit newer than mine so it might be a little better. Nice compressor, it WILL do the job and the Cart looks a lot like Mine.
 

sphelps

Supreme Mariner
Joined
Nov 16, 2011
Messages
11,468
Re: MFG rebuild getting started pics

Yeah 6 layers of vinyl sounds pretty thick. No biggie , it was all free cept for my sore back from moving all those molds. I have to pic up the last truck load of em tomorrow.:eek:
 
Top