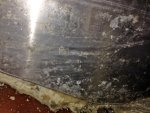
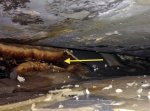
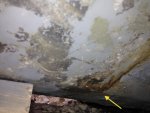
Formula 330SS Bulkhead Replacement

bear_69cuda

Commander
Joined
Oct 10, 2008
Messages
2,109
Re: Formula 330SS Bulkhead Replacement

Hey Ted,

Sorry you have to deal with this on your new ride! I'm positive you'll make it good brutha! I'm taggin along...
 

tpenfield

Moderator
Staff member
Joined
Jul 18, 2011
Messages
18,091
Re: Formula 330SS Bulkhead Replacement

Hey Ted,

Sorry you have to deal with this on your new ride! I'm positive you'll make it good brutha! I'm taggin along...

Glad to have you along. This boat is a keeper. It has been totally awesome in its first season of 'new-to-me'. I am thinking that if I do the fixing, it will last for quite a while. Then I can buy a new 292 FasTech :thumb:
 

tpenfield

Moderator
Staff member
Joined
Jul 18, 2011
Messages
18,091
Re: Formula 330SS Bulkhead Replacement

I think it comes down to a trade off: How bad are the pits, how much time & effort will it take, how much it costs to pressure test (possibly more then once) versus how much is a replacement tank and is the difference enough to overcome your concerns about:
:flame:

Even if you swore to me that your tank had worse pits then mine (remotely via limited pix the internet), yours turned out perfectly fine, passed the pressure test after some JB Weld and looked brand new when you were done, when it comes down to fuel, below decks, I'd really rely on my eyes & gray matter to form an opinion my gut could live with and that I'd be confident in proceeding to put the tank below decks.

Know what I mean?

You've already been down the fixed vs new tank. Really, how bad was the old tank you replaced?

Just catching up to your post. Definitely a judgement call. Here are a couple of pictures of the tank that I replaced on my 242. I could have done the JB Weld patches on it, but was concerned that by getting into clean metal, I'd be way more than 50% through the thickness of the aluminum. So, I think 50% is my 'magic number'. I do recall checking in with the Admiral on the tank for the previous boat. After explaining the situation, the options and the ramifications, the orders were . . . "get a new tank" :)

FuelTankInsp-07.jpg

FuelTankInsp-08.jpg

It also had some minor pits also the bottom and some on the inside. The worst area was the rear face, as shown in the pictures.
 
Last edited:

jbcurt00

Moderator
Staff member
Joined
Oct 25, 2011
Messages
25,070
Re: Formula 330SS Bulkhead Replacement

Well, a consultation w/ the Admiral...... Yeah, that's not a bad idea at all. In this situation, it's a tough call, for both the expense of the new versus the what if about the old.

What I know about something & how I feel about it aren't always in agreement, and neither always over rules the other. From WV the last tank you replaced doesn't look that compromised. But if pitted nearly 50% from the inside & outside, yikes.
 

tpenfield

Moderator
Staff member
Joined
Jul 18, 2011
Messages
18,091
Re: Formula 330SS Bulkhead Replacement

Yea, overall the tank on my 242 looked pretty good, but the depth of those few pits on the butt end of the tank made the determination. There happened to be a block of wood that the tank butted up against and it seemed to have promoted a loss of paint and the deep pits in that area.

thankfully with the tank on my 330, it has foam all around it and is not in contact with any wood, so far as I can see.
 

jbcurt00

Moderator
Staff member
Joined
Oct 25, 2011
Messages
25,070
Re: Formula 330SS Bulkhead Replacement

W/ any luck the factory paint protected this tank from similar damage.
 

tpenfield

Moderator
Staff member
Joined
Jul 18, 2011
Messages
18,091
Re: Formula 330SS Bulkhead Replacement

I am currently flying back to Boston, having been in Florida the past few days. (Posting from 35000 feet). The Admiral and I will be on Cape Cod this weekend, so I'll be able to do some more work on the boat. I hope to get the fuel tank out and get all of the foam out of the fuel bay.
 
Last edited:

tpenfield

Moderator
Staff member
Joined
Jul 18, 2011
Messages
18,091
Re: Formula 330SS Bulkhead Replacement

Fuel Tank Removal Update:

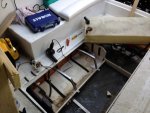
Today I started to remove the fuel tank, which is a bit of a process. A few weeks ago, I removed the helm seat to expose the deck hatch and tilted it up for a first look into the fuel tank bay.

I started out the day by repositioning the deck hatch so that I would have room to work, etc. Then is was a matter of removing the waste tank, which is suspended over the fuel tank.

Here is a video of the day . . . I am finding the videos fairly easy to put together versus a slew of photos, but I did take a few stills.


I did not quite get the tank to 'pop' out of the foam today. The foam seems to be separated from the tank most of the way around the tank, but some of the saturated foam, low in the fuel bay is frozen. Perhaps that has a grip on the tank :noidea:

I'll have a bit more time to work on the tank tomorrow morning, so I'll see if I can get the tank to come out.
 

tpenfield

Moderator
Staff member
Joined
Jul 18, 2011
Messages
18,091
Re: Formula 330SS Bulkhead Replacement

Here are a bunch of still photos from yesterday, working on the fuel tank removal . . .

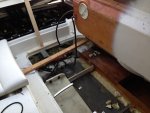
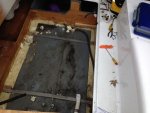
I managed to jockey the deck hatch around so that I could get all of the 'junk' that I forgot to remove from the ski locker. What you see here is the underside of the ski locker as the deck hatch is propped up on its end. I elevated the deck hatch with some boards to hold it out of the fuel tank bay and secured it with some lines. I'm guessing it weighs about 300 lbs, so it may just stay where it is for the duration of the project.

IMG_3551.jpg IMG_3553.jpg

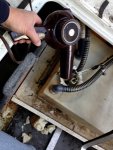
I heated the hose connections to the waste tank so that they would be a bit more pliable in removing them from the fittings. This is a technique that I use fairly often with older hoses as they become brittle with age. These hoses have been in place for 18 years.

The waste tank came out fairly easily, yet still had about 1 gallon of 'pee/poop' in it . . . very gross. I am not sure how much antifreeze made it to the waste tank from my winterizing. So, I will have to sharpen that process up a bit.

IMG_3554.jpg IMG_3558.jpg

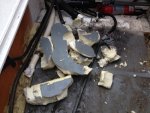
I got the tank and its 'carrier' out of the way so I could get clear access to the fuel tank. I started pulling the foam out from the sides of the tank with a pry bar. The paint from the tank came off, on the sides and rear of the tank. the front face of the tank, was different in that the paint held and the foam stuck to the tank, as it should.

IMG_3566.jpg

So, I suspect that the tank was not properly prepped on all sides before painting. Probably, just the front face was prepped. Of course, with my luck, the underside was probably prepped, which will make the removal of the tank all that much harder :rolleyes:
 
Last edited:

tpenfield

Moderator
Staff member
Joined
Jul 18, 2011
Messages
18,091
Re: Formula 330SS Bulkhead Replacement

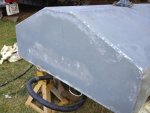
I did not get the tank to 'pop' out from the foam, as I stated in my earlier post, but here are a few pictures that I took of the rear face of the tank. there is some corrosion showing, but not bad at all. My hopes are that the underside of the tank is also in decent shape (else the boat budget is gonna take another beating this year)

IMG_3583.jpg IMG_3586.jpg

You can see the areas of the rear face that still have paint on it. Those areas are where there were voids in the foam fill that I discovered when I removed the bulkhead initially.

IMG_3584.jpg

Today, I'll have a few more hours to try to get the fuel tank to come out. Then it is off to the Super Bowl party :)
 
Last edited:

Scott Danforth

Grumpy Vintage Moderator still playing with boats
Staff member
Joined
Jul 23, 2011
Messages
49,892
Re: Formula 330SS Bulkhead Replacement

i found that a wire cup brush and a few drill extesnsions on the end of the cordless drill make short work of any foam vs using a pry bar. just need to use the shop vac to remove the foam dust. it cleaned it right down to the fiberglass in my case

however with your fuel tank there, it may take the paint of the tank.
 

tpenfield

Moderator
Staff member
Joined
Jul 18, 2011
Messages
18,091
Re: Formula 330SS Bulkhead Replacement

i found that a wire cup brush and a few drill extesnsions on the end of the cordless drill make short work of any foam vs using a pry bar. just need to use the shop vac to remove the foam dust. it cleaned it right down to the fiberglass in my case

however with your fuel tank there, it may take the paint of the tank.

Yea, I might try something like that . . . I am on my 'break' now and have got 2 wooden 'wedges' going on the end of the tank, but it still is putting up a good fight. Most of the paint IS off the tank, so I am not too worried about that. I just want to be careful about anything that could cut into the surface of the tank, etc.

When I pulled the tank out of my '242, I hollowed out an area under the front of the tank and put a heavy duty nylon strap under the tank. Then lifted the tank/strap with a scissor jack. . .
 

tpenfield

Moderator
Staff member
Joined
Jul 18, 2011
Messages
18,091
Re: Formula 330SS Bulkhead Replacement

a quick update . . . I did get the tank to 'pop' from the foam. I made some longer wedge boards out of 1 x 3 strapping and pounded a few of those between the tank and the foam from the rear of the tank. That extra amount of separating force, further under the tank seemed to make the difference. :thumb:

There is still some foam that has a grip under the tank towards the forward portion, but leverage is now in favor of the tank coming out. I'll post a video and some pics later. . . .
 

tpenfield

Moderator
Staff member
Joined
Jul 18, 2011
Messages
18,091
Re: Formula 330SS Bulkhead Replacement

Another Update:

I was able to lift the rear of the tank up about 4-5 inches, and with that, it has broken loose all around. I ran out of time today, since I was only going to do 1/2 day of work on the boat. So, next time will be focused on getting the tank out of the boat.

Here is a video of the day and I'll post some pictures later on as well.


tpenfield

Moderator
Staff member
Joined
Jul 18, 2011
Messages
18,091
Re: Formula 330SS Bulkhead Replacement

I took some pictures of the underneath of the tank before I packed things up for the day, yesterday. A couple of the images have me a bit concerned about the tank . . .

I noticed that there is a void in the foam along the belly of the tank . . . this is about 1-2 feet from the rear of the tank

IMG_3630A.jpg

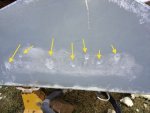
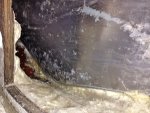
Then there seems to be a corresponding dark area on the tank itself . . .

IMG_3631A.jpg

My concern is that although the tank looks pretty good overall, one deeply pitted area can ruin it. So, I will have to see what it looks like at closer inspection, once I get the the tank out of the boat.

I am thinking that I will want to come up with a installation/foaming method that will insure a solid fill along the belly of the tank. Ideas, comments and thoughts welcome on that aspect of the repair (and any aspect for that matter) :)
 
Last edited:

zool

Captain
Joined
Aug 19, 2012
Messages
3,432
Re: Formula 330SS Bulkhead Replacement

Hey Ted, good to see your getting it out. That hole where the arrow points does look sizeable, but its hard to tell...mine looked really crusty on the bottom too, but it cleaned right off and wasnt bad in the end..getting it out and cleaning it off is the only way to know for sure..
 

tpenfield

Moderator
Staff member
Joined
Jul 18, 2011
Messages
18,091
Re: Formula 330SS Bulkhead Replacement

Hey Ted, good to see your getting it out. That hole where the arrow points does look sizeable, but its hard to tell...mine looked really crusty on the bottom too, but it cleaned right off and wasnt bad in the end..getting it out and cleaning it off is the only way to know for sure..

Yea, I'm hoping it just looks bad in the picture :rolleyes: It seems that the void in the foam along the belly of the tank (first photo) would have contributed to moisture retention and that may have been 'feeding' moisture to the tank in the darkened area. Like you say, I won't know for sure until I get the tank out of the boat, cleaned up, and can inspect it closely. If it does not look good at that point, I will probably get a new tank.

I'll have to think about how best to make sure I get a complete and solid fill when I go to foam the tank in upon re-installation. It is hard to know if the foam is making it all the way down to the underneath areas of the tank, and obviously, as the picture shows, there can be some voids.

I was thinking of a couple of approaches . . .

1) Suspend the tank over the fuel bay with enough clearance to pour-in the foam mix along the keel of the fuel bay. . . then quickly lower the tank into the expanding foam and secure it with the straps. I'm thinking this will force the foam upwards fairly evenly on all sides of the tank as the foam expands.

2) Secure the tank in its place and use air pressure to essentially spray the foam down into the areas underneath the tank. I would have to set up a hose & low pressure apparatus and use a mixing nozzle to mix the foam parts 'A' & 'B' as it is dispensed through the nozzle.

3) I'm still thinking about other options . . . :noidea:
 

alldodge

Moderator
Staff member
Joined
Mar 8, 2009
Messages
42,346
Re: Formula 330SS Bulkhead Replacement

I was thinking of a couple of approaches . . .

1) Suspend the tank over the fuel bay with enough clearance to pour-in the foam mix along the keel of the fuel bay. . . then quickly lower the tank into the expanding foam and secure it with the straps. I'm thinking this will force the foam upwards fairly evenly on all sides of the tank as the foam expands.

2) Secure the tank in its place and use air pressure to essentially spray the foam down into the areas underneath the tank. I would have to set up a hose & low pressure apparatus and use a mixing nozzle to mix the foam parts 'A' & 'B' as it is dispensed through the nozzle.

3) I'm still thinking about other options . . . :noidea:

I would lean toward option two. Replaced my 27 gallon water tank and secured the top with wood braces before I sprayed in the foam. The amount of force which will be pushing up on the bottom of the tank will increase as the foam dries. It would be terrible if the tank was pushed up to far where you would have to remove it again to drop it down. Now I'm sure you would have some time before the pressure when be difficult to over come to set the tank back in, but that amount of time is unknown.

My original water tank had remnants of tubes which went to the bottom of the tank and those tubes were used to release the foam under the tank and have it come up. Once sprayed in the tubes were left and cut off flush.
 

zool

Captain
Joined
Aug 19, 2012
Messages
3,432
Re: Formula 330SS Bulkhead Replacement

You could also just skip the foam, and build some small draining bulkheads to raise the tank, and put neoprene between the tank and bulkheads...and strap the top like it was...plenty of air circulation, and no standing water.
 

tpenfield

Moderator
Staff member
Joined
Jul 18, 2011
Messages
18,091
Re: Formula 330SS Bulkhead Replacement

You could also just skip the foam, and build some small draining bulkheads to raise the tank, and put neoprene between the tank and bulkheads...and strap the top like it was...plenty of air circulation, and no standing water.

Well, the problem is that the boat was designed to have a foamed in tank. I checked with the Formula tech support group a while back and they indicated that foaming the tank in adds a fair amount of strength to the structure and provides a high amount of support to the tank.

In my first year of ownership (of my then 17 year old boat), the boat seemed 'loose' to me when pounding through the waves. Based on what I found, with the tank & foam . . . that the tank was essentially sitting in the foam loose, it makes sense that the boat would feel and act a bit 'flimsy'. The tank & foam around it were not contributing to the strength of the boat in their current state.

So, it is best to put the boat back to the way it was designed. However, I am thinking about providing some drainage for the fuel bay into a separate mini bilge, so that I can see if there is water migrating through the foam. If I were to have a new tank made, I think that I would take out an inch or two of depth to the tank so that it is sitting further up in the foam, away from where water would collect along the keel.
 
Top