Formula 330SS Bulkhead Replacement

Scott Danforth

Grumpy Vintage Moderator still playing with boats
Staff member
Joined
Jul 23, 2011
Messages
49,893
Re: Formula 330SS Bulkhead Replacement

depending on what the car is and what its worth, I would consider selling it in CA.
 

tpenfield

Moderator
Staff member
Joined
Jul 18, 2011
Messages
18,092
Re: Formula 330SS Bulkhead Replacement

depending on what the car is and what its worth, I would consider selling it in CA.

I got enough things on my plate . . . Besides the kid has expensive tastes, cannot imagine what I would have to buy to replace it :rolleyes:

I use United Road (aka Autolog) for the transport . . . "Terminal to terminal" service. We drop the car off at their local terminal and head to the airport.
 

tpenfield

Moderator
Staff member
Joined
Jul 18, 2011
Messages
18,092
Hey a new fresh look to the forums with the software upgrade. Probably take a while to figure all the ins and outs. Heading back to MA after 6 days on the west coast attending my kid's college graduation. A good time was had by all. . . The kid graduated, we got the car shipped, and now we are waiting for our flight to take off. 8 huge bags of stuff, plus a car trunk full, was all the clothes and belongings that got packed up. Fortunately we are flying Southwest, where 2 bags/person fly free. :) I am looking forward to the long weekend to get back to the boat work. Ideally, I'd like to get the tank foamed in, the plumbing put back and the deck hatch laid back down and sealed. I forgot to order the mixing containers, so I will have to try the big box stores this week to see if I can get enough containers to mix about 8-10 pours of the foam liquid.
 

tpenfield

Moderator
Staff member
Joined
Jul 18, 2011
Messages
18,092
A quick update . . .

I have been waiting for the issues with the forum software to get sorted out before re-posting the couple of updates that were lost in the restore and adding some more updates. The boat is back together and just needing a few finishing touches in the mid-cabin and engine room. I have this same thread going on over at the OSO forum, in case anyone wants to check over there for the latest updates.

Once, we get the green light on these forums, I'll make a couple of large 'catch-up' posts. :thumb:

Here is a video of the foaming of the subfloor and the fuel tank:

 
Last edited:

Axkiker

Petty Officer 1st Class
Joined
Nov 18, 2013
Messages
264
A quick update . . .

I have been waiting for the issues with the forum software to get sorted out before re-posting the couple of updates that were lost in the restore and adding some more updates. The boat is back together and just needing a few finishing touches in the mid-cabin and engine room. I have this same thread going on over at the OSO forum, in case anyone wants to check over there for the latest updates.

Once, we get the green light on these forums, I'll make a couple of large 'catch-up' posts. :thumb:


You can definitely tell that the forums are a last priority of Iboats.com. I get that they are free, but darn, if you are gonna have something like this at least make sure the changes made work prior to implementing.
 

tpenfield

Moderator
Staff member
Joined
Jul 18, 2011
Messages
18,092
But in the meantime, here are a couple of pics.

IMG_4349.jpg

IMG_4354.jpg
 
Last edited:

tpenfield

Moderator
Staff member
Joined
Jul 18, 2011
Messages
18,092
In the meantime, here are some recent pics. . . .

IMG_4349.jpg

IMG_4354.jpg

Ooopppps!!! double post. See what this thing made me do :D :noidea:
 
Last edited:

JASinIL2006

Vice Admiral
Joined
Feb 10, 2012
Messages
5,682
You do really nice work! That looks very professional! (Better than professional, actually...)
 

tpenfield

Moderator
Staff member
Joined
Jul 18, 2011
Messages
18,092
Thanks JAS, it always seems on projects like this is that I end up in a race with time. I started this on December 9th (2013) . . . so coming up on 6 months. Now pushing the summer season. My plan is still to launch mid-June, but I got quite a bit of work ahead over the next 2 weeks.
 

tpenfield

Moderator
Staff member
Joined
Jul 18, 2011
Messages
18,092
I am pretty much finished with the bulkhead replacement project . . . just a few odds and ends.

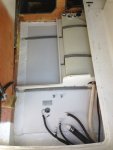
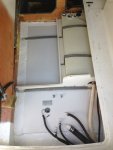
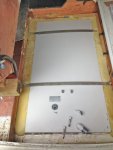
Here is a picture of the new bulkhead, now that all the wiring, plumbing and hardware has been put back on place.

IMG_4430.jpg

I am looking forward to see how the boat feels with all of this repair work done. I still have some regular prep work to go, so launching may be a couple of weeks away.
 
Last edited:

tpenfield

Moderator
Staff member
Joined
Jul 18, 2011
Messages
18,092
With the posts lost a while back., it is hard to figure out where I was in the process. I think it was right before I foamed in the fuel tank.


Anyway, I thought that I would do a 'catch-up post' (or two) of the steps that are missing from the thread,

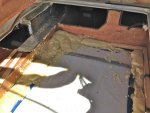
Here is the fuel tank after it was foamed, The tank got fairly hot during the foaming process . . . and was even making some funny noises the next day. :eek:

IMG_4322.jpg

I subsequently had a situation were I was able to test the foam for proper adhesion strength . . . It seemed to pass the test, because the bond that the foam makes with surfaces it comes in contact with (i.e. the fuel tank and the fuel bay) is stronger than the foam itself. The foam actually breaks before the bond releases.

here is my foaming process video, for those who have not seen it. http://www.youtube.com/watch?v=0rbvNS7f_Xk

Also here is a quick video to show how tough the foam is . . . it is wicked hard . . . http://www.youtube.com/watch?v=4buD5zgj-zw

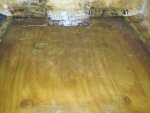
Here is the storage bay floor and fuel bay after it was all cleaned up from the foaming . . .

IMG_4329.jpg

IMG_4334.jpg
 
Last edited:

tpenfield

Moderator
Staff member
Joined
Jul 18, 2011
Messages
18,092
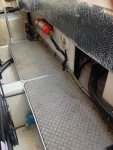
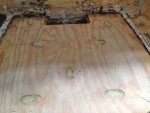
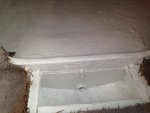
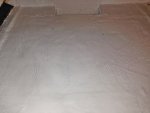
Here is the storage compartment floor after fiberglassing. This was a bit of a challenge, since the space is very confined, and I wanted to glass the entire floor area after the tabbing was done. I could not easily reach all of the areas to lay down the CSM and wet it out, basically, I would be crouched down on top of my work. I decided to lay the resin down over the whole area, then layout the CSM, then put a piece of plastic drop cloth over the entire area. I was able to wet out the resin into the CSM through the drop cloth while I was crouched on top of it.

IMG_4350.jpg

Here are a couple of pictures of the storage compartment area, after finishing it off. The fact that I used plastic over the floor area for glassing it made a wrinkled finish . . . no worries, since it is a storage compartment.

IMG_4418.jpg

IMG_4422.jpg

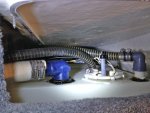
I also found that I had goofed on hooking up the waste tank, as I was looking through some photos that I took during the demolition process. I neglected to connect one additional hose, and as such had the existing hoses connected incorrectly. Since I had already laid the deck hatch back down and sealed it, I had to go in through the storage compartment and fix the plumbing.

Here is the plumbing correctly connected.

IMG_4356.jpg

Anyway, that is a few catchup photos and videos for your viewing pleasure. :)
 
Last edited:

tpenfield

Moderator
Staff member
Joined
Jul 18, 2011
Messages
18,092
Double post (again) sorry about that. This new software is giving me challenges :rolleyes:

Well, I am at the end of this project and thought to take some time to reflect . . .

1) It all started out with a higher than normal moisture level reading in the main bulkhead, which separates the fuel bay and the engine room. This bulkhead is also a major junction point for the major stringers in the boat.

2) That lead to some diagnostic and remediation efforts to understand the propagation of moisture to joining areas.

3) There was some moisture found in the lower portions of the foam in the fuel bay by drilling some test holes and core samples.

4) Based on the diagnostics done, a decision was made (by me) to remove & replace the center section of the main bulkhead.

5) Upon removal of the bulkhead, an additional issue was noticed, in that the fuel tank was no longer adhering to the foam. This was the most probable cause for the collection of moisture in the fuel bay and the bulkhead.

(these problems usually go further than you think . . . )
smile.gif


6) Upon removal of the fuel tank and related foam, moisture was also noted in the forward bulkhead. It was not too bad, but it warranted looking further forward into the mid cabin storage area.

7) The storage area floor was in a progressed stage of moisture absorption and partial rotting, so that extended the scope of the repairs to the mid-section of the boat.

8) Along the way, I looked at the structure of the boat in terms of stiffening the structure. . . since I felt the boat was a bit 'wobbly' on the open water. Bonding the cockpit sole to the stringer grid would be a way of adding some rigidity to the boat. Correcting the fuel tank/foam bonding would help a lot, but I felt that I had the opportunity to do more.

I contacted Formula Tech Support about this idea. They indicated that although it would add some strength it was not really necessary and may result in some crazing of the gelcoat in some areas of the cockpit sole. I decided to go ahead and bond the cockpit sole to the stringer grid, figuring that this would be my only chance. In my research, a few boat manufacturers advertise the fact that they bond the cockpit sole to the stringer grid . . . mostly higher end center console boats, as I recall.

9) Additionally, I had asked Formula about the built-in flotation that is used in the structure. I was interested to know if the boat had enough flotation to remain afloat in an 'unplanned event'. I also did my own estimations and calculations to determine if the boat could barely stay afloat. It turned out that I should probably add some flotation to insure that the boat would remain on the surface if it ever became flooded/mostly submerged. So, I added approximately 24 cubic feet of flotation to the boat.

10) Then it was a matter of putting it all back together . . .

So, what started out as a wet bulkhead, expanded in scope based on both what I found as the underlying cause of the moisture as well as some improvements made along the way.

Total time for the work was about 6 months from the first cut into the bulkhead . . . my hopes are that this boat will be good for a very long time, probably the rest of its useful life.
 
Last edited:

GT1000000

Rear Admiral
Joined
Jul 13, 2011
Messages
4,916
All of your hard work and attention to details look like they will pay huge dividends once you get back to being able to enjoy your boat.
Everything looks top notch and solid!
Can't wait to see some "action" pics...:photo:
Thanks for sharing this project, I have learned a few good tips!
 

tpenfield

Moderator
Staff member
Joined
Jul 18, 2011
Messages
18,092
Thanks, everyone for the compliments as I finish things up. It is great to be able to walk a cross the deck again :)

The Admiral reminded me about my previous boat, where I did similar repairs, and ended up getting rid of the boat due to the engine failing. :rolleyes: I certainly hope for a longer term outcome with this boat. :thumb:
 
Last edited:

Scott Danforth

Grumpy Vintage Moderator still playing with boats
Staff member
Joined
Jul 23, 2011
Messages
49,893
If the engines go now, rebuild them as either 468's or 496's and keep the boat.
 

tpenfield

Moderator
Staff member
Joined
Jul 18, 2011
Messages
18,092
Another update:

I got my 'boat hauler guy' scheduled to launch the boat mid-day on Saturday (June 21st). I've got a few odds & ends to do that morning . . .

1) Oil change on both engines

2) Replace the fume detector, since the existing one stopped working. (those seem to last only a few years, but I don't like being without a working fume detector)

3) General cleaning

4)Load more fuel - I got 50 gallons in, probably will load another 40 gallons just to get the season going. I think last year, I used about 400 gallons and put 55 hours on the boat.

5) Adjust the port trim sender - got a new one this year . . . seems to be a pain to get adjusted. Tried last weekend, but gave up :rolleyes:

With the amount of work done on the boat this year, I am nervous that something will be out of whack or overlooked once I get it in the water. Hopefully, it will be OK.
 

Scott Danforth

Grumpy Vintage Moderator still playing with boats
Staff member
Joined
Jul 23, 2011
Messages
49,893
as Captain Ron stated, "if anything is going to happen to her, its going to happen out there"

dont forget to put the plug in it
 
Top