Formula 330SS Bulkhead Replacement

tpenfield

Moderator
Staff member
Joined
Jul 18, 2011
Messages
18,091
regarding the foam stain on the gel, have you tried to remove the foam with a razor blade and buff? not sure what you can use to get it out of the vinyl. if you find something, let me know :facepalm:

fuel consumption is a bit high, however if your pushing winds and going against the chop, that would be normal. Especially if your just lumbering along at displacement speed.

most importantly, was the cooler full?

Hey Scott:

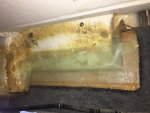
It seems that I got one of the 2 parts of the foam on a few spots (not the catalyzed foam itself) Looks like it is the darker colored 'part', which I believe is the 'isocyanate' part (nasty stuff) . . . It seems to be dry/cured . . . or perhaps just left a stain. I did a little bit of searching on the web and it seems that MEK might be the next thing to try. Acetone works if used right away, but does not seem to do anything afterwards.

Fuel consumption is about 1.4 - 1.5 mpg . . . which is about right for that boat. Of course, I have no precise way of measuring.

Cooler was full . . . at the start of the day . . . :)
 

Scott Danforth

Grumpy Vintage Moderator still playing with boats
Staff member
Joined
Jul 23, 2011
Messages
49,892
I have some foam and resin in a few spots. seat rest and swim deck mostly, looks like transfer from my shoe climbing over the swim deck and aft, and a spot on the hull near a grab bar that looks like it came off a brush or roller.

Have you thought of using DMF? however all the chemicals that remove the uncured crystal isocyanate will be nasty.

Funny thing, our cooler was full at the beginning of the day as well.
 

tpenfield

Moderator
Staff member
Joined
Jul 18, 2011
Messages
18,091
I have some foam and resin in a few spots. seat rest and swim deck mostly, looks like transfer from my shoe climbing over the swim deck and aft, and a spot on the hull near a grab bar that looks like it came off a brush or roller.

Have you thought of using DMF? however all the chemicals that remove the uncured crystal isocyanate will be nasty.

Funny thing, our cooler was full at the beginning of the day as well.

Yea, I found some info on Linkedin via some Q & A from some polymer professionals looking to clean spray equipment. As you say, probably anything that will dissolve the isocyanate will probably dissolve the vinyl and/or gelcoat.

I can look for some DMF as well as MEK. If I find a successful solvent, I'll post the results.

My worst case is to do a little glecoat touch-up top cover the spots and maybe the same on the vinyl with the SEM vinyl paint.
 

tpenfield

Moderator
Staff member
Joined
Jul 18, 2011
Messages
18,091
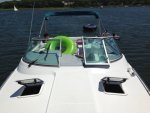
No real action photos or videos yet, . . . we did make a feeble attempt at tubing on Sunday, but there were 3+ footers out in the bay. We ended up going inside the harbor into a shallow basin . . . fortunately the tides were right so that we could get in fairly close to shore. Mostly swimming off the back . . . There were some other boats in there too, as few were able to go out into the bay.


IMG_4501.jpg

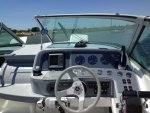
while the family was enjoying the sun and the water, I was continuing with cleaning things up, still finding 'restoration dust' around the instrument panel and the steering wheel.

IMG_4507.jpg

I think the wind on Sunday was close to what the tropical storm brought on Friday . . . :rolleyes: Next weekend, we will hopefully get a chance to venture out some more. . . I may try to get some videos underway.
 
Last edited:

alldodge

Moderator
Staff member
Joined
Mar 8, 2009
Messages
42,346
IMG_4507.jpg


.

Morning, is that the mirror you use to be able to pull a tube and such without someone on board? Kind of small isn't it?
 

tpenfield

Moderator
Staff member
Joined
Jul 18, 2011
Messages
18,091
Morning, is that the mirror you use to be able to pull a tube and such without someone on board? Kind of small isn't it?

the mirror is kind of small . . . planning on getting a bigger one. I use it in general just to see what is behind me, but not specifically for tubing. Always at least one extra on board as the spotter, but usually there is a crowd onboard anyway.
 

Scott Danforth

Grumpy Vintage Moderator still playing with boats
Staff member
Joined
Jul 23, 2011
Messages
49,892
I see a bigger problem..... Two beverages, only one mouth.
 

alldodge

Moderator
Staff member
Joined
Mar 8, 2009
Messages
42,346
the mirror is kind of small . . . planning on getting a bigger one. I use it in general just to see what is behind me, but not specifically for tubing. Always at least one extra on board as the spotter, but usually there is a crowd onboard anyway.

Looks like we have about the same GPS plotter 536S. Here is the mirror I have, and a note never has gotten in the way


tpenfield

Moderator
Staff member
Joined
Jul 18, 2011
Messages
18,091
Here is an 'action video' of the boat all put back together and in operation . . .

The other day was a " 10 on a 10 scale " for boating, so I went out for a little cruise in the bay. Nobody around to be the crew, but it was too good to pass up.

Here is a little video I made of the cruise.


http://www.youtube.com/watch?v=ERG3mQ0zJUQ

The boat feels really solid after all of the repair work done over the winter.

Eventhough it was flat out in the bay, I did not 'open it up' , because I am getting a bit of vibration out of the starboard outdrive (I think) . . . it is trim and turn sensitive, so probably gimbal and/or u-joints. I replaced the port side u-joints in the pre-season prep. My plan is to do the bellows, gimbal bearings and the other u-joint after this season.

For now I'll just have to go easy on it . . . :rolleyes: It seems fine if I stay under 3K RPM and trim up a bit.
 
Last edited:

tpenfield

Moderator
Staff member
Joined
Jul 18, 2011
Messages
18,091
OK, another video from the weekend, just one I promise :) . . .

''Normal' wind & wave conditions were back on Saturday So, we were able to put the boat to more of a test versus the calm conditions of last week.

Here is a video that we shot running with the sea ( about a 4 foot chop), the boat feels really solid in the chop and as you can see from the video, not too much need to hang on.


Later in the day, we picked up a larger crew and were headed into the chop . . . . . . . Could not really shot anymore video during that run as it takes a bit more concentration heading into the chop. We passed what looked to be a 1989 (ish) Formula 242 heading the other direction. . . nobody , except the deep v-hulls, out in the bay that day.
 
Last edited:

tpenfield

Moderator
Staff member
Joined
Jul 18, 2011
Messages
18,091
2 Year Followup . . .

It has been 2 years since I fixed the wet bulkhead and fuel bay issues on my Formula 330. Overall the boat has been much stiffer going through the seas, which is a good thing.

One of the modifications that I made to the original design/manufacture was to bond the cockpit sole to the stringer grid. I bonded the cockpit to the stringer grid along 2 major points of contact.

First was the cockpit sole/liner at the edge of the rear seat where it meets the bulkhead that I replaced (so going across the beam of the hull)

Second was along the main stringer on the starboard side of the fuel tank as the cockpit sole normally rests upon it.

These two bonding areas essentially form a "T" going across and length-wise. The bonding points meet at the bulkhead at the front of the engine compartment.

After 2 years of use with this modification, it seems that more twisting forces are now felt up at the helm of the boat, whereas the stern area seems quite solid. I have also noticed a couple of stress cracks around the instrument panel, which I take to mean that there is more stress up at the helm than before.

So, I think, during the off season, I will look to bond some more areas up under the helm to the stringer grid to see if I can stiffen the helm station up a bit.

Just wanted to share that tidbit of information to anyone doing a restore/rebuild on a larger boat.
 
Last edited:

tpenfield

Moderator
Staff member
Joined
Jul 18, 2011
Messages
18,091
Another follow-up on this project . . .

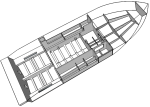
I came across a 3D modeling software that would have been quite helpful when I started the rebuild. I have taken some time based on the knowledge that I gained in repairing the structure of the F-330 SS to 'build' a 3D model of it.

Here are a few pictures. . .
F-330SS-1.png
F-330SS-2.png
F-330SS-3.png
It took some guesswork in the bow section in terms of making this model, since my restoration stopped at the mid-section of the boat.

The repairs have made the boat sound, but I do plan on doing a bit more work at the cabin bulkhead and possibly the engine room bulkhead to stiffen up the structure a bit more.
 
Last edited:

garbageguy

Lieutenant Commander
Joined
May 8, 2012
Messages
1,582
Thanks for the update, and all the info on your project. If we get into the smaller house/large shop and garage dwelling we would like - I may be doing a similar project on our 25 ft express cruiser. I use some 3D modeling software for site work and I can appreciate the work you've done to model your boat. Nice work - makes me think...
 

tpenfield

Moderator
Staff member
Joined
Jul 18, 2011
Messages
18,091
Thanks, there is a guy in the Pittsburgh area currently doing a very similar repair to an F-330 SS to what I had to do. So, perhaps the 3D model will come in handy. His boat is a couple of years newer than mine.
 

tpenfield

Moderator
Staff member
Joined
Jul 18, 2011
Messages
18,091
You just want to play with your new toy...... and I don't blame you :D toys are great

Yup :D :thumb:

I figure the guy that we have helped with his 330SS rot situation on the Formula Boats forum could use these pictures.
 

tpenfield

Moderator
Staff member
Joined
Jul 18, 2011
Messages
18,091
Another thing . . .

As I made this model, I noticed that the structure is pretty 'beefy'.
 

tpenfield

Moderator
Staff member
Joined
Jul 18, 2011
Messages
18,091
Getting back to my 'update' post from August, I plan on adding additional bonding of the stringer grid to the cockpit sole and hull during the Spring prep work this year (2017)

So, using my 3D diagram, here is the plan. The Red is the existing bonding that I added back in 2014 when I replaced the bulkhead. The Blue is what I plan on adding.

F-330SSB-1.png
 

tpenfield

Moderator
Staff member
Joined
Jul 18, 2011
Messages
18,091
Stringer Grid Bonding Update:

Just another update on the structural aspects of the boat. I had planned on doing a bit more bonding of the stringer grid to the cockpit sole, which basically joins the two 'halves' of the boat in more places, making it more structurally rigid.

Today, as I did my prep work for the season, I added some bonding in the mid-ship section as planned. Here is a picture of the structure and the previous and newly added bonding areas.

F-330SS-2B.png

It is a bit tight working in the mid-ship section. . . really nothing more than a storage area. It looked like I could remove a few areas of carpet and headliner material and then apply some 1708 biaxial cloth to those areas. I prepped the areas and used epoxy to get a bit more adhesion.

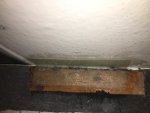
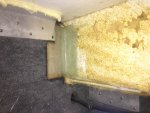
Here are a few pictures of the bonding areas.

Here is the front edge of the cockpit sole as it mates to the forward bulkhead
IMG_9970.jpg


This area is along the main stringer on the starboard side. I bonded the more aft portions of this stringer, when I did the major structural work.
IMG_9972.jpg


This is an area at the front of the main stringer on the port side. I had not been able to bond very many areas along the port side since the port stringer is quite differently shaped than the starboard side. What is on the other side of this is the molded step that leads to the cabin.
IMG_9971.jpg

I put 2 layers of 1708 in this area . . .

I'll check the epoxy resin in the AM to make sure it cured properly. It is only about 65 degrees F here, so a bit on the cold side of epoxy.
 
Top