Chaparral 2000 SL Sport floor, and more?? [SPLASHED Sept 2017]

Baylinerchuck

Commander
Joined
Jul 29, 2016
Messages
2,726
Thanks sir.....I don't ever want to this again, seal it right and forget it.

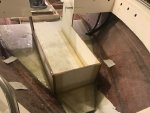
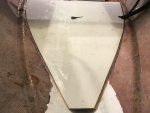
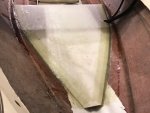
I finished the bow section today. Made more PB with a little hair to glue it down. Seven screws held it fast.

I should have taken a picture of how I did this myself. I put the piece of ply wood in place. I used some little c-clamps on the aft edge of the plywood and strapped it to the helm. I crawled into the anchor locker and spread the glue on the cleats and tops of the stringers. Once coated, I released the c-clamps and lowered the plywood into place. The stuff I'm using is really heavy so I needed an extra hand or five. Lol.

End result:
IMG_1469.JPG
 
Last edited:
Baylinerchuck

Commander
Joined
Jul 29, 2016
Messages
2,726
Got a little bit done tonight. Prepped the motor mounts for some glass. Needed to improve a few of the fillets and grind some nubs smooth. While the fillets were kicking I mixed up some hairy PB and glued in the bow plywood with fillets.
IMG_1471.JPG

After that I put two layers of 1.5 oz CSM on the tops of the motor mounts. I think I'll add at least two additional layers of 1708 and see how that looks.
IMG_1472.JPG
 
Last edited:
Baylinerchuck

Commander
Joined
Jul 29, 2016
Messages
2,726
2 layers of 1708 on the flat area the motor sits on completed tonight. A total of two layers of 1.5 oz CSM, and two layers 1708. I would have finished tabbing but things get very sticky, very quick. Hopefully will be done with the motor mounts tomorrow.
IMG_1472.JPG
 
Last edited:
Baylinerchuck

Commander
Joined
Jul 29, 2016
Messages
2,726
Thanks sir.

Got some more glasswork done on the motor mounts. Corners complete, and deck tabbed. Also improved the fillets around the bow deck.
IMG_1476.JPG
 
Last edited:
Baylinerchuck

Commander
Joined
Jul 29, 2016
Messages
2,726
Lots of detail and prep work. Smoothed out fillets on bow deck and laid down a layer of CSM tabbing. Glued down support beams over fuel tank.

Two coats of gelcoat on the transom inside and out. Dressed up the motor mounts more and faired a lot of areas that needed it. It's a long process to make things right, and boating season is knocking at the door.
IMG_1509.JPGIMG_1508.JPG
 
Last edited:
Baylinerchuck

Commander
Joined
Jul 29, 2016
Messages
2,726
Two more coats of gelcoat on the transom area. Five coats on the exterior transom, four coats on the inner. Last coat with surfacing wax.

Tabbing complete on bow deck.
IMG_1518.JPG

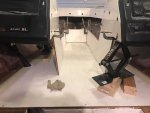
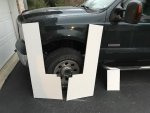
Cut all the supports for the bow seats. Glad I was able to save patterns.
IMG_1515.JPG

IMG_1516.JPG

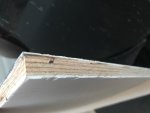
The secret of my success. Fiberglass coated plywood. I can't think of a better material to build a boat out of.
IMG_1517.JPG
 
Last edited:

Baylinerchuck

Commander
Joined
Jul 29, 2016
Messages
2,726
Not too much tonight. Gave the edges on what I cut yesterday a drink of resin. Used what was left to finish a couple of pieces of tabbing and smooth the tops of the motor mounts slightly.
 

drewm3i

Petty Officer 1st Class
Joined
Dec 31, 1969
Messages
288
Two more coats of gelcoat on the transom area. Five coats on the exterior transom, four coats on the inner. Last coat with surfacing wax.

Tabbing complete on bow deck.


Cut all the supports for the bow seats. Glad I was able to save patterns.


The secret of my success. Fiberglass coated plywood. I can't think of a better material to build a boat out of.

Whoa! That stuff is awesome! Where did you find it? That would be perfect for my aft bulkhead and even the stringer I need to replace! I also need to ask, how did you cut out your transom? The oscillating tool works great, but I fear cutting through my hull.
 

Baylinerchuck

Commander
Joined
Jul 29, 2016
Messages
2,726
Whoa! That stuff is awesome! Where did you find it? That would be perfect for my aft bulkhead and even the stringer I need to replace! I also need to ask, how did you cut out your transom? The oscillating tool works great, but I fear cutting through my hull.

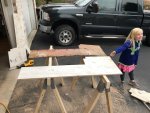
Believe it or not the material was salvaged from old ROADWAY trailers. A buddy of mine got a whole truckload of it for next to nothing. This material is what made up the sides of 28' pup trailers. As far as I know they haven't made trailers out of plywood in a long time due to weight. As you can see from the picture, once you sand the paint and decals off, it looks brand new. The sides of a trailer provide integrity and strength, so these panels are very sturdy.
As far as my transom, it was pretty much completely rotten. I was able to peel most of it away after I cut the top fiberglass skin loose. Most of the wood had already delaminated from the transom.
 

Baylinerchuck

Commander
Joined
Jul 29, 2016
Messages
2,726
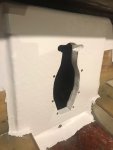
Close up of the transom gelcoat. I fiberglassed and gel coated the inside of the keyhole and cutout for the steering arm.
IMG_1530.JPG
 
Last edited:

Scott06

Admiral
Joined
Apr 20, 2014
Messages
6,442
Unbelievably nice job here. Been following this thread and just a huge amount of work done. And to think my wife was worried about me doing a repower last year, in comparison a walk in the park
 

Baylinerchuck

Commander
Joined
Jul 29, 2016
Messages
2,726
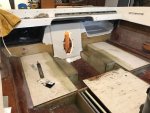
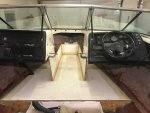
Got a lot done today. I love days off! I assembled the three bow pieces I cut last weekend. It was hard to keep everything straight and level. Scissors jacks, c-clamps, welding clamps and angle iron, oh my!
IMG_1531.JPG

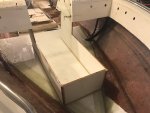
I kept all the wood off the deck 1/4" with UHMW tabs. This way I can make sure I get a solid bead of hairy PB squeezed in. This was a very similar process to bedding stringers. I figure keeping the wood 1/4" off the deck will also protect it further from water intrusion. Once kicked, the frame was extremely solid and clamps could be removed.
IMG_1534.JPG

I used 1.5 oz CSM to tab all of the frame. What a sticky, nasty mess.
IMG_1537.JPG

IMG_1538.JPG
 
Last edited:

ezmobee

Supreme Mariner
Joined
Mar 26, 2007
Messages
23,767
Looking good. I was glad to see the windshield on in the last pic. You definitely don't wanna be adjusting consoles without knowing how that'll be affected. Learned that the hard way.
 

Baylinerchuck

Commander
Joined
Jul 29, 2016
Messages
2,726
Looking good. I was glad to see the windshield on in the last pic. You definitely don't wanna be adjusting consoles without knowing how that'll be affected. Learned that the hard way.

Yeah I was a bit annoyed this morning while I was trying get everything level. I hate how the consoles on either side appear to droop. I actually had them level but that left me a bow window that wouldn't close by a 1/2". I went back and looked at some images I took prior to disassembly and they were droopy there too. Taking measurements from the bow to each console there is a 1/2" difference front to back. There is a 3/4" difference in height from one console to the other. There is absolutely nothing I can do about it. Just more great craftsmanship in the mass boat construction industry. I'm trying to ignore it and carry on. I'm guessing I'll be the only one that knows, aside from whoever reads this post. Lol.
 
Top