Chaparral 2000 SL Sport floor, and more?? [SPLASHED Sept 2017]

ripazka

Petty Officer 1st Class
Joined
Jul 30, 2016
Messages
246
Chuck, what was your plan on top of the gas tank? Previously I had that sheet completely separated from the deck and I could lift it up. It was kind of great but I think it also increases water intrusion risk so I will not do it now. Are you going to make some kind of "maintenance hatch"? I thought Im going to install water proof hatches on it...
 

Baylinerchuck

Commander
Joined
Jul 29, 2016
Messages
2,726
Chuck, what was your plan on top of the gas tank? Previously I had that sheet completely separated from the deck and I could lift it up. It was kind of great but I think it also increases water intrusion risk so I will not do it now. Are you going to make some kind of "maintenance hatch"? I thought Im going to install water proof hatches on it...

I want to cover all that remains with one large piece. The forward tank connections will be accessed through an 8" diameter snap on cover. The rear will be accessed by pulling up the center cushion of my rear bench seat. Like you, I do not want to add extra seams that could leak, but mostly due to aesthetics. In the end, I really see no need to access the fuel tank once the deck is laid down other than we need to have access to hose clamps, anti-siphon valve/fuel pick-up, and gauge sending unit.
 

ripazka

Petty Officer 1st Class
Joined
Jul 30, 2016
Messages
246
I want to cover all that remains with one large piece. The forward tank connections will be accessed through an 8" diameter snap on cover. The rear will be accessed by pulling up the center cushion of my rear bench seat. Like you, I do not want to add extra seams that could leak, but mostly due to aesthetics. In the end, I really see no need to access the fuel tank once the deck is laid down other than we need to have access to hose clamps, anti-siphon valve/fuel pick-up, and gauge sending unit.

Ok then Im on a right track ;)
 

Baylinerchuck

Commander
Joined
Jul 29, 2016
Messages
2,726
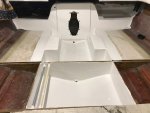
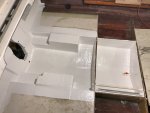
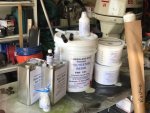
Lots done today. I tabbed inside my bow seat bases, what a PITA. It's hard to keep the respirator on straight when your head is upside down and stuffed in a seat base. I got my gimbal bearing flipped and greased and my trim and limit senders installed. I measured and cut the last section of deck. Last but not least, two coats of gelcoat, glorious gelcoat. Funny how everything looks better in bright white gelcoat.

IMG_1578.JPG

IMG_1579.JPG
 
Last edited:

Baylinerchuck

Commander
Joined
Jul 29, 2016
Messages
2,726
Thanks for the kind words guys...I'm definitely liking the gelcoat.

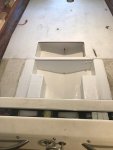
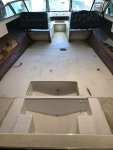
I mentioned that yesterday I cut the final deck piece out. Well after a little trimming I got it to sit close. I still have to install a pink fuel sender wire and fuel line. I need to cut the hole for the snap on cover that's for the fuel pick-up. I also need to install the cleats to attach this monstrosity. It does feel really good having that piece of deck laying there, albeit temporarily.

IMG_1594.JPG

IMG_1595.JPG


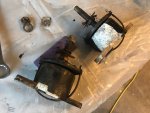
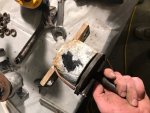
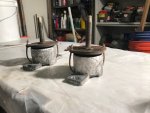
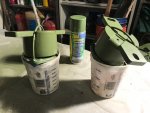
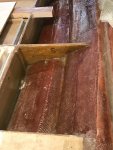
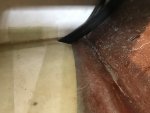
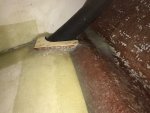
After I did that I started doing a little clean up and changed gears to the motor. The front motor mounts looked terrible when I removed the motor. There was a lot of corrosion on the aluminum bases, as well as pitting on the steel mount. With the corrosion I found on the aluminum outdrive, I'm wondering if this is normal. This boat was only freshwater. I prepped and primed the aluminum.

IMG_1601.JPGIMG_1602.JPGIMG_1603.JPGIMG_1604.JPG
 
Last edited:

Woodonglass

Supreme Mariner
Joined
Dec 29, 2009
Messages
25,927
Uhhm for future reference... you only need a light coating of the ZC primer looks like you laid it on pretty thick
 

Baylinerchuck

Commander
Joined
Jul 29, 2016
Messages
2,726
Uhhm for future reference... you only need a light coating of the ZC primer looks like you laid it on pretty thick

Thanks, only 2 coats. Not really my intent. This can of paint is the same one I used 5 years ago to prime the 78 Johnson. The nozzle got plugged up and I had to use one out of a different can, lol. It sprayed a little fast.
 

strokendiesel002

Petty Officer 1st Class
Joined
May 15, 2012
Messages
283
Wow Chuck! You do amazing work, I've checked some of your threads in your sig link from time to time, but just got through this one and it is impressive! I can't wait to finish my basement project and get back into my boating projects! Thank you for sharing! After I finish up my tin projects, I have a feeling I'll be helping my uncle with his new to him Crownline. I'm kind of excited to learn the ways of the Glasser after all these years :)
 

Baylinerchuck

Commander
Joined
Jul 29, 2016
Messages
2,726
Well, according to my 1990 Chaparral brochure, I could very well be sitting on a gold mine my friends. Not only did the factory hand lay roving, but I did as well.

I needed to beef up the area around the second chine. This area was so thin, you could see the back side of the gelcoat through the factory "hand laid roving". This is the area I punched through the hull while trying to remove a 3/4" wood strip that was only half rotted. I already installed 2 layers of 1708 here, however, a little CSM and some 24oz roving can't hurt. I may add an additional layer just to be 100%.

IMG_1607.JPG

IMG_1610.JPG

IMG_1609.JPG
 
Last edited:

Jbasham

Petty Officer 3rd Class
Joined
Apr 10, 2017
Messages
84
Is your garage attached to your house? If so how are you managing the poly smell?
 

Baylinerchuck

Commander
Joined
Jul 29, 2016
Messages
2,726
Second layer of roving on the thin spots. Finished bedding the top of the bow seat base. Cut the 8" hole for the fuel tank pick-up access cover.

I have also been scratching my head as to the hole I made in the deck for the fuel lines. It was really bugging me that this was a place water could get in. Granted, in the bow seat storage box, but still.

IMG_1613.JPG
I decided to add a couple shaped pieces to build up a collar around the tubes. I will be adding a drain to the bilge, so I only need the collar high enough to keep water from going in the wrong hole. I'll add a couple more pieces before calling it good.

IMG_1614.JPG
 
Last edited:

Baylinerchuck

Commander
Joined
Jul 29, 2016
Messages
2,726
Jbasham my garage is attached to my house, and more specifically is under it. I learned on my first project to induce a negative pressure in the garage so air from the house will draw into the garage. I'm lucky enough to have a window in my garage. I made a dual fan unit that I mount to the window and seal around it. The air from the garage is pulled out through those fans creating a negative pressure. I can glass with resin while the door to the living space is slightly open and you can't detect a resin smell in the house, at all. I think duct booster fans I'm using for my window are about 400cfm each. They also have a secondary benefit of keeping dust out of the house. I've made the Admiral very happy with this setup.
 
Top