Chaparral 2000 SL Sport floor, and more?? [SPLASHED Sept 2017]

ezmobee

Supreme Mariner
Joined
Mar 26, 2007
Messages
23,767
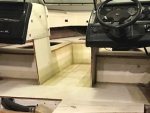
The windshield bolts are in a channel so if you loosen them you can slide it around some. Would that help close the gap if you leveled the consoles? The supports should be move able also. The windshield alignment was the hardest part of my restore. Struggled quite a bit with it on a buddy's boat as well.
 

tpenfield

Moderator
Staff member
Joined
Jul 18, 2011
Messages
18,040
I hope the folks at Chaparral have been watching you re-build their boat . . . :thumb:
 

Baylinerchuck

Commander
Joined
Jul 29, 2016
Messages
2,726
The windshield bolts are in a channel so if you loosen them you can slide it around some. Would that help close the gap if you leveled the consoles? The supports should be move able also. The windshield alignment was the hardest part of my restore. Struggled quite a bit with it on a buddy's boat as well.

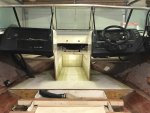
Since there was no need to remove the cap, the windshield was never removed or manipulated. It's in its factory location. Point being, the windshield is my only constant. I have the pass thru door aligned perfectly with about an 1/8" gap top and bottom when closed. If I level the consoles perfectly it really makes the angle of the bow seat boxes weird since they are attached to the consoles. I think I have a happy medium. I was able to save the bow seat box from the demo that I used for templates, so I know those are right.
 

Baylinerchuck

Commander
Joined
Jul 29, 2016
Messages
2,726
I hope the folks at Chaparral have been watching you re-build their boat . . . :thumb:

I have been posting on the Chap forum. I don't think many folks over there have ever seen a restoration this involved. On iBoats it's an everyday thing. In the Chap forum I'm becoming a folk hero. Lol. Ok, that might be a slight exaggeration.
 

Baylinerchuck

Commander
Joined
Jul 29, 2016
Messages
2,726
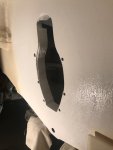
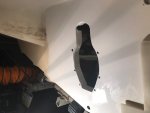
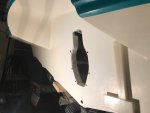
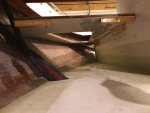
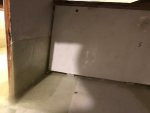
One of the other things I did yesterday while waiting for resin to kick was to sand the gelcoat on the transom. This gelcoat is so thick that it never levels. The end result looks very much like an anti-slip surface. Unfortunately this is not the look I'm going for on the transom.

IMG_1533.JPG
Before......

IMG_1535.JPG
Wet sand to 800

IMG_1536.JPG
Wet sand entire rear to 2000.

The new blended in ok. The important thing is the keyhole is completely flat now.
 
Last edited:

Slager

Petty Officer 2nd Class
Joined
Apr 30, 2014
Messages
189
That's looking really nice. What grits did you end up using for each step?
 

Baylinerchuck

Commander
Joined
Jul 29, 2016
Messages
2,726
That's looking really nice. What grits did you end up using for each step?

150 to start, 220, 400, 800, 1000, 1500, 2000. Probably could have stopped at 1500, but I had 2000 so why not. Just need to buff out with scratch and swirl remover, then wax.
 

Baylinerchuck

Commander
Joined
Jul 29, 2016
Messages
2,726
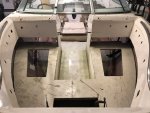
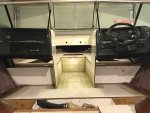
Finished up the tabbing on the bow seatbase. That was more of a PITA than the first tabbing. It's hard not to wear the resin when you're tabbing in confined spaces.

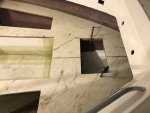
Once that was all done and kicking I started laying out the top for the seat base. I decided to make it two pieces so it's easier to handle. The center storage cut out was not in the oem design. I decided to add this so I can access the bow loop nuts and easily reinforce my two piece design. The boat is starting to look like a bowrider again!!
IMG_1539.JPG

IMG_1540.JPG

IMG_1541.JPG
 
Last edited:

Baylinerchuck

Commander
Joined
Jul 29, 2016
Messages
2,726
All cleaned up.....cleats installed, cut edges given a drink of slowkicking resin, final adjustments, glued and screwed. Screws covered with left over hairy PB.

IMG_1544.JPG
 

Attachments

  • IMG_1544.JPG
    IMG_1544.JPG
    82.6 KB · Views: 15
Last edited:

mickyryan

Rear Admiral
Joined
Apr 18, 2016
Messages
4,214
Awesome work man, i totally feel you on the droop, from inside looks like both drooping however from the bow back , looks spot on , i would have gone nuts too , end result looks great !
 

Baylinerchuck

Commander
Joined
Jul 29, 2016
Messages
2,726
Had a couple hours tonight after work to get the ends of my bow seat bases completed. I cut these out a day ago. First I Did some final scribing and trimming on the wood. I added cleats to attach the panels. The cleats got a drink of resin as did the edges of the panels.

IMG_1557.JPG

I added 1/4" UHMW spacers to the bottom of the panels to keep them off the deck.

IMG_1558.JPG

Once screwed in I bedded them with thickened resin and 1/4" chop.

IMG_1559.JPG

Tabbing those panels under the consoles is not going to be a pleasant experience.
 
Last edited:

ripazka

Petty Officer 1st Class
Joined
Jul 30, 2016
Messages
246
It really starts to take the shape now. That boat is just pure quality after your restoration, keep it up!
 

rad1026

Chief Petty Officer
Joined
May 1, 2006
Messages
443
I love what you have done. My Chap is an 89 2100SX and fortunately for me damage was limited to the stern of the boat. My water intrusion came in from a corroded transom bolt and luckily I caught it before it went past the first bulkhead. My job has been on hold for winter since all my work has to be done outside, but good temps this weekend will have me mixing PB and maybe laying down some glass on my deck. I have two part foam to pour and then I can start bilge paint. I went with a completely different design on my motor mounts. I took them from my friends Sea Ray with a big block. I will also glass the keyhole cut out. Great job! Get that Chappy back in the water!
 

Baylinerchuck

Commander
Joined
Jul 29, 2016
Messages
2,726
I love what you have done. My Chap is an 89 2100SX and fortunately for me damage was limited to the stern of the boat. My water intrusion came in from a corroded transom bolt and luckily I caught it before it went past the first bulkhead. My job has been on hold for winter since all my work has to be done outside, but good temps this weekend will have me mixing PB and maybe laying down some glass on my deck. I have two part foam to pour and then I can start bilge paint. I went with a completely different design on my motor mounts. I took them from my friends Sea Ray with a big block. I will also glass the keyhole cut out. Great job! Get that Chappy back in the water!

Thanks rad! I'm taking the extra time now to think through this boat and try to eliminate problem areas of water intrusion. I plan on having this Chap for a long time. Would love to see some pics of your boat and work you did.
 

Baylinerchuck

Commander
Joined
Jul 29, 2016
Messages
2,726
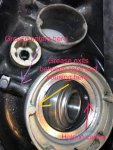
Got a little bit more bedding done on the insides of my bow seat base. Also a little fairing with thickened resin. I also received the last trim hose I was waiting on so decided to work on the gimbal housing a little.

The mechanic the PO was using must have liked to ensure his customers came back. I noticed red grease smeared about the zerk fitting but really nothing but old black grease in the race. I figured get rid of the red and replace with blue marine grade since I had no idea what was used prior and some greases are incompatible with others. As I squirted grease in the zerk it exited between the race and the housing. The grease should come out between the bearing and the race. Upon further inspection I found that a past mechanic did not align the hole in the race with grease port. It was only 180 degrees out..... luckily the factory grease did its job and the bearing is fine. I'll remove it and align it properly tomorrow.

IMG_1568.jpg
 
Last edited:

Baylinerchuck

Commander
Joined
Jul 29, 2016
Messages
2,726
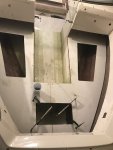
A little more tabbing completed. Got the deck tabbed to the bow seat base, and the ends done.

IMG_1575.JPG
 
Last edited:
Top