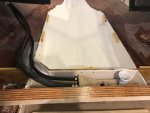
Chaparral 2000 SL Sport floor, and more?? [SPLASHED Sept 2017]

kcassells

Fleet Admiral
Joined
Oct 16, 2012
Messages
8,720
Well... Like I've been told
"It's your boat and you can do what you want."
Just saying.
 

Woodonglass

Supreme Mariner
Joined
Dec 29, 2009
Messages
25,927
My understanding is that you should NOT allow fuel to drain to the bilge. Could cause a KABOOM!!!! Any fuel coffin drain should be piped from the compartment to the outside via the transom or side of hull. A valve could be incorporated for this in the bilge opening so you could open it periodically to see if any fuel was present.
 

Baylinerchuck

Commander
Joined
Jul 29, 2016
Messages
2,726
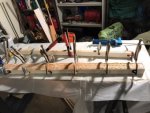
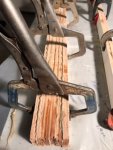
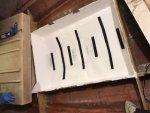
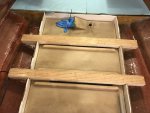
I need to add two support members over the top of the fuel tank. Chaparral used solid lumber 2" thick. I decided to laminate strips of the 1/2" fiberglass coated plywood I used for stringers. I'm extending this a bit on either side of the stringer to add additional support for the seat bases. I glued the plies together using PL spread with a 1/8" notched trowel.

IMG_0468.JPG
IMG_0469.JPG
 
Last edited:

Baylinerchuck

Commander
Joined
Jul 29, 2016
Messages
2,726
Nice looking work. The weather is crazy here too, and they are calling for some major snow on tuesday here a the Jersey Shore area. Glad you go the transom assembly apart. I forgot to mention the special socket require to remove the shift cable. I have never done a bellows on a Alpha Gen2 but did one for a friend on a Gen 1 (slightly different) and have done my own Bravos which I think is similar to yours. Just take your time and follow the Merc Instructions in the repair manual if you don't have it, it and tons of info are over in the MerCruiser forum. I understand budgets also, but I would not consider anything but an OE Merc part for the drive shaft bellows if it fails it will sink your boat. To me that is not worth saving a couple $s. Just my opinion. Look forward to seeing this thing come together. have a great weekend

This is a Gen I Alpha. So any pointers you have are appreciated. I'm guessing the gen II uses the sleeve for the bellows, where mine uses hose clamps on both ends. The PO had the exhaust tube put on, but I'm tired of the black exhaust stains under my swim step. I'm putting the exhaust bellows back on. I've never done bellows before, and they don't look fun.
 

Baylinerchuck

Commander
Joined
Jul 29, 2016
Messages
2,726
Ok, two more coats of gel coat. So that's a total of 2 coats with out wax, last coat with surfacing wax. Once it kicked, the gel coat feels silly smooth. Very pleased. No pictures of that since it's white, like yesterday's pics.

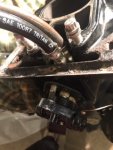
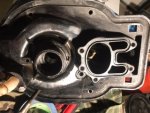
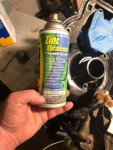
I also worked on cleaning up the gimbal housing. There was a lot of corrosion around the lower mounting bolts. Used a wire wheel and primed with zinc chromate. I also remove the hydraulic lines from the trim cylinder manifold. Both of these lines were very stiff, so I'll probably replace. Cleaned up all the mounting surfaces for the bellows.

IMG_0470.JPGIMG_0471.JPG

IMG_0472.JPGIMG_0473.JPG
 
Last edited:

Baylinerchuck

Commander
Joined
Jul 29, 2016
Messages
2,726
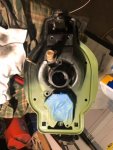
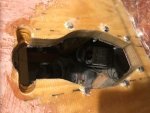
A few small odds and ends tonight. I fit the gimbal housing back on the transom just to check fit. Like a glove. I sanded and put two layers of 1708 on the cut out. I cut the keyhole just a hair big, so closing it up and sealing it sounds like a good idea. I wrapped plastic around some 1/2" bolts to keep the resin from filling the drilled holes.
5D04B060-5516-44A6-A744-0F46C7C7A3BD.JPG7BA0C8CC-7091-4610-AF6A-A209C079F62A.JPG

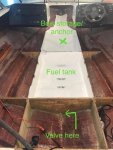
I laid some rubber in the fuel tank bay, and dropped in the tank.

0F6A899A-4437-4D04-9A50-90987F13A262.JPG

I also cut a foam template for the bow deck section.

A9C7244C-EA16-4F86-A913-CCD0B7A604F1.JPG
 
Last edited:

Baylinerchuck

Commander
Joined
Jul 29, 2016
Messages
2,726
My understanding is that you should NOT allow fuel to drain to the bilge. Could cause a KABOOM!!!! Any fuel coffin drain should be piped from the compartment to the outside via the transom or side of hull. A valve could be incorporated for this in the bilge opening so you could open it periodically to see if any fuel was present.

I thought about this....Well since I used CPVC pipe connectors for my bulkhead drains, I could glue on a small 3/4" stub and glue a valve to that. The valve will positively seal off any water, or fuel, from the tank area. Once at home and the boat on the trailer, I can open that drain and dump any liquid out. There should never ever be fuel present due to a poly tank, but an ounce of prevention...the only liquid that should come out is water from the anchor storage in the bow. I think that should solve my issue. What say you kcassells and Woodonglass.
 

kcassells

Fleet Admiral
Joined
Oct 16, 2012
Messages
8,720
This is what I'll plan....@Woodonglass, kcassells
il_340x270.610726625_k1n6.jpg


carry on says I.
 

Baylinerchuck

Commander
Joined
Jul 29, 2016
Messages
2,726
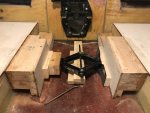
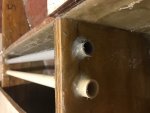
I temporarily installed the inner transom plate to get some accurate measurements for the motor mounts. After some trimming and a few modifications I glued them in place with hairy PB. I used a scissors jack to clamp them in place.
IMG_1457.JPG

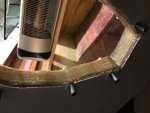
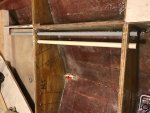
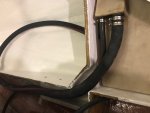
I decided to install a piece of 3/4" CVPC and 1/2" conduit from the fuel tank compartment to the engine area. The CPVC for the 3/8" fuel line and the conduit for the fuel gauge wiring. I also added the valve for the fuel tank compartment drain.
IMG_1455.JPG
IMG_1456.JPG

I planed the two laminated beams that are to be installed over the fuel tank.

IMG_1458.JPG
 

Attachments

  • IMG_1455.JPG
    IMG_1455.JPG
    128.2 KB · Views: 18
Last edited:

tpenfield

Moderator
Staff member
Joined
Jul 18, 2011
Messages
18,040
Maybe some resin in the holes that you drilled for the conduits. . . .

Looking at the care and detail that you are doing on this re-build, you can see that most production boats are just 'slapped together' by comparison.
 

Baylinerchuck

Commander
Joined
Jul 29, 2016
Messages
2,726
Maybe some resin in the holes that you drilled for the conduits. . . .

Looking at the care and detail that you are doing on this re-build, you can see that most production boats are just 'slapped together' by comparison.

Thanks Ted. I actually used hairy PB to seal the holes for the conduit and pipe. I had some bedding to finish up with the motor mounts and had a little left over.
IMG_1465.JPG
 
Last edited:

Baylinerchuck

Commander
Joined
Jul 29, 2016
Messages
2,726
Started out capping the ends of my motor mounts, bedding them a little better, and glueing in pipes I installed yesterday.

I installed an aluminum tray to keep my fuel fill tube from sagging prior to foaming.
IMG_1459.JPG

I installed a new fuel fill line and a new vent.
IMG_1460.JPG

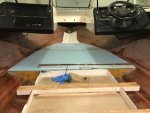
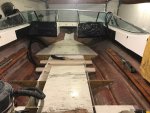
I also cut the fiberglass coated plywood for the bow. This took quite some time to get just right. Such a pain in the donkey to get this in and out of the boat. Still have some sanding to do, but it's pretty close.

IMG_1464.JPG
 
Last edited:

tpenfield

Moderator
Staff member
Joined
Jul 18, 2011
Messages
18,040
Excellent attention to detail in sealing up any holes that you make in the wood structure. That's an area where most boat manufacturers fall down. . . They leave areas of exposed wood and drill a bunch of holes that they don't seal up.
 

Baylinerchuck

Commander
Joined
Jul 29, 2016
Messages
2,726
Cleaned up the top of the bow deck. Made some slow kicking resin to seal the edges of the deck. Screws some cleats to hold the deck in place and gave them a drink of resin. Waiting for everything to kick.
IMG_1466.JPG
 
Last edited:
Top