Chaparral 2000 SL Sport floor, and more?? [SPLASHED Sept 2017]

Corjen1

Lieutenant Junior Grade
Joined
Aug 24, 2013
Messages
1,237
Well, page one to present...as many others have said, well done!! Your attention to detail is fantastic. I would venture to bet, your grand kids will have a solid and fantastic boat!!

Good Job Chuck!!
 

Baylinerchuck

Commander
Joined
Jul 29, 2016
Messages
2,726
First chore of the day.....
IMG_1661.JPG

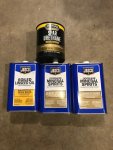
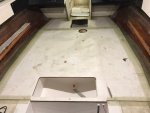
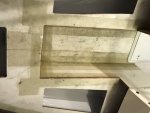
Yeah, when I realized the spar urethane I bought was water based.....back to Lowes to get the right stuff. Then sealed all the wood and edges of the bench I made. This old timers wood sealer did work nice.


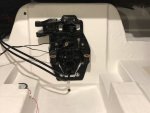
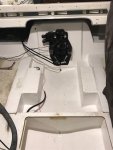
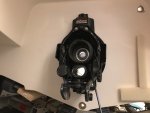
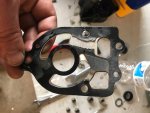
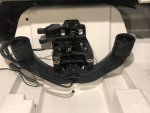
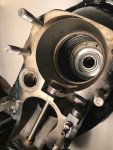
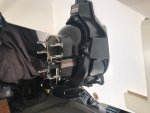
I worked on the gimbal housing next. New hydraulic lines installed. Hydraulic manifold installed with a new gasket. All three bellows glued and clamped to the housing. Transom seal glued with weatherstrip adhesive, and a thin bead of black RTV. I fought with it a little getting it level and had to open a couple of the transom bolt holes. Sure is nice having some shiney black in this boat again.

IMG_1662.JPG
IMG_1663.JPG
IMG_1664.JPG

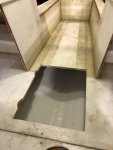
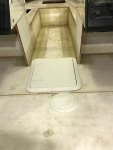
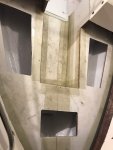
I absolutely dread the thought of hooking those bellows up.....looks like no fun at all. I also dread cutting holes in my new floor.
IMG_1666.JPG

Except that it was for a hatch. So the anxiety was momentary.
IMG_1667.JPG
 
Last edited:

Baylinerchuck

Commander
Joined
Jul 29, 2016
Messages
2,726
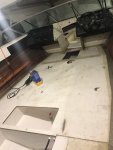
I have a little fiberglass work left to do, but just wasn't into it today. Painted the inside of the bow seat boxes.
IMG_1669.JPG
IMG_1671.JPG
IMG_1670.JPG

Also installed the wye pipe. Only had a few hours to work, so I'm glad I got this much done.
 

Attachments

  • IMG_1672.JPG
    IMG_1672.JPG
    68.4 KB · Views: 8
Last edited:

Baylinerchuck

Commander
Joined
Jul 29, 2016
Messages
2,726
I haven't been able to do much work due to some key players in my department being out on medical leave. Frustrating that I have a bunch of vacation saved for this boat, but can't use it. I guess that's life. I did manage to get a little tabbing done. I have one more layer to do on the deck.
IMG_1713.JPG
 
Last edited:

Baylinerchuck

Commander
Joined
Jul 29, 2016
Messages
2,726
You're gonna have to change your iboats username to ChapparalChuck!

:laugh::laugh::laugh::laugh:

Yeah, I kinda wish I could change it now. I was just paying homage to the boat that started it all for me. My 16' Capri was a great first boat. We really enjoyed that boat.
 

Baylinerchuck

Commander
Joined
Jul 29, 2016
Messages
2,726
Picture of the wye pipe installed. Love the black against the white gelcoat.
IMG_1717.JPG

Another layer of tabbing on the deck today.
IMG_1718.JPG

Some finishing touches of glass before I start faring the bow in preparation of gelcoat.

IMG_1719.JPG
Things seem to be moving at a snails pace now. Weekends just aren't long enough.
 
Last edited:

Baylinerchuck

Commander
Joined
Jul 29, 2016
Messages
2,726
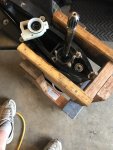
I finally mustered the mental strength to complete my bellows. Clamping the drive shaft bellows to the bell housing was a real treat. I never found any instructions or video on clamp placement. Seems most everyone has videos on the press sleeve. My first attempt was a fail since I couldn't reach the clamp screw. The second attempt went much better after repositioning the clamp. The exhaust bellows were simple. Next time I'm going to make my own video. I think I can do these pretty easily now. I tightened the pivot pins, installed the trim and limit senders, and inserted my shift cable.

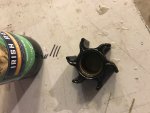
I started filling my lower up with gearlube. Lubricant started flowing out of the water weep hole on the front of the lower casing. Grrrrrr!!! Separated the halves and discovered I have the wrong water pump base installed. The rest of the waterpump kit was ok, but the base doesn't have a flange for the gasket, nor does the o-ring seat properly. It appears as though Sierra sells the base, just not with an entire kit??? 18-3420 is the sierra base. 46-44292A3 is the mercruiser #. Pretty confusing. I sourced an SEI pump base with the same p/n. Also ordered my remote oil drain kit.

Pictures to come later. My wifi is out so I don't want to use all my data.
 

rad1026

Chief Petty Officer
Joined
May 1, 2006
Messages
443
Mornin' Chuck. You are doing great work. Thanks for the little encouragement you wrote on my thread. I have been following your progress since we have similar boats. Although your restoration is much more involved then mine. I'm so glad I discovered the transom problem before it went much further. I noticed on post #442 you said, "Transom seal glued with weatherstrip adhesive, and a thin bead of black RTV." You used the weather strip adhesive to hold the gasket in the gimbal housing groove, correct? Where did you use the black RTV, between the gasket and the hull? Why black RTV? I'm ready to get my transom back on and just wondering if I should use some sealant between the gasket and the hull. Thanks!
 
Last edited:

Baylinerchuck

Commander
Joined
Jul 29, 2016
Messages
2,726
Mornin' Chuck. You are doing great work. Thanks for the little encouragement you wrote on my thread. I have been following your progress since we have similar boats. Although your restoration is much more involved then mine. I'm so glad I discovered the transom problem before it went much further. I noticed on post #442 you said, "Transom seal glued with weatherstrip adhesive, and a thin bead of black RTV." You used the weather strip adhesive to hold the gasket in the gimbal housing groove, correct? Where did you use the black RTV, between the gasket and the hull? Why black RTV? I'm ready to get my transom back on and just wondering if I should use some sealant between the gasket and the hull. Thanks!

Yes, 3M weatherstrip adhesive to hold the gasket to the groove. Honestly that's the only way it'll stay there. The black RTV was a tip from someone on this forum, but I honestly can't remember who. Add a very small bead only to the inside of the rubber seal when mounting the housing to the hull. The gentlemen who gave the advice has done several of these. I figure a little extra sealant won't hurt. The lower and middle mounting bolts were areas I had some water intrusion. Sealant made sense.
 

Baylinerchuck

Commander
Joined
Jul 29, 2016
Messages
2,726
The FedEx man came bearing gifts!! And free ones at that! Credit card reward points are awesome!! Bilge pump, blower and duct, and stainless elevator bolts for the side pads. More bolts than I'll use, but I couldn't resist the price!!
🤘🏼


IMG_0939.JPG
 
Last edited:
Top