Chaparral 2000 SL Sport floor, and more?? [SPLASHED Sept 2017]

Baylinerchuck

Commander
Joined
Jul 29, 2016
Messages
2,726
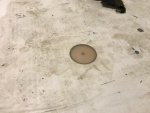
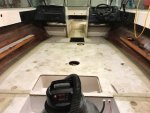
I feel like a mile stone was achieved. I plugged all of the holes made to pour the foam. I glued the pucks back in place with thickened resin and chopped strands.
IMG_0043.JPG
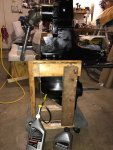
Since the 4lb foam is in place now, I removed the 2x6 supports under the hull and placed the boat directly on the wobble rollers. This boat is extremely solid.

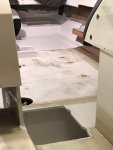
I just wish the deck wasn't such a disgusting dirty mess. Sticky foam and unwaxed resin really took it toll!!
 
Last edited:

Roady68

Seaman Apprentice
Joined
Sep 17, 2016
Messages
38
I feel like a mile stone was achieved. I plugged all of the holes made to pour the foam. I glued the pucks back in place with thickened resin and chopped strands.

Since the 4lb foam is in place now, I removed the 2x6 supports under the hull and placed the boat directly on the wobble rollers. This boat is extremely solid.

I just wish the deck wasn't such a disgusting dirty mess. Sticky foam and unwaxed resin really took it toll!!

Is replacing the plugs in the holes necessary if not walking on the deck? I am replacing stringer and deck that the batteries mount to in the engine bay on our Sig 300. The original decking did not have the plugs replaces. The expanded foam was trimmed flat and glassed over. I am guessing since it wasn't a walking deck, it didn't need it.
 

Baylinerchuck

Commander
Joined
Jul 29, 2016
Messages
2,726
Is replacing the plugs in the holes necessary if not walking on the deck? I am replacing stringer and deck that the batteries mount to in the engine bay on our Sig 300. The original decking did not have the plugs replaces. The expanded foam was trimmed flat and glassed over. I am guessing since it wasn't a walking deck, it didn't need it.

Since you aren't walking on yours and water shouldn't get in there, I'd guess you're fine. The US Composites web site states that their foam can be directly glassed over. In my application on an exposed deck, gluing the pucks back in and glassing over is essential for keeping out water and structural integrity.
 

gsxrdan

Petty Officer 1st Class
Joined
Aug 28, 2016
Messages
317
congrats chuck - its practically in the water now!! ooh yeah good to have her resting on the rollers and feeling rigid!
 

Baylinerchuck

Commander
Joined
Jul 29, 2016
Messages
2,726
Nice! How much foam did you end up using?

I bought 3 of the 16lb kits and used 1/2 of the third kit. I heated the cans and stuck my heat gun into the cavities to make sure a get full expansion. I'm pretty happy with the results. Based on what was left over, I filled somewhere around 10 cu. ft.
 

Baylinerchuck

Commander
Joined
Jul 29, 2016
Messages
2,726
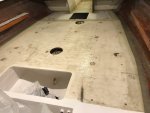
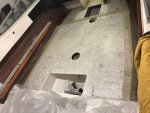
Got a good bit of work done today. I ground down all the nubs from glueing the pucks back in. I took some time and wiped the deck down and vacuumed dust out of the boat. I made a thin batch of thickened resin skimmed over the pucks and some other defects in the deck.

IMG_0050.JPG
I also installed the new water pump base in my lower and reassembled the drive. I filled the drive with lube and guess what? Yeah, no leaks.

IMG_0045.JPG
Not to mention mow the lawn and trim some trees. Whew, I'm whipped. Time for a beer or two.
 

Attachments

  • IMG_0047.JPG
    IMG_0047.JPG
    74.3 KB · Views: 13
  • IMG_0051.JPG
    IMG_0051.JPG
    69.1 KB · Views: 11
  • IMG_0048.JPG
    IMG_0048.JPG
    80.5 KB · Views: 14
Last edited:

ripazka

Petty Officer 1st Class
Joined
Jul 30, 2016
Messages
246
Looks great Chuck! I need sunglasses when I watch the pic from that bright white gelcoat on the back :D
 

ripazka

Petty Officer 1st Class
Joined
Jul 30, 2016
Messages
246
Yes I was definitely afraid of that. I would have liked to use body puddy, but didn't think it could be used below the waterline. I used WOGs formula of poly resin, phenolic bubbles, a little cabosil to bring it to the right consistency, and surfacing wax. I didn't see anything in the ingredients of this compound that I would be worried with under the waterline. Thanks to Woodonglass for this formula. He taught me something new.

Do you have recipe somewhere for this compound? I have same kind of problem. Im 1/8" off just the same way.
 

ripazka

Petty Officer 1st Class
Joined
Jul 30, 2016
Messages
246
One of the other things I did yesterday while waiting for resin to kick was to sand the gelcoat on the transom. This gelcoat is so thick that it never levels. The end result looks very much like an anti-slip surface. Unfortunately this is not the look I'm going for on the transom.


Before......


Wet sand to 800


Wet sand entire rear to 2000.

The new blended in ok. The important thing is the keyhole is completely flat now.

What kind of equipment you used for sanding? I ordered items today. Hoping to do the same tasks next week...
 

Baylinerchuck

Commander
Joined
Jul 29, 2016
Messages
2,726
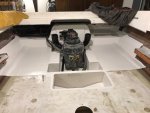
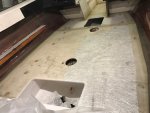
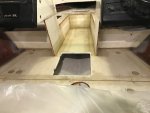
Got a little glassing done after work. I laid up some CSM to level the deck in preparation of gel coat. I needed the rest of the deck to be even with the tabbing. Although not necessary for strength, this was more cosmetic. I have a little left to do under the consoles.
IMG_0055.JPG
IMG_0058.JPG
 

Attachments

  • IMG_0057.JPG
    IMG_0057.JPG
    71.2 KB · Views: 12
  • IMG_0056.JPG
    IMG_0056.JPG
    88.1 KB · Views: 11
Last edited:

Baylinerchuck

Commander
Joined
Jul 29, 2016
Messages
2,726
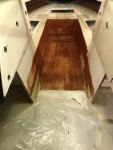
Laid a sheet of plastic down on my freshly glassed deck. After that I cut some CSM for the area under the consoles. I glassed those areas as well as the pocket supports for the side panels.

IMG_0060.JPG
IMG_0062.JPG
IMG_0061.JPG
 
Last edited:

Baylinerchuck

Commander
Joined
Jul 29, 2016
Messages
2,726
Used some of the WOG signature series Limited edition faring compound in the bow area. I want to get this area pretty smooth before gel coating.

IMG_0063.JPG
Looks like crap but it should sand out nice.
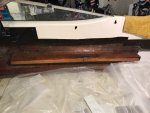
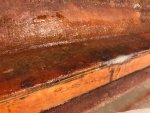
Also fiberglassed the sides of by side panel supports. I am making these as water resistant as possible. It about the only pieces of wood on a 26 year old boat that didn't totally rot.

IMG_0064.JPG
 
Last edited:
Top