'96 lund tyee 1850 floor rebuild and foam replacement.

brunolund

Chief Petty Officer
Joined
Jan 26, 2008
Messages
417
started taking apart the front deck and compartments. old carpet was pretty worn! and some rotten wood too.
 

Attachments

  • BC3E0FE3-033D-4F5B-9CC0-9FA5201C5BF8.jpeg
    BC3E0FE3-033D-4F5B-9CC0-9FA5201C5BF8.jpeg
    339.5 KB · Views: 8
  • 10CE2756-3F87-438D-9880-982482E90AA7.jpeg
    10CE2756-3F87-438D-9880-982482E90AA7.jpeg
    363 KB · Views: 8
  • 1FD7DB81-E79E-493B-AD3D-1910E255C0BC.jpeg
    1FD7DB81-E79E-493B-AD3D-1910E255C0BC.jpeg
    385.6 KB · Views: 8

brunolund

Chief Petty Officer
Joined
Jan 26, 2008
Messages
417
new wood, epoxied, and new carpet glued on!! looks so much better. little bigger gap than i thought for the edges. this compartment door was quite tight before and feels the same with new carpet.
 

Attachments

  • 7ADB9423-2DBD-4F9D-8BD9-CEF51CD24BCD.jpeg
    7ADB9423-2DBD-4F9D-8BD9-CEF51CD24BCD.jpeg
    277.3 KB · Views: 10
  • 9F718E85-33CA-43F3-8E06-CE180C91483C.jpeg
    9F718E85-33CA-43F3-8E06-CE180C91483C.jpeg
    268.3 KB · Views: 10
  • 5B83878A-257B-4398-9009-033F432B15E6.jpeg
    5B83878A-257B-4398-9009-033F432B15E6.jpeg
    258.9 KB · Views: 10

brunolund

Chief Petty Officer
Joined
Jan 26, 2008
Messages
417
livewell tops and doors. i didn’t take a picture before i took the old ones apart, but they were worse than the front now compartment above. still working on it, but it’s very slow!!
 

Attachments

  • BDA36D3E-077A-4FCB-B948-B267731980B4.jpeg
    BDA36D3E-077A-4FCB-B948-B267731980B4.jpeg
    288.9 KB · Views: 6
  • 9998B491-D30E-4C19-92E3-7A5A5C8551A5.jpeg
    9998B491-D30E-4C19-92E3-7A5A5C8551A5.jpeg
    325.2 KB · Views: 6
  • C7972E8E-2F69-4EA9-8075-A700797AF054.jpeg
    C7972E8E-2F69-4EA9-8075-A700797AF054.jpeg
    299 KB · Views: 6

todhunter

Canoeist
Joined
Sep 15, 2020
Messages
1,234
got the motor put back in place, nice to have the space in the shop it was taking up.
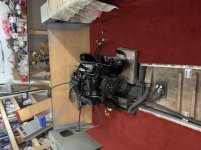
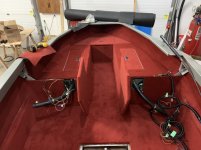
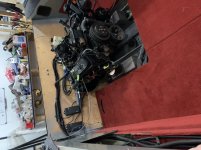
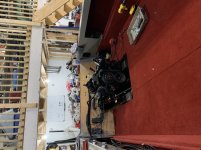
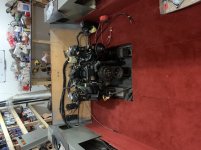
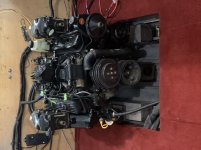
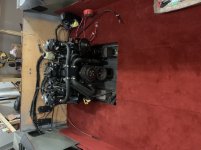
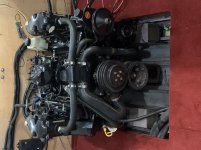
Congrats! I hear ya on the engine taking up space...my shop is so tight now with the boat in here. I was able to get my engine under my welding table, but had to put my welding table (and welder) in the corner far from my 220V outlet. I had to build four 4x4 foot overhead storage lofts in the rafters to put all the stuff that came off the hull. I can't wait to start gaining space back in my shop.
 

brunolund

Chief Petty Officer
Joined
Jan 26, 2008
Messages
417
finally got back at it! installed the front compartment and started on the livewells and consoles.
 

Attachments

  • 323625BA-AFC2-42F6-81D3-AAF7F2D458A9.jpeg
    323625BA-AFC2-42F6-81D3-AAF7F2D458A9.jpeg
    254.6 KB · Views: 13
  • 11AF6D82-06D8-4FA9-89E5-0074126FB339.jpeg
    11AF6D82-06D8-4FA9-89E5-0074126FB339.jpeg
    262.3 KB · Views: 13
  • 19C64E75-49A0-479F-A4B8-8C8ECDA6BBAF.jpeg
    19C64E75-49A0-479F-A4B8-8C8ECDA6BBAF.jpeg
    272.2 KB · Views: 13

brunolund

Chief Petty Officer
Joined
Jan 26, 2008
Messages
417
also spent a couple hours tidying up a wiring harness. looks WAY nicer covered in loom. also makes it seem less confusing to install when it’s all organized.
 

Attachments

  • 3D884F04-F27D-4B17-AE49-F2EB0AB6AE79.jpeg
    3D884F04-F27D-4B17-AE49-F2EB0AB6AE79.jpeg
    273.4 KB · Views: 15
  • 5EB645B7-438F-4AC4-981E-1057552840A0.jpeg
    5EB645B7-438F-4AC4-981E-1057552840A0.jpeg
    293.6 KB · Views: 15
  • 13E31B9B-EFF0-4470-B593-DEF999850208.jpeg
    13E31B9B-EFF0-4470-B593-DEF999850208.jpeg
    282.8 KB · Views: 15

brunolund

Chief Petty Officer
Joined
Jan 26, 2008
Messages
417
front deck
 

Attachments

  • 24600E22-2D21-4273-982C-555AC7287CE9.jpeg
    24600E22-2D21-4273-982C-555AC7287CE9.jpeg
    314.4 KB · Views: 13

brunolund

Chief Petty Officer
Joined
Jan 26, 2008
Messages
417
it’s coming slowly. always seem to get sidetracked with life. but getting there. hoping it will be ready for spring, so i can get it in the water as soon as the ice is gone!
 

brunolund

Chief Petty Officer
Joined
Jan 26, 2008
Messages
417
engine is wired!! spent a bunch of time cleaning up all the loose wires. still need to mount battery switch.
 

Attachments

  • 26B58613-A8AB-4B9F-B6A1-8829003B3FF4.jpeg
    26B58613-A8AB-4B9F-B6A1-8829003B3FF4.jpeg
    347.4 KB · Views: 10
  • A489B765-D15C-47E0-B93B-29EB7683D07A.jpeg
    A489B765-D15C-47E0-B93B-29EB7683D07A.jpeg
    373.5 KB · Views: 10
  • 84364B05-9B83-4C85-866A-5CEB55404FE5.jpeg
    84364B05-9B83-4C85-866A-5CEB55404FE5.jpeg
    344.7 KB · Views: 10

brunolund

Chief Petty Officer
Joined
Jan 26, 2008
Messages
417
wire harnesses ran to console. pretty happy with how it’s looking so far. just have to install exhaust manifolds and build the side panels and consoles now.
 

Attachments

  • E4B68B53-3E1C-47C2-9403-0F03B40DA8D5.jpeg
    E4B68B53-3E1C-47C2-9403-0F03B40DA8D5.jpeg
    280.2 KB · Views: 5
  • 8A4C5028-2BCE-4217-ADF0-ACBF476EFF2D.jpeg
    8A4C5028-2BCE-4217-ADF0-ACBF476EFF2D.jpeg
    312.8 KB · Views: 5

Baylinerchuck

Commander
Joined
Jul 29, 2016
Messages
2,726
So are you just test fitting everything? Sure would be nice to see some bilge-coat, paint, or gelcoat in that bite and on the transom. My opinion.
 

brunolund

Chief Petty Officer
Joined
Jan 26, 2008
Messages
417
was thinking of brushing on some aluminum coloured paint on the transom, but there is three coats of epoxy on it, so i don’t need the protection, just for looks. it is covered by an aluminum deck when done, so not exposed to uv. bilge area is painted grey, just dirty. might still pint the transom for looks. only couple screws to move the harnesses now.
 

brunolund

Chief Petty Officer
Joined
Jan 26, 2008
Messages
417
decided to clean up the manifolds a bit. didn’t take a pic in between, but i sandblasted them before painting. used VHT caliper paint. rated for 900f. should be well under that.
 

Attachments

  • F5144699-F36D-4349-9E13-C529FE3DA3E3.jpeg
    F5144699-F36D-4349-9E13-C529FE3DA3E3.jpeg
    289.7 KB · Views: 7
  • 35900D60-120C-41BC-976A-90307EFB6557.jpeg
    35900D60-120C-41BC-976A-90307EFB6557.jpeg
    312.4 KB · Views: 7
  • A2852232-049D-4A1B-9B25-A5FCB0AF3F85.jpeg
    A2852232-049D-4A1B-9B25-A5FCB0AF3F85.jpeg
    303.8 KB · Views: 7

brunolund

Chief Petty Officer
Joined
Jan 26, 2008
Messages
417
manifolds on
 

Attachments

  • 89286FD8-01B5-4B1C-993A-99D909874770.jpeg
    89286FD8-01B5-4B1C-993A-99D909874770.jpeg
    342.9 KB · Views: 4
  • AA6C74EE-4D7F-4B78-95B8-31552A3C2913.jpeg
    AA6C74EE-4D7F-4B78-95B8-31552A3C2913.jpeg
    322.8 KB · Views: 4

brunolund

Chief Petty Officer
Joined
Jan 26, 2008
Messages
417
coolant hoses on
 

Attachments

  • 3ED591AC-774F-405F-BD81-5F425F62226E.jpeg
    3ED591AC-774F-405F-BD81-5F425F62226E.jpeg
    302.8 KB · Views: 5
  • 4EDB72A7-2C4D-4D81-B538-80058EAB555D.jpeg
    4EDB72A7-2C4D-4D81-B538-80058EAB555D.jpeg
    335 KB · Views: 5

brunolund

Chief Petty Officer
Joined
Jan 26, 2008
Messages
417
sealing the wood for the side panels/ rod lockers, and the console tops. three coats here, then i can install the vinyl and assemble, and then hook up the rest of the wiring. and install the controls.
 

Attachments

  • 36DE9D84-D94A-4DC3-9B97-8ACC97B8A5BB.jpeg
    36DE9D84-D94A-4DC3-9B97-8ACC97B8A5BB.jpeg
    276.5 KB · Views: 10
Top