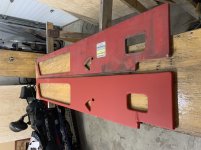
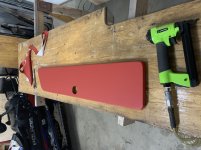
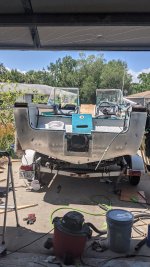
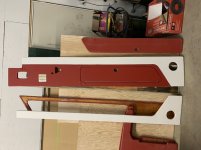
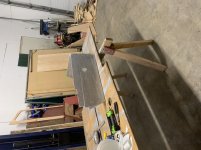
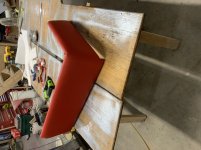
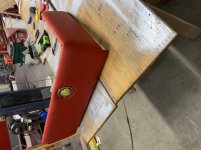
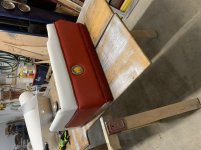
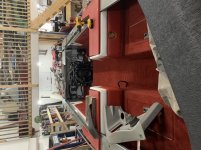
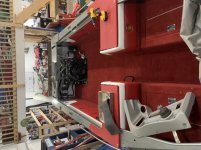
'96 lund tyee 1850 floor rebuild and foam replacement.

brunolund

Chief Petty Officer
Joined
Jan 26, 2008
Messages
419
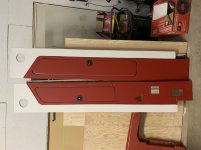
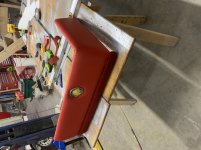
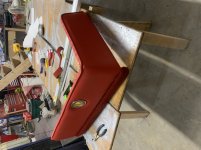
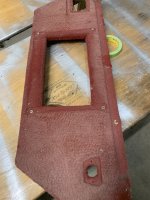
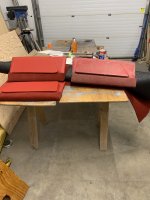
new vs old side panel piece and new rod locker door. just waiting for o e more part before i can assemble the side panels and install!!
 

Attachments

  • 29BF6FF2-D000-4219-9BF3-1B6701442BE3.jpeg
    29BF6FF2-D000-4219-9BF3-1B6701442BE3.jpeg
    286.5 KB · Views: 14
  • 970960FC-2C79-4D6D-B694-382C03E129DF.jpeg
    970960FC-2C79-4D6D-B694-382C03E129DF.jpeg
    293.1 KB · Views: 13

TCKibe1

Cadet
Joined
Mar 27, 2021
Messages
16
Man, this is just what I was looking for! I've got a 93 that someone tore the floor out of. Now I can visualize the layout for the new floor. Thanks for posting this!
 

Sparike

Seaman Apprentice
Joined
Aug 29, 2019
Messages
46
Man, this is just what I was looking for! I've got a 93 that someone tore the floor out of. Now I can visualize the layout for the new floor. Thanks for posting this!
TC--I used that thread also then posted under "1990 Tyee 1850 interior"--some pictures there also, hope they help ---the search function is very helpfull narrowing down what you are looking for
 

brunolund

Chief Petty Officer
Joined
Jan 26, 2008
Messages
419
glad it helped. hopefully i can get back on this project soon. as usual, life gets in the way. ask any questions you have, and i’ll try to help.
 

TCKibe1

Cadet
Joined
Mar 27, 2021
Messages
16
Bruno, 2 questions. How many sheets of plywood did you use and did you use all of the foam in the 80 lb kit.
 

brunolund

Chief Petty Officer
Joined
Jan 26, 2008
Messages
419
think i used 6 sheets of plywood, but i am replacing every single piece of wood in the boat. and 2 more 3/4” sheets for the transom. i used 4/5ths of the 80 lb kit. i didn’t get to the foam under the rod lockers, as i found dry foam around them, and i didn’t want to take any more rivets out from the side of the boat. but rear of the rod lockers and everything under the floor got replaced.
 

TCKibe1

Cadet
Joined
Mar 27, 2021
Messages
16
Thanks, how was the aluminum on your transom? Mine was full of corrosion perforations. I skinned over it with a piece of 5052. I'm sure I'll have more questions when I get to the front of the boat, just doing the back so we can use it.
 

Attachments

  • PXL_20210408_163800166.jpg
    PXL_20210408_163800166.jpg
    2.8 MB · Views: 13

brunolund

Chief Petty Officer
Joined
Jan 26, 2008
Messages
419
looks good. i had no corrosion, but i did get a few old mounting holes welded up. left some very minor distortion, but it’s all good.
 

brunolund

Chief Petty Officer
Joined
Jan 26, 2008
Messages
419
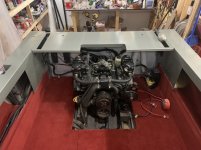
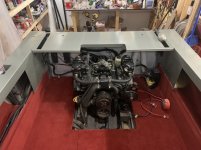
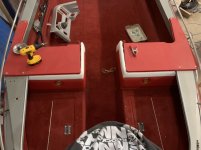
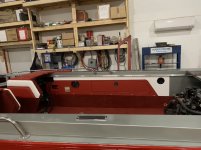
got a bit more done!! side panels are built, although i need to iron out some wrinkles, but otherwise good. and installed the rear deck.
 

Attachments

  • 2706DB95-D048-4F56-BB37-EF0791163263.jpeg
    2706DB95-D048-4F56-BB37-EF0791163263.jpeg
    232.1 KB · Views: 9
  • C1F34E61-09AF-4658-A8A2-4C5E1D85DBB6.jpeg
    C1F34E61-09AF-4658-A8A2-4C5E1D85DBB6.jpeg
    220.3 KB · Views: 9
  • 6E9AB412-F519-4C8D-B16E-F2A930906CD1.jpeg
    6E9AB412-F519-4C8D-B16E-F2A930906CD1.jpeg
    327.1 KB · Views: 9

brunolund

Chief Petty Officer
Joined
Jan 26, 2008
Messages
419
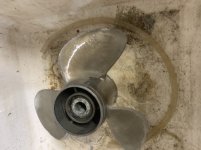
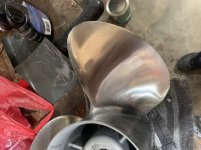
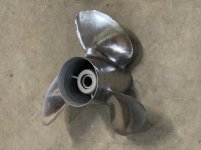
also found a great deal!! $50.00! took about ten mins to clean up with some hydrochloride acid hull cleaner.
 

Attachments

  • DCAA3EEA-0924-49E2-84D9-BBCB9B7137AD.jpeg
    DCAA3EEA-0924-49E2-84D9-BBCB9B7137AD.jpeg
    248.3 KB · Views: 6
  • D8F296C8-DF54-438D-A2D1-4200B54BF44D.jpeg
    D8F296C8-DF54-438D-A2D1-4200B54BF44D.jpeg
    306.8 KB · Views: 6
  • 1495D6F8-CF0F-4733-9273-F8920B287C21.jpeg
    1495D6F8-CF0F-4733-9273-F8920B287C21.jpeg
    270.2 KB · Views: 6

brunolund

Chief Petty Officer
Joined
Jan 26, 2008
Messages
419
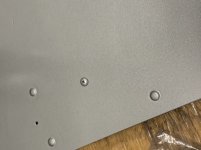
got the rear deck panel installed!! had to paint individual screw heads because i forgot there was a board under this deck. but sandblasted the head and epoxied then painted the heads with a tiny brush.
 

Attachments

  • 4940AE98-CACE-4744-9BAE-1A01AFBA8465.jpeg
    4940AE98-CACE-4744-9BAE-1A01AFBA8465.jpeg
    267.6 KB · Views: 11
  • 5E072660-389C-421A-B2C6-5286C2432EAE.jpeg
    5E072660-389C-421A-B2C6-5286C2432EAE.jpeg
    327.1 KB · Views: 11

brunolund

Chief Petty Officer
Joined
Jan 26, 2008
Messages
419
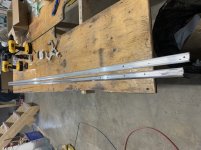
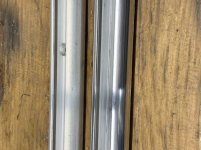
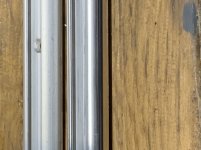
polished up the side interior rub rails. came out pretty good!!
 

Attachments

  • 4C2F8B58-EBB3-4002-B1AB-7C1E10F374C6.jpeg
    4C2F8B58-EBB3-4002-B1AB-7C1E10F374C6.jpeg
    335.2 KB · Views: 7
  • A0A58DC4-5087-4C4E-96F5-F8711C21A687.jpeg
    A0A58DC4-5087-4C4E-96F5-F8711C21A687.jpeg
    314.2 KB · Views: 7
  • 126E68FD-2ED1-4AFA-AEF7-AF02A3DFE769.jpeg
    126E68FD-2ED1-4AFA-AEF7-AF02A3DFE769.jpeg
    271 KB · Views: 7

brunolund

Chief Petty Officer
Joined
Jan 26, 2008
Messages
419
console front/ sides, and bow side compartments cut and first coat on.
 

Attachments

  • CCA7754B-191D-44CA-812B-FBF3AA1E9601.jpeg
    CCA7754B-191D-44CA-812B-FBF3AA1E9601.jpeg
    364.7 KB · Views: 10
  • 2E082F33-7CCD-436A-8073-ECA39C2152D5.jpeg
    2E082F33-7CCD-436A-8073-ECA39C2152D5.jpeg
    361.7 KB · Views: 10

brunolund

Chief Petty Officer
Joined
Jan 26, 2008
Messages
419
building the console front/ sides
 

Attachments

  • 4B725F9A-DBA3-408A-A4CE-017D12330226.jpeg
    4B725F9A-DBA3-408A-A4CE-017D12330226.jpeg
    282.8 KB · Views: 11
  • 81BC1081-B9AD-43A2-8B0C-9F70C0448217.jpeg
    81BC1081-B9AD-43A2-8B0C-9F70C0448217.jpeg
    292.2 KB · Views: 11
  • E7A13A91-5779-4310-A59C-A92E369CD1DA.jpeg
    E7A13A91-5779-4310-A59C-A92E369CD1DA.jpeg
    294 KB · Views: 11

brunolund

Chief Petty Officer
Joined
Jan 26, 2008
Messages
419
surprisingly difficult and time consuming. but got them done. now to install them!!
 

Attachments

  • 4ECECC76-DEFB-4176-A149-EAC93A65542B.jpeg
    4ECECC76-DEFB-4176-A149-EAC93A65542B.jpeg
    288.4 KB · Views: 9
  • 7D4F79E5-E5A6-4147-A6B8-54D03DD0EADA.jpeg
    7D4F79E5-E5A6-4147-A6B8-54D03DD0EADA.jpeg
    298.8 KB · Views: 9
  • 83000C18-00CC-4D1F-B02A-8CD40F973C47.jpeg
    83000C18-00CC-4D1F-B02A-8CD40F973C47.jpeg
    287.4 KB · Views: 9

brunolund

Chief Petty Officer
Joined
Jan 26, 2008
Messages
419
got them in! needed a little tweaking, and i still need to screw down the center pieces, but gotta get more screws!!
 

Attachments

  • 88E11C4E-57EE-4E4E-8B38-757EDCDE51F5.jpeg
    88E11C4E-57EE-4E4E-8B38-757EDCDE51F5.jpeg
    276.2 KB · Views: 13

brunolund

Chief Petty Officer
Joined
Jan 26, 2008
Messages
419
got the rod lockers in! coming together slowly. nice to have these bigger pieces out of the way in the shop.
 

Attachments

  • EAFC966E-28BB-460E-9513-08213021B57C.jpeg
    EAFC966E-28BB-460E-9513-08213021B57C.jpeg
    274.6 KB · Views: 8
  • F0EC0464-D449-4B1D-B053-7C2935DFE659.jpeg
    F0EC0464-D449-4B1D-B053-7C2935DFE659.jpeg
    370.1 KB · Views: 8
  • 704BA01D-81B3-4B1F-B700-1F8F6354FC61.jpeg
    704BA01D-81B3-4B1F-B700-1F8F6354FC61.jpeg
    330.2 KB · Views: 8

brunolund

Chief Petty Officer
Joined
Jan 26, 2008
Messages
419
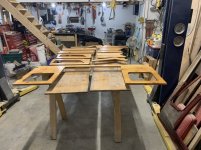
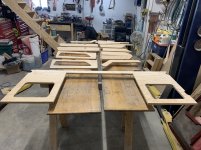
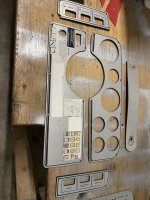
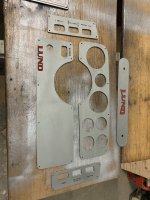
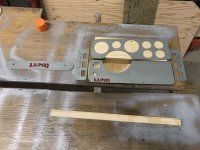
new bow side compartments, with the old one beside. also trying to figure out how to fix/ or remake the dash panel inserts. think i’ve got it figured, but will see how it turns out.
 

Attachments

  • 47FB27EA-3922-4366-900E-762DDE0EEE85.jpeg
    47FB27EA-3922-4366-900E-762DDE0EEE85.jpeg
    2.2 MB · Views: 5
  • C934884E-9332-409A-A4D5-68688DC39743.jpeg
    C934884E-9332-409A-A4D5-68688DC39743.jpeg
    1.8 MB · Views: 5
  • C889B907-35EA-43BD-81F8-064D3A3A81BA.jpeg
    C889B907-35EA-43BD-81F8-064D3A3A81BA.jpeg
    1.1 MB · Views: 5

brunolund

Chief Petty Officer
Joined
Jan 26, 2008
Messages
419
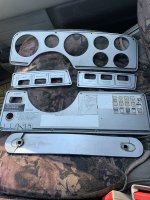
new and old dash inserts.
 

Attachments

  • 5029A303-E545-4F0A-BCC4-F56002855550.jpeg
    5029A303-E545-4F0A-BCC4-F56002855550.jpeg
    2.1 MB · Views: 8
  • 0F8451CE-B773-4AAD-97C6-9A53BD11A96D.jpeg
    0F8451CE-B773-4AAD-97C6-9A53BD11A96D.jpeg
    2.4 MB · Views: 8
  • 5B08831B-5256-41D8-8C18-CD0116BFA797.jpeg
    5B08831B-5256-41D8-8C18-CD0116BFA797.jpeg
    3.2 MB · Views: 8
Top