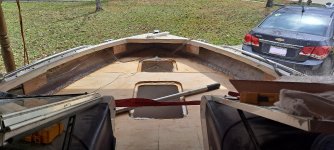
'90 Maxum 2100SR - restoration & conversion

kcassells

Fleet Admiral
Joined
Oct 16, 2012
Messages
8,721
Got the rest of my foam poured yesterday evening, before the cold weather hits this weekend.

Now working on fileting and tabbing the deck in and closing up all of the pour holes. Hope I can keep it warm enough over the next 5 days (Mardi Gras Holiday) to get a lot done.

No pics to show at this point, but more coming soon. Hope to get the deck (sole) completed (less gelcoat). Thinking I may do wax on the second layer of CSM so that it won't trap dirt while I buildup above the sole and get the engine in place.
Moving along pretty well PC!
 

todhunter

Canoeist
Joined
Sep 15, 2020
Messages
1,311
Are you going to put the engine in before the cap goes back on? I haven't decided yet, but was thinking I'd get the cap back on first.
 

PC on the Bayou

Petty Officer 1st Class
Joined
Apr 27, 2020
Messages
234
Are you going to put the engine in before the cap goes back on? I haven't decided yet, but was thinking I'd get the cap back on first.
I didn't have to remove the cap on mine.

I want to put the engine back in so that I can easily get to everything before I rebuild all the structure in the area around there.
 

PC on the Bayou

Petty Officer 1st Class
Joined
Apr 27, 2020
Messages
234
Not looking like i will get much done over the holiday. Did finish bedding in the floor panels and the casting deck bulkhead. I also got the casting deck panel cut to shape.

Looks lime with this winter storm, i won't get to do much today or tomorrow. Certainly too cold for fiberglass work; but if I can stand the cold, I may do some more wood work.
 

PC on the Bayou

Petty Officer 1st Class
Joined
Apr 27, 2020
Messages
234
Nasty cold weather ruined (mostly) the plan for a holiday marathon. Couldn't get it warm enough to do any fiberglass work; but I did get to work on some of the wood cutting.

It looks like it will start warming back up starting this weekend.
 

Lectro88

Petty Officer 1st Class
Joined
Oct 24, 2020
Messages
303
Is it just me or have we had and excessive wet... summers and winters the last 3 years.
I can't remember So much rain.
It has brought my progress to almost nothing(and I didn't need any help in that area)
I'm in NC for those that wonder.
But you have made really good progress, and it looks good too.
 

PC on the Bayou

Petty Officer 1st Class
Joined
Apr 27, 2020
Messages
234
I am so glad the weather has warmed back up. It made it up to 67F today.

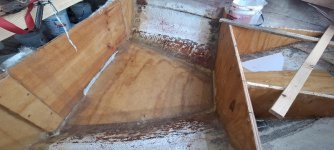
I decided, since I have to do my work inside the boat / tent still, that I am going to work from bow to stern. Got the bulkhead and floor glassed in for the storage under the casting deck.

20210221_134339_copy_800x360.jpg

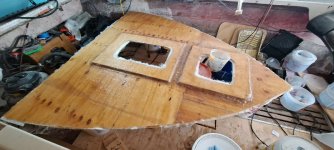
And, also got the hatch openings fashioned and the bottom side of the casting deck glassed.
20210221_134315_copy_800x360.jpg

I now have to figure out how I am going to get the deck PB'd in once it is in place. I am hoping that I can lift it up and place the PB via the hatch openings. If not, then I will just have to figure another plan.

Next up, finish up the anchor locker and gelcoat it and the under deck storage area.
 

Reserector_

Chief Petty Officer" & 2021 Splash of the Year Win
Joined
Oct 15, 2019
Messages
607
I now have to figure out how I am going to get the deck PB'd in once it is in place. I am hoping that I can lift it up and place the PB via the hatch openings. If not, then I will just have to figure another plan.
I don't know how yours will go together, but I did my sole one panel at a time. I troweled a ridge of PB along allog the top edges of the stringers and bulkheads like a brick layer troweling mortar. Then, I troweled some on the mating edges and any underlapping joiners, and then carefully set the panel in place and weighted it.
Ran my screws, what few there were, at that point. Those all got glassed in later.
 

PC on the Bayou

Petty Officer 1st Class
Joined
Apr 27, 2020
Messages
234
I don't know how yours will go together, but I did my sole one panel at a time. I troweled a ridge of PB along allog the top edges of the stringers and bulkheads like a brick layer troweling mortar. Then, I troweled some on the mating edges and any underlapping joiners, and then carefully set the panel in place and weighted it.
Ran my screws, what few there were, at that point. Those all got glassed in later.

I did that with the main panels in the sole, too.

The challenge is going to be the casting deck in the front of the boat (shown in my thread pics). Because of its position in the bow (only about 10 inches below the cap and extending a bit under the consoles with only about 3 inches clearance), I can't easily set it in place the same way. I'll figure it out one way or another.
 

todhunter

Canoeist
Joined
Sep 15, 2020
Messages
1,311
You may find yourself trying to squeeze down into those compartments to seal them up, haha.

What about setting it in position but blocked up on some pieces of 2x4? You may be able to reach down through the hatches and pipe PB on top of the top edges of the bulkheads, then having someone give you a hand, pull/knock out the supports and squish the deck down onto the PB.
 

Reserector_

Chief Petty Officer" & 2021 Splash of the Year Win
Joined
Oct 15, 2019
Messages
607
Or maybe take todhunter's idea, but use long pieces of (spacer) running parallel to the keel that you can draw them out from the stern-facing side.
Apply the PB, lay down the spacer strips/planks/pipes (whatever), slide the deck into place using the spacers as rails, and then slide the spacers out.
 

Meames1

Petty Officer 2nd Class
Joined
Dec 14, 2020
Messages
157
Or maybe take todhunter's idea, but use long pieces of (spacer) running parallel to the keel that you can draw them out from the stern-facing side.
Apply the PB, lay down the spacer strips/planks/pipes (whatever), slide the deck into place using the spacers as rails, and then slide the spacers out.
I like this. Similar to laying formica counter tops.
 

PC on the Bayou

Petty Officer 1st Class
Joined
Apr 27, 2020
Messages
234
Great ideas guys!! I like the idea of using removable / knock out spacers.

To expand on this idea, I may sit the deck in place and mark the position well before actually doing the spacers & PB. This way I can make sure it is all aligned well and will drop straight down onto the PB.

I can also, like Tod said, peep down through the openings to pipe in some extra PB as "fillets" once it is all in place to seal any areas.
 

todhunter

Canoeist
Joined
Sep 15, 2020
Messages
1,311
I can also, like Tod said, peep down through the openings to pipe in some extra PB as "fillets" once it is all in place to seal any areas.
I'm going to have to do this on my ski locker once I put the deck down, as when I cut the height of my stringers I didn't cut them very straight.
 

PC on the Bayou

Petty Officer 1st Class
Joined
Apr 27, 2020
Messages
234
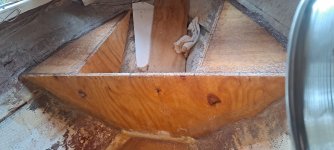
Lovin' the awesome weather this weekend. Spent the day, yesterday working in the bow. Got the two air chambers (??) Closed in on either side of the anchor locker.

20210227_084148_copy_1000x450.jpg

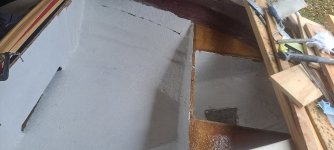
Then put a layer of gelcoat in both the anchor locker and the storage locker. I will do another coat through the hatch once all is installed.

20210227_125759_copy_1000x450.jpg

I, also, put in the deck supports between the two bulkheads (sorry no pic), trimmed the glass on the underside of the deck, and resin painted various other pieces parts. Gotta get used to the warmer (70-80F) weather and cut back on the MEKP. My resin and gelcoat was kicking off fast.

Planning to get the casting deck installed today. I want to get the consoles secured up front as well.

Will give an update soon.
 

PC on the Bayou

Petty Officer 1st Class
Joined
Apr 27, 2020
Messages
234
Another beautiful day. Gio the front casting deck "glued" in and also did the fillet around the edge to tie it to the hull. Will come back with tabbing to follow.

20210228_115656_copy_1000x450.jpg

Did a few odds and ends as well (mostly cleanup) before calling it a day. Gotta work on the lawn mower because the grass is liking the warmer weather, too.
 

PC on the Bayou

Petty Officer 1st Class
Joined
Apr 27, 2020
Messages
234
Another quick question for the fiberglass gurus:

Is there any way to keep my rollers & brushes from kicking off between batches of resin?

I know that I could clean them with acetone, but I've found that that is more trouble than just buying lots of the little covers.

I was thinking, maybe, putting them somewhere cold like the fridge or freezer. I used to do that with my paint rollers between coats and didn't know if it may work for resin, too, since it doesn't cure well in the cold.

I'm getting to the point where I'm doing lots of small sections / batches and didn't know if, maybe, I could save a few $$ on rollers ($2.50 each). I may try just using a spreader on some of the small stuff, too.
 

todhunter

Canoeist
Joined
Sep 15, 2020
Messages
1,311
I'm all ears too...it hurts to throw those rollers away! If I'm doing a long day of layups, I find that while it may get a little gummy, the roller and brush can go for several hours by constantly being refreshed with the latest resin. If you stop for more than about 30 minutes though, it's probably done. I try to use the chip brushes as much as possible since they're only about $0.50 each, but for bigger areas, I'm using the roller. I just bought my 5th 10-pack of rollers last week, since starting the project.
 
Top