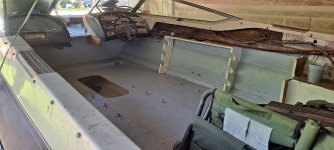
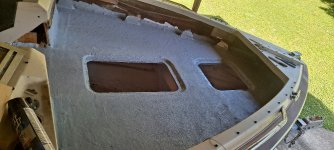
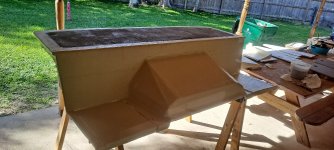
'90 Maxum 2100SR - restoration & conversion

Reserector_

Chief Petty Officer" & 2021 Splash of the Year Win
Joined
Oct 15, 2019
Messages
592
It has style and character. It doesn't look like something that was cobbled together in someone's driveway.
What did you use for the rounded corners on the lower portion?
 

PC on the Bayou

Petty Officer 1st Class
Joined
Apr 27, 2020
Messages
234
It has style and character. It doesn't look like something that was cobbled together in someone's driveway.

Thanks. I was shooting to make it more functional. It gives me a bit more of a rear-deck to sit on for fishing or for my girls to lounge on while I'm fishing LOL. Wanted to keep the jump seats as well.

What did you use for the rounded corners on the lower portion?

The two black rounded parts came from the original enclosure. If they wouldn't have fit, I was going to use some 4" PVC pipe; but they actually fit great.
 

PC on the Bayou

Petty Officer 1st Class
Joined
Apr 27, 2020
Messages
234
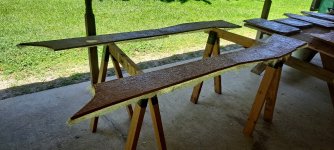
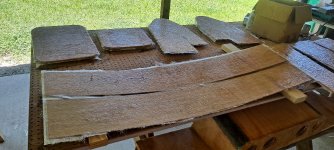
Did more woodwork this weekend. Worked on the hatch covers for the casting deck as well as the wood closures for around the casting deck. I will take some pictures soon.

While I am working this stuff, it brings up the question of sealing / bedding the edges between the deck and gunnel closures. Since both will be glassed and gelcoated, should I use marine grade silicone or something like 4200 to seal them around the edges?
 

PC on the Bayou

Petty Officer 1st Class
Joined
Apr 27, 2020
Messages
234
Getting to the home stretch on the glassing. Need one more layer of csm on the decks and then all of the trim parts. Then I have to get to gelcoating.
 

PC on the Bayou

Petty Officer 1st Class
Joined
Apr 27, 2020
Messages
234
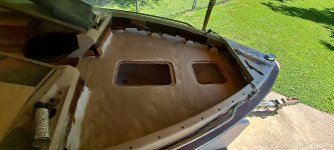
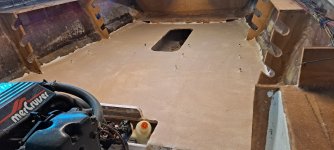
Great progress today. Got the deck glass all down and hardening. Will trim edges and sand next. That leaves the only glass left to do is the trim panels. Then it will be time for gelcoating it all.
 

PC on the Bayou

Petty Officer 1st Class
Joined
Apr 27, 2020
Messages
234
Making a marathon for the Memorial Day weekend to push toward completion.

Since my last post, I finished up the trim panels with sanding and put a layer of CSM on front and back yesterday and this morning.

20210530_130704_copy_1000x450.jpg

20210530_130712_copy_1000x450.jpg

I also put the first layer of gelcoat on the decks and spread the sand for non-skid.

20210530_130400_copy_1000x450.jpg

20210530_130321_copy_1000x450.jpg

Plan to put the topcoats of gel on the decks and also gelcoat the panels tomorrow.

It sure feels good to be done with the glassing and pushing to the final leg. Hoping after this weekend to have only mechanical and electrical work to do before a splash. I will let y'all know how it goes tomorrow.
 

Reserector_

Chief Petty Officer" & 2021 Splash of the Year Win
Joined
Oct 15, 2019
Messages
592
Good progress. Make the most of this good weather and the holiday time off. But don't rush and miss the enjoyment of the work.
 

PC on the Bayou

Petty Officer 1st Class
Joined
Apr 27, 2020
Messages
234
While sorting out the wiring last weekend, i found that the trim sensor and limit switch wires were toast. The insulation was just crumbling off and one of the wires was broken by the limit switch. I promptly ordered new ones and received them this week.

I also did some reading up and found a thread (sorry I dint remember whose it was) where they did the replacement without pulling the gimbal. I will give the details here, again, where it may be seen by others and could help.

First, let me say that I have already inspected all of my bellows and my gimbal bearing. The bellows are all still in good shape, pliable, and show no signs of pending failure. My gimbal bearing is quite smooth operating and was well greased. So i was not inclined to pull all of that loose at this time.

My drive is an Alpha One with only a single bolt holding the sensor wire retainer. By turning the steering all the way to starboard and applying downward pressure on the trim, i was able to get a long 1/4 extension and swivel in there to remove the bolt. I went through pretty straight through the opening between the pieces of the gimbal. When pulling the wires out, I attached a string to pull the new ones through.

Going back in was a bit more challenging but not too difficult. First, I put the sensors in place and fished both wires to the port side (with the steering all the way starboard). I also put a little tape before the grommet and after the retainer to keep the half grommets in the correct positions. I was then able to pull the wires through the transom and into place easily. The real challenge was getting the retainer bolt in position and started. My smart wife suggested sticky tack in the socket to hold the bolt in the socket and extended far enough to go through the retainer and into the threads. I used a welding rod and my super long needle nose to get the retainer into position. I then used the long extension and swivel to hand start the bolt. I did have to use my needle nose to help guide the swivel into position. After a bit of struggling before the sticky tack suggestion, i was able to get it started and tightened pretty easily.

All that is left, now, is to adjust the sensors once everything is back together.

This weekend, i hope to attack the rest of the wiring and get all of the trim panels in place.
 

PC on the Bayou

Petty Officer 1st Class
Joined
Apr 27, 2020
Messages
234
Stull doing the electrical and mechai nical hookups. Got all of the electrical in the engine bay area connected. Also got the=st of the engine mechanicals connected. I think that I am ready to install the engine enclosure after some needed cleaning.

I still have the electrical to do in the console and bow area including running a couple new circuits for USB outlets, 12v outlets, and the trolling motor.

Hoping to get some time this weekend to work that. Evenings aren't being too productive this week.
 

PC on the Bayou

Petty Officer 1st Class
Joined
Apr 27, 2020
Messages
234
It has been a bit since my last post. I have been continuing to work on the boat, just not a lot of stuff to post about. Finished up the electrical this week and installed all of the side panels.

This morning I installed the fuel lines and screwed on engine enclosure and cover. Then, this afternoon, I installed the outdrive (what a pain).

Now all that is left is to clean it up / out and take pictures before I splash. Oh, and troubleshoot my trim limit.
 

PC on the Bayou

Petty Officer 1st Class
Joined
Apr 27, 2020
Messages
234
Well, some good and some bad. First the good. Launched her to do some check-out this morning.

When I unloaded her, and opened up the engine compartment, i could hear water running in. Once I lowered the outdrive, it stopped. Upon inspection this afternoon . . . Yep . . . Shifter bellows. Guess I should have done that bellows job while I had the drive off. Lesson Learned. LOL

Also, once I got it started, it was idling good. When I tried to put it in gear, it died and wouldn't restart. Upon troubleshooting, it appears to be the ignition sensor.

Another problem, too. Although the engine block seems to have survived the winter freeze, one of the exhaust manifolds didn't. There is a significant crack in the port side one that has a pretty good water drip. I never would have guessed there was still water in there once I pulled the engine and it sat for the whole last summer. Another lesson learned. I am going to try to weld the crack and if unsuccessful will find a replacement.

Guess I am not finished with this project yet.
 

Reserector_

Chief Petty Officer" & 2021 Splash of the Year Win
Joined
Oct 15, 2019
Messages
592
Sounds similar to my first launch; a blend of success and disappointment.
But don't lose heart. Take a breath, make a list and finish your build.
We'll be here cheering you on.
 

PC on the Bayou

Petty Officer 1st Class
Joined
Apr 27, 2020
Messages
234
Looking at the engine to see the extent of the freeze damage. I know I have a cracked exhaust manifold which was obvious from the drip when running. However, now that it has sat a bit here at the house, it looks like I may have water in the oil.

This weekend, I'm going to try to pressure test the block to see if it will hold air pressure; but, I'm now thinking that a replacement engine block may be in my future.
 

kcassells

Fleet Admiral
Joined
Oct 16, 2012
Messages
8,600
Looking at the engine to see the extent of the freeze damage. I know I have a cracked exhaust manifold which was obvious from the drip when running. However, now that it has sat a bit here at the house, it looks like I may have water in the oil.

This weekend, I'm going to try to pressure test the block to see if it will hold air pressure; but, I'm now thinking that a replacement engine block may be in my future.
Ouch! BOAT!
 

PC on the Bayou

Petty Officer 1st Class
Joined
Apr 27, 2020
Messages
234
Well, maybe some good news. Block seems to be holding air pressure. Even turned the crank a half turn to move the pistons in the cylinders. No sound of air coming out inside the engine.

Guess the only way to know for sure is to run it and check the oil again.
 

PC on the Bayou

Petty Officer 1st Class
Joined
Apr 27, 2020
Messages
234
My bellows replacement parts came in today; so, I pulled the drive and removed the gimbal. Old exhaust bellows had one hole. Shift bellows was very bad. Drive shaft /gimbal bellows was still solid, but very stiff. Also noted that the water hose was kinked.

While I had it apart, I could tell that the water tube was loose in its fitting;so I pulled it out. Glad I did because it was in bad shape and about ready to break. So I ordered a new one.

Once I have the bellows and drive back on, I am going to do a quick epoxy patch on the manifold just to keep it from leaking too much and then put her back in the water to run the engine a bit and verify no water getting into the oil. If this confirms no apparent block cracks, I will go ahead and order new manifold(s).
 
Top