'90 Maxum 2100SR - restoration & conversion

Reserector_

Chief Petty Officer" & 2021 Splash of the Year Win
Joined
Oct 15, 2019
Messages
609
All of the above, plus try to consolidate your small batch work as much as possible. Get a bunch of it staged for resin so you can keep on rolling, or at least not have long delays between batches.

Brushes can simply be dropped into a covered container of acetone and then "banged out" and wiped on a rag before starting back to using them.
If you clean them thoroughly and stand them with their bristles up, they can dry that way and still be used another day.

Don't try to soak the rollers in acetone, unless you take the cover off the frame to do it. The solvent will pool inside if you do, and then leak out to wreck your work.
Might be practical if you had a tall skinny container that a roller could fit in, and not need allot of solvent to submerge it. Roller cleaning requires a "spinner" that flings the paint (or resin) and solvent out of them.
A spinner will spin a brush, also.
 

PC on the Bayou

Petty Officer 1st Class
Joined
Apr 27, 2020
Messages
234
Had a pretty successful weekend. Took y'alls advice and grouped smaller glassing jobs together. It actually worked out well; so thanks for the suggestion.

Didn't take any pictures this weekend because, well, there wasn't a lot of interesting stuff to look at. I did a lot of odds and ends that I had been putting off. Tabbing, etc. I did get the supports made for the fuel tank cover so it can be installed.

Making good progress. Hoping to splash in the next couple months with luck. Gotta be ready for late spring / early summer.
 

PC on the Bayou

Petty Officer 1st Class
Joined
Apr 27, 2020
Messages
234
Had a pretty productive weekend with the boat.

Got the fuel tank installed and the cover in place. Still need to tab the seam when I proceed with that area of the sole.

Got the battery "shelf" installed across the area under my consoles. This will give me the place for my trolling motor batteries.

PB'd in the engine mounts, tabbed them, and did a layer of CSM across the engine bay area. I plan to gelcoat this area next so that I can get the drive and engine installed and aligned.

Overall keeping the project moving forward with hopes of a splash before Summer making for a year-long project.

More pics coming soon.
 

PC on the Bayou

Petty Officer 1st Class
Joined
Apr 27, 2020
Messages
234
Good morning everyone!!

Had a productive Sunday working on the boat. Didn't do any glass work; however, I did some fabrication of items that will be installed soon and will require glass coverage. For example, I built the gunnel rod holder brackets that I'm going to install down each side of the gunnels and I started building the engine bay enclosure (to include jump seats). I'll take some pictures once I have them fabbed and sitting in place.

I do have a question for those that have come before me. I'm considering installing gas struts to help open / support the "hood" portion of the engine bay enclosure and am looking at options for how and where to mount them. As part of the design, I'm considering making the cover portion in two pieces. The first piece will be the "lounging deck" and will go all the way across the boat. The second piece would be a smaller "hatch" portion that would only go over the front half of the engine bay (where the jump seats would be on either side). I want the smaller hatch to open independently or in unison with the overall structure. I have the design sketched out in my head, but am thinking of the best way to install the assist struts for each.

My question for you all is "Is it safe to install the struts near the engine or will the heat there cause a dangerous situation?"
 

Reserector_

Chief Petty Officer" & 2021 Splash of the Year Win
Joined
Oct 15, 2019
Messages
609
I understand your dilemma because I still need to figure out the strut placement in mine. Mine is light enough to lift, but it needs something to hold it in the UP position. I think I may end up adding a bracket to the engine rather than somewhere on the cap, just to get the angle I need for it to "over-center" when down, and hold reliably when UP.
As for the heat, I don't think that will be a problem because those struts are used on cars.
 

PC on the Bayou

Petty Officer 1st Class
Joined
Apr 27, 2020
Messages
234
I understand your dilemma because I still need to figure out the strut placement in mine. Mine is light enough to lift, but it needs something to hold it in the UP position. I think I may end up adding a bracket to the engine rather than somewhere on the cap, just to get the angle I need for it to "over-center" when down, and hold reliably when UP.
As for the heat, I don't think that will be a problem because those struts are used on cars.

After looking at it more yesterday evening, I may be leaning to make the entire "hood" a one-piece design. If I do this, then I can just put the struts on either side by the gunnels which should be plenty far away from the engine heat. I just have to build it and see how heavy it is.

I, also, though about just doing an old school brace to hold it up if it isn't too heavy.
 

Reserector_

Chief Petty Officer" & 2021 Splash of the Year Win
Joined
Oct 15, 2019
Messages
609
The way mine turned out, the center part is where most of the mass is. The side portions are very shallow. Strutting it to the gunwales would not support the weight of the center. I feel that it would twist.
Another observation on mine (sorry, it's the only reference I have) is that to gain really good access, it needs to hinge up beyond 90Ā°. More like 120Ā°. That rules out a broomstick. Haha. I've been lifting it up that far and hooking a strap from the engine to the enclosure to keep it from swinging back too far. It's own weight holds it open at that point.
20210130_154020.jpg20210130_190854.jpg

Don't forget about wind. A good windy day out on the water could bring it down on your head if you don't have a way to lock it open.
 

PC on the Bayou

Petty Officer 1st Class
Joined
Apr 27, 2020
Messages
234

I love the way yours completely lifts / opens to gain full access to the engine. You make a very good point in the possible need to open to or beyond the 90 degrees as well.

I'm thinking that I may just wait until I have it built (this weekend hopefully) and see how heavy it is.
 

Reserector_

Chief Petty Officer" & 2021 Splash of the Year Win
Joined
Oct 15, 2019
Messages
609
Keep in mind that the hinge will bear much of the weight. You will never actually lift the entire weight once it is installed and hinged. Maybe half when you first start lifting, and lighter as the hinge takes more and more.
 

PC on the Bayou

Petty Officer 1st Class
Joined
Apr 27, 2020
Messages
234
Had a pretty productive day, today. Put the first layer of CSM on the main deck along with some other stuff. Was hoping to get 2 layers done today but no joy . . . Didn't have enough CSM so I had to order more which will be in Tuesday. A minor setback for the weekend plan.

Planning to continue build-up of the engine enclosure and other above deck items tomorrow and maybe do the gelcoat in the engine bay.

I will take some pics tomorrow of the progress.

Starting to see some light at the end of the tunnel. Here is to hoping it isn't a train coming my way. šŸ˜
 

PC on the Bayou

Petty Officer 1st Class
Joined
Apr 27, 2020
Messages
234
Another productive day moving toward the light. Here are a few pictures, as promised.

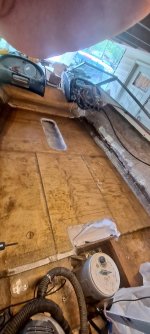
First, you can get a look at the first layer of CSM on the new deck. This is was done yesterday but it sure is nice to have that wood covered now. Looking forward under the consoles,you can also see the shelf that I installed for my trolling motor batteries. Having them 3 abreast will balance the load.

20210327_141450_copy_450x1000.jpg

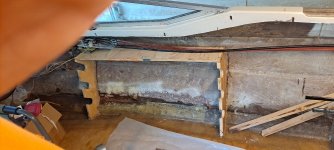
Today, I bedded in the rod racks that are under the gunnels one on each side, and the two braces near the transom (not shown).
20210328_154454_copy_1000x450.jpg

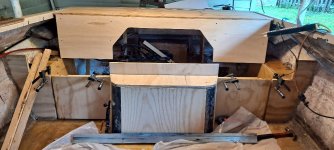
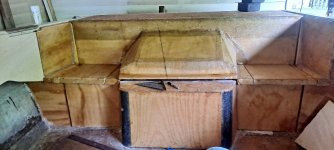
Then, I continued working on the engine enclosure. I bedded in the two ends for the front of my removable engine enclosure and clamped in the center section. I also started building the top section. You can see the sun platform and jumpseat back with the engine cover cutout. I will continue with that buildup this week into next weekend. When complete, the top half and jumpseats will hinge up and the bottom half will be removable as well.

20210328_154409_copy_1000x450.jpg

Gotta get more resin and another 10 yds. of CSM is on the way to complete the deck layup. I have some 3/4 oz. CSM to cover the non structural above deck items.

Still hoping to splash by May making this a 1 year project.
 

Reserector_

Chief Petty Officer" & 2021 Splash of the Year Win
Joined
Oct 15, 2019
Messages
609
Looking at your picture, above, it looks like you didn't glass the back side of your engine cover. Did you glass any of your above deck structure?
I didn't glass any of it. I plan to insulate the interior with foil- backed foam board, and that's it.
 

PC on the Bayou

Petty Officer 1st Class
Joined
Apr 27, 2020
Messages
234
Still plugging away . . .

I have the bilge area ready for gelcoat. Since it's not a visible area, I'm not trying to make it beautiful, but only functional and sealed against water intrusion.

I'm using the evenings, this week, to lay down the gelcoat in that area with hopes of installing the drive and engine this weekend. First coat went on yesterday evening. Planning a second probably tomorrow. I'm focusing on the areas that will be covered or very near to the engine and will touch up the other areas as I complete the build of the engine cover and surrounding structure.

Pics to come once the gelcoat is in place.
 

PC on the Bayou

Petty Officer 1st Class
Joined
Apr 27, 2020
Messages
234
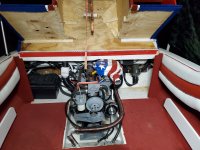
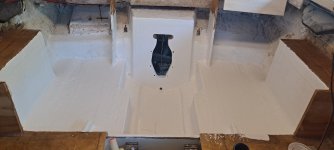
Here is a picture of the pretty white engine bay after completing the gelcoat.

20210409_131951_copy_1000x450.jpg

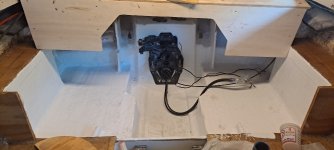
Spent this afternoon cleaning up the outdrive gimbal and transom plate. Then my wife and I installed them. Engine bay isn't so pretty and white anymore. šŸ˜

20210409_160510_copy_1000x450.jpg

Planning to install the engine tomorrow or Sunday depending on the weather. Once the engine is in, I will feel like I am in the home stretch.
 

PC on the Bayou

Petty Officer 1st Class
Joined
Apr 27, 2020
Messages
234
Rainy on Saturday morning and then I needed to knock out a couple automotive repairs; so I didn't get to work on the boat until today. It was a beautiful and productive day.

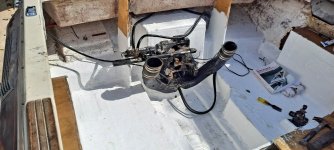
First off, had to install the power steering and exhaust Y pipe.

20210411_103108_copy_1000x450.jpg

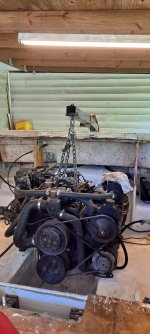
Next up was to sit the engine in place and align it to set the front motor mounts. Then re-lift the engine a bit to drill the lag bolt pilot holes.

20210411_133226_copy_450x1000.jpg

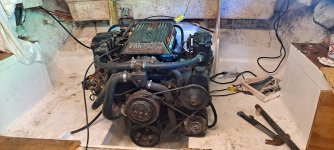
Once I got the motor mount pilot holes drilled, I set the engine back in place and secured the front mounts with 4 inch SS lag bolts. I put some 5200 in the pilot holes and a good bit in the threads of the lag bolts to seal up the holes against water. I then did another check of the alignment of the engine. Believe it or not, the pre-set from the removal put the alignment right on. I couldn't believe it myself.

20210411_143606_copy_1000x450.jpg

Definitely need to clean the engine bay. As you can see, it is very dirty white.

I am stoked now!! Feel like I can see the end of the tunnel.
 

PC on the Bayou

Petty Officer 1st Class
Joined
Apr 27, 2020
Messages
234
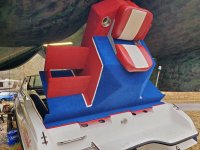
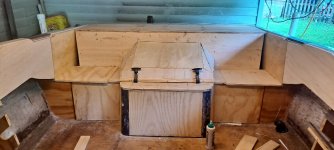
Spent this weekend doing interior woodwork. Did the rough build-up of the engine bay enclosure and cut my gunnel trim panels. Here's pic of the engine bay enclosure. Obviously I have to do the finish fittups and gap closures as well as the fiberglass work.

20210418_151618_copy_1000x450.jpg

The jumpseat tops are just sitting in place along with the latch hardware.
 
Top