77 Skeeter Restoration

fmjnax

Chief Petty Officer
Joined
Jul 21, 2011
Messages
457
Re: 77 Skeeter Restoration

Just checking in to say I'm following ya. Boat looks good!

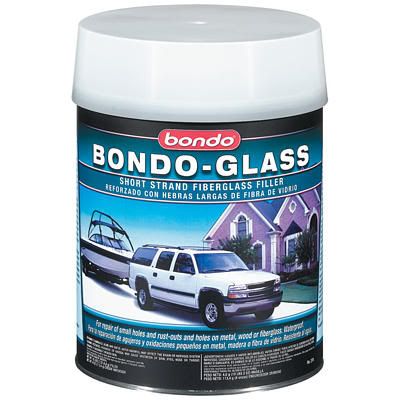
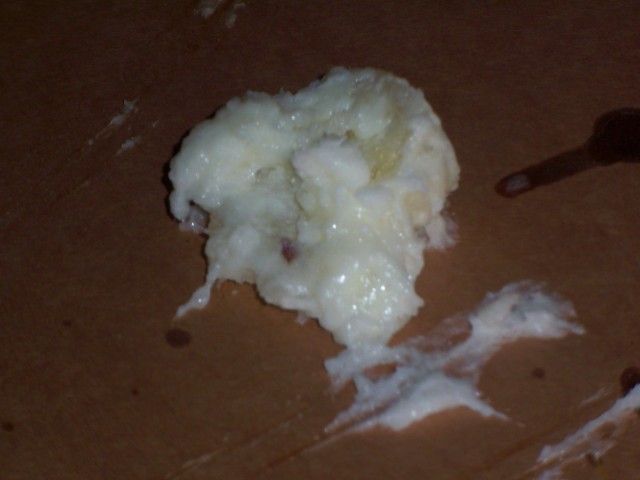
For the filler, the stuff I used has a green label with a picture of a house/truck/boat on it. I want to say it was $20/quart. Seems to have worked just fine for me.

I know it's kind of old, but I'm going to comment on the compressor topic. I had a small pancake compressor rated at 2.6CFM @90. I knew it wouldn't be up to the task, so I bought another small 3HP compressor and plumbed them together. I can't remember what it brought me up to (comparable to a 5HP unit), but it still wasn't enough to run a DA sander. I borrowed my dads DA and gave it a try and I was lucky to run it for 10 seconds before both compressors were on. That said, I do have a HVLP gun that I used and the setup worked perfectly. With the gun shooting at 35psi, I was able to spray continuously without both compressors kicking on. The slave compressor would fire on and run for a while to keep air supplied to the main tank, but the other one would never turn on. So long story short, a small compressor should run an HVLP fine, but I wouldn't even think of running a DA unless you had significant setup to supply the air.
 

fishbone77

Petty Officer 1st Class
Joined
Apr 12, 2011
Messages
304
Re: 77 Skeeter Restoration

Just checking in to say I'm following ya. Boat looks good

Thanks for checking in! I appreciate the input!

I used has a green label with a picture of a house/truck/boat on it

Yeah, I'm going to go ahead and try the Bondo - your results look great, and you can't beat the price - the 3M high strength is almost 60bucks a quart, the 3M premium marine is like 40 bucks a quart. I placed the order yesterday, so I'm trying to finish up the little bit of rough sanding I have left before it gets here. Should be able to give it a shot this weekend!

Here's a pic of what I bought: You're right on with the price - I spent 20 bucks for a quart, including shipping off Amazon.
bondoglass.jpg


I had a small pancake compressor rated at 2.6CFM @90. I knew it wouldn't be up to the task, so I bought another small 3HP compressor and plumbed them together.

Neat idea plumbing them together - how big of tubing did you use? Yeah, my dad runs a woodworking company in western Michigan, and I could have used their compressor. But, that would have meant trailering the cap and the hull all the way across the state to sand them - about 3.5hrs each way. I ended up purchasing an electric DA made by Hitachi that WOG recommended. I've been very pleased with how it has worked, and at 45$ it was much less expensive than the gas to make the trip.

I do have a HVLP gun that I used and the setup worked perfectly.

I'm glad to hear that the HVLPs work on smaller compressors - I would much prefer to spray the boat vs brushing/rolling - around my hatches, etc., there's so many small contours, it just will make my life much easier. Plus, I like a sprayed finish better:D
 

fmjnax

Chief Petty Officer
Joined
Jul 21, 2011
Messages
457
Re: 77 Skeeter Restoration

When I bought the first small pancake compressor (quite a few years ago), it came with a yellow coiled hose as part of the "kit". I don't know what the size is (I'll check it when I get home) but it's fairly small (and short!). I bought a larger and longer hose to use as my main hose (again, I'll check the size when I get home). It was simply a matter of buying various connectors and a roll of pipe dope. You do have to ensure that one of your compressors has two hose connectors, though. ;)

I hear ya on spraying vs rolling. From start to finish, I can spray a full coat in under 30 minutes! That includes setting up, mixing, shooting, and clean-up. It did take me a while to get the hang of the settings on my gun, but once I had it dialed in, I was golden.
 

fishbone77

Petty Officer 1st Class
Joined
Apr 12, 2011
Messages
304
Re: 77 Skeeter Restoration

Got the Bondo fiberglass filler today! Weather supposed to be good this weekend - hopefully this holds - will finally get back outside and get some work done!
 

fishbone77

Petty Officer 1st Class
Joined
Apr 12, 2011
Messages
304
Re: 77 Skeeter Restoration

Well the last few months have been pretty busy - not much has happened on the boat - but it looks like I'll finally get some time over the next few weeks to plug away at it again!

Got out today and worked on it for most of the day.

I got all the deck pieces cut out:
100_1941.jpg


And got the bottom of each panel coated with 2 coats of epoxy for waterproofing.
100_1945.jpg


I also took the stern stringers that I had fabricated this spring and waterproofed the edge grain so I can install tomorrow...
100_1799.jpg

100_1944.jpg


Tomorrow, I'll also put a final waterproofing coat on the bottom of the deck - I'm going to use Interlux's Bilgecote; I'll apply this to the bottom of the deck and also throughout the bilge and eventually across the transom.
100_1947.jpg
 

fishbone77

Petty Officer 1st Class
Joined
Apr 12, 2011
Messages
304
Re: 77 Skeeter Restoration

I also made my first attempt at mixing up some peanut butter - used it to fill around the transom. Tomorrow I'll do some light sanding, and then tab it in.

100_1943.jpg
 

fishbone77

Petty Officer 1st Class
Joined
Apr 12, 2011
Messages
304
Re: 77 Skeeter Restoration

Got a coat of bilgekote on the underside of the deck today - takes a while to fully cure - it's still tacky after 12hrs. More to come tomorrow!
 

fishbone77

Petty Officer 1st Class
Joined
Apr 12, 2011
Messages
304
Re: 77 Skeeter Restoration

So I got out and put in a solid day yesterday...

I put the first layer of tabbing in on the transom, but will still need to do another overlapping layer. I put my first coat of bilgekote on most of the bilge that will be covered by the deck. Every compartment except the middle one will be filled with closed cell foam once the deck is down. I left the back part of the middle bilge compartment without bilgekote because the glass there was pretty porous and I wanted to lay some new cloth over it.
100_1949.jpg


Then I took the stern stringers that I had prepped the day before and I bedded them in and installed them. I used PB to bed them, then I used PL to smooth out the edge contours between the new stringer and the existing hull.
100_1950.jpg

100_1951.jpg


Got a little too eager with adding the cabosil to some left-over epoxy and ended up with a nice solid, useless blob...haha
100_1953.jpg
 

fishbone77

Petty Officer 1st Class
Joined
Apr 12, 2011
Messages
304
Re: 77 Skeeter Restoration

Yesterday, I also started working on a replacement stem to anchor my bow-eye into. I used (4) 1" thick pieces of oak that I had, and used thickened epoxy to glue them up. I alternated the grain direction - not sure if it'll end up making a difference strength-wise, but I figured it couldn't hurt.

Wood pieces laid out...
100_1955.jpg


Glued clamped...
100_1954.jpg


Then today, I took off the clamps and shaped it out...
100_1956.jpg


Dry-fit..
100_1957.jpg


Probably overkill since it's solids, but I put on a coat of epoxy for waterproofing...
100_1960.jpg
 

fishbone77

Petty Officer 1st Class
Joined
Apr 12, 2011
Messages
304
Re: 77 Skeeter Restoration

Today I also finished putting bilgekote on the underside of all the deck pieces, and in the bilge...
100_1959.jpg


I also glassed in the stern stringers...
100_1958.jpg
 

Woodonglass

Supreme Mariner
Joined
Dec 29, 2009
Messages
25,926
Re: 77 Skeeter Restoration

The entire Bow of the boat will tear out if the bow eye comes out!!!!:eek: Nice Job!!! A bit overkill with the Bilgecoat but... If you keep the boat for 20 - 30 years it'll be worth it. At the very least great selling point if you decide to sell her later on.
 

Pete104

Lieutenant
Joined
Apr 30, 2011
Messages
1,439
Re: 77 Skeeter Restoration

I just jumped on board with you. Very nice work! Early on you mentioned "med school" & I'm thinkin' to myself, where the heck did a Dr. learn how to cut wood like that? The earlier pic's of the transom & the grid you made for reference. I thought this guy should be building high-end cabinets. Then in post #82, you say your "dad runs a woodworking company". That explains alot!

Really looking good!!!
 

fishbone77

Petty Officer 1st Class
Joined
Apr 12, 2011
Messages
304
Re: 77 Skeeter Restoration

The entire Bow of the boat will tear out if the bow eye comes out!!!! Nice Job!!! A bit overkill with the Bilgecoat but... If you keep the boat for 20 - 30 years it'll be worth it. At the very least great selling point if you decide to sell her later on

Haha - thanks for the compliment WOG - after all the work of laying in new stringers and deck, I may have gotten a little carried away waterproofing it all! haha, but it'll be worth it if it makes it last that much longer:D
 

fishbone77

Petty Officer 1st Class
Joined
Apr 12, 2011
Messages
304
Re: 77 Skeeter Restoration

I just jumped on board with you. Very nice work! Early on you mentioned "med school" & I'm thinkin' to myself, where the heck did a Dr. learn how to cut wood like that?

Haha - glad to have you on board Pete - yah, it's nice to have something to do other than study all the time! haha
 

fishbone77

Petty Officer 1st Class
Joined
Apr 12, 2011
Messages
304
Re: 77 Skeeter Restoration

Got outside for just a little while today... I sealed the edge grain of the stern stringers with epoxy, put a second coat of epoxy on the new stem piece. I should be ready to coat the stern bilge and stringers with bilgekote tomorrow. Then I can lay down the deck and tab it in. If the weather is nice I may even be able to pour foam this weekend!
 

fishbone77

Petty Officer 1st Class
Joined
Apr 12, 2011
Messages
304
Re: 77 Skeeter Restoration

Started off this afternoon by bedding in the new stem piece with peanut butter...
100_1961.jpg

100_1962.jpg


I had tabbed in the stern stringers yesterday and let them dry overnight:
100_1963.jpg


So today they were ready to be coated with bilgekote...there were still somehow just a couple of spots that I had missed earlier that I wanted to put either some PB or some cloth over, so I did that today - I'll be able to complete coating the bilge tomorrow...
100_1967.jpg
 

fishbone77

Petty Officer 1st Class
Joined
Apr 12, 2011
Messages
304
Re: 77 Skeeter Restoration

Last night I realized that I still needed to "cap" the fronts of the side bilge areas that will be filled with foam - even though I'll be using the 2-part closed cell foam, I still don't water sitting against it if I can avoid it... So I started by cutting out some pieces to cap off the front ends of these areas, and attached them to a cross board as a brace for when I'm bedding them in...

Caps will go between the 2 center stringers and the lateral sides of the hull...
100_1966.jpg


The caps cut out and attached to the brace...and coated with epoxy to seal the edge grain...
100_1964.jpg


Dry-fit...
100_1965.jpg


Then things got a little dicey - I don't know if it was the angle I was working at or what, but I had a terrible time bedding these in - I think I was just getting too picky and didn't want to screw the crossbrace to the actual stringers so it kept moving on me... anyhow, I got a fair bit of PB in (enough that will dry and hold them in place, and I'll have to fill the rest tomorrow...

Bedded...
100_1968.jpg


100_1970.jpg
 

fishbone77

Petty Officer 1st Class
Joined
Apr 12, 2011
Messages
304
Re: 77 Skeeter Restoration

Got back out late last night to finish bedding the front "caps" to close off the foam compartments in the bilge... without the brace in my way, it worked better - I think another part of my problem was that I was using a larger spatula and it wasn't getting into the corner very well, but got it worked out!

Bedding completed...
100_1971.jpg


I also got them glassed in and coated with bilgekote...
100_1974.jpg


Finally, I have the entire bilge coated, and can work on getting the deck down today!
100_1973.jpg
 

fishbone77

Petty Officer 1st Class
Joined
Apr 12, 2011
Messages
304
Re: 77 Skeeter Restoration

Started laying the deck yesterday - the plan was to bed the deck to the stringers with PB, then use coated deck screws dipped in epoxy to screw the deck down.

Started by marking the stringer positions on the deck pieces...
100_1975.jpg


I'm planning on pouring foam. I've seen a couple of ways to do this across the iboats forums...
1) the easiest and least expensive I've seen is to use sections of 2" thick foam board placed under the deck before fastening it to the stringers.
2) pouring a 2-part closed cell foam and then shaving the surface level before laying the deck.
3) drilling pour and vent holes in the deck, laying the deck, and then pouring the foam through the holes, working from one end of the boat to the other.

I went with option #3, with the idea of preserving as much of the foam's closed-cell properties as possible - with that in mind, I wanted to pre-drill all my pour and vent holes, to prevent tear-out on the underside of the deck that could be a starting point for deck rot down the road...

I piloted the holes based on my stringer lines...
100_1976.jpg


Then drilled them half from one side and half from the other side so there was no tear-out on either surface...
100_1977.jpg


100_1978.jpg
 

fishbone77

Petty Officer 1st Class
Joined
Apr 12, 2011
Messages
304
Re: 77 Skeeter Restoration

More pics...

I ended up just working my way from the bow towards the stern with laying the deck and using PB to fill around the edges. I wanted to PB around the edges with the idea that when I tab the deck to the hull, the cloth will have a smoother contour to follow, hopefully a stronger bond in the end.

If I had been using an electric drill to bore the pour/vent holes, I could have easily gotten this done in an afternoon, but as it was, I kept having to wait on my batteries to charge, so I didn't finish it until this morning...

A final dry-fit for the bow section...
100_1979.jpg


The bow-section PB'd and screwed to the stringers, with PB fill along the edges. The bow-section ended up fitting nicely with the end-caps I did for the foam compartments...
100_1982.jpg


2 sections placed and edged in with PB, PB'd and screwed to the stringers...
100_1980.jpg


I still had this much left to do at the end of the night yesterday...
100_1981.jpg


But got up early this morning and finished it up!
100_1986.jpg
 
Top