'76 Holiday i/o 18' Fishing Rebuild (pic heavy!)

italianstal27

Chief Petty Officer
Joined
Feb 18, 2017
Messages
403
MORE PROGRESS COMRADES.

Although, it just looks like we're repeating the same thing over and over again -.-

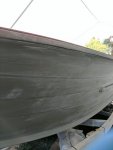
Let the boat sit for 7 days to dry. Paint at this point couldn't be scratched with a fingernail, so we were quite pleased with that. Temps high of 80 and low of 40 over the week. Mostly sitting around 58-62 degrees average.

So we wet sanded with 400 grit in the morning, and boy that paint was HARD. Hardly any came off.
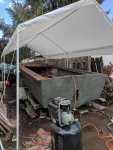
IMG_20170506_132100.jpg
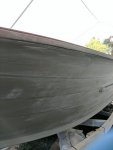
Sanded down every piece of green metal we could find. Did all of it by hand either with the paper wrapped around a small piece of 2x4, or simpy by hand. If the paint came off, we wanted to knock it down real good.

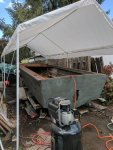
You'll notice we brought the air compressor over. The 125' of hose probably was giving us consistency problems. We thought doing 25' of line might give more pressure and more consistent volume. (Spoilers, it did).
IMG_20170506_132124.jpg

After wet sanding, we washed the boat with dish soap and water.

Then, we sprayed it down REAL good with the hose.

Then after it dried, we wiped it down with 50/50 mineral spirits and acetone. Let that dry.

To speed up the drying (and get the mineral spirits out of the small holes in the rub rail), we blew 90psi air on the boat with the air compressor. Make sure you have an in line oil/water separator!!
IMG_20170506_170332.jpg
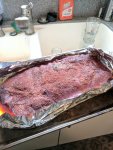
Smoking ribs on the smoker while we're working because that's an efficient use of time.
IMG_20170506_174805.jpg
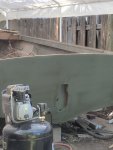
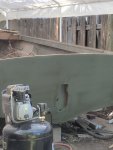
First coat on. Set the compressor to ~55 psi and boy did the paint FLY on there. We only needed 1 cup (roughly 500ml) of paint to cover the entire boat once. And it wasn't a 'thin' coat, but it wasn't thick either.
IMG_20170506_174808.jpg
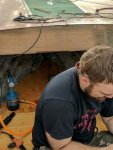
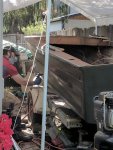
Wyatt spraying the boat. Watch those isocyanates friends!

At this point, we're done painting the outside. We'll roll the gunnels with the khaki paint (and interior as well) sometime this week or next when we get the final bow piece of deck installed.
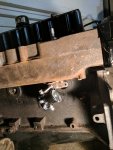
IMG_20170501_220817.jpg
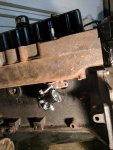
On the engine side, finally found where the slave solenoid mounts on this engine. UNDER THE EXHAUST MANIFOLD. Who designs this!?

Also, This is a solenoid which requires the base to be grounded. The two 'signal' nuts are not attached. So I think we may have procured the wrong solenoid.... But! This one should work.

Engine is now completely reassembled minus the 2 bolts for the thermostat.

We've broken 2 bolts putting the engine back together... Home depot doesn't have these bolts in stock either. Maybe ACE?

-John
 

Attachments

  • IMG_20170506_132100.jpg
    IMG_20170506_132100.jpg
    172 KB · Views: 1
  • IMG_20170506_132124.jpg
    IMG_20170506_132124.jpg
    79.1 KB · Views: 1
  • IMG_20170506_170332.jpg
    IMG_20170506_170332.jpg
    192.2 KB · Views: 1
  • IMG_20170506_174805.jpg
    IMG_20170506_174805.jpg
    122.8 KB · Views: 1
  • IMG_20170506_174808.jpg
    IMG_20170506_174808.jpg
    153.7 KB · Views: 1
  • IMG_20170501_220817.jpg
    IMG_20170501_220817.jpg
    163.8 KB · Views: 1

italianstal27

Chief Petty Officer
Joined
Feb 18, 2017
Messages
403
Bad news today.
Tried cranking the engine over and it didn't go. The new rotor actually snapped off where it is keyed into the distributor housing. The new cap didn't seem to work either... So back to the old rotor and cap. Got a spark! Sprayed starter fluid into carb and it combusted with backfire. Ok no problem. Add gas and Bam. Nothing. Back to square one tomorrow.

Also curious, how does 12v get to the ignition coil after you're done cranking the starter? On the wiring diagram, the only way to get power to the ignition coil is from the starter R0 port.

-John
 

italianstal27

Chief Petty Officer
Joined
Feb 18, 2017
Messages
403
So good news!! We had black exhaust coming out of the j pipe today. Realized that we were actually combusting.

Because we had fuel spitting out the top of the carb, we quadruple checked the distributor cap. Low and behold it had moved 90 degrees on us. Wtf.

So we move the cap 90 degrees, put it roughly 8 degrees behind the rotor, and button it all back up. Now it spins SUPER quick when we crank the starter, but still not kicking over! We were clearly firing wrong before and that was causing the engine to almost stall while cranking.

Guys we can almost taste how close we are!!!!!
 

jsparks747

Petty Officer 3rd Class
Joined
Apr 12, 2017
Messages
77
It's looking good! I saw you mentioned Tigard in an earlier post, are you in Oregon?
 

italianstal27

Chief Petty Officer
Joined
Feb 18, 2017
Messages
403
So more updates...

We have tried for a week now to get the engine to turn over and are having extreme difficulties getting it to do anything.

At this point we kinda have to take it to someone who "knows what they're talking about".

:( sad day... but sometimes you have to know when to call it quits :)
 

Watermann

Starmada Splash of the Year 2014
Joined
Jan 12, 2013
Messages
13,790
So the motor turns over with the starter and doesn't fire? If so those older non TB ignitions are super simple with points as long as you have the distributor installed correctly and not 180 out they always will fire off.
 

italianstal27

Chief Petty Officer
Joined
Feb 18, 2017
Messages
403
Glorious news!!!! Engine is running :D :D :D Will post video soon!

Most of our gauges are not working. Tachometer says engine is idling at 4000 rpm. Water temp is all over the place.

Need to order new gauges before we start 'fine tuning" things. Can't really tell if we're at idle speed without it.

Sure sounds like it's idling slower than 1100!!!! Progress!!
 

pckeen

Commander
Joined
Jun 20, 2012
Messages
2,067
Very good news. Did you have to take it to a mechanic, or did you get this done yourself?
 

italianstal27

Chief Petty Officer
Joined
Feb 18, 2017
Messages
403
Distributor was 180 out -.-

We looked at it 3 times and somehow we put it in backwards. Also, our initial timing was 6 degrees ATDC.

Between those 2 factors, we chased a lot of fake issues. If you're having backfire issues etc. bit the bullet and check AGAIN if you're 180 out! Our tachometer isn't working (maybe it's the distributor cap firing twice due to bad contact resistance?) But at idle it says we're at 3000 rpm. I really feel like 3000 rpm is louder than what we're experiencing.

I should upload a video. It seems the way to know if your engine is working is to listen to it!

-John
 

Watermann

Starmada Splash of the Year 2014
Joined
Jan 12, 2013
Messages
13,790
Hey that's awesome... Yeah yeah video!

Hey I think I remember a page or so back someone saying something about how those motors should fire right off unless the distributor is 180 out. :lol:
 

italianstal27

Chief Petty Officer
Joined
Feb 18, 2017
Messages
403
hahaha you don't say ;)

Plan for this weekend is to install bowmost piece of deck, and start building the console.

Once console is all in, we'll start painting the inside.

-John
 

italianstal27

Chief Petty Officer
Joined
Feb 18, 2017
Messages
403
When we first started this project, we thought it'd be easy to plow through it for 4 months and get 'er done.

DON'T be fooled friends, sometimes you have to take a 2-3 week break to recharge the engines.

After getting the engine running (2 weeks of work >.<), we finally got back into the boat last night!

IMG_20170602_175912.jpg

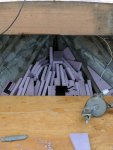
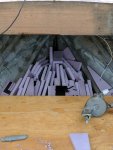
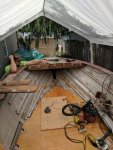
Cutting smaller pieces of foam for the bow. We were able to fit 1/2 a sheet of 1" foam in the bow most piece.

IMG_20170602_184053.jpg

Unfortunately, we were only able to get 2 rivets where the bowmost piece touches the piece behind it. The piece didn't sit well on the front most rib and the rivet didn't take :(

So, now we're rocking 2 rivets holding down the bow. Not our favorite. Hoping that the weight of the stuff on top of it will hold it down. We're considering dropping 2 1" screws on either side in the front with 5200.

-John
 

Attachments

  • IMG_20170602_175912.jpg
    IMG_20170602_175912.jpg
    138 KB · Views: 2
  • IMG_20170602_184053.jpg
    IMG_20170602_184053.jpg
    144.8 KB · Views: 2

italianstal27

Chief Petty Officer
Joined
Feb 18, 2017
Messages
403
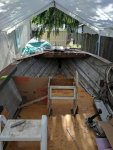
Apparently finish off the deck wasn't big enough news.

Today we were just trucking along, trying to figure out what the next step in the plan was. Maybe work on the wiring, maybe get the second side panel in...

Look at the bow of the boat, see if that needs to be fixed...

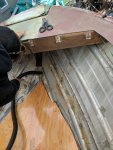
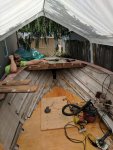
IMG_20170604_111827.jpg

Realize it's a lost hope...

IMG_20170604_115400.jpg

Start doing some calculus and differential equations... trying to figure lines out...

IMG_20170604_120702.jpg
Contemplating life decisions...

IMG_20170604_120711.jpg

OUT! OUT! OUT!

IMG_20170604_121622.jpg

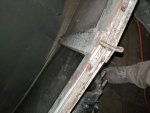
Vacuuming all the debris that eventually ends up in the keel preventing drainage causing black mold which kills you...

IMG_20170604_134639.jpg

Coming to terms with this had to be done...

IMG_20170604_171346.jpg

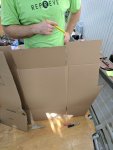
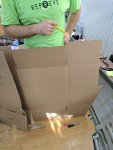
Realizing that none of the templates we have from the exiting boat are going to work. Moving to cardboard to mock up some designs.

Realize cardboard sucks at holding it's shape if it has kinks in it. Spend 2 hours looking at the boat, 20 minutes actually doing stuff. Contemplating that we could have bought a boat and been fishing for Sturgeon now that it's open for retention...

IMG_20170604_175012.jpg

Final mock up for the day. Go grab beers at the pub, realize that we've kinda made this into a super sport, decide to model it after a super sport. 4 hours of trying to get stuff to align properly down the drain.

Comrades, if you're reading this in the future, don't give up. For every 1 good idea you have, you'll have 2 bad ones. But that's ok. Survive.

Until next time amigos!!!

Next step is to get the windshield fixed (the middle panel is smashed and spiderwebbed) Our plan is to get the windshield on the boat, trace out the outline of the windshield on a big piece of plywood, and use that as the piece separating the bow from the console.

-John
 

Attachments

  • IMG_20170604_111827.jpg
    IMG_20170604_111827.jpg
    178.4 KB · Views: 3
  • IMG_20170604_115400.jpg
    IMG_20170604_115400.jpg
    152.4 KB · Views: 3
  • IMG_20170604_120702.jpg
    IMG_20170604_120702.jpg
    132.4 KB · Views: 3
  • IMG_20170604_120711.jpg
    IMG_20170604_120711.jpg
    160.3 KB · Views: 2
  • IMG_20170604_121622.jpg
    IMG_20170604_121622.jpg
    165.4 KB · Views: 2
  • IMG_20170604_134639.jpg
    IMG_20170604_134639.jpg
    169 KB · Views: 2
  • IMG_20170604_171346.jpg
    IMG_20170604_171346.jpg
    117.3 KB · Views: 3

italianstal27

Chief Petty Officer
Joined
Feb 18, 2017
Messages
403
IMG_20170605_094000.jpg

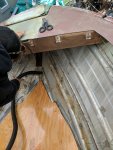
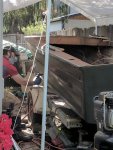
on the windshield, you can see the middle pain is "smashed". So trip to home depot to snag some acrylic glass?

IMG_20170605_093923.jpg

Researching says that the seal holding the glass to the window is called a glaze. We need to pull the edge panes because they popped out of the seal when we were removing the window.

Is this a part that's usually good to go? If it's not completely vulcanized has anyone had issues with just caulking it up?

-John
 

Attachments

  • IMG_20170605_094000.jpg
    IMG_20170605_094000.jpg
    119 KB · Views: 0
  • IMG_20170605_093923.jpg
    IMG_20170605_093923.jpg
    97.6 KB · Views: 0

Watermann
Starmada Splash of the Year 2014
Joined
Jan 12, 2013
Messages
13,790
Having the decking go in is a milestone in my book, things start to really take off after that.

So yeah your thread is in the general resto forum not the SC forum and since you don't venture out and post on the scores of other threads that really limits the subscribers to your thread I'm sorry to say.

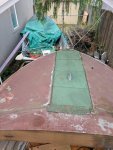
So are you going to fabricate some consoles now that the bow deck is gone?

You can use a wet seal for your center WS but polycarb would be my choice over acrylic if you want that sort of material, personally I would go to a glass shop and get a piece of tempered glass, probably cheaper too. Sikaflex works great for wet seals and you can get it in gray so you don't have a white bead of goop showing.

You did buy a boat, just needed a little TLC and elbow grease right? :lol:
 
Top