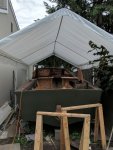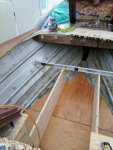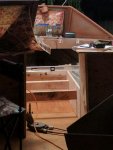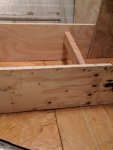
'76 Holiday i/o 18' Fishing Rebuild (pic heavy!)

italianstal27

Chief Petty Officer
Joined
Feb 18, 2017
Messages
403
IMG_20170607_183307.jpg
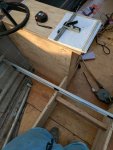
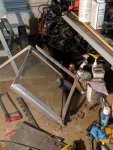
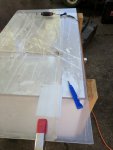
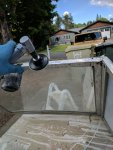
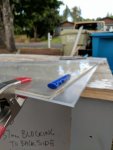
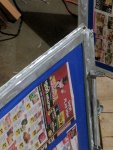
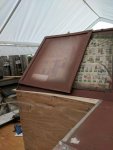
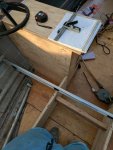
So here's a better picture of the windshield and how bad it's cracked.

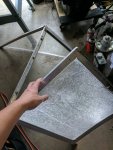
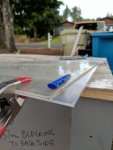
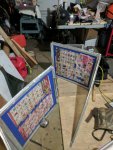
We tried removing the rivets holding the frame together, but the obscene amount of corrosion had basically welded everything together. When in doubt, head to the saw:

IMG_20170607_193429.jpg
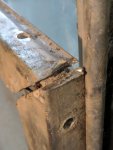
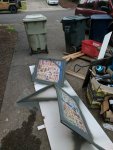
No bueno. Cannot get the above to separate AT ALL. whacked it with a hammer for 2 hours on both ends.

IMG_20170607_201404.jpg
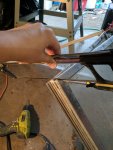
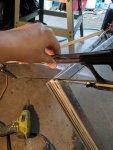
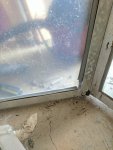
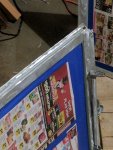
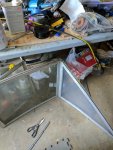
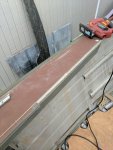
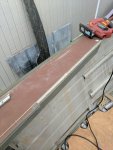
Taking a saw to it. We'll pull the pieces of lead out with vicegrips later. For now, just got to get the windshield off. Beyond frustrating lol.
IMG_20170607_203343.jpg
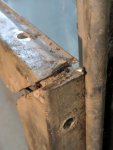
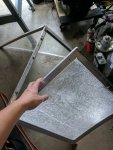
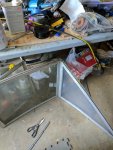
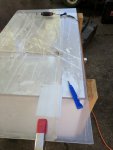
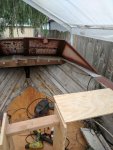
Where we're at now... the top piece of the frame accidently snapped off. We'll have to rivet it like we did on the side closest to the hinge. If anyone's attempting this, be careful! The aluminum frame is very very very thin where they made the bends! Don't snap it like I did.

Does anyone have thoughts / opinions on where to get the glaze / weatherstrip that goes inside the aluminum channel that the plexiglass sits in?

We'll be buying acrylic made by Optix from Home Depot at $9 a sheet and $24 for the sides.

-John
 

Attachments

  • IMG_20170607_183307.jpg
    IMG_20170607_183307.jpg
    173.5 KB · Views: 2
  • IMG_20170607_193429.jpg
    IMG_20170607_193429.jpg
    108.5 KB · Views: 2
  • IMG_20170607_201404.jpg
    IMG_20170607_201404.jpg
    139.6 KB · Views: 2

italianstal27

Chief Petty Officer
Joined
Feb 18, 2017
Messages
403
Update from over the weekend: yuge gains!

IMG_20170610_181433.jpg

Picked up a piece of acrylic at le home depot $60. It was big enough to fit the 2 side windshield pieces and the center. Yay! Tried using a dremel, jigsaw, and the plastic cutting knife, and I can say with 100% certainty that the cutting knife is the way to go. If you need to make a curved cut or notch, jigsaw is the way to go.

IMG_20170610_193504.jpg

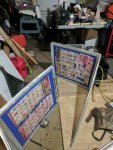
Not sure how old the old piece was but you can see it had yellowed a little bit. The rubber clamps held the pieces together SUPER well. Also left the clear protective cover on. Resisting the urge to peel it off took all the will power in my soul.

IMG_20170611_120741.jpg
You can see the gaskets didn't seat the best when reinserting the glass, but hopefully they'll settle over time! Also you'll see the rivet in the botom is heavily corroded. We drilled out most of these (1/8" i think) rivets and replaced them with 3/16".

IMG_20170611_155309.jpg

Side panel in! Using a rubber mallet to get it to fully seat is THE way to go. Rivet in the top of the frame, and we're off to the races.

IMG_20170611_170601.jpg

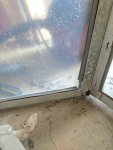
In the above picture you can see the obscene amount of corrosion on the windshield. Covered in white. Took the die angle grinder with an assortment of 100, 120, scotchbrite pads, and scuffed up the entire frame, removing as much of the corrosion as possible.

IMG_20170612_092808.jpg

Still have the protective film over the new pieces, so all that needed to be covered was the big windshield panes. Masking the front and back took more than an hour... Making tape fit a curve is difficult at times.

IMG_20170612_092819.jpg

Cleaned as much as possible! Tonight we'll etch it with vinegar and then spray 2 coats of self etching primer!

We're thinking of painting it the outside color of the boat (olive drab green). Once the windshield is done drying, we can put it in the boat and get our center consoles built!

-John
 

Attachments

  • IMG_20170610_181433.jpg
    IMG_20170610_181433.jpg
    107.2 KB · Views: 1
  • IMG_20170610_193504.jpg
    IMG_20170610_193504.jpg
    79.6 KB · Views: 1
  • IMG_20170611_120741.jpg
    IMG_20170611_120741.jpg
    135.8 KB · Views: 1
  • IMG_20170611_155309.jpg
    IMG_20170611_155309.jpg
    164.8 KB · Views: 1
  • IMG_20170611_170601.jpg
    IMG_20170611_170601.jpg
    136.5 KB · Views: 1
  • IMG_20170612_092808.jpg
    IMG_20170612_092808.jpg
    150.7 KB · Views: 0
  • IMG_20170612_092819.jpg
    IMG_20170612_092819.jpg
    152.8 KB · Views: 0

italianstal27

Chief Petty Officer
Joined
Feb 18, 2017
Messages
403
Self etching primer. done.

IMG_20170612_200100.jpg

Tonight, Wyatt sprays the rusty metal primer after a light scuff on the self etching primer.

I get to sand the old paint off the bow.

Also question to the gurus out there:
Since we're moving the console almost 2' back, are we going to need new throttle, shift linkage, and steering cables?

In all honesty, the steering cable has started yellowing. What's the typical lifespan on these cables?

-John
 

Watermann

Starmada Splash of the Year 2014
Joined
Jan 12, 2013
Messages
13,798
You'll need a new steering cable for sure, no way to take up 2 feet of extra steering cable but you can take up the slack in the control cables with a wide loop. If the control box works no need to replace it but I would suggest taking it apart and cleaning all the old grease out and then putting on new grease. I use Quicksilver 2-4-C for little grease jobs like that and for splines on the prop / drive shafts.
 

italianstal27

Chief Petty Officer
Joined
Feb 18, 2017
Messages
403
Thank you sir excellent advice

Thoughts on the throttle control & shifting cables? Keeping the control box, but we read a lot of threads where the shift cables eventually get worn out.
Is that something you just replace when they wear down, or should we fix it now while everything is opened up?

-John
 

Watermann

Starmada Splash of the Year 2014
Joined
Jan 12, 2013
Messages
13,798
Those 2 control cables are easy to replace if they go bad, what's tough is the lower unit shift cable you should replace it if it hasn't been yet, it's shorter and goes from the lower unit through the transom assembly to the top of the motor.
 
Last edited:

strokendiesel002

Petty Officer 1st Class
Joined
May 15, 2012
Messages
283
The cables in question should be one of the easier things to swap out on the boat so long as you route them properly, with the idea that they may need to be changed without disassembling anything else

Looking great btw!
 

italianstal27

Chief Petty Officer
Joined
Feb 18, 2017
Messages
403
With the windshield fixed and primed with rusty metal primer, it's onto the next thing chaps!!!!

IMG_20170617_101843.jpg

cutting the inside rub rail to make room for the windshield being moved back...

IMG_20170617_104005.jpg

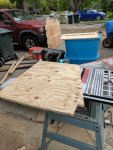
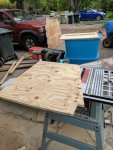
Mocking up what we think the dash will look like. We're doing 1/2" ply for what the windshield sits on + using it as a dash. Everything under the dash is 3/4".

Distance on the inside is 18". Roughly the width of the swinging windshield.

IMG_20170617_155713.jpg

Borrowed my dad's table saw. You can see this is a fancy cut... The top is curved, there's an angle cut, and there's also a 2"x3" notch so it can slide under the gunnel to support it.

IMG_20170617_173518.jpg
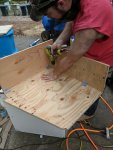
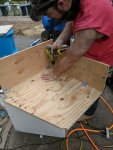
Assembling the port side console. RIVETS ON RIVETS ON RIVETS. We used 3 rivets per side of the L bracket ( 6 per L bracket total), and even then it was a little... not completely squeezed down. Highly recommend using 3 rivets minimum.

IMG_20170617_195906.jpg

Leaving the dash a little long (it's flipped), because we may want to keep it long. Who knows. Doesn't hurt to leave extra!

IMG_20170617_200358.jpg

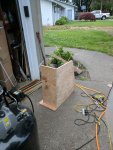
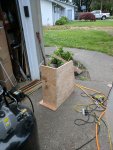
Both consoles sitting inside the boat. The curve actually matches up fairly well!!!! At most we have < 1/8" of gap between the windshield and the console. And best of all, the windshield closes! Huzzah!

IMG_20170617_200409.jpg
Pic from a little further back. Console looks solid!! Even though we built it square the sides of the console (not the splash wall) are angled towards the middle of the bow. No idea. No idea at all. BUT! It looks pretty solid! Tomorrow, we'll pull the consoles and cover them in epoxy.

IMG_20170617_174637.jpg
Bonus picture of how the windshield lined up on the port side.

Starboard had more issues... But we'll figure out how to level it tomorrow.

What do you guys think of the gap? Not bad eh? :D
 

Attachments

  • IMG_20170617_101843.jpg
    IMG_20170617_101843.jpg
    139.6 KB · Views: 1
  • IMG_20170617_104005.jpg
    IMG_20170617_104005.jpg
    159.1 KB · Views: 1
  • IMG_20170617_155713.jpg
    IMG_20170617_155713.jpg
    179.7 KB · Views: 1
  • IMG_20170617_173518.jpg
    IMG_20170617_173518.jpg
    156.9 KB · Views: 1
  • IMG_20170617_195906.jpg
    IMG_20170617_195906.jpg
    189.9 KB · Views: 1
  • IMG_20170617_200358.jpg
    IMG_20170617_200358.jpg
    135.8 KB · Views: 0
  • IMG_20170617_200409.jpg
    IMG_20170617_200409.jpg
    142.5 KB · Views: 0

johnmorgan

Petty Officer 2nd Class
Joined
May 28, 2011
Messages
105
Cool looking boat I took the side panels off my ss and made it a centre console.
 

Watermann

Starmada Splash of the Year 2014
Joined
Jan 12, 2013
Messages
13,798
Cool looking boat I took the side panels off my ss and made it a centre console.

John those side panels and consoles you deleted on an SS add to the structure of the boat tying in the sides of the hull to the deck/bottom, without them the boat is compromised structurally. Unless you added something to take their place you run the risk of cracks developing.

On another note, getting the windshield aligned properly is a huge hurdle especially with the design change to an open bow, looks like you cleared it no sweat. Nice work. :thumb:
 

italianstal27

Chief Petty Officer
Joined
Feb 18, 2017
Messages
403
For people who redesigned their consoles, did you put the steering wheel into 1/2" or 3/4" ply? Did you vinyl or paint it? Epoxy?

Just looking for opinions before we jump off the deep end ;)

-Galati
 

italianstal27

Chief Petty Officer
Joined
Feb 18, 2017
Messages
403
Huge gains today and back at it again tomorrow!!

Got the design for the raised deck done, storage options, foam packing in the areas we can't store gear, and console design started.

Switches arrived from OTRATTW!!!!! Super excited to see the quality of these switches. Feel great and look amazing.

Pics tomorrow! Our goal is to splash August 1st!

-John
 

italianstal27

Chief Petty Officer
Joined
Feb 18, 2017
Messages
403
On another note, how long does one expect a rebuilt boat to last with proper winterizing and keeping it covered under a roof in the northwest?
 

Watermann

Starmada Splash of the Year 2014
Joined
Jan 12, 2013
Messages
13,798
On another note, how long does one expect a rebuilt boat to last with proper winterizing and keeping it covered under a roof in the northwest?

A lifetime... after that some typical schulb will get it and ruin the boat leaving it out in the elements for years after they let the block get cracked.
 

Pusher

Lieutenant
Joined
Sep 2, 2014
Messages
1,273
And true too! :) My gut gets a little sick every time I see a new jet sled with the canvas top exposed to the sun for no other reason that to keep it from... Wrinkling?

Seems like the aluminum boats will breath a lot better arpund the floor boards since they aren't sealed to the hull (longer life).
 

italianstal27

Chief Petty Officer
Joined
Feb 18, 2017
Messages
403
8 hours of epoxying the center console and substructure and raised deck in the bow. And still not done 😂. Haven't epoxied since it was 50F and BOY does that fast 205 hardener cook off QUICK. Ended up doing 2 pumps at a time otherwise it would harden on me before I could even get it out of the pot. Hit maybe 89 today. But! The plus side is within 2 hours I could flip it over and so the other side!!! No waiting 24 hours to let the epoxy cure!!!! Glorious success!

Put 1 coat of epoxy on ALL plywood edges. Planning on mixing up some peanut butter with the fumed silica and when we're ready to install, use the peanut butter to help adhere the console and sub structure to the deck.

Has anyone ever epoxied their center console to the deck & screwed it down? Any downside? Or should we peanut butter the edge, let it dry, and then attach to deck? Probably better to not glue to deck... Maybe our Craftsman abilities aren't what we thought they were ;)

-John
 

italianstal27

Chief Petty Officer
Joined
Feb 18, 2017
Messages
403
As promised, PICS!

IMG_20170706_205751.jpg

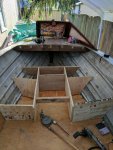
We started off with the two straight pieces. Our stake in the ground if you will. Super sport owners have it so easy with this being done already.

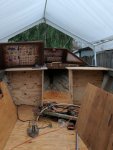
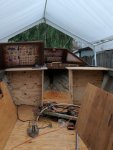
However, our open bow is 44" long :D There's enough room that someone who is 5'10" can easily recline with their back against the console and not have their feet go under the bow section. (Yes that piece of wood holding the bow deck up is getting replaced).

Miraculously enough, the boat is actually fairly level!

Unmiraculously, the boat is not square. Nothing is square. There is no point of reference lol. Measuring from the transom to the bow, it's off by 1/2". So measuring anything in the front was super difficult.
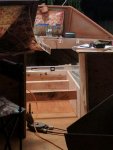
IMG_20170706_223004.jpg

Taking measurements late at night. We measured from the edge of the vertical plywood, at a 90 degree angle, to the hull. This was so when we cut the raised deck piece, it would fit as closely as possible.

Word of advice to anyone, cutting anything to fit in the bow is ridiculous. Take TONS of measurements. We measured every 4", and at 36" long that was 10 marks.
IMG_20170706_223108.jpg

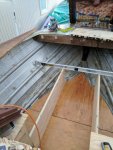
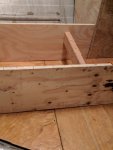
You can see we have a slight gap under the main supports... Our bow piece doesn't sit "plane" with the piece behind it. So we'll shave down the edges of the sub structure to help it sit a little more level.

The front bow piece has to be a little long so we have enough deck to rivet into the ribs. There's maybe a 1/4" gap between the deck and the supports. With sanding, we'll get it a little closer. After epoxy + peanut butter we'll see how it sits :)

IMG_20170707_195605.jpg

More measurements. Spent at least 6 hours measuring and double checking. You can only cut once. And we wanted this deck to be one solid piece for structure. So measuring was crucial. Having no template SUCKS.
IMG_20170707_210804.jpg

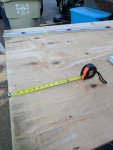
Laying a grid out on the 3/4" ply. MAKE SURE YOU LABEL PORT / STARBOARD! Halfway through I realized I was putting my port measurements on the starboard side. (No it's not symmetrical, so frustrating lol).
IMG_20170708_184213.jpg

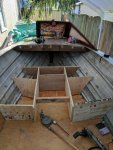
My dad convinced us that we needed supports every 24" maximum, which make complete sense. The 2' span our deck traverses between stringers is almost too much. You can see the deck deflect a little. So we added a middle support. We plan on using the bigger section for storage, the second compartments filled with foam, and the bowmost area rope & anchor ball.
 

Attachments

  • IMG_20170706_205751.jpg
    IMG_20170706_205751.jpg
    156.5 KB · Views: 2
  • IMG_20170706_223004.jpg
    IMG_20170706_223004.jpg
    124.1 KB · Views: 2
  • IMG_20170706_223108.jpg
    IMG_20170706_223108.jpg
    110.2 KB · Views: 2
  • IMG_20170707_195605.jpg
    IMG_20170707_195605.jpg
    142.5 KB · Views: 2
  • IMG_20170708_184213.jpg
    IMG_20170708_184213.jpg
    163.1 KB · Views: 2

Watermann

Starmada Splash of the Year 2014
Joined
Jan 12, 2013
Messages
13,798
Yeah cutting bow decking is one of life's great challenges. Then if you get it so close that it looks great with barely any gap if one part of it is touching the hull it'll squeak when you step on it no matter how thick the plywood is. :lol:
 
Top