'76 Holiday i/o 18' Fishing Rebuild (pic heavy!)

jbcurt00

Moderator
Staff member
Joined
Oct 25, 2011
Messages
25,043
2 full 4X8 sheets of 2in foam provides approx 650lbs of flotation.

Each shert will make 32 1ft X 1ft squares, 2in thick. You need 6 squares to make a 1X1X1ft cube of foam (or 1 CubicFoot). 1 CF of foam provides 60-62lbs of flotation each. So w a total of 64 squares you get 10.667CF of flotation or 650lbs +/-.

Is 650lbs of flotation enough for a metal boat w an I/O?

IMO, ya gotta find room for another full sheet of 2in or 2 whole sheets of 1in. And thats depending on gas and plywood being a net positive (they float) rather then a net negative, like the bare hull full of water or the motor.

Whats the bare hull weight? I/O weight?
 

italianstal27

Chief Petty Officer
Joined
Feb 18, 2017
Messages
403
We're going to try to get more foam in :) We estimate that we need 1000 lb of flotation. boat with everything + trailer at weigh station was 2200 lbs. We're thinking the engine is 400 and boat is 600-700. With adding foam to the bow and sidewalls we should be able to get another sheet in for about 1000 lbs flotation.

We're still mulling around how to get more foam in, but it's a frustrating part of boat building: cutting foam. You don't feel like you're making a ton of progress.

Anyway, onto the part no one said could be done!

IMG_20170405_223419.jpg

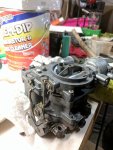
LOOK HOW BEAUTIFUL THAT CARB IS!

In case you forgot:
IMG_20170303_192010.jpg
Here is where we came from... this was truly a labor of love. I'd say an easy 14 hours into cleaning + reassembly + trying to figure out why the previous owners had a rochester carb in there who's model # didn't exist ANYWHERE on the interwebs. So we pieced it back together little by little. But I can say, 100%, we know how this carb works! So adjusting it for idle speed shouldn't be a daunting task...

-John
 

Attachments

  • IMG_20170303_192010.jpg
    IMG_20170303_192010.jpg
    282.9 KB · Views: 0
  • IMG_20170405_223419.jpg
    IMG_20170405_223419.jpg
    178.8 KB · Views: 0

italianstal27

Chief Petty Officer
Joined
Feb 18, 2017
Messages
403
Making progress.
IMG_20170407_132320.jpg
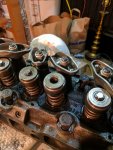
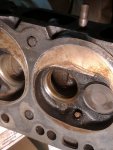
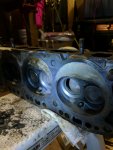
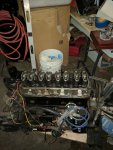
You'll remember we had rust on the 3/4 intake. So the valves had to come out. Got a spring compressor from amazon, whacked the top of the spring with a 14mm socket and a rubber mallet at least 15 times,and eventually the retainers came out! Spent an hour removing rust and we were good to go!

IMG_20170407_135849.jpg
Looks gross.

IMG_20170407_142001.jpg
Cleaned out!

IMG_20170408_112750.jpg
Mostly done scrapping the gasket off the block. Checked for level and we're good! Hardly any left so we'll scrape buff it with scotchbrite red and call it a day.

IMG_20170408_153228.jpg
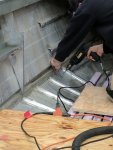
Wyatt spent all day riveting the sternmost 2 deck pieces in. We were idiots and drilled 1/4" holes thinking the epoxy would fill the gap. We'd then redrill to 3/16".

Well believe it or not! YOU CANT GET THE RIVET TO EXPAND IF THE HOLE ISN'T 3/16".

So we called an audible, drilled the remaining holes 3/16". Coated the rivet in west marine epoxy, and sunk it in. Done. If we need to pull the rivet out at a later date, then we'll drill it out regardless.

IMG_20170408_171746.jpg
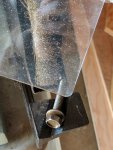
Installing the plate that watermann suggested. We used the green armrest that you can see we removed to the left of this picture. We screwed 3/16 holes, coated the entire thing in 5200, and riveted it with closed end rivets.
 

Attachments

  • IMG_20170407_132320.jpg
    IMG_20170407_132320.jpg
    241.3 KB · Views: 0
  • IMG_20170407_135849.jpg
    IMG_20170407_135849.jpg
    194.5 KB · Views: 0
  • IMG_20170407_142001.jpg
    IMG_20170407_142001.jpg
    177.8 KB · Views: 0
  • IMG_20170408_112750.jpg
    IMG_20170408_112750.jpg
    183.4 KB · Views: 0
  • IMG_20170408_153228.jpg
    IMG_20170408_153228.jpg
    169.3 KB · Views: 0
  • IMG_20170408_171746.jpg
    IMG_20170408_171746.jpg
    178.1 KB · Views: 1

Watermann

Starmada Splash of the Year 2014
Joined
Jan 12, 2013
Messages
13,790
You're making some great headway, looking like some solid work. :thumb:
 

sprintst

Commander
Joined
Apr 18, 2009
Messages
2,066
Man you guys really got after that thing. Wicked progress and it looks like the boat will stand up to whatever you will throw at it.

My wife did her masters in Portland a while back and I hung out for a week looking around during her grad. Looks like you will get your moneys worth with the Willamette right there.
 
Last edited:

italianstal27

Chief Petty Officer
Joined
Feb 18, 2017
Messages
403
More progress comrades!

IMG_20170409_193441.jpg
Engine header torqued down to 90 ft-lbs. Followed proper torquing procedure.

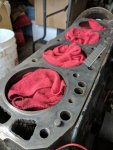
Before putting header on, we did a 5 minute wipe down of the cylinder walls with WD40 & TONS of compressed air around the rings to dislodge any aluminum oxide that may have fallen in there while scrubbing down the block with scotch-brite pads. We'll do an oil flush to try and capture any random bits that may not have been caught by the red rags in the cylinder & then eventually some sea foam.

We didn't get either the block or header "shiny", but we did get everything off and weren't able to get a piece of paper to slide under a 6" flat edge. Hoping it seals up real nice! We had a copper gasket, which I hear is better than aluminum or steel.

IMG_20170410_172435.jpg
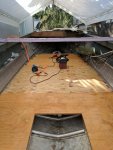
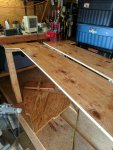
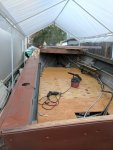
Wyatt got the 3 deck pieces riveted down after we let the epoxy + hardener (six-10 tube), cure overnight. All the deck pieces had six-10 smeared thick on the edges.

We drilled 1/4" holes in that sternmost piece thinking the epoxy would fill the holes down to a 3/16" hole. Word to the wise, use a 3/16" hole for a 3/16" rivet. Anything bigger and the rivet won't bind. We covered the rivet in epoxy before riveting it. Should form a water tight seal on the top. The harbor freight rivet gun is a god send. Don't do it by hand. They suck.

IMG_20170410_190534.jpg
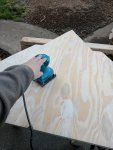
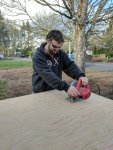
Got the bow-most piece cut last night using the old floor as a template. Low and behold, it was WAY to big. We shaved the edges 4 times, each time taking off a 1/4" and still weren't done by the time the sun set. Threw in the towel and went to Applebee's we were so frustrated. We'll tackle this piece again tonight. It needs to be flat relative to the piece behind it for future plans. We also sanded and blew the dust off with the air compressor to keep dust from compiling within the boat. Anything to keep dirt out of the water drainage holes!

Next big agenda item is rewiring the engine. Need to pick up tons of wire
-John
 

Attachments

  • IMG_20170409_193441.jpg
    IMG_20170409_193441.jpg
    180.9 KB · Views: 1
  • IMG_20170410_172435.jpg
    IMG_20170410_172435.jpg
    197.3 KB · Views: 1
  • IMG_20170410_190534.jpg
    IMG_20170410_190534.jpg
    186.3 KB · Views: 0
Last edited by a moderator:

italianstal27

Chief Petty Officer
Joined
Feb 18, 2017
Messages
403
We have a marine retailer(Gold status baby!) fairly close to our house so I'll be jetting out there today or tomorrow to snag 10' of all the colors I need, plus a decent chunk of primary black & red.

We're resoldering all the connections and cleaning the terminals. There's a decent amount of rust. And after they're tightened back down throwing some dielectric grease to prevent corrosion.
 
Last edited by a moderator:

italianstal27

Chief Petty Officer
Joined
Feb 18, 2017
Messages
403
Been a while since the last update :( Easter is suuuuper busy.
IMG_20170414_181510.jpg

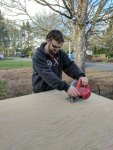
Wyatt is quite skilled with the hand tools... so he used the skill saw to cut 3/4" we're using for the sidewalls. We're doing 15" from the deck for sidewell space, and 22" to hit the top of the stern gunnel. We're planning on using this sidewall as a structural member for the gunnel.
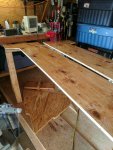
IMG_20170415_091241.jpg
At this point, we've gotten REAL good at laying down the epoxy. A word of advice, find the NICEST piece of B-C or A-B plywood you can. The knots soak up egregious amounts of epoxy, and the cost of applying epoxy on these cheaper boards is more than buying nice plywood. Also, if the plywood is bent at home depot, don't expect it to lay out flat when you get it home!
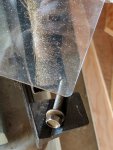
IMG_20170415_091300.jpg
To remove rust from the exhaust manifold bolts, we used a bench grinder with a 5" brass wire wheel from harbor freight. Tooks seconds to do each bolt and removed 100% of the rust. HIGHLY recommend using this for all your bolt / exterior metal needs!
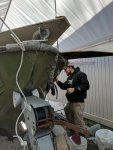
IMG_20170415_093759.jpg
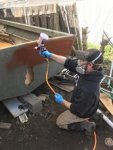
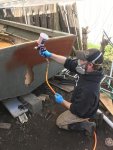
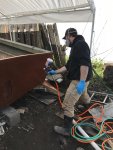
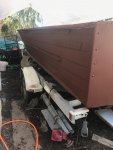
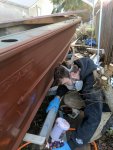
Finally had a break in the weather so we mixed a tiny bit of soap into the buckets with water, and stared scrubbing away removing all the grime from the boat! (There wasn't much). Prepping for the paint!

Once we had done a light soap + rinse, we applied 50/50 vinegar water on the exposed metal parts, waited for it to dry thoroughly, and then applied the self etching primer. $3.50 at home depot. While that dried (2 hours), Wyatt started working on the HVLP painting.

We wet sanded with 400 grit sand paper over everything, then did a quick rinse.
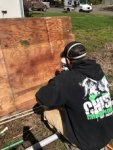
18009852_279170552529690_1521466472_n.jpg
Test board, learning how to use the gun, after we thoroughly cleaned it with mineral spirits.
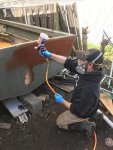

18008989_279170649196347_1258564670_n.jpg
Rustoleum rusty metal primer going on!!!!
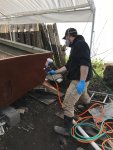
17974918_279170495863029_372527807_n.jpg
All done with the transom!

We're doing 1 coat of primer, and 2 coats of the top coat when we have a break in the weather. Looking like Friday will give us a break in the rain!
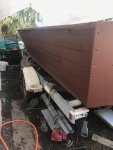
Attach21877_20170415_153131.jpg

We'll paint the black starcraft logo with our exterior green paint, and the interior will be the color of the inside of the boat. Should tie it together nicely!

Wyatt crushed it on the paint job!

-John
 

Attachments

  • IMG_20170414_181510.jpg
    IMG_20170414_181510.jpg
    266.5 KB · Views: 1
  • IMG_20170415_091241.jpg
    IMG_20170415_091241.jpg
    220.3 KB · Views: 1
  • IMG_20170415_091300.jpg
    IMG_20170415_091300.jpg
    210.7 KB · Views: 1
  • IMG_20170415_093759.jpg
    IMG_20170415_093759.jpg
    182.1 KB · Views: 1
  • 18009852_279170552529690_1521466472_n.jpg
    18009852_279170552529690_1521466472_n.jpg
    21 KB · Views: 1
  • 18008989_279170649196347_1258564670_n.jpg
    18008989_279170649196347_1258564670_n.jpg
    18.7 KB · Views: 1
  • 18008989_279170649196347_1258564670_n.jpg
    18008989_279170649196347_1258564670_n.jpg
    105.3 KB · Views: 1
  • 17974918_279170495863029_372527807_n.jpg
    17974918_279170495863029_372527807_n.jpg
    107.2 KB · Views: 1
  • Attach21877_20170415_153131.jpg
    Attach21877_20170415_153131.jpg
    168.2 KB · Views: 2

Woodonglass

Supreme Mariner
Joined
Dec 29, 2009
Messages
25,927
Uhmm, it's always highly recommended to apply self etching primer on aluminum to guarantee proper paint adhesion. It's also recommended to wipe down the Hull with a mild acidic solution (vinegar and water) prior to applying the SE Primer.
 

italianstal27

Chief Petty Officer
Joined
Feb 18, 2017
Messages
403
We have 2 days this weekend of no rain and temps hitting 70F, so these next couple days are a whirlwind of paint prep!

Does anyone have experience rolling Rustoleum metal primer onto epoxy on the deck? How well does it hold up? We're planning on using sand to give it some traction.

Top coat will be polyurethane for UV protection
 

Woodonglass

Supreme Mariner
Joined
Dec 29, 2009
Messages
25,927
My Bad!!!! These Old eyes don't catch as much as they used to!!!! Carry On!!!!:facepalm:
 

italianstal27

Chief Petty Officer
Joined
Feb 18, 2017
Messages
403
Progress. Here's a list of what we're going to accomplish the next 7 days:
  1. Peanut butter edges of bowmost piece and sidewall trough. (Tuesday)
  2. Second coat of primer (Tuesday)
  3. Buy Mason Sand. (Tuesday)
  4. Sand interior sidewells with 400 grit. (Tuesday)
  5. Styrofoam 2 1" pieces from home depot (Tuesday).
  6. Finish sanding interior sidewells with 400 grit. (Wednesday)
  7. Remove Amine Blush on Bow + sidewall (Wednesday)
  8. Remove amine blush on deck (Wednesday)
  9. Clean grit of sanding off sidewell (Wednesday)
  10. Sand sidewalls + bow piece with 220 grit (Wednesday)
  11. Sand interior of boat decking with 220 grit. Vacuum + acetone with rags to remove debris.(Thursday)
  12. Sand outside of boat with wet 400 grit (Thursday). Is this necessary?
  13. Light rinse on outside of boat to remove sanding debris (Thursday).
  14. Paint front of boat (Thursday night).
  15. Spray top coat on outside of boat (Friday morning).
  16. Roll primer on interior + mason sand (Saturday afternoon)
  17. Spray 2nd top coat on outside of boat (Saturday afternoon)
  18. Roll primer + mason sand on sidewalls outside of boat. (saturday afternoon).
  19. Roll primer + mason sand on tops of gunnels (Saturday afternoon)
  20. Vacuum sand up (Monday afternoon).
  21. Paint rest of sidewall with primer. (Monday afternoon)
 

italianstal27

Chief Petty Officer
Joined
Feb 18, 2017
Messages
403
Tonight we made more progress than we thought we would!

IMG_20170418_190214.jpg
Second coat of primer going on. No rain today, and the temp was 63F, so we decided to go for it. Temp will hit 45F tonight, but hey what's a couple degrees below 50F.

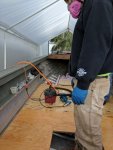
Safety first!

IMG_20170418_191349.jpg
Also sprayed a layer on top of the gunnel. We had wet sanded this with 400 grit 2 days earlier, so we went for it. We're going to sand down this layer HARD before rolling on more primer with sand in it. The gunnels are going to have some grip. Mostly to hide the jb weld patches we threw down on the massive holes.

IMG_20170418_201351.jpg
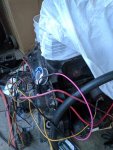
First wires getting soldered together. I'm using pink/yellow for signal. Red/Black for power.

The wires are heavily corroded and the flux isn't helping. So I'm going to try soaking the wire in vinegar to remove the oxide, and then quickly dunk in baking soda to prevent more oxidation. We'll see if that allows the solder to stick better.

The terminal kit I bought didn't come with 3/8" ring terminals, so back to amazon we went for more connectors. Unfortunately, all of them had insulation on them, so that's what we'll have to use.

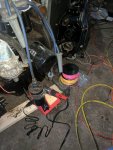
IMG_20170418_201356.jpg
Humble soldering station while we fix the wires on the engine. All the terminals are heavily corroded. Ignition coil needs replacement, as does the main solenoid.

18034598_955091412643_1367308812_n.jpg
We got peanut butter on the sidewall edges + the remaining bow piece! So we're going to let that dry with a 1100 watt fan heater in the garage tonight. By tomorrow PM, it should be done curing and ready for sanding! Completely encapsulated in epoxy.

18034861_955090968533_1835849945_n.jpg

Tomorrow has some big ticket items. Lots and lots of work going into the boat!
-John
 

Attachments

  • IMG_20170418_190214.jpg
    IMG_20170418_190214.jpg
    149.8 KB · Views: 1
  • IMG_20170418_191349.jpg
    IMG_20170418_191349.jpg
    131.5 KB · Views: 1
  • IMG_20170418_201351.jpg
    IMG_20170418_201351.jpg
    159.3 KB · Views: 1
  • IMG_20170418_201356.jpg
    IMG_20170418_201356.jpg
    180.1 KB · Views: 0
  • 18034598_955091412643_1367308812_n.jpg
    18034598_955091412643_1367308812_n.jpg
    79.8 KB · Views: 0
  • 18034861_955090968533_1835849945_n.jpg
    18034861_955090968533_1835849945_n.jpg
    66.5 KB · Views: 0

Watermann
Starmada Splash of the Year 2014
Joined
Jan 12, 2013
Messages
13,790
I haven't rolled on primer with sand in it but I did roll the entire top side of my SS with Epifanies poly beads mixed in the paint and catalyst hardener. I don't know about deck surface being paint and how long that will hold up.

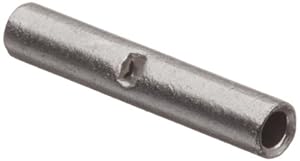
I used non insulated heavy duty appliance butt splices and terminals on my motor along with epoxy lined shrink tube.

31pZuhAVtTL._SX300_.jpg
 

italianstal27

Chief Petty Officer
Joined
Feb 18, 2017
Messages
403
So as we prep for this final outside paint job, do you sand the primer before spraying the paint?

What's the purpose of sanding? Is it for the finish look or paint adhesion? Our paint is matte so we don't care about the shiny look, just that it adheres well :)
 
Top