'76 Holiday i/o 18' Fishing Rebuild (pic heavy!)

Watermann

Starmada Splash of the Year 2014
Joined
Jan 12, 2013
Messages
13,798
I hate sanding but if you wait days between primer and paint then you have to sand as the primer is cured and the top coat won't want to adhere as well.

Usually on my paint jobs the entire boat is painted from the SE primer, regular primer to 2 top coats all in one long day so when the tape is pulled the doors are shut and I don't go back in until the next day.
 

italianstal27

Chief Petty Officer
Joined
Feb 18, 2017
Messages
403
Oh that's interesting... Our primer and top coat both say to wait 24 hours between coats! But i suppose that's mostly dependent on temperature eh?
 

Watermann

Starmada Splash of the Year 2014
Joined
Jan 12, 2013
Messages
13,798
Yeah temps play a big part but the most I wait between coats when painting between 70 - 80 degrees is 2 hours. You can follow the instructions on your paint can, not sure what paint your using but most guys around here use oil based alkyd enamel on our tin tubs. Some guys have used car paint lacquer or acrylic paint.

The only thing I read on the can is what reducer to use and how much, usually 8 - 1 ratio and then 16 - 1 for catalyst hardener is most common. If your primer is still gassing out and not cured then I would shoot it without sanding. I think that rusty metal primer is oil based, I used it on my trailer and it does go on real nice.

Trying to sand primer on a boat full of rivets will make you go nuts, I say hit it with paint if it's been cool there the primer won't be cured and the top coat will melt in.
 

italianstal27

Chief Petty Officer
Joined
Feb 18, 2017
Messages
403
WOG's recommended Majic paint haha. We ordered the primer, but it was cracked on arrival. So we ended up using rustoleum rusty metal primer and Majic camoflauge paint. We may have extra time tonight to scuff it with 400 grit before we spray in the morning.

-John
 

Woodonglass

Supreme Mariner
Joined
Dec 29, 2009
Messages
25,928
Primer only needs to dry for about an 2 hours between coats if temps are in the 60's I'd recommend sanding with 220 after the final coat of primer. The hardener in the color coats enhances cure time sooo you can wet sand and apply the second coat in about 4 hours. Sanding puts miniscule scratches in the primer which allows the color coat to get a better "Bite". Wet sand between the color coats with 320 grit. wipe Down with a 50/50 mix of Mineral Spirits and Acetone. With the gun and tip you're using I'd recommend at least 20% thinner for the color coats.
 

italianstal27

Chief Petty Officer
Joined
Feb 18, 2017
Messages
403
Ah we're not mixing hardener! We need the matte finish color for duck hunting. But a quick sand with 220 doesn't sound overly difficult.

So Friday with a high of 70 and no rain, we're thinking spray 7am in the morning, then come back around 3PM to spray the second coat.

-John
 

Woodonglass

Supreme Mariner
Joined
Dec 29, 2009
Messages
25,928
If you're NOT using the hardener then drying time is more like a 7-10 days before wet sanding and the next coat. Heat lamps could/would speed up the process.
 

Watermann

Starmada Splash of the Year 2014
Joined
Jan 12, 2013
Messages
13,798
Yeap and I've seen guys a week later saying that the paint is still soft and will come off with a fingernail. Catalyst hardener and wet on wet is the only way to go, well for me at least... I hate sanding and riveted boats it's extremely tough.
 

italianstal27

Chief Petty Officer
Joined
Feb 18, 2017
Messages
403
Well sorry about this guys... We felt like we ready EVERY paint thread on here but didn't realize it took 7-10 days without hardener.

In Oregon's climate right now, with temps dropping to high thirties at night sometimes & upwards of 80% humidity, it will take the full 10 days. Heck, it's even possible that with temps fluctuating between 70 and 38, that the paint might not cure properly outside WITHOUT the hardener.

So my question for people who've sprayed their top coat with Hardener:
1) How did you mitigate the isocyanate risk? VOC cartridges aren't rated to block isocyanates.
2) How much gloss does hardener add to a matte paint?

Sorry for bugging everyone :( #AmateurHour
 

jbcurt00

Moderator
Staff member
Joined
Oct 25, 2011
Messages
25,063
The hardener makes the paint cure glossier, so, IMO, it shouldnt make matte finish glossy, but somewhere between matte and semi-gloss.

I used hardener on gloss white and its BRIGHT white and GLOSSY
 

Watermann

Starmada Splash of the Year 2014
Joined
Jan 12, 2013
Messages
13,798
Aren't you painting outdoors? Should be plenty of fresh air mixing. May not want to do it every day for a year.

Hardener won't make matte turn to gloss. I rolled on gloss paint mixed with poly beads and hardener. The mixture looks great and came out satin at best.
 

Woodonglass

Supreme Mariner
Joined
Dec 29, 2009
Messages
25,928
The amount of the BAD stuff you'd have to inhale is pretty significant and in your painting conditions I'd say you don't have much to be concerned about. As stated the Hardener should effect the paint minimally as to glossiness. If you haven't applied any color coats yet. I'd for sure add some hardener and shoot the transom and see what you get. If you HAVE applied paint without hardener it will need to be sanded really well before shooting the paint with hardener to ensure proper adhesion.
 

italianstal27

Chief Petty Officer
Joined
Feb 18, 2017
Messages
403
IMG_20170421_204132.jpg
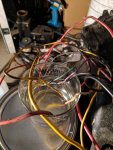
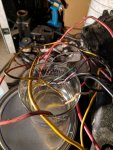
Little bit of a science experiment going on last night... The copper wire was badly corroded (like black), so I took some vinegar, filled a jar, and dropped the stripped wire into it. Left it overnight (way overkill), and came back the next morning. Used a brass brush and got the copper shine back!

Solder wicked in perfectly.
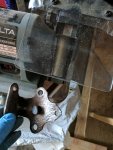
IMG_20170422_142421.jpg
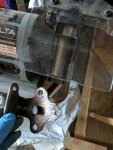
Slave solenoid is grounded through this metal attachment, so to the brass wire wheel it went. If you're thinking of doing a restoration, a bench grinder is 100% necessary to clean up the smaller components.
IMG_20170422_162409.jpg
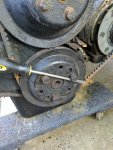
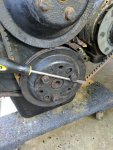
Because we got the header back on, next step was manually cranking the engine over to find top dead center. Cylinder 1 is the cylinder closest to the pulleys. You want to crank clockwise, but to get this picture i have the screwdriver setup in reverse. I backed the bolts out to turn it around.

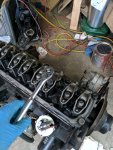
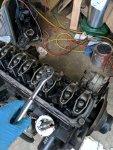
Once we found TDC, we started the process of lashing the valves. Tons of videos on youtube on how to do it. Doing it the first time, took 20 minutes. Rest of my life? way less!
IMG_20170422_195932.jpg

Tightening down the nuts. Next step is getting the rotor in the right position of the distributor.
IMG_20170423_081326.jpg
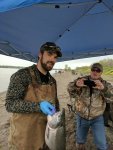
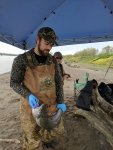
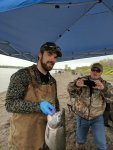
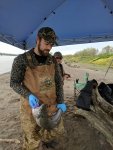
And today we took a break from the boat rebuild to go fishing. Wyatt caught a springer today! 11 pounder :D. These Spring Chinook are absolutely delicious. Some of the best Salmon meat I've ever had in my life.
IMG_20170423_081323.jpg

Can't wait until we can do this in a boat!!!!!!!!!!!!!!!!!!!
 

Attachments

  • IMG_20170421_204132.jpg
    IMG_20170421_204132.jpg
    159.3 KB · Views: 0
  • IMG_20170422_142421.jpg
    IMG_20170422_142421.jpg
    137.2 KB · Views: 0
  • IMG_20170422_162409.jpg
    IMG_20170422_162409.jpg
    179.1 KB · Views: 0
  • IMG_20170422_195932.jpg
    IMG_20170422_195932.jpg
    175 KB · Views: 0
  • IMG_20170423_081326.jpg
    IMG_20170423_081326.jpg
    145.7 KB · Views: 0
  • IMG_20170423_081323.jpg
    IMG_20170423_081323.jpg
    157.9 KB · Views: 0

italianstal27

Chief Petty Officer
Joined
Feb 18, 2017
Messages
403
Good news, found top dead center on the engine today & cleaned the pulley wheels with a wire brush and a drill. Will spray the inside of the pulley's with the high temp black paint we bought for the engine and call it a day.

Next is getting a new distributor cap + rotor. Ours had corrosion on the #3 cylinder, which could have contributed to our inability to run below 1100 rpm.

New spark plugs are getting installed as well.

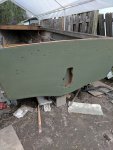
Tomorrow morning, boat is getting sanded with 600 grit sand paper over the red primer, and then the first coat of paint goes on!!!!!!! We'll spray in the morning, and then spray again in the afternoon after it's had a chance to dry.
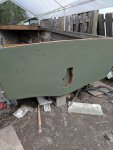
We bought the Valspar hardener as there wasn't anywhere to buy the majic hardener. But both are for alkyd enamel paints so we're good there.

tomorrow distributor cap goes on + exhaust manifold, carb, ignition coil,etc. and then we are off to the races! Still need to figure out how to hook up a garden hose to the engine.

We also need to buy new hoses. Ours were molded :(

Will continue to keep y'all posted!
-John
 

Watermann

Starmada Splash of the Year 2014
Joined
Jan 12, 2013
Messages
13,798
Nice springers you got hold of there, they're the best eating for sure.

Take a look at this short video of a guy running his 4 banger on a stand with the garden hose attached. One thing I would suggest not doing is to use your portable fuel tank as a battery stand. :lol:


someone11

Petty Officer 1st Class
Joined
May 2, 2009
Messages
296
You guys should try atlantic salmon! Better than any chinook ive had. :thumb:
 

italianstal27

Chief Petty Officer
Joined
Feb 18, 2017
Messages
403
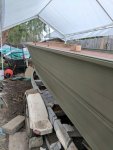
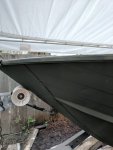
Wyatt shot the paint this weekend while I was at a wedding with the hardener!! Paint looks good, but man that paint smells BAD. So glad we were wearing respirators because that stuff is nasty.
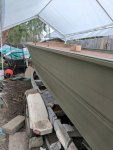
IMG_20170429_143742.jpg
IMG_20170429_143749.jpg
IMG_20170501_113612.jpg

The hardener did not make the paint shiny either!
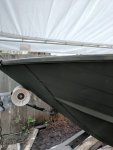
Still a little soft to the touch, so we're gonna wait a week to see if it'll harden up more. You can scrape the paint with your fingernail.

Now the sad news :(

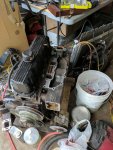
Putting the engine back together we were missing a gasket for where the carb attaches to the exhaust manifold. Turns out the exhaust manifold is from a Mercruiser 120, NOT a 140. So now we're trying to figure out what engine we really have.

IMG_20170430_131200.jpg

Serial number is 2769040, which doesn't help determine what's what. Posted a thread on the engine forum to possibly get some help on figuring out if this really is a 120. If so that really sucks because we already replaced the headgasket with a 140 kit.

-John
 

Attachments

  • IMG_20170429_143742.jpg
    IMG_20170429_143742.jpg
    154.7 KB · Views: 1
  • IMG_20170429_143749.jpg
    IMG_20170429_143749.jpg
    142.3 KB · Views: 0
  • IMG_20170501_113612.jpg
    IMG_20170501_113612.jpg
    120.3 KB · Views: 1

jbcurt00

Moderator
Staff member
Joined
Oct 25, 2011
Messages
25,063
Any warm sunny days in the next 7 - 10 days?

May need to get it out from under the tent into the sun to aid in curing. Hardener should help, but if its been cold overnight, it may be dry, but not yet cured.

Some have reported 15-30 days+, when no hardener was used, even in warm temps to 'cure' oil based enamel on a tin boat. And its not been warm 24hrs/day for days at a time since you painted....

Good luck w the manifolds, gaskets and 120 Vs 140....
 
Top