72 Thunderbird Formula w/twin 165hp Mercs

Mark72233

Ensign
Joined
Jul 11, 2014
Messages
926
That didn't work just a link to photobucket with a picture. Any help out there for loading videos.
 

sphelps

Supreme Mariner
Joined
Nov 16, 2011
Messages
11,462
This might work . Just click the IMG tag like normal then paste ..
 
Last edited:

Mark72233

Ensign
Joined
Jul 11, 2014
Messages
926
It was still running a little rough I needed to adjust the valves a little more. The water pump was leaking and so was the back up so I had to take the pump off the other engine. The fuel pump is also leaking and so was the spare. So I have 2 fuel pumps to rebuild also. I also got both of my trim pumps hooked up and working that was a day of chasing down a leaking fluid tank, broken high pressure line.
 

sphelps

Supreme Mariner
Joined
Nov 16, 2011
Messages
11,462
You just post it as you would a still shot pic from your p/b .. Click the IMG tag on the right sidebar . after it flashes yellow copied then you can right click and paste into your post .. The only bad thing about posting vids from your p/b account is it uses your band width up faster .. Thats why I started just putting vids on youtube instead ..
 

nurseman

Lieutenant Junior Grade
Joined
Jun 2, 2013
Messages
1,045
sounds real nice Mark! My dad had a Ford industrial I-6 that he used for an irrigation pump power unit. Hearing your I-6 brought back some nice memories of summer as a kid! Those six's sound really distinctive when they are running under load with just a straight pipe!!
 

Mark72233

Ensign
Joined
Jul 11, 2014
Messages
926
For the electricians out there or for that matter anyone that knows. I need a diagram of a 2 engine, 2 battery system and the components I should purchase to make it happen. I have the boat, the 2 batteries and the 2 engines :joyous::confused::facepalm:
 

Woodonglass

Supreme Mariner
Joined
Dec 29, 2009
Messages
25,927
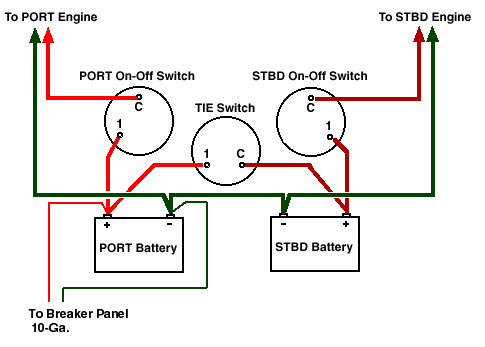
Not sure if this is what you're looking for but... Here's it is for what it's worth...
wiringAlternate485x347.gif


and some info on the installation...


http://continuouswave.com/whaler/ref...alBattery.html

Just an Old Dumb Okie Googlin!!!!
 
Last edited:

alldodge

Moderator
Staff member
Joined
Mar 8, 2009
Messages
42,079
Depends on what you want to use and how easy you would like it to work. Your options are:

Do you want a separate house battery for electronics?

One battery for each engine or just one start and one house
Onboard battery charger or just Alternator
Want to manually switch between one battery to combine another or push a button and electrically do it
Automatic Charge Relays or simple Isolator?
Have several options just how far do you want to go
 

tpenfield

Moderator
Staff member
Joined
Jul 18, 2011
Messages
18,044
I have 2 engines and 2 batteries . . . only 1 switch. It is a perko switch with 4 positions . . . Off, #1, Both, #2.
 

Mark72233

Ensign
Joined
Jul 11, 2014
Messages
926
I don't think I need a seperate house battery. I only have the standard gauges, VHF, Humminbird Helix 5 Si, music radio, maybe a few courtesy lights, a couple lights in the cabin, later probably a live well. Ok maybe I need a house battery. How about one battery to start both engines with the ability to tap into the second battery for starting if the first goes dead or has an issue. One engine could charge first battery, second engine can charge second battery.
 

archbuilder

Vice Admiral
Joined
Sep 12, 2009
Messages
5,697
I need a diagram :bounce:I suddenly feel dizzy....but wiring seems to do that to me lol!
 

alldodge

Moderator
Staff member
Joined
Mar 8, 2009
Messages
42,079
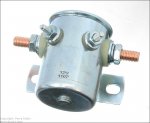
Then the one WOG posted will work. It uses a manual switch to put the two together when needed. The combining switch can also be done using a solenoid so you can just push a button at the helm.


Solenoid.jpg

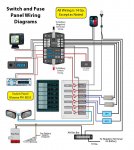
Run the house wiring off one of the batteries using the 10 AWG wire (shown).
Gen Wiring Diagram.jpg
 

Mark72233

Ensign
Joined
Jul 11, 2014
Messages
926
AllDodge look at you go with that diagram, that's awesome. Pictures and everything and I did forget my 2 bilge pumps and bilge blower also. That will certainly get me close enough to figure it out from there and like I told you guys earlier I am a pictures kind of guy :eek:
 

Mark72233

Ensign
Joined
Jul 11, 2014
Messages
926
Ok, since I only have 16 Ga tinned wire I ordered the 10 ga, 12ga and 14ga. I also ordered 10 gang bus bar, a Bluesea fuse block 12 circuits, a 12v dual car cigarette lighter socket wit 2 USB ports and I already have 2 nice switch panels that my dad bought new 15 years ago that are still like new so saved some cash there. So once that all comes in I will be ready to do some wiring. Thanks again for the diagram and advise on what I needed.
 

Mark72233

Ensign
Joined
Jul 11, 2014
Messages
926
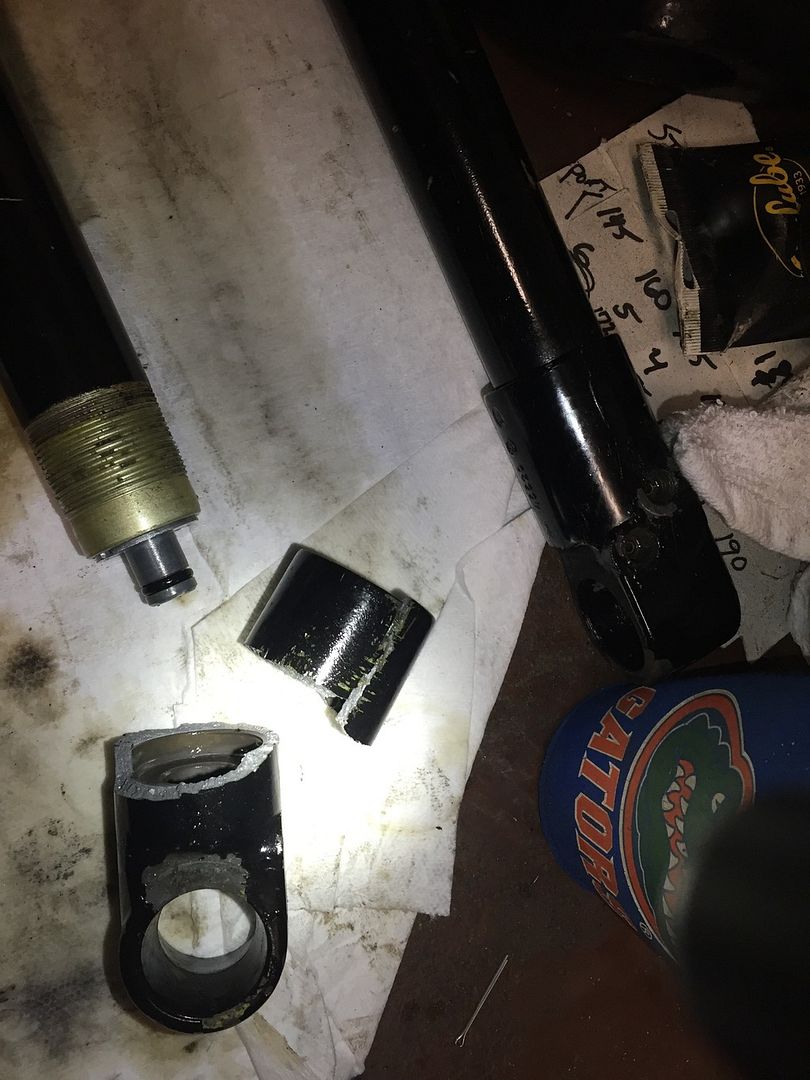
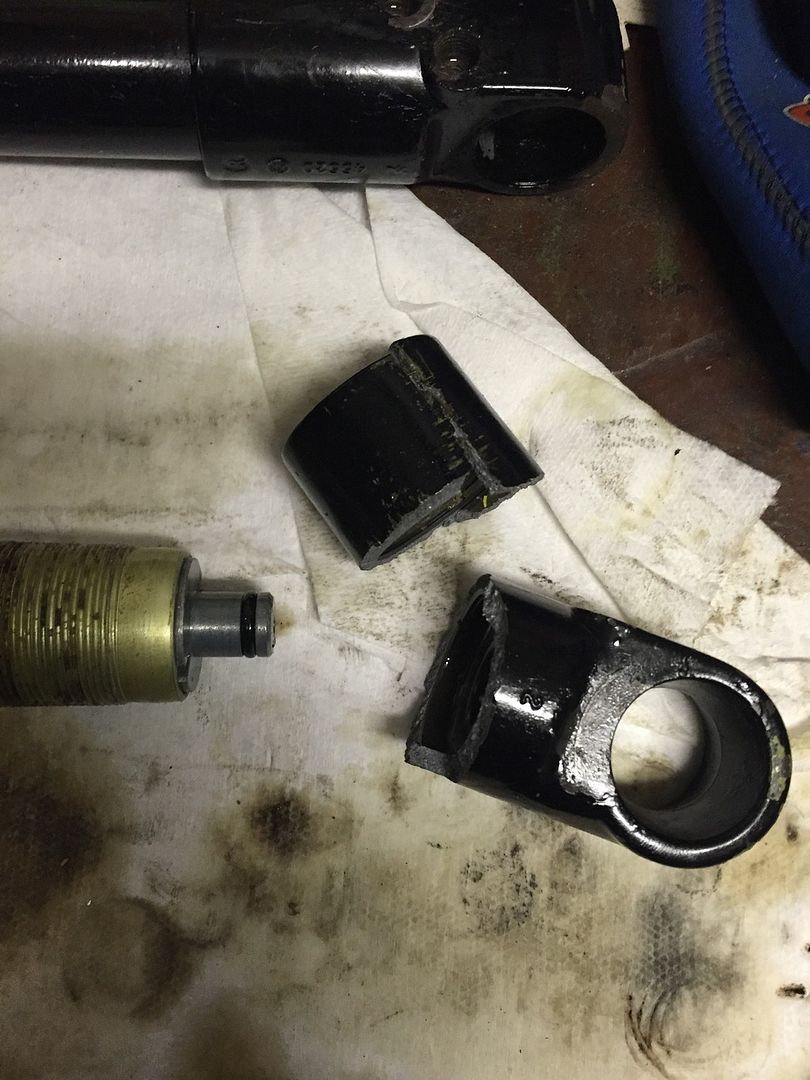
Well I am still out here working on this money pit:baby:. I have been buying a lot of items getting ready to at least get most of my shopping done. Real close to putting the engines back in. Still having trouble with the hydraulics associated with both of the trim units. Leaking tanks, blown hoses, locked up rams, the fun just keeps multiplying which is what I get for trying to use as many of the old parts as I can:facepalm:. I finally just decided to buy 2 new hoses and be done with it. All the parts came in so Sunday I worked on that. Starboard engine first. Pulled the small manifold off of the bottom of the transom gimbal housing which is held on by 2 nuts. This area is important because it is below the water line so of course you don't want it leaking. I bought a new gasket also. I replaced the old line with the new line and cleaned off the old gasket that's been there for all of 2 months. Put everything in place and started to tighten the 2 nuts and the front one torqued down just fine but the back one didn't. It felt as if it was striped so I unscrewed it and inspected it but the stud and the nut are fine so I pulled the manifold back off and noticed the stud has pulled out of the bottom of the housing, awesome. I screwed it back in and it seems to have a few good threads left so I pulled it out, cleaned it up and put it back in seated in some Marine JB Weld, I am hoping the holds. I haven't messed with it since so today when I get home I will put it all back and tighten down the nuts and we will see. So on to the Port side. Long story shortened down everything went back great no issues. Fired up the pump to run the rams back in and out and few times and of course they wont run in and out smooth or all the way. While I was running them out the left side high pressure side line outside the transom hooked to the back of the ram blows. No big deal I have about 6 extra ones. Replaced the line, cleaned up the mess and filled the tank back up. Lets try that again. Run them out again but again they only move an inch or two and then stop. So I keep running pressure to it and that's when I find out, bad idea. Pow the back of the right side ram grenades spraying oil every where and shooting the entire ram into the garage:eek::faint2:. Did some research later and found out the pump produces 600 PSI as the rams are pulled in and 2600 PSI when the rams are pushed out. Lesson learned.


Well now I have rebuild kits coming and I can learn how to rebuild rams.
 

Mark72233

Ensign
Joined
Jul 11, 2014
Messages
926
Here is my shopping list for the past 60 days.
50 feet of 16AWG tinned wire in Red, Blk & Brown. 25 feet of 16AWG tinned wire in Gray and Purple.
1 Engine rebuild kit including pistons .030 over
1 set of Hydraulic lifters
2 sets of spark plug wires
1 Power steering fluid cooler
2 Cole Hersee 3 position ignition switches
2 in line fuel cut off valves
1 3/8" Barbed "T" for fuel line
1 3/8" Barbed fuel line fitting
1 Mercruiser used trim manifold with 2 lines attached, turns out they are the wrong size so they are on eBay again for sale
2 Fuel pump diaphragm kits
1 Sierra Exhaust Manifold
25' of 3/8 fuel line
1 LED Anchor light
8 stainless steel rod holders
2 water pumps
2 Pertronix ignitor and coil , which so far they are working great
1 5000 lb electric winch for the trailer
2 starters
2 Captains chairs with adjustable seat bases. They are nice. they spin 360*, go up or down 12"-18" and slide back to front
10' of bilge blower hose
1 4" Rule in line bilge blower
2 hydraulic lines
1 Humminbird Helix 5 SI with GPS
1 LED round stern light
1 Blue Sea Fuse Block 5026 ST Blade 12 Circuits ground bus with cover
1 Seachoice Terminal block 10 Gang
12 feet of Black 12AWG tinned wire
25 feet of red 12AWG tinned wire
50 feet of black & Red 10 AWG tinned wire
50 feet of black & red 14 AWG tinned wire
25 feet of green 14 awg tinned wire
1 12V dual cigarette lighter socket, dual USB port plug and volt meter
4 13" trailer tires
30' of protective wire shield
1 Block of 20 LED water proof lights for courtesy lights
1 roll of neoprene rubber 1/16" thick, 12" by 10'
1 box of 180 pcs of electrical water proof terminals
2 group 27 battery boxes
1 Blue Sea 6007 Dual battery switch selector
25 pcs cushioned 3/4" stainless steel mounting loop clamps
1 pack of 20 lug nuts
1 Mercruiser twin engine tie bar steering linkage
1 13 1/2" 5 spoke destroyer style stainless steel steering wheel with the suicide knob
more than a dozen miscellaneous engine parts from Mercruiser
2 trim ram overhaul kits
1 19' 9 pin engine harness, one of my old ones was fried and the plug on the engine side is falling apart
1 12v dual usb port for the cabin
1 tube of Mercury marine 2-4-C marine grease
1 NOS rebuild kit for trim rams
1 new Bimini top fro iBoats


I will add this stuff to all the other items I have purchased since I started this project in July 2014. I am never getting done with this boat am I?
 
Top