66 Starcraft Sunchief re-Build

Status
Not open for further replies.

North Beach

Commander
Joined
Sep 29, 2008
Messages
2,022
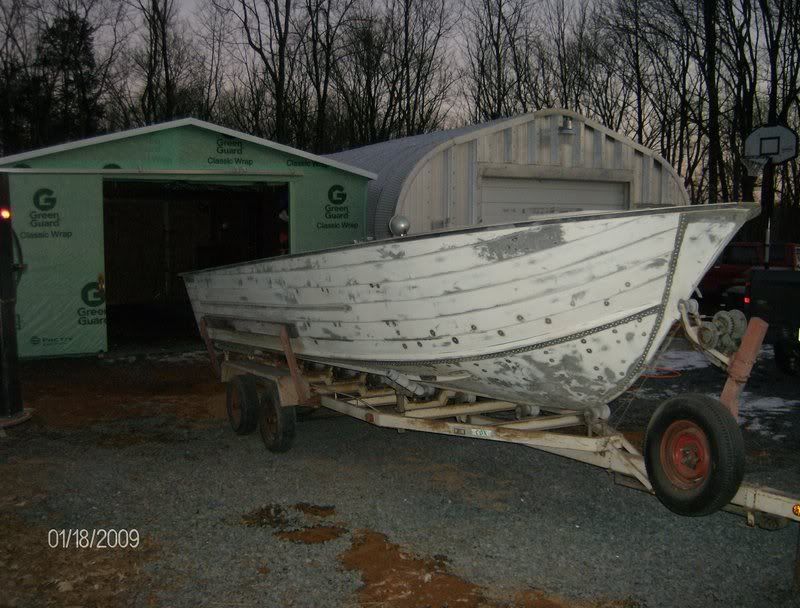
This will be my first attempt at restoring an old boat, so I thought I?d do a build along. That way, in exchange for providing you folks a little humor (inevitable due to my inexperience), I can ask a bunch of redundant silly questions!

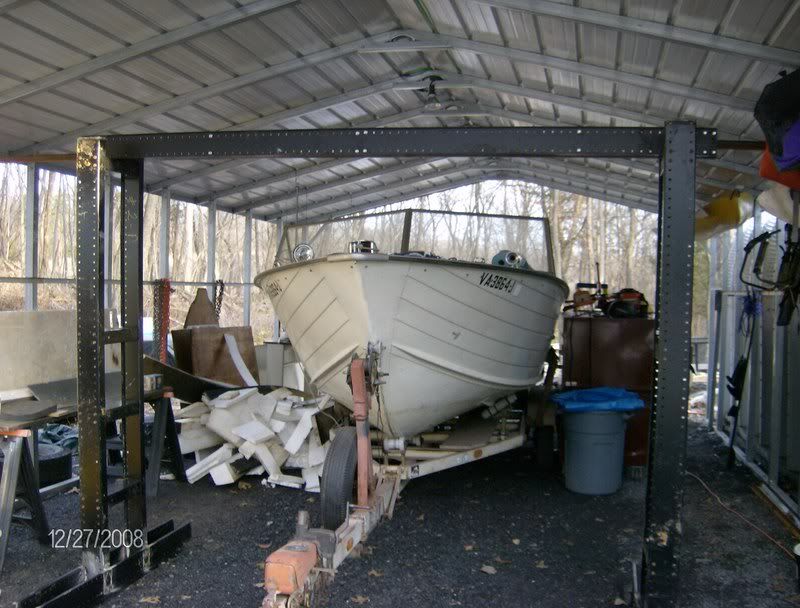
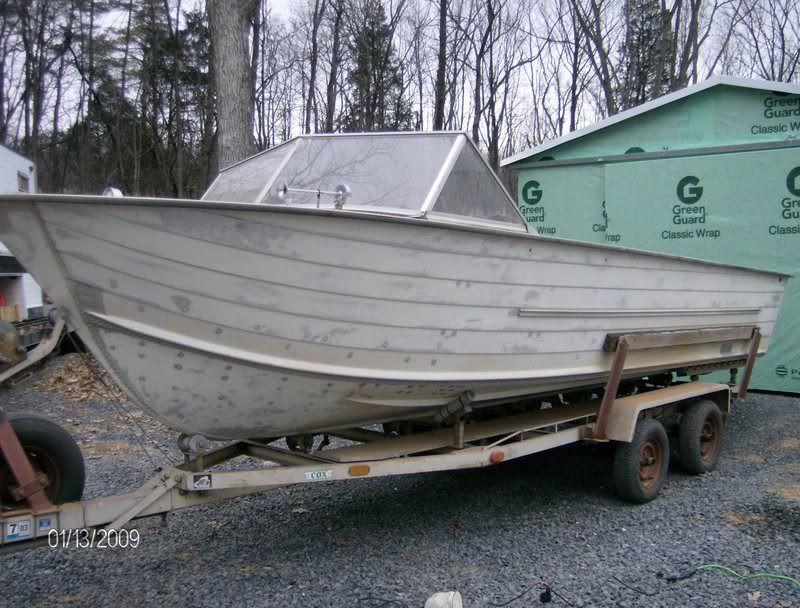
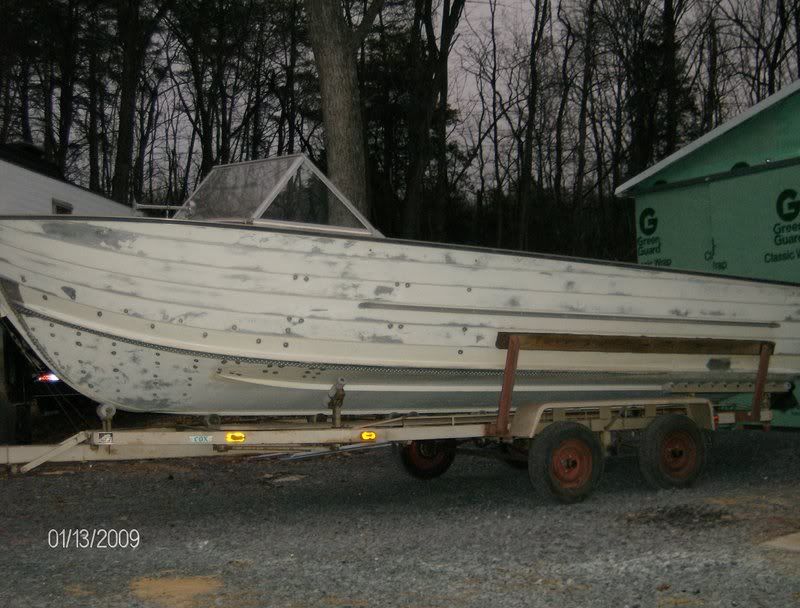
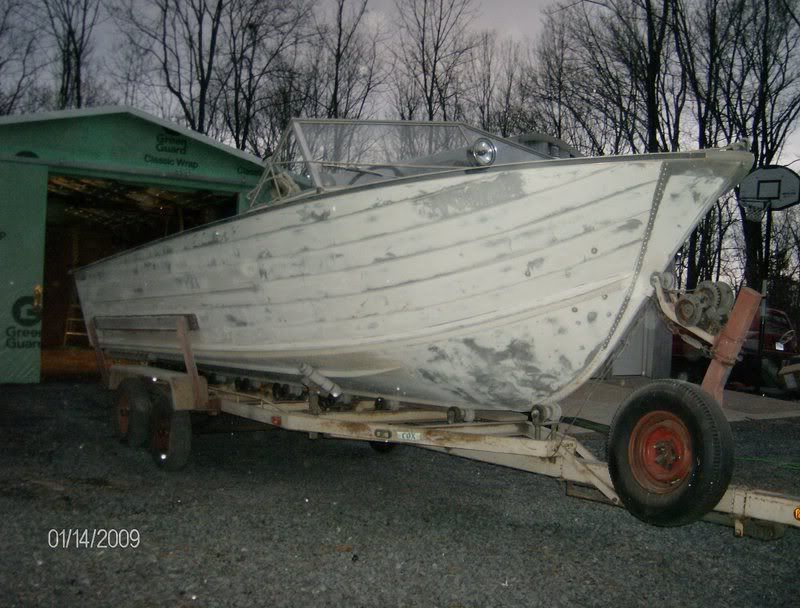
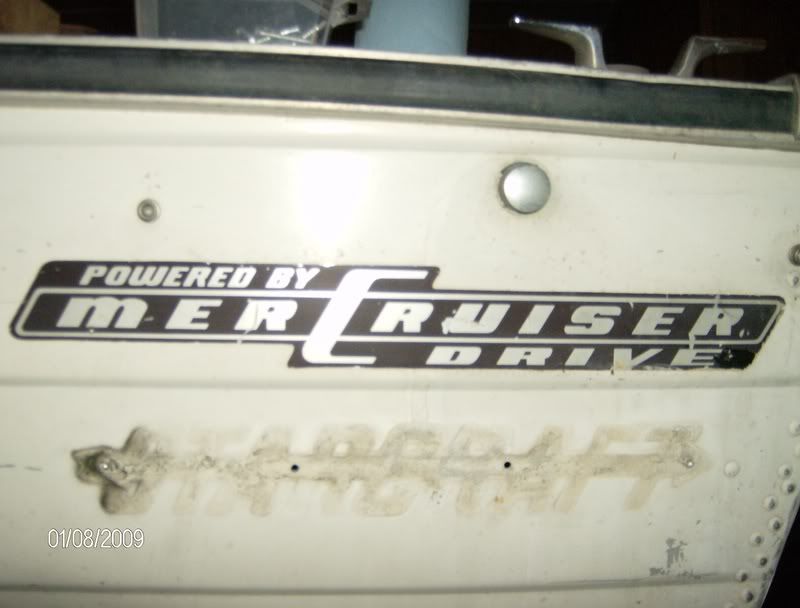
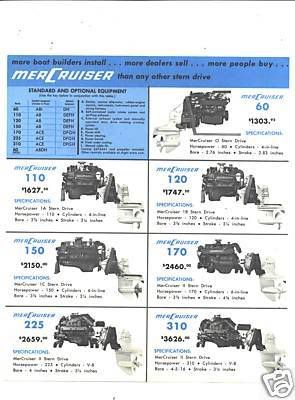
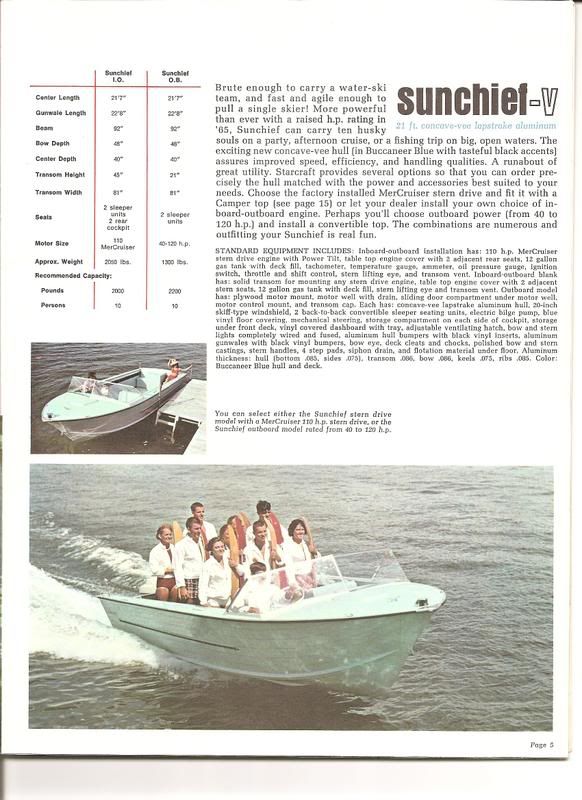
The boat is a 66 Starcraft Sunchief. It?s 21?7? long and came with the 110 HP Mercruiser Sterndrive option.

The motor had a head job in 83 and a full engine rebuild to 040 over in 84. When not in use, it was parked in a carport. She hasn?t been in the water since 02 when she was winterized and parked in a garage. I bought her from my brother a couple of months ago and I?m ready to try and bring her back to original condition with exceptions being some small cosmetic upgrades.

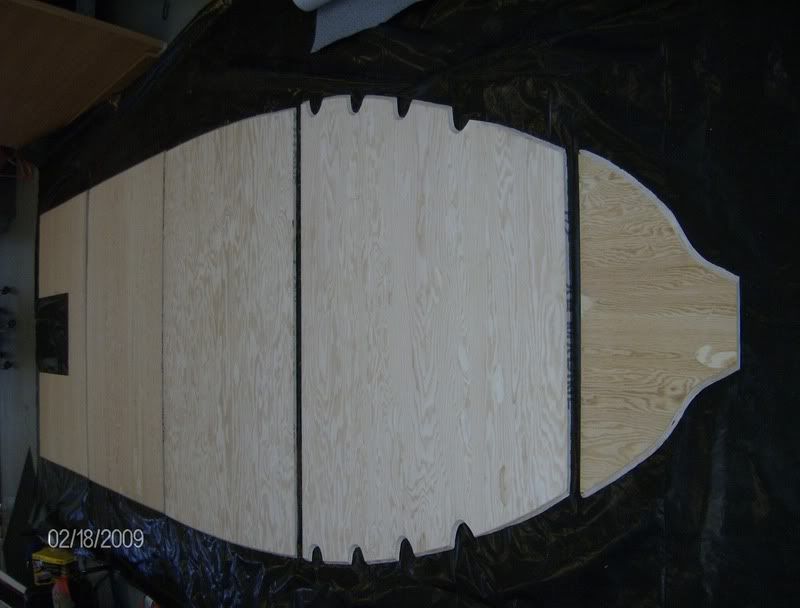
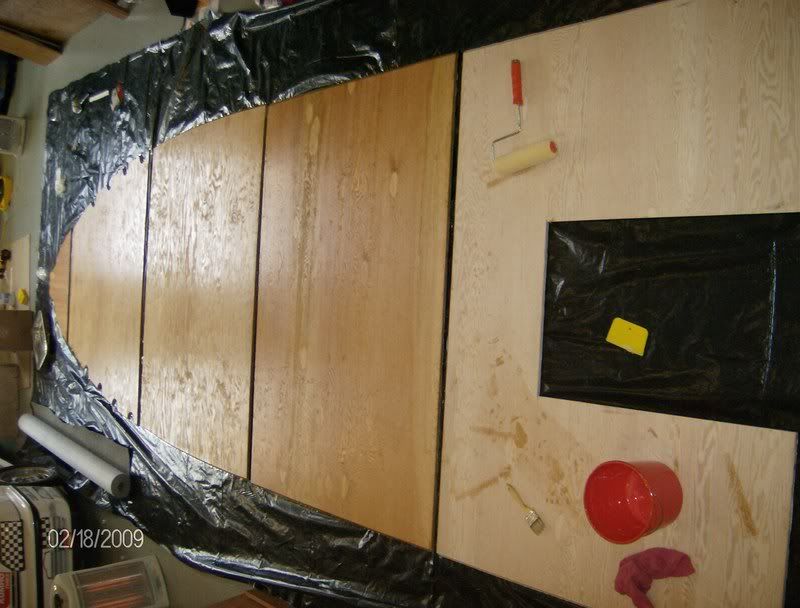
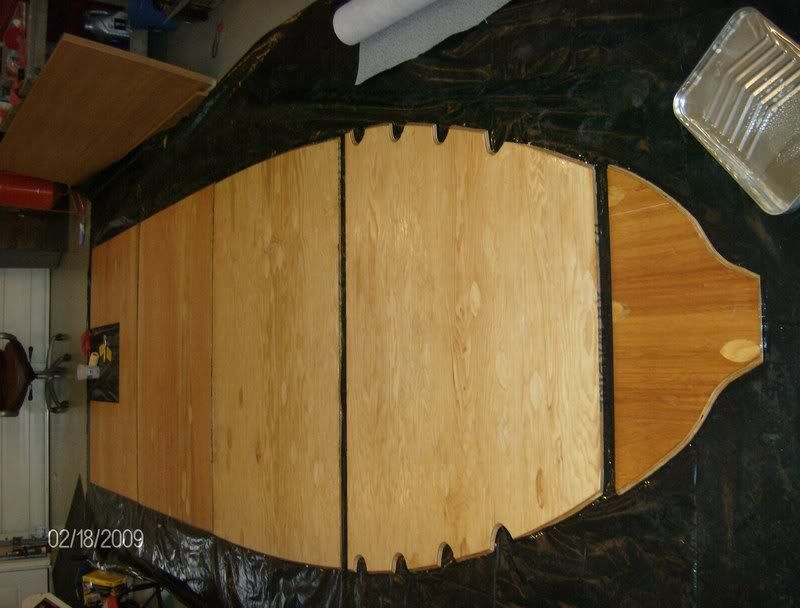
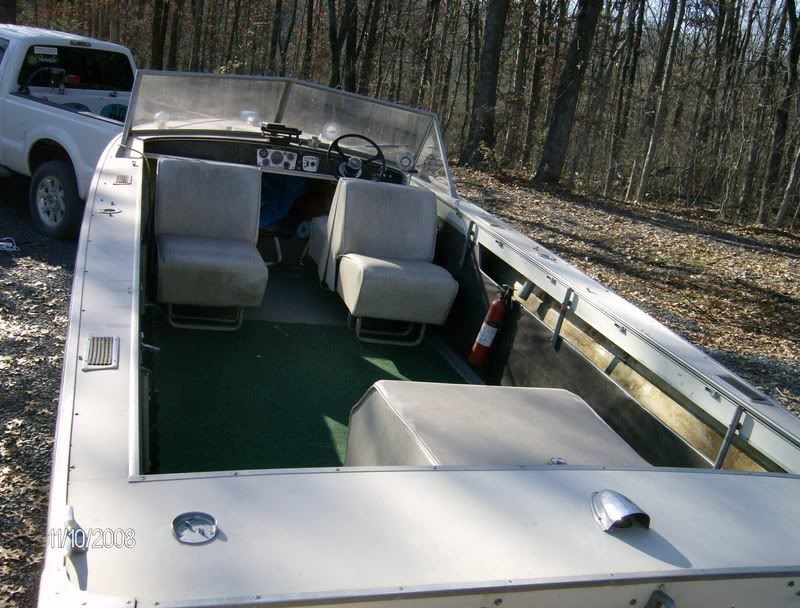
The plan is to re-do the floor and flotation, new paint top & bottom, complete re-wire, re-upholster the seats, new fabric in the cubby hole area on each side (haven?t figured out the term for that area) new finished wood side panels and dash in lieu of the fabric covered stuff, and new marine vinyl in lieu of the deck rotting carpet, new gauges & steering wheel.

TinCan.jpg


TinCan4.jpg


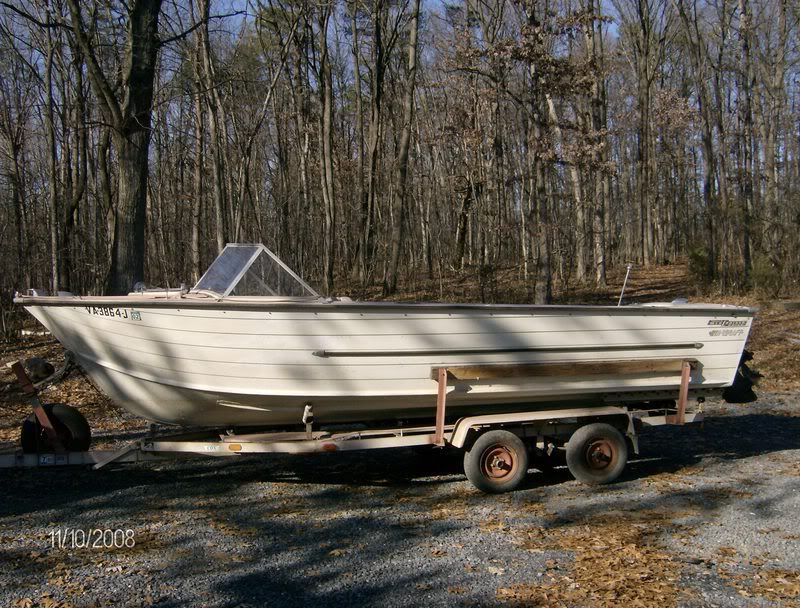
My brother?s teenagers piled all sorts of stuff on it, and a few months ago he painted his 71 Harley some sort of red color, resulting in the entire boat being pink from overspray???

TinCan7.jpg


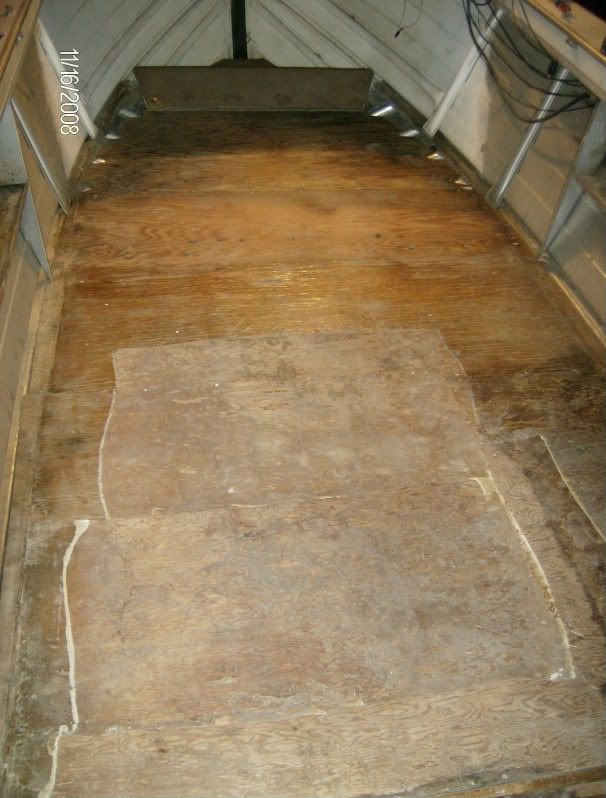
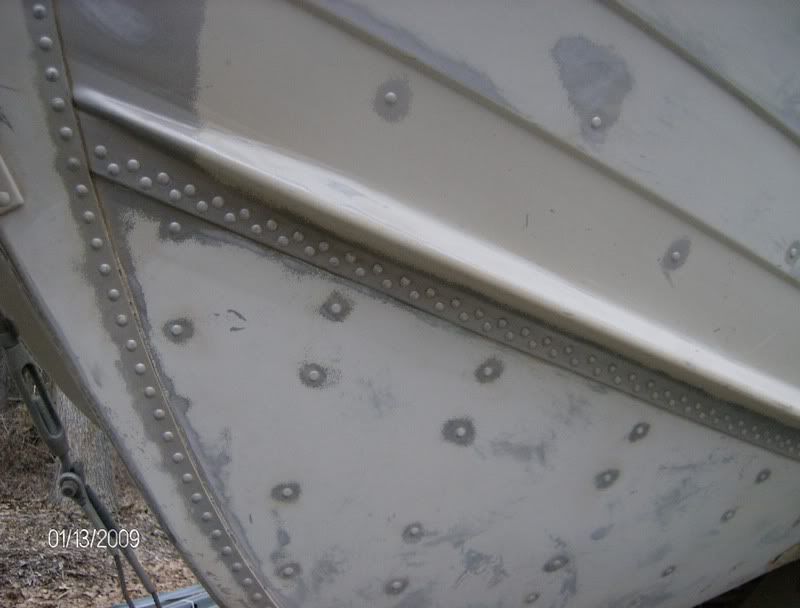
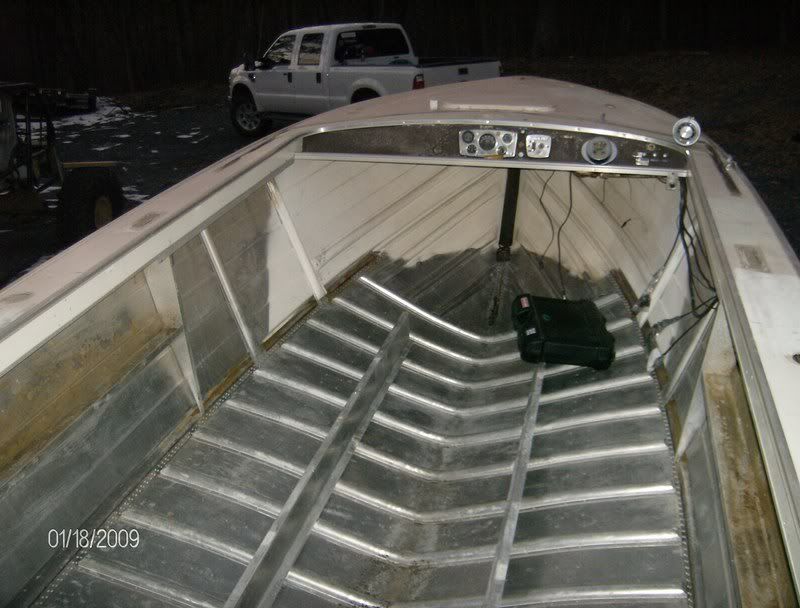
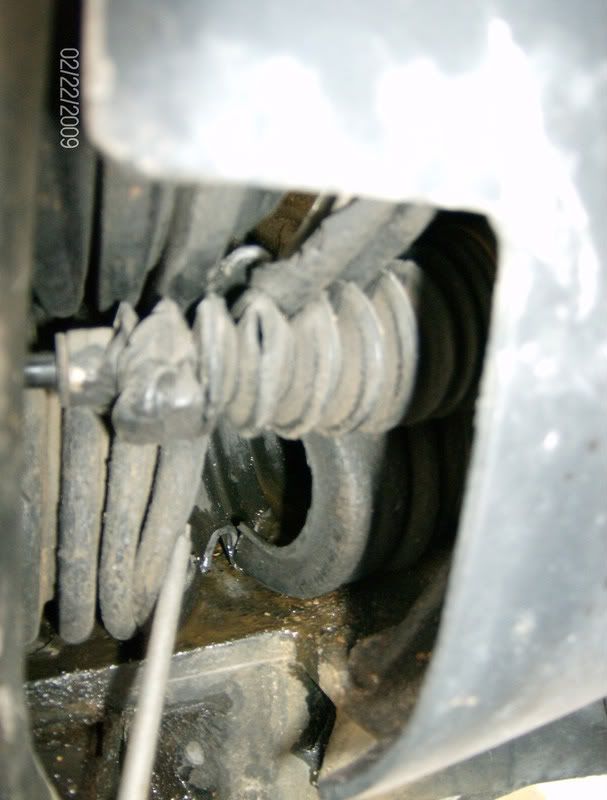
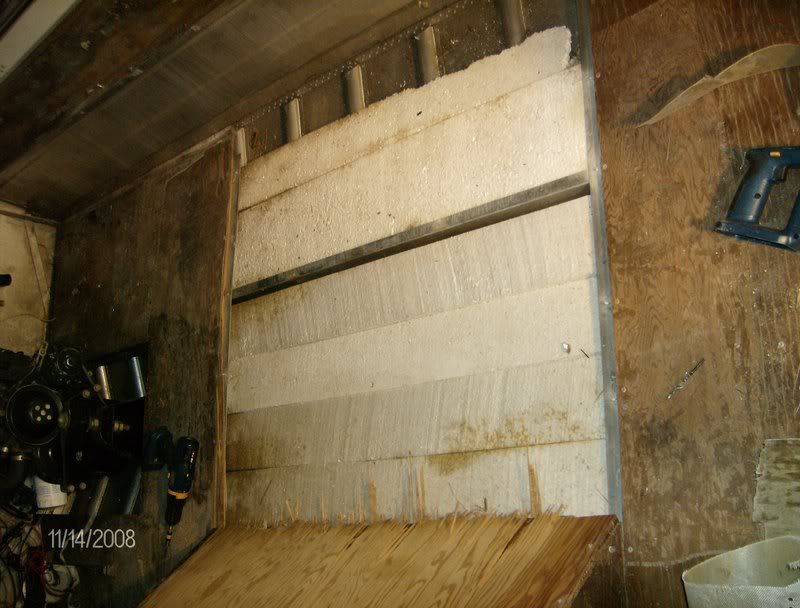
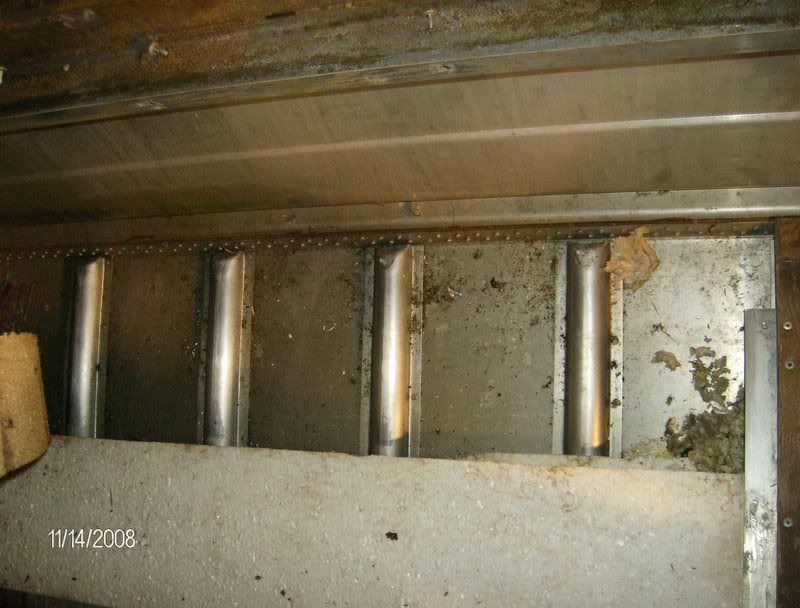
I?ve been really worried about wet flotation and the resultant rust/rot. So today I removed the seats, carpet, fuel tank and one side panel. So far everything?s looking good!

TinCan8.jpg


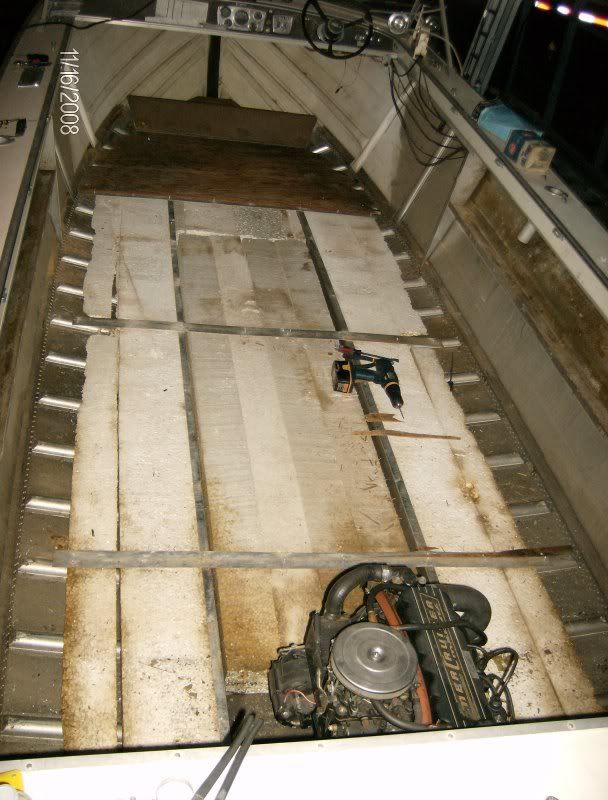
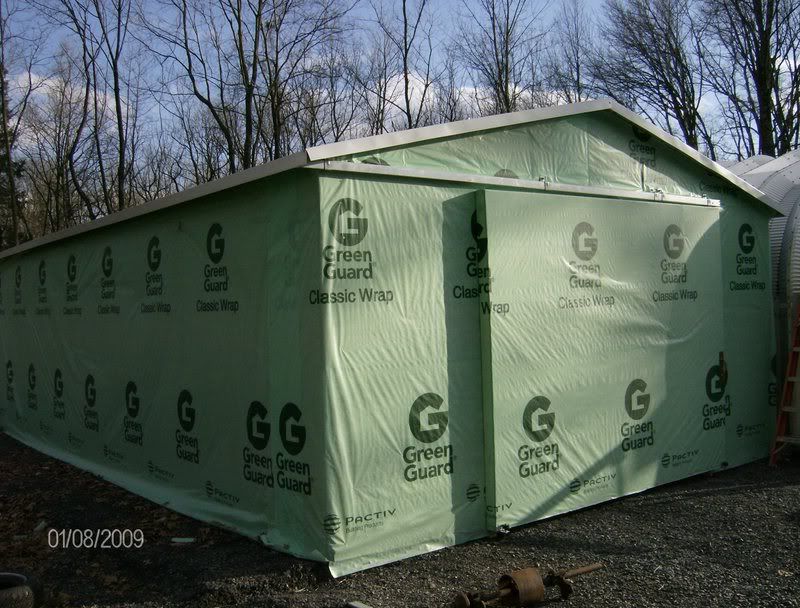
The sun started going down and the temp started dropping and this stage of the restoration is being done in the carport, so I decided to remove the reinforcement and yank out one sheet of the plywood just to get a peek at the danged flotation I?ve been losing sleep over. Everything looks pretty good here.

TinCan10.jpg


TinCan11.jpg

Tomorrow afternoon I?ll remove the other side panel and all of the flooring.
 

North Beach

Commander
Joined
Sep 29, 2008
Messages
2,022
Re: 66 Starcraft Sunchief re-Build

Almost forgot! Here's what the 65 model looks like.

TinCan3.jpg
 

North Beach

Commander
Joined
Sep 29, 2008
Messages
2,022
Re: 66 Starcraft Sunchief re-Build

The foam that is exposed so far is bone dry. Does this look like a STOCK setup? The foam is just loose laid in pieces and the plywood was reinforced with one ply of glass with Resin(?) sloshed all around. In some places it was really thick and I believe that's what was making the cracking sounds when we walked on it.

I should have the rest of the floor and sides out by sundown this evening.
 

North Beach

Commander
Joined
Sep 29, 2008
Messages
2,022
Re: 66 Starcraft Sunchief re-Build

Sorry guys! I got a case of buck fever and opted to spend the afternoon in a ground blind:D We'll be back on it tomorrow.

Tashasdad & Honker, after going back and looking again, looks like the only rivit holes for the decking are the ones in use now. I'm thinkin maybe it did come that way from the factory. Who Knows?

Gluvit huh? I think I will seal the inside before I put the flooring back in since it's already exposed.

I've seen a couple of videos of the ole man in this boat and it looks like it moves accross the water pretty good.
 

North Beach

Commander
Joined
Sep 29, 2008
Messages
2,022
Re: 66 Starcraft Sunchief re-Build

Just a little update here.
Got the starboard sideboard off and most of the plywood flooring out this evening. Everything is still looking good.
TinCan12.jpg


I spoke with my brother and he says my father in law did a little glassing of the floor on the back two thirds when he replaced the carpet years ago. That explains what I?m seeing now. The front third of the floor still had the original vinyl on it with bare plywood.
TinCan13.jpg


Based on what I?m seeing here, I played around with just replacing the worn out aft two thirds of the floor and leave the bow area alone, but after mulling it over, decided to yank it all out, use the gluvit and purchase some new flotation. We have an EPS manufacturing plant just up the road and they?ll cut the stuff however I want. Besides, all the flotation around the engine and under the gas tank is fairly well boogered up with oil and gas. Still can?t find any rot/rust. Hard to believe this boat is almost 43 years old!!!


Next step is to replace everything I just took out, and then my son will come over and help me with the total re-wire.

I was also informed that the hour meter we found under the stern was installed when the motor was re-built-it shows 150 hours.
 

North Beach

Commander
Joined
Sep 29, 2008
Messages
2,022
Re: 66 Starcraft Sunchief re-Build

Looks like propellers are about the most complicated part of this whole deal.

I finally contacted Mercruiser and gave them the specs for the boat. They're telling me I should go with a 14" x 19 pitch, standard (right) rotation and that this motor stock should run at 3900 to 4300 RPMs. Their rep also said that the overbore on the engine would not have enough impact on power to justify going to a 21. I have to consider that the last prop placed on the boat could have been the wrong one???? Any thoughts?

While I've got folks looking again, more silly questions-

I finally got all the wood removed and I'm able to look under the flotation. Down the center of the boat is a fair amount of sludge. I assume that's a combination of dirt, engine oil, and fuel. Prior to using the gluvit, is there any special cleaning proceedure? I assume I'll have to use some sort of engine de-greaser, but what should I use to make sure I have that off so the gluvit will stick?

After that, I've decided to just install all new flotation.
 

North Beach

Commander
Joined
Sep 29, 2008
Messages
2,022
Re: 66 Starcraft Sunchief re-Build

We had a nice day here weather wise so while my brother was grinding and welding on the Hillbilly Gantry (see other thread), I decided to yank out the flotation and shop vac all the debris out of the boat bottom.

Thought i'd post up a shot of what it looks like.
cleanbottom.jpg


I know there hasn't been much progress to report, but basically I'm just running around ordering up all the stuff I need for the new floor and waiting for it to arrive.

As you can see, there's a fair amount of motor goo down the center and I'm still fighting over what I want to use to remove it. I'm thinking at this point I'll just scrub it with engine cleaner and drain it into containers.
 

North Beach

Commander
Joined
Sep 29, 2008
Messages
2,022
Re: 66 Starcraft Sunchief re-Build

OK. Another nice day temerature wise and the wife decided to do a one day road trip to visit family. So... I decided to go buy a couple gallons of commercial de-greaser and have at it. After scrubbing and a lot of scraping with a plastic putty knife, this is what I've come up with so far.
cleanbottom2.jpg


I had to run wire thru the bottom of the VEE in the stringers due to build up of engine gunk-the water wouldn't even drain.

Danged bottom is just about as clean as I can get it. I think I'm gonna let it air out a couple of days and get the new foam in.

I'm thinking about using the extruded(blue or pink board) instead of expanded so I won't have to deal with the beads in the bottom. Any thoughts?
 

North Beach

Commander
Joined
Sep 29, 2008
Messages
2,022
Re: 66 Starcraft Sunchief re-Build

Thought I'd add an update of recent progress.

Knowing cold weather was eventially goint to happen I decided to use up some of the materials left over from recent jobs piling up and try to close the carport in. This is what I started with.
Gantry4.jpg

I took that shot while we were building the Hillbilly Gantry for lifting the front of the boat.

Here's what we ended up with about five days later. Days four and five included about an inch and a half of rain. Got it closed in just before the temps started to bottom out. BTW, the date is screwed up on my camera and evidently I'm too danged dumb to fix it.
HPIM0785.jpg


We had an old redeye heater that burns just about anything out in the shop so we filled up a bunch of cans of deisel and started heating it up. Everything was pretty much OK till the temps started getting into the single digits. With no insulation the metal roof started condensating and drops started freezing on the ceiling. No Problem! That is until I overslept this morning and the heater ran out of fuel. Danged inside of the Boatel looked like a rain forest:eek:

So we experienced a heat wave today. Started at 6 degrees and climbed to 16 so I hitched up the boat and drug it out into the yard. We cant really do any of the floor or gluvit work until we get into some higher temps so I fired up the 89 dollar gravity feed blaster and dumped in a 50 # bag of walnut shells and started working on stripping paint off of the rivits. A lot of them would have required some heavy sanding and I hoped the shells would do the trick. I blasted till I ran out of shells. Did a pretty good job, but it was a tad on the slow side. I figure three more bags and one long day will do the rest.
Sanded1.jpg


After I ran out of shells, I fired up the orbital sander with some 100 grit pads and started on the paint. I'm really amazed at how quickly this setup takes off the paint. Base on how things went today, I'm thinking one long day to finish everything I can reach before I have to pull the trailer out from under it minus the blasting.
Sanded2.jpg


Sanded3.jpg


If we don't see snow I'll be back on the sander tomorrow.
 

North Beach

Commander
Joined
Sep 29, 2008
Messages
2,022
Re: 66 Starcraft Sunchief re-Build

I have a fresh can of gluvit setting here in my office for just that purpose. We hit 32 degrees today. Maybe later in the week we can get that done.

I managed to get the starboard side (minus the rivits) done before it started snowing today.

Sanded4.jpg


Sanded5.jpg


I'm gonna need three more bags of walnut shells to finish off the rivits and they won't be in till later this week, so I guess the next couple of days will be spent sanding the stern and the top side after I remove the last of the bow mounted hardware.
 

North Beach

Commander
Joined
Sep 29, 2008
Messages
2,022
Re: 66 Starcraft Sunchief re-Build

OK, yesterday evening I fired up the heater in the shop and spent the evening removing the aluminum bow and stern castings, all the bow mounted hardware, the windshield (which was danged fun considering they evidently didn?t have phillips head screws in the 60?s), the gunwale rubber and all the top mounted hardware. I also dis-assembled the Mercontrol unit and found 4 broken plastic shaft sleeves.
Windshield.jpg

We got weather in the 40?s today so I wheeled the boat out of the shop and spent the entire evening blasting the rest of the rivets. Now the only thing left is sanding the stern, the top, and everything I couldn?t reach on the bottom while trailered.
Blasted1.jpg

Blasted2.jpg

Looks like we?ll be suspending the boat and getting it off the trailer this weekend. Once that happens, we?ll be working on the trailer and the boat.

So I?m basically working my tail off here and the wife is standing on the porch shaking her head EVERY DAY when the UPS guy shows up. Yesterday we received 3 boxes of walnut shells and today they?re gone!

BTW, the 89 dollar blaster works great! You have to stop periodically and remove what looks like mud from the tip, but overall, I?m happy with it?s performance. I?m blasting all the rivets in an attempt to make the fresh paint look crisper. Plus, I really didn?t want to sand all three million rivets!!!

Tomorrow, I?ll be in DC talking with the folks at West Marine about paint.
 

North Beach

Commander
Joined
Sep 29, 2008
Messages
2,022
Re: 66 Starcraft Sunchief re-Build

Here's the info on the 90# Clarke Gravity feed Blaster at Tractor supply

http://www.tractorsupply.com/webapp...10551_10001_44254_-1______?rFlag=true&cFlag=1

It's listed on thier site for 99 bucks now. We used a small to medium shop sized Craftsman compressor-I think it puts out something like 9.4 cfm-nothing special.

The fine grade walnut shells came from Kramer Industries. Here's the link

http://www.kramerindustriesonline.com/blasting-media/walnut-shells.htm

This danged 22 footer is presenting a few problems-Like I'd really love to be able to flip it to work on the bottom prep and paint but there's absolutely nothing wrong with the drive train or the stern so i'm not taking it out.
 

North Beach

Commander
Joined
Sep 29, 2008
Messages
2,022
Re: 66 Starcraft Sunchief re-Build

In the midst of all this grunt work, we want to remember all the little stuff that must keep moving forward also. We?re removing a lot of hardware and signage from the boat and some of this stuff takes a while to duplicate/restore. With this in mind, I contacted a friend of my son who owns a metal fabrication shop here locally and he got all excited about the OLD BOAT as everyone refers to it. He took my old busted up vinyl Starcraft emblems, scanned them, did some tweeking on the computer, and waterjetted me a new set. This is the prototype
HPIM0874.jpg


The other two sets are off to be powdercoated black. I know they?re not exact repros, but they?ll have to do. Finding 43 year old vinyl emblems so far has been impossible.

The Powered By Mercruiser Drive foil backed emblems on the stern are also not available. So I took a photo, emailed them to my sister who is a graphic artist. She sent them to a guy she knows and for 10 bucks I got back an electronic file that I can take to the cheapo sign folks and have a couple of decals made. Much simpler that I thought it would be. Here?s the photo I sent them and a print out of what they sent me back. Close enough for me.
Merc.jpg

HPIM0872.jpg


I ordered a tube of 240 and 120 grit greaseless polishing compound like the British guy uses on Youtube for polishing aluminum, put some Ryobi Home Depot polishing wheels on my cheapo grinder out in the shop, and did a test on the bow and stern castings. Here?s a before and after shot.
Polishbefore.jpg

Polishafter.jpg


They still need a little work, but I think I just saved myself a ton of cash and even better, I won?t have to wait three months to get them back. I also bought a bunch of small wheels for the air Dremel and we should be able to polish some of the miles of aluminum trim on the boat without removing it.

Now if I could just do my own chroming, I?d be set!!!
 

North Beach

Commander
Joined
Sep 29, 2008
Messages
2,022
Re: 66 Starcraft Sunchief re-Build

My meeting in DC was re-scheduled for tomorrow, so I'll be talking with the folks at West Marine about paint then.

The sanding and blasting is making such a mess, I think I'll try and get that phase finished or close to finished before I apply the Gluvit. The deck wood has been in the shop air drying for about three weeks and I still need to cut and seal it. Another week or so of tearing things up, ordering stuff, and general prep and we should make the turn to actually putting things back together:D
 

North Beach

Commander
Joined
Sep 29, 2008
Messages
2,022
Re: 66 Starcraft Sunchief re-Build

I got these back today from the powdercoater. I couldn't be happier with how they turned out.
Emblem2.jpg

And it looks like my son's stuff will be out of the shop early next week so I can begin cutting and coating the deck and installing it. Can't wait! It's too danged cold to do any liquid stuff in the Boatel :(
 

North Beach

Commander
Joined
Sep 29, 2008
Messages
2,022
Re: 66 Starcraft Sunchief re-Build

All the photos in the 66 brochure and the 66 Mercruiser pamplet show my outdrive being white also. Not sure what the deal is there.
4bb6_1.jpg

4d3f_1.jpg

So we moved all of my son's stuff out of the garage today. Wood decking is cut to fit and sometime in the next few days, I'll be throwing the resin on the back sides. In the meantime, we can move the boat into the heated garage and apply the gluvit to the rivits and seams.

Hope to be posting some additional pics showing some movement on this project real soon.

Unfortunately, work keeps getting in the way of my playing :(
 

North Beach

Commander
Joined
Sep 29, 2008
Messages
2,022
Re: 66 Starcraft Sunchief re-Build

OK we finally moved my son?s stuff out of the heated garage so I took a day off and my nephews helped me lay the new deck in the boat to check fitment.This is marine grade douglas fir 5 ply plywood. We used the old peices as templates and cut it out with a jigsaw. This wood was in a heated shop since just after Christmas so I'm sure it's dried out plenty.

We made some small adjustments and laid the wood out to coat the bottom and edges with resin.
woodlayout.jpg

I bought 2 gallons on the Part A resin and one gallon of the Part B medium hardener. We?ll use some for coating the bottom side and the rest when we glass in the top side.
Resin.jpg

This stuff mixes at 2 parts resin and one part hardener. Here?s what it looks like after I hit it with the paddle.
resinmixed.jpg

This is sort of a first for me so I tried to roll it on-That didn?t go to well so I used the small squeegees I bought with the resin to spread it and then back rolled with the paint roller to make it uniform. That seemed to work much better. All of the cut edges were thoroughly saturated with resin also. That new wood really seems to soak up the resin.
squeegee.jpg


The first mix was 1 pint of Part A and ? pint of Part B. To give an idea of coverage, we got this far with the first mix.
Thisfar.jpg

So I mixed up a little more and finished it off. I?ll let it dry overnight and do it all again.
Completeresin.jpg

After I get the bottom side of the wood ready, I?ll clean up the inside of the boat and move it into the heated garage for the Gluvit application. Then we can replace the flotation and put the deck back in.
 

North Beach

Commander
Joined
Sep 29, 2008
Messages
2,022
Re: 66 Starcraft Sunchief re-Build

I just realized that since I know absolutely nothing about restoring an old boat, a lot of learning would be done here. So I figured I'd go into some detail while the folks here guide me through it and maybe it will help someone else.

BTW, here's a shot of the old man killin his kneecaps:D
Resinbrush.jpg
 

North Beach

Commander
Joined
Sep 29, 2008
Messages
2,022
Re: 66 Starcraft Sunchief re-Build

OK, as predicted, this project just keeps growing. Not a really big deal as we were prepared for this. After moving the boat into the regular shop I noticed this problem in the outdrive.
Bustedboots.jpg


Looks like the exhaust and driveshaft boots have split open. So, we removed the outdrive and this is what we found.
driveboot.jpg

gunk.jpg

outdrive.jpg


Along with the busted boots we found a good bit of gunk buildup and also don?t like the feel of the gimble bearing. With this in mind and since we have the outdrive off, I figure it?s also time for a new water pump and shift linkage.

So the parts are ordered and I?m gonna blast the outdrive and prime and paint before we put it back together.

Note should be made that the tilt shocks are in good condition but the lines were leaking so we?ll be replacing the lines as well.

Has anyone noticed how far along we are on this project, and all we?ve done so far is take stuff apart?
 

North Beach

Commander
Joined
Sep 29, 2008
Messages
2,022
Re: 66 Starcraft Sunchief re-Build

I ran into the same problem. On the peice with the circles cut into it there was a place on either side up front that the original peice didn't fit so they just shoved it in totally destroying the edges of the plywood???? I guess they figured it's gonna be covered so what the heck!
 
Status
Not open for further replies.
Top