66 Starcraft Sunchief re-Build

Status
Not open for further replies.

North Beach

Commander
Joined
Sep 29, 2008
Messages
2,022
Re: 66 Starcraft Sunchief re-Build

My paint information says to do a coat a day. At the temp in my boat shop a min of 16 hrs between coats. You hit the nail on the head-I'm not getting powder when I sand. I'll skip that for the next coat and delete the spraying thinner. I don't beleive I really need it.

As far as the damage being done, hopefully the next coat will smooth it out. I only had a couple of runs and I know what caused that. Operator error:D
 

North Beach

Commander
Joined
Sep 29, 2008
Messages
2,022
Re: 66 Starcraft Sunchief re-Build

I hit the boat with the tack cloth and sprayed another coat without the thinner around 5 pm today and it's looking much better! Thanks for your input. I think I may have saved the paint job. That's coat #3. I'll wipe down with the tack cloth tomorrow and put one last heavy coat on and that should do it. Now, any suggestions on how long to wait on the masking tape so I can shoot the light green? I didn't bother with pictures since I'm sure everyone is probably tired of looking at those white boat pictures by now:D

A couple other developments. I blindly ordered the last two 50' rolls of 1 1/4" rubrail inserts that Taco had in their warehouse. I think the only thing they sell now is 200' rolls. My inserts were 1" and I was hoping I could make them work. They came in today and turns out they fit perfectly. If any of you folks with early 60's starcrafts need to replace your rubrail inserts I have the part #.

Secondly, I'm still searching for windshield gasket material and I'm not having much luck. I ordered the white stuff made by Taylormade hoping to get lucky and it isn't even close. Anyone know of a supplier?
 

North Beach

Commander
Joined
Sep 29, 2008
Messages
2,022
Re: 66 Starcraft Sunchief re-Build

I think it looks like simply not enough paint, just a fog or tac coat.
He shot half of the boat with 18.5 oz of primer, and if i understand he did
the same with paint that is not nearly enough to get a good wet coat which
is what you need to bring out a good flow and gloss. and you need to really
over thin to affect the gloss. And i have seen more runs from under thinned
paint because people are trying to get the gloss or wet look and keep hitting
a area till they get it, and being under thinned the gun is not atomizing the paint particles proporly. thus very thick paint which leads to runs.

warmer wheather means warmer paint which actually thins the paint for you.
think of cold honey next to hot honey .which falls off a spoon faster?
so when its warm does not mean more thinner.
Tip let your paint supplies stay in the warm house, not the cold garage when your painting the next day.

Instead of leaving a finger print in what ever were painting how about going
a good medium tach coat followed by a good medium tach coat probably 80
percent covered followed by a good wet coat.

Instead of just picking a random amount of time to do different things with your paint. Get a product data sheet, it will give you specific info.
EG: cure schedules, recoat times.

Sorry to be a A## H### my first post
im just a anal retentive perfectionist painter.

Magicbronco, You may be onto something there. I profess to know next to nothing about paint. The data sheet is where I got the bright idea to sand between coats. Anyhow, based on what I'm hearing here and looking at what I was getting results wise I'd have to agree that I'm not laying down enough paint. All said and done, It's looking better now. Thanks for the help!
 

North Beach

Commander
Joined
Sep 29, 2008
Messages
2,022
Re: 66 Starcraft Sunchief re-Build

Another Friday evening in the paint shop. This is getting to the point where my wife is calling the boat ?His Other Girl?.

I didn?t want to contribute to SS and MB?s heads getting any bigger so I sort of combined their recommendations.:D

The first step was taping off the waterline with some 1? masking tape. I tried to use the wide stuff but it didn?t want to conform to the radius very well so I went with the 1? on the new paint. Then I broke out a big roll of blueprint paper we salvaged from an office renovation we did a couple of years ago. I keep it out in my bow shop for covering the work benches when I?m glueing up wood. I taped it to the 1? with the wide stuff.

Once I got all the cursed white paint covered I wiped everything with a fresh tack cloth.

The next step was to mix a full quart of Pettit Kelly Green and a quart of the Gloss White. The 50/50 mix gets us real close to the green my wife picked for the bottom and the topside.

Once I got all the mixing done (I wanted to mix it all so we wouldn?t have any tinting issues between coats), I cleaned up one of the quart cans and set a quart of the mixed paint aside for tomorrow. I mixed in 1.5 ounces of spraying thinner to 16 ounces of paint.

The next step was to spray a tack coat with the new green. My friend with the recently restored Orland Clipper said to ?robin egg? the tack coat, so that?s basically what I did. Once I got the whole bottom covered I just went back to the beginning and layed down a nice wet coat of the new stuff. IMO it looks great!!! I shot a full quart on the bottom.

After the opinion sharing of SS and MB I think I got it figured out. Thanks guys!


GP2.jpg

GP1.jpg
 

North Beach

Commander
Joined
Sep 29, 2008
Messages
2,022
Re: 66 Starcraft Sunchief re-Build

Today I hit the boat shop at 6 AM determined to finish the paint job. I wiped the entire first coat of green down with the tack cloth and shot a tack coat and wet coat. Done!

EDIT- Forgot to mention-I mixed pretty much the same as yesterday -16 ounces of paint to 1.5 ounces of spraying thinner and shot another full quart today.

I waited a couple of hours to give the paint time to set and removed the paper and carefully removed the masking tape. I?ve got the temperature hovering right at 75 degrees so the paint is setting pretty quick.

Here?s what we got!!!!! Note-For some reason my digital camera makes everything look all funky in the shadows under the boat. I can?t wait to get it out in the sun and take some pictures.
Green2nd1.jpg

Green2nd2.jpg

Green2nd3.jpg

Green2nd4.jpg

So, I shot the first Zinc Chromate on the hull on March 18th. It took 10 days working just about every day to finish off the bottom painting. I'm glad I don't do this for a living-I'd probably starve!!

Now it just sets and cures till we throw it on the trailer and haul it over to the boat mechanic to get the outdrive straightened out.
 

North Beach

Commander
Joined
Sep 29, 2008
Messages
2,022
Re: 66 Starcraft Sunchief re-Build

i think you need a shamrock decal or two ..
kelly green always makes me think of st pattys day!

Looks really great..
Looks great. Can't wait to see it all put back together. You're going to be getting lots of compliments at the ramp on that thing. What's the plan for the interior?
92, That was THE GREENEST paint I've ever seen! Mixing it 50/50 with the gloss white sure calmed it down a bunch.

EZ, here's the plan.
Side panels(still don't know what they're called), dash, motorbox, and the piece opposite the dash at the stern are all gonna be finished wood (mahogony), stainless steering wheel, new temptress captains chairs, re-cover the old jump seats (I like the way the seat backs follow the contour of the stern), and two new 46 inch pontoon seats with storage on each side behind the captains chairs. New vinyl. Re-use the stock guages and add NOS airguide in dash compass and speedo just like Kev's. A new switch plate with a couple power plugs to get rid of the existing random switches and knobs approach taken by the previous owner. And we're painting the topside to match the bottom paint.

And of course there's new rubrails, lots of aluminum polishing, re-chroming a bunch of the stock hardware................. I'm gonna need a part time job:eek:
 

North Beach

Commander
Joined
Sep 29, 2008
Messages
2,022
Re: 66 Starcraft Sunchief re-Build

It's looking great, NB! You are certainly carrying things to a level of detail that most never would (including me). As usual, your posts are an inspiration. My deadline is to have the boat reassembled and sea worthy before the stripers get here (which is not a hard date, those damn fish NEVER show up when it's convenient or when I want them to). I don't have time to make 'er pretty on the outside this spring. That's ok, though. I think the hull is the last thing on a striper's mind as I swing her over the gunnel :p

Great work!
Matt, I figure what ever level of detail a person wants to achieve is their personal choice. This boat was owned by my wife's father for over 20 years and we knew it was a good representation of a somewhat hard to find 1966 model. With that in mind, we decided to go sort of all out. Now there's a bunch more we could do with it along the lines of returning it to completely original condition, but we gave up some of that for upgrades and some personal choices such as color.

If I was working an old center console, I'd be more concerned with setting it up to chase them danged stripers just like you're gonna do. I'm still toying with the idea of converting one anyways-There, I said it-maybe resto # 2 is in the works. Or at least in my thoughts. DO NOT tell my wife:D
 

North Beach

Commander
Joined
Sep 29, 2008
Messages
2,022
Re: 66 Starcraft Sunchief re-Build

Man, at one point I thought the day would never come when I could share these pictures!!!!!!!

My nephew works for me part time and he was out in the shop working while I took care of some office stuff. After work this evening we got all fired up and made some quick adjustments to the new trailer and dropped her off the cables for a trip into the sunlight.

I couldn't be happier with how the bottom paint turned out!!! Here she is!
po1.jpg


po2.jpg


po3.jpg


po4.jpg


Did I mention how happy I am with the bottom paint?????
 

North Beach

Commander
Joined
Sep 29, 2008
Messages
2,022
Re: 66 Starcraft Sunchief re-Build

Looks Great!!!! Man that boat makes your truck look small!

Meet me here when your done:
orlandoclipperlake003.jpg

One word ----- WOW!

NB she looks mint ! I'm surprised you did not bring the sea foam green around the transom.
When you first started and showed that color in the brochure , I thought to each his own , but that different green and your paint scheme made it all work.

That will be one sharp StarCraft to be proud of !
I hope to be there by sometime in June!

That's a pic of the boat that inspired me to do this:D
 

North Beach

Commander
Joined
Sep 29, 2008
Messages
2,022
Re: 66 Starcraft Sunchief re-Build

We got a little down time on the project for now. Tuesday she goes to the mechanic to spend a couple days getting the outdrive re-built. BTW-I picked up a brand new, still in the box 1966 gear casing (lower end) for my outdrive from a guy in Cali for 109.00 shipped!!!!!!! I didn't need it but I couldn't pass on the deal.

My neighbor the cabinet maker just started on all the mahogony stuff.

We're scheduled at my other neighbor the autobody guy to have him shoot the topside on the 20th. I'm not even going to try and shoot the top. We're gonna use the last two cans of Easypoxy Kelly Green and Gloss White so it will all match.

In the meantime, I did manage to get the vinyl rub rail inserts installed on the side bumpers using a cotter key extractor last night. Now I have to work in DC for a couple of days and she'll just have to set:(
 

North Beach

Commander
Joined
Sep 29, 2008
Messages
2,022
Re: 66 Starcraft Sunchief re-Build

Here's a couple shots of some of the trim back on. I also had an episode back when I was cleaning the hull on the way to the car wash. I left the locks loose and at 60 the front hatch blew up and bent the hinges and the lid where the support bars fasten. So today before trailering it over to the mechanic I drilled out the rivets and removed the hatch for some minor tweeking before the topside paint.

Feels weird without the boat in the garage:confused:

Badged1.jpg


Badged2.jpg


BTW, this was the maiden voyage on the newer trailer and it sure does ride better!
 

North Beach

Commander
Joined
Sep 29, 2008
Messages
2,022
Re: 66 Starcraft Sunchief re-Build

The Admiral and I got all dressed up late this morning and decided to start working on the only piece of boat we have left. The windshield! As I stated somewhere yesterday, the boat mechanic needed the boat dropped off on Wednesday so he could start workin on it on Monday! So after a couple days of withdrawal, I remembered we still had the crusty windshield we could polish. Also the tenting I installed before I sprayed the green paint failed and the pink windshield is now a nice green color.

Here?s a before shot.
WS1.jpg

I spent a good bit of time trying to replicate the grinder with the buffing wheels with various drills but just couldn?t get the speed I needed for the polishing wheel. Then I rigged up a small polishing wheel on the air dremel and got the speed I needed. I was using the 240 grit polishing compound that I used on the bow and stern castings a few weeks ago.
WS2.jpg

The results were way too varied on all the small windshield frames so I went out to the bow shop and grabbed some fine grade steel wool. Man, that stuff worked like a charm! Here?s a shot to show the before and after with the steel wool.
WS3.jpg

Took a lot of elbow grease but it worked out just fine. Here?s a shot of The Admiral earning a seat in the boat.
WS4.jpg

I know this aluminum is anodized, but this gunk has been building up for 43 years and something had to be done so it looks like we?re gonna be waxing the aluminum every so often.

Here?s a shot of the finished product. I can live with it.
IMG
 

North Beach

Commander
Joined
Sep 29, 2008
Messages
2,022
Re: 66 Starcraft Sunchief re-Build

Just a quick update. The mechanic still hasn't started on my outdrive???? and I'm on one of those five day marathons at work:mad:

So, the plan is to give him to wednesday when I get my next day off and then I'm showing up with the tow hitch.

In the meantime, I have managed to drop off the jump seats at the uphosltry shop and order the new helms seats and the pontoon storage seats for the sides.

The wood has been ordered for the interior and will take a couple weeks to arrive.

More to come!!!!
 

North Beach

Commander
Joined
Sep 29, 2008
Messages
2,022
Re: 66 Starcraft Sunchief re-Build

Still living at work folks. Worked 18 hrs Sat, 16 on Sun, 16 yesterday with the danged 3 1/2 hr round trip each day! Got in at 4 this morning and just woke up.

Got the seats ordered, the wood ordered, and if the boat mechanic isn't done when I get this phase of the work project done on Thursday, you'll probably read about in in the paper:eek:
 

North Beach

Commander
Joined
Sep 29, 2008
Messages
2,022
Re: 66 Starcraft Sunchief re-Build

HaHa! Evidently the boat mechanic is following this thread and read my threatening post a couple of days ago:D

We finally finished up the work project form hell and when I dropped by the mechanic's shop Low and Behold!!!! My outdrive was rebuilt and re-installed on the stern! That got me all excited and I turned them loose on a new rack & pinion steering system, new engine hoses and belts, an oil change and bearings on the trailer.

The painter is himhawing about being real busy and I have the esay phase of this project to get thru next week so I figure I'll let the mechanic keep the boat and next week I'M painting the topside.

In the mean time the new white Wise helms seats showed up along with the new Stryker Golight. The pontoon seats are supposed to arrive in a week or so.

Also, we discovered a wiring problem with the tilt so we're gonna re-wire that this week.

Probably gonna be a week or so before I have any new pics to post.
 

North Beach

Commander
Joined
Sep 29, 2008
Messages
2,022
Re: 66 Starcraft Sunchief re-Build

Still gonna be a couple of days before I have any new pics to post but I don't want Matt, Kev and Bob getting all the glory on this site so I thought I'd at least post another update.

Spent a couple of hours at the boat shop yesterday getting everything straight.

We now have the outdrive re-built and installed complete with new water pump, gimball bearing, hoses-basically the works.

I bought a new Moeller 12 gallon permanent tank and the complete installation kit. The kit came with a new SS fill spout, SS vent fitting to replace the old dingy one and all the hoses, sending unit, etc. We installed all that.

The folks at the shop changed the oil, replaced everything replaceable (hoses, plugs,points, etc), and we fired her up. MAN! That ole 110 was purrin like a kitten!! All the guages on my old stock guage cluster worked just fine, which was a relief! I don't want to change any of that stuff.

Looks like the new wiring took care of the tilt problem. The new steering system was already in when I got there and the new shift cables were to arrive via fedex today.

Sooo... Tomorrow Imagoin to get my boat!!!!!! Saturday evening I'll be yankin the dash and the stern trim off and Sunday morning I'm installing rivits on the miscellaneous un needed holes all over the gunwales and dadgummit, before I go to bed Sunday night I'm shootin topside primer.

Just for info here-I really wanted to accomplish some of the mechanical stuff myself, but the heavy load at work really shortened my available time. So rather than letting the boat just set, I opted to let the mechanic do a little more than I had originally planned. The folks who are fool enough to venture out onto the lake with me this summer will probably appreciate this approach:D

Did I mention how good that 110 sounded:p
 

North Beach

Commander
Joined
Sep 29, 2008
Messages
2,022
Re: 66 Starcraft Sunchief re-Build

Nice - she's breathin' fire again! I'm having small panic attacks that my johnson is going to give me trouble before this is over (I can't say that without smirking). did the tank go under the splashwell?


steering: check
Fuel: check
instruments: check
Fire up main engine: check

You're getting there, brother!
NB you just can't kill those old 4 bangers.

Heck I thought you might have fallen and couldn't get up ! :eek:

You have not been posting.

I have been waiting for this boat to come back to life......

AP, I haven't even had time to sleep, so what I have posted has been barely legible.

Matt, under the splashwell. Stock location under one of the jump seats. Looking back, I kinda wished I'd put a big honkin tank under the deck over the keel.But I'm not gonna be takin trips to Norway like you:D

Once I get this wood out and off to the wood shop, and shoot the topside, things will start goin back together fast.

I've got stuff arriving every day. I think the wife is gettin sweet on the UPS man. Heck, she's been seein way more of him than me.

Man, early in the morning you can do all kinds of damage with a credit card and a computer:D

I caught life jackets and ski/tube vests on sale and they, along with the electric horn arrived today. I hope to be seeing the pontoon seats sometime soon.
 

North Beach

Commander
Joined
Sep 29, 2008
Messages
2,022
Re: 66 Starcraft Sunchief re-Build

OK, I finally got the boat back so it's time to break out the hatchet and get back to work!!!

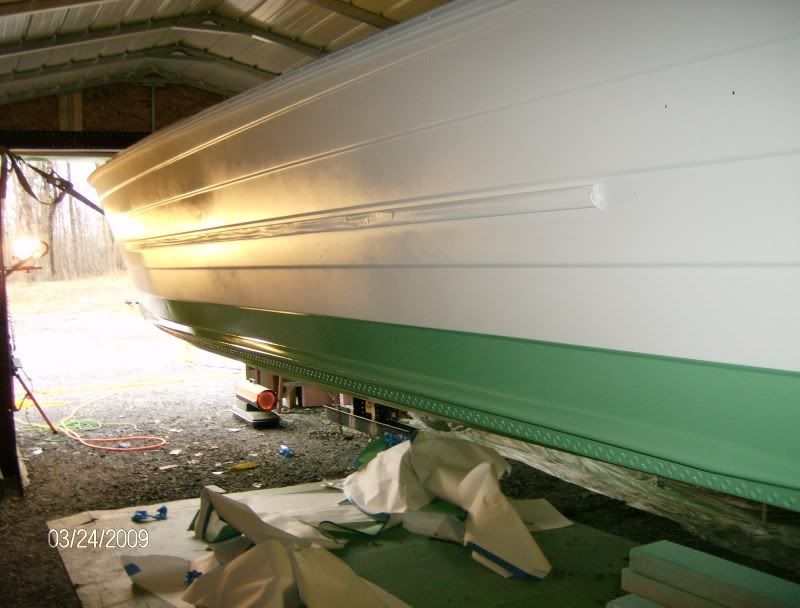
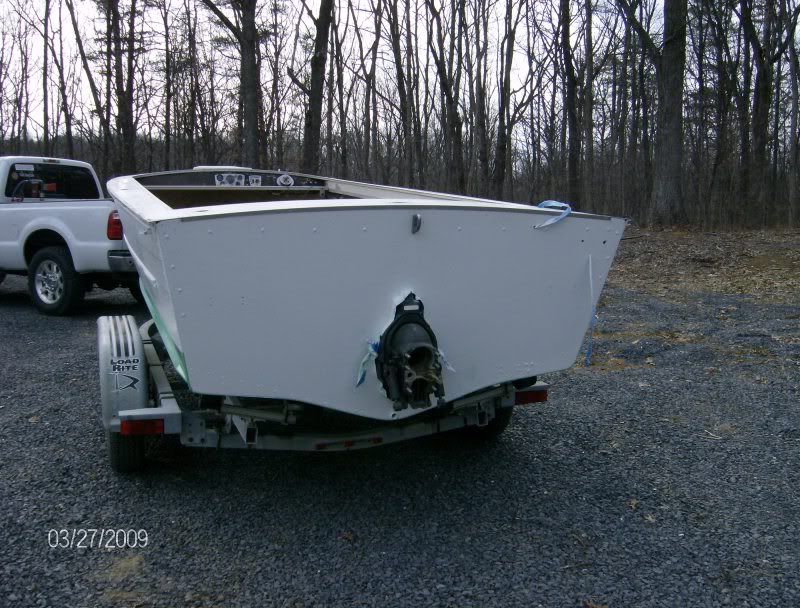
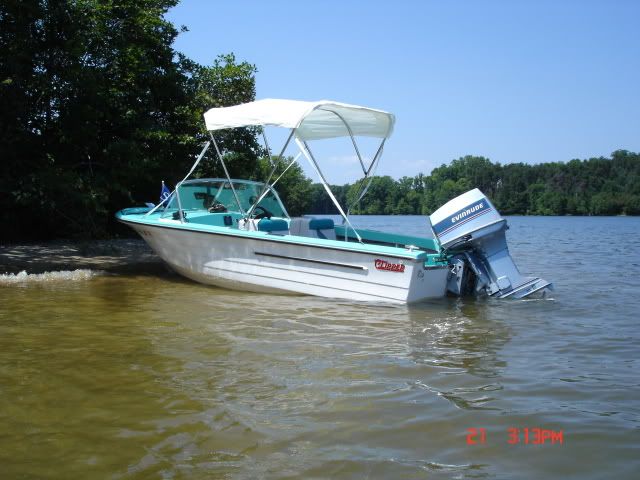
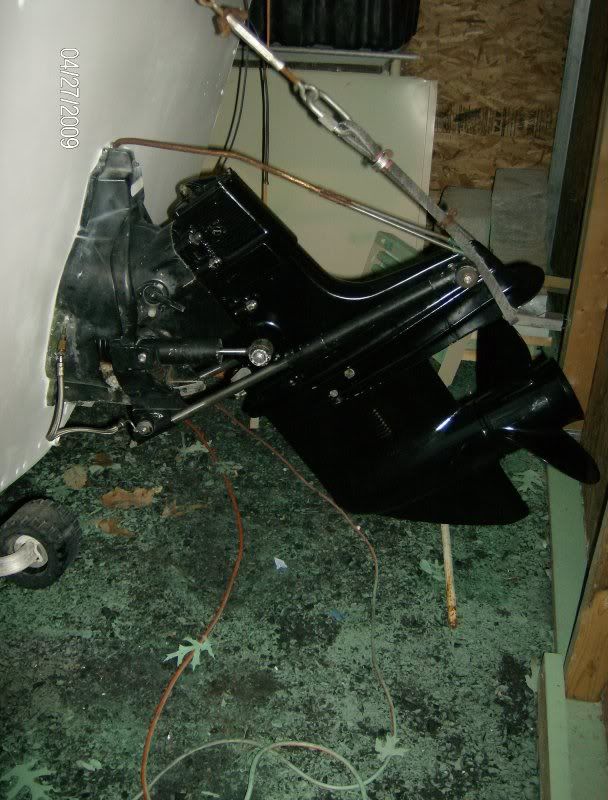
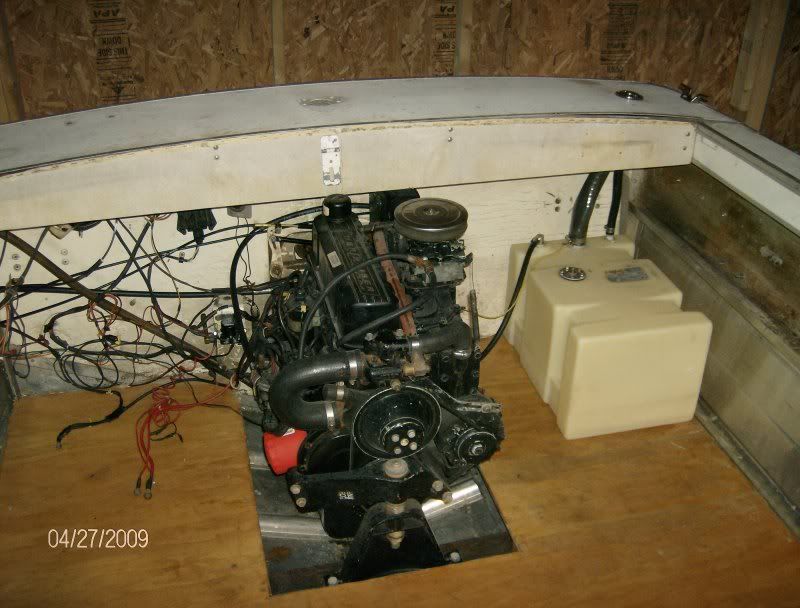
Here's a shot of the installed outdrive. I still have to tape off the stern and shoot the peices we left attached to the boat and touch up the scratches and dings from the little guy at the mechanic's shop who has to muscle all the stuff around. All in all, they were fairly gentle with it and I have no complaints. Not a really great picture as, of course, it started pouring rain about ten seconds after we hitched the trailer to my truck.
outdriveon.jpg


Here's a pic of the newly installed Moeller 12 gal tank. I won't permanently attach it until I get back the jump seats from the upholstry shop so I can make sure it's placed correctly.
newtank.jpg


Now that I have the boat back, it's time to ramp things up a little. Remember, we have the lake house for two weeks in mid July, and I leave on the 20th this month for a three week trip to British Columbia. Pressure, pressure, pressure!!!

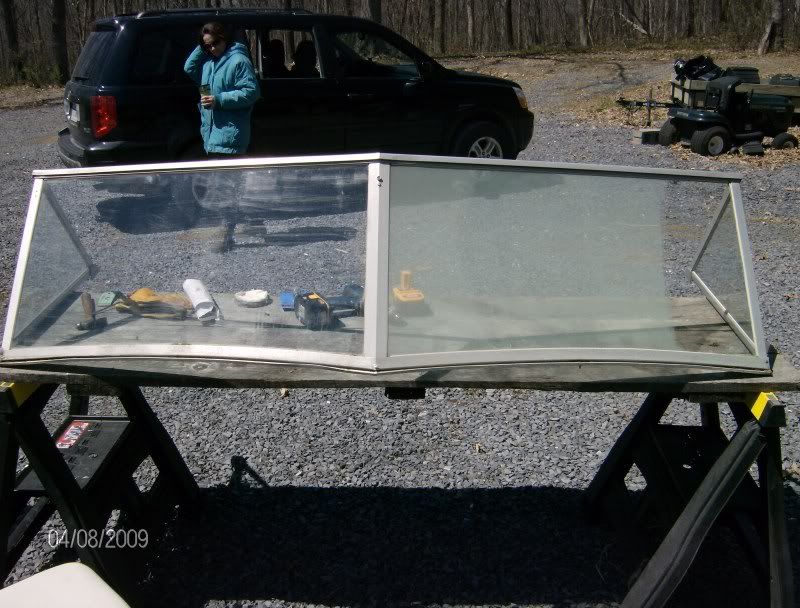
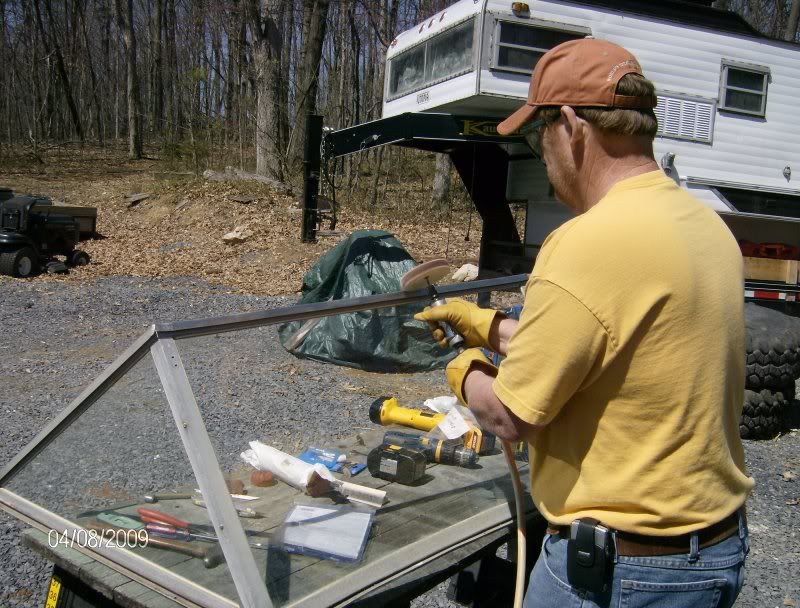
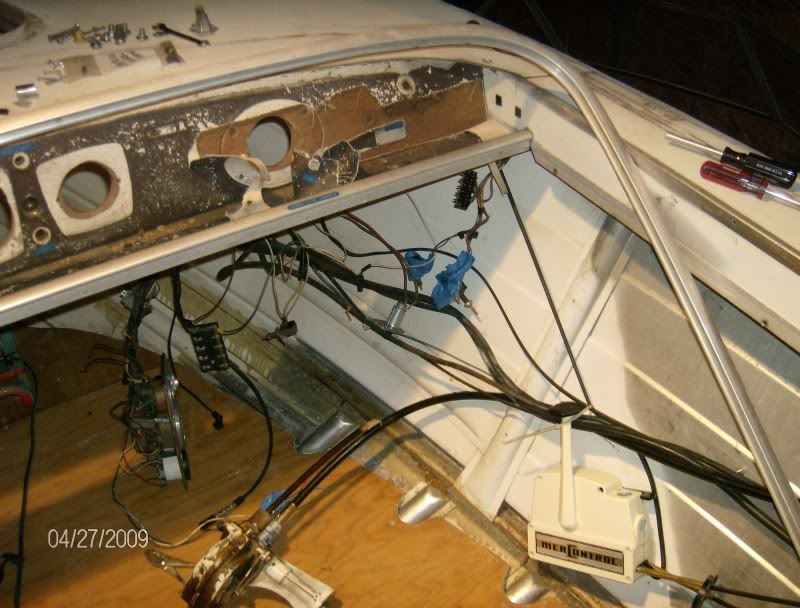
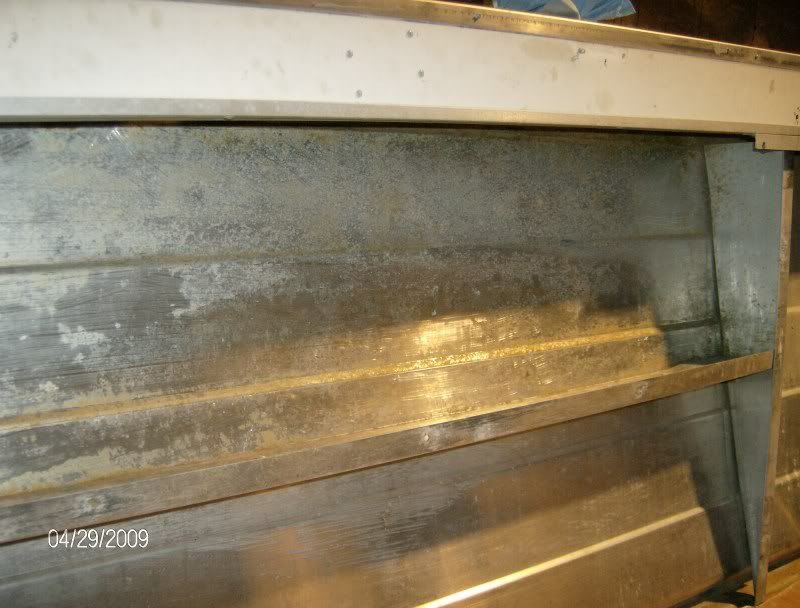
We want to replace the old decrepid, full of holes dash with a new spankin peice of mahogany. Problem is, the danged edges are cut on an angle with the sides of the boat. Guess they were put in before the deck skin was installed and I don't want to detach all the deck stringers in the bow and remove the deck. So first I had to remove all the hardware, controls, and the gunwale rubrail receiver. This came up in the Starcraft forums a few months ago. After you remove the rubrail insert, the receiver is screwed to the dash and rivited along the gunwale. Also there's about 16 thru bolts into metal brackets that also tie into the deck stringers. Removing this dash is not a fun project!!!!
rroff.jpg

hodgepodge.jpg

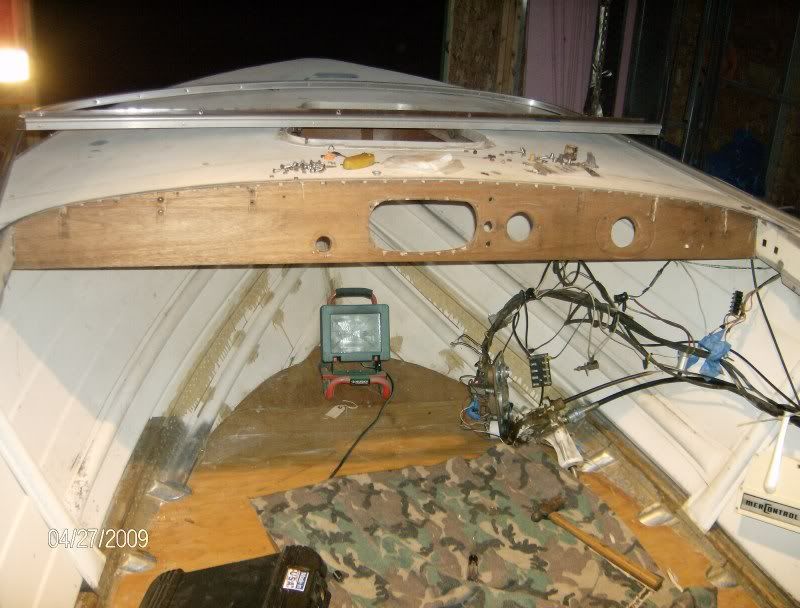
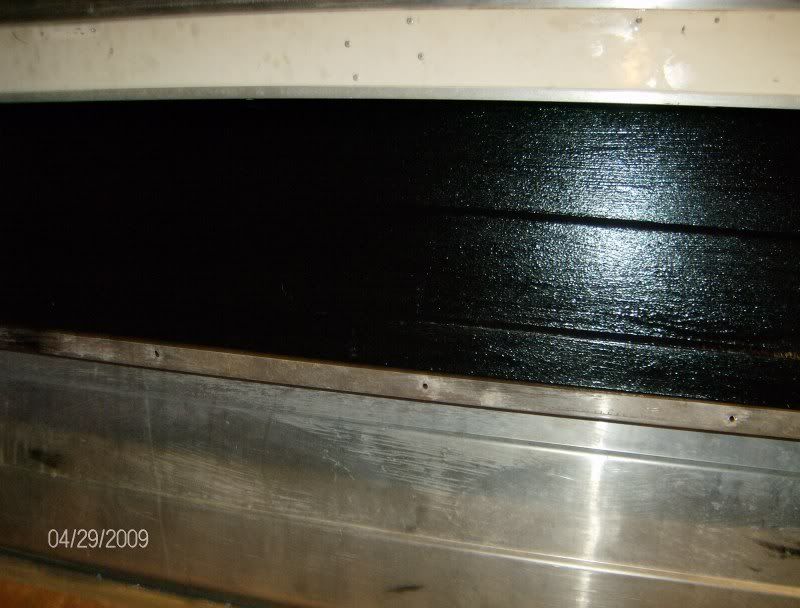
Then you remove the tray attached to the bottom and peel the old canvas off so you can get to the bolt heads counter-sunk in the wood, There are also four bolts on each side up under the gunwale.
dashready.jpg

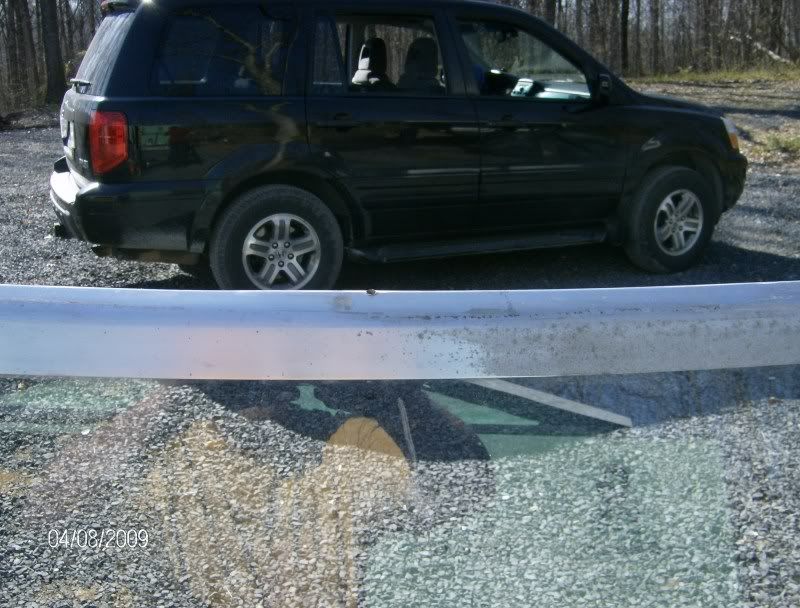
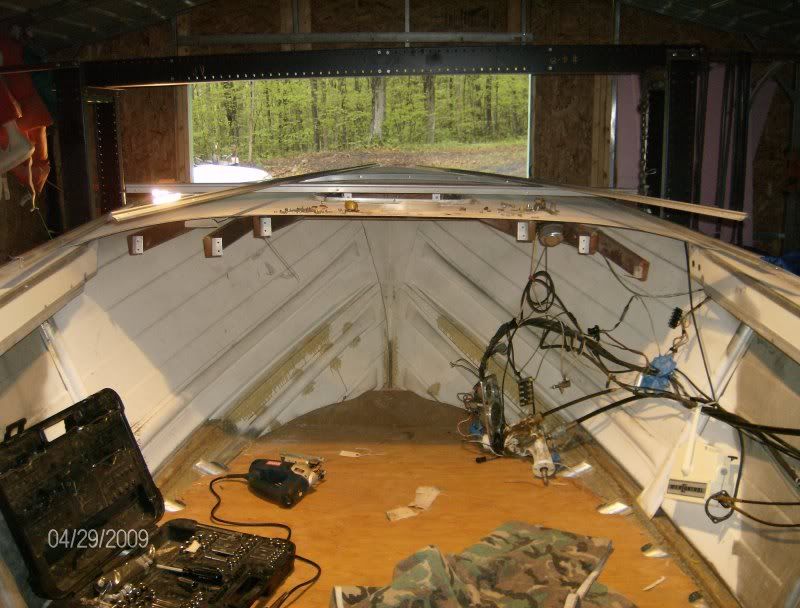
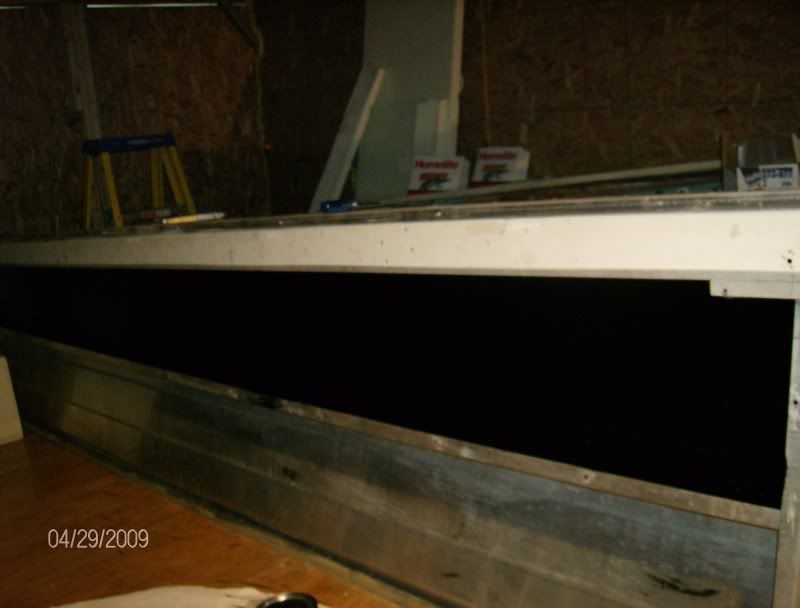
Now we've got it all ready to come out. Tomorrow evening, I'll saw it right up the middle and it should drop right out.

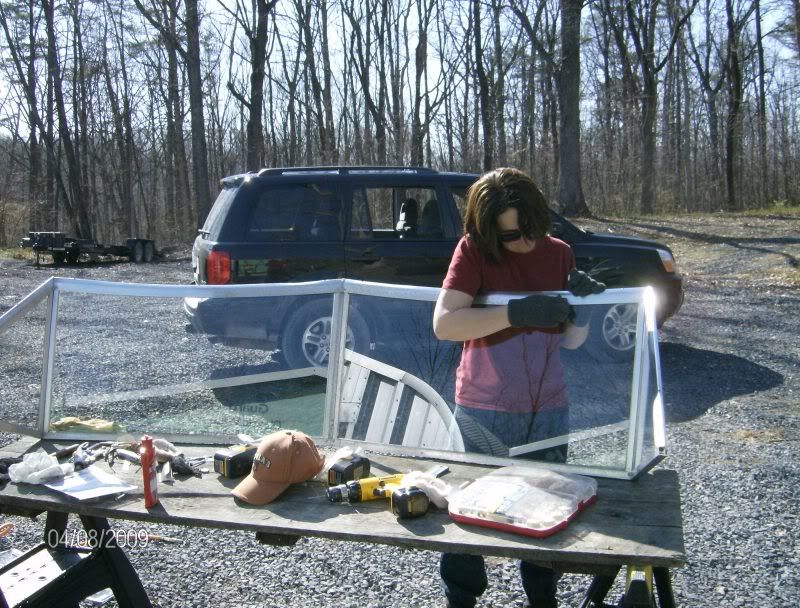
I forgot to mention there's a ton of stuff mounted to the back side of the dash-several fuse blocks, etc. and I also marked all the switches with masking tape so I wouldn't be trying to figure out which wires went to what when we re-wire.

Both of the fuse blocks had been totally bypassed by previous repairs except for one. But instead of a fuse, someone had installed a small spring, sort of like the ones you used to see in an old ball point pen???

It's gonna be nice to get all that cleaned up with this re-build.
 

North Beach

Commander
Joined
Sep 29, 2008
Messages
2,022
Re: 66 Starcraft Sunchief re-Build

A little more to update.

Back out to the Boatel and took the jig saw with me this time. As I said yesterday, the dash board is cut on an angle and was evidently installed from the top before the deck skin was installed. To get around removing the deck, I ripped it up the middle with the jigsaw and removed it. Here's what she looks like with the dash removed.

Dash1.jpg

Now we can use the old dash as a template. We will just shorten her up a tad and not cut the edge on an angle so we can get the new piece of mahogany in without removing the deck. note should be made that to use the original gauges and tilt control, we won't have enough room on the driver's side of the dash to mount the in dash compass, speedo, and switch panel. Looks like we're gonna have to go Macguyver again. More on that as it delelops. I do have a few ideas that will probably drive the wood guy crazy.

Here's a shot of the transom wood removed. This also will be replaced with the dark wood.

Dash2.jpg


Since we have been plauged by rain for several days, painting the deck has been out of the question. But, since we have that self imposed deadline rushing at us, I decided to put the time to good use and work on the cubbyhole problem. We've talked a lot here about all the different approaches to removing the excess glue when the tired old canvas cloth is removed from these areas and I think I stumbled on a quick fix for the glue removal. I tried walnut blasting and also the MEK and rags approach and found myself lacking the patience to see either approach thru to the end. I went to the local auto parts store and purchased some Rustoleum truck bed liner with the thought of just slathering it over the glue and being done with it. Here's a shot of the magic stuff along with an applicator that for some reason rung up for 1 cent when scanned (who am I to argue) by the cashier.

CH2.jpg


So I broke out a couple sheets of sandpaper to rough the stuff up and found a spot near the stern that still showed remnants of the oil grime we saw in the bilge when we took the wood and foam out. The sandpaper didn't work so I broke out the ole razor blade decal remover and went to work. Here's what the entire area looked like 20 minutes later.

CH1.jpg


Amazing! The blade took that stuff off like nobody's business!! In no time I had it all cleaned up and ready for the bed liner. Here's what the one side looked like with the liner in.

CH3.jpg


The stupid applicator/roller just flung stuff all over the boat, so I just brushed it on and couldn't be happier with the results. Here's another shot.

CH4.jpg

Tomorrow I plan to do the other side. I'm waiting for some parts to arrive to plug holes in the gunwale and as soon as they get here, the plan is to prime the bare aluminum with ZC and start shooting deck side primer
 

North Beach

Commander
Joined
Sep 29, 2008
Messages
2,022
Re: 66 Starcraft Sunchief re-Build

Well..... as I mentioned last night..... I might be looking at a holiday this week Mentioned it to the wife and she said sure fill the whole yard with boats!!! Mind you .... we have 2 acres :eek: Dang I love that woman :D Very tolerant of my antics.

Bob, More boats-less grass:D
Matt, I have an 8 wire that goes from the front to the back that's in good shape so I'm gonna leave it alone if possible. But powering all the small stuff is def gonna get re-worked.
Kev, that danged roller just started throwing the stuff right back at me:eek:

Dangit! I just want this boat back together!!!!
 
Status
Not open for further replies.
Top