66 Starcraft Sunchief re-Build

Status
Not open for further replies.

North Beach

Commander
Joined
Sep 29, 2008
Messages
2,022
Re: 66 Starcraft Sunchief re-Build

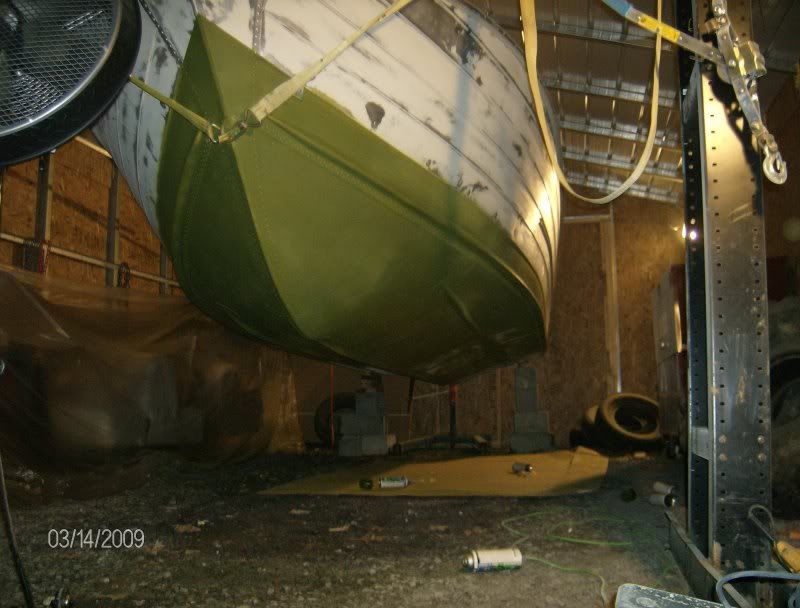
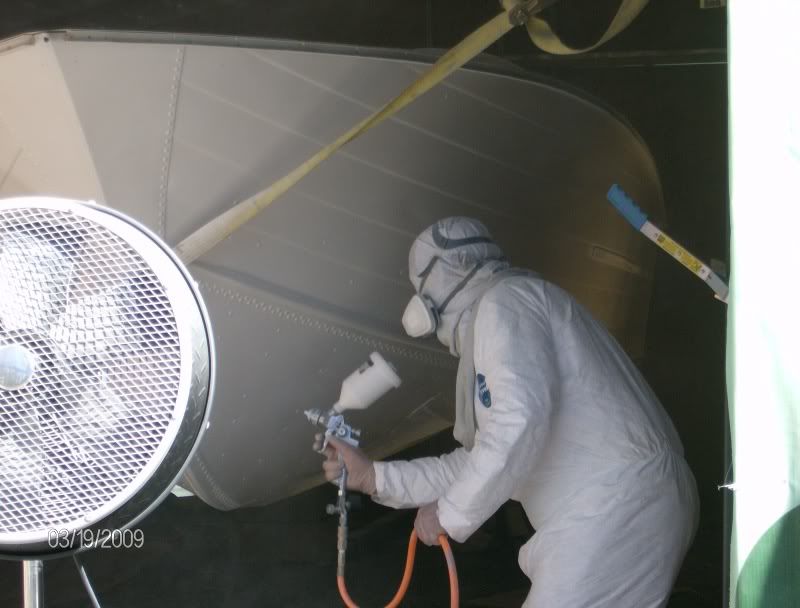
OK it?s Friday night and me being the homebody that I am, I decided to party hard and go out to the garage and apply the Gluvit to all the seams and rivets.

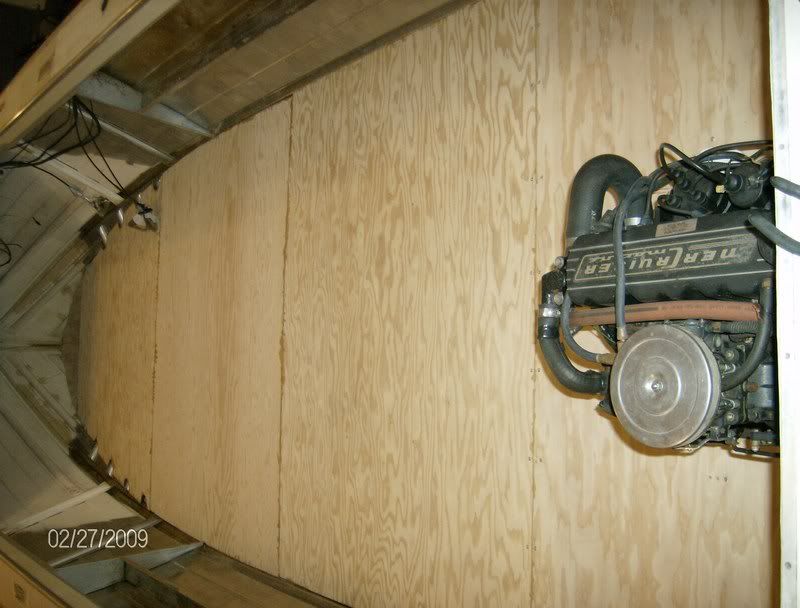
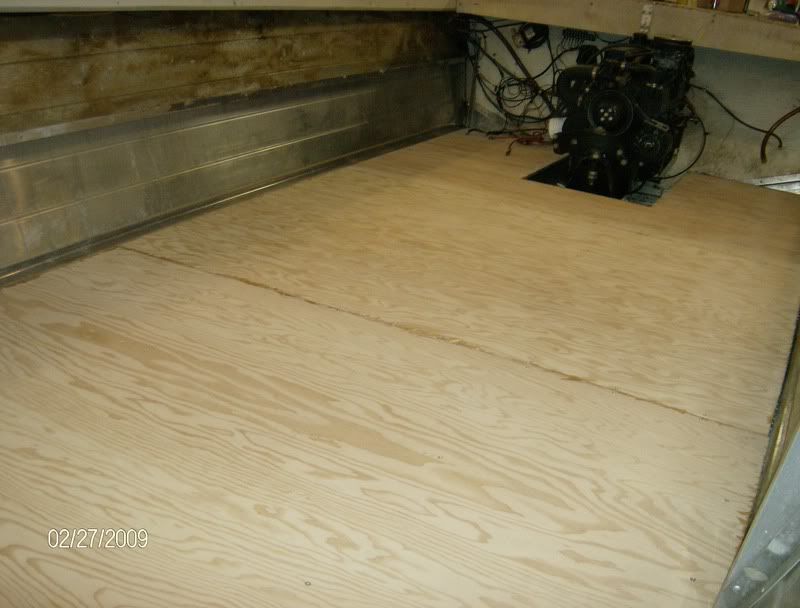
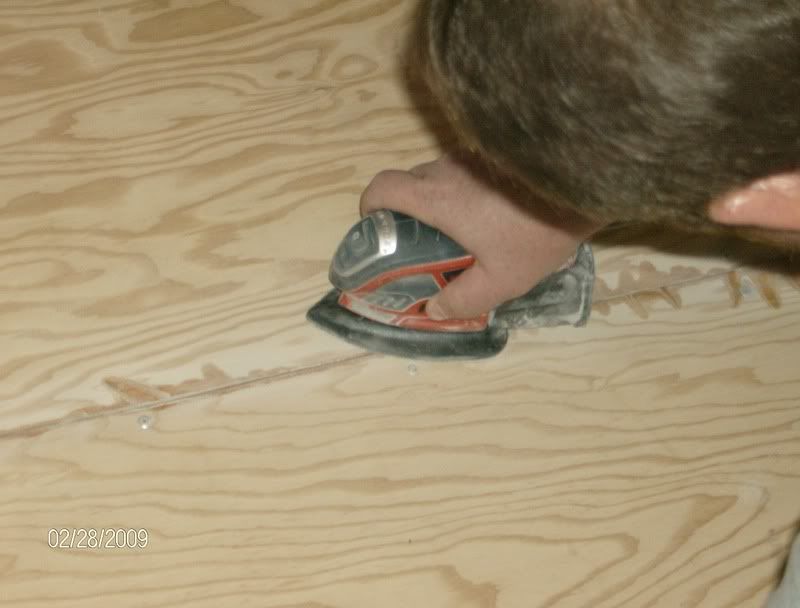
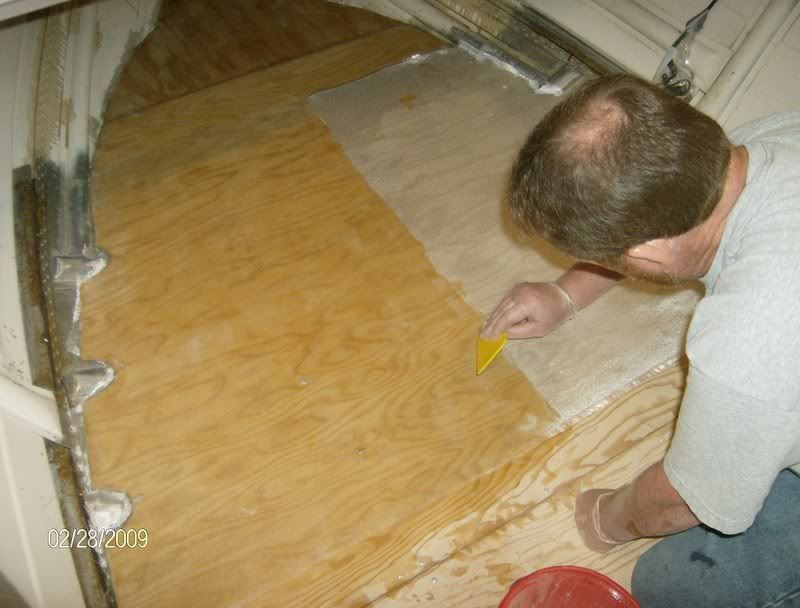
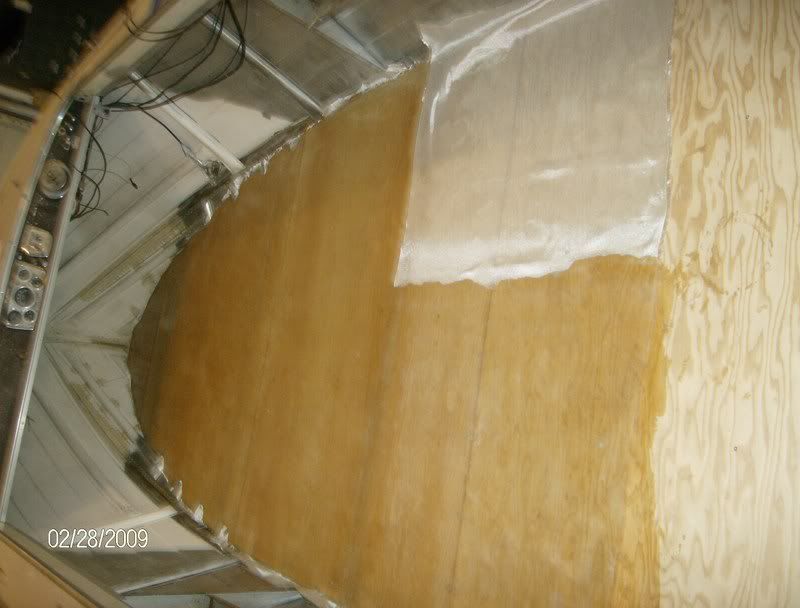
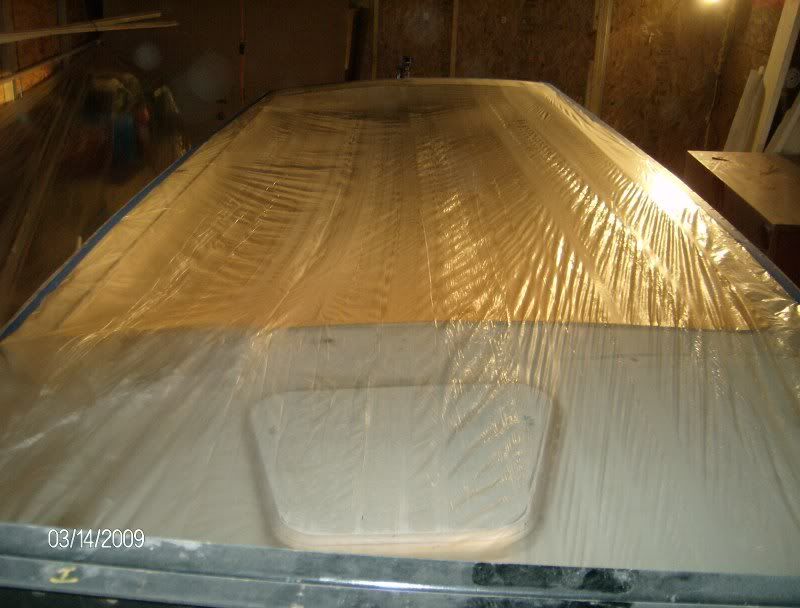
The plywood decking has been sanded and another coat of resin applied to the bottom so we?re gonna be re-installing the deck soon.

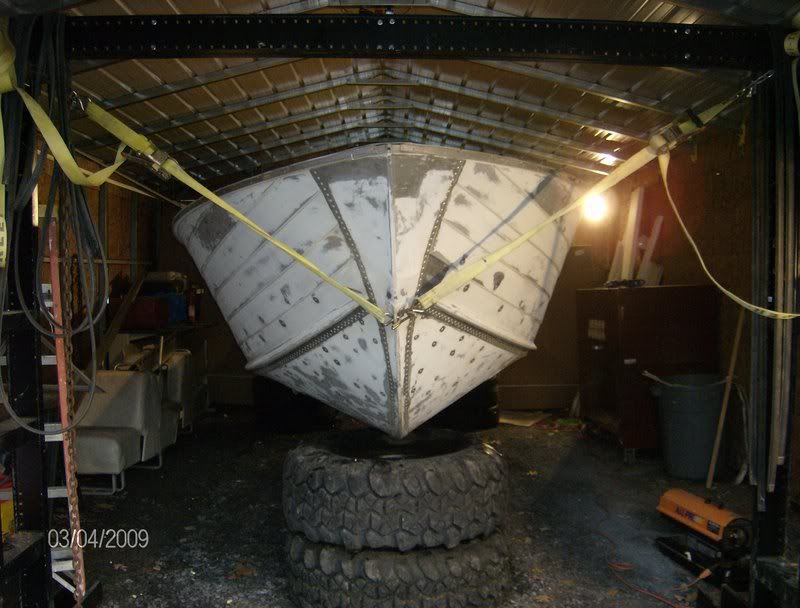
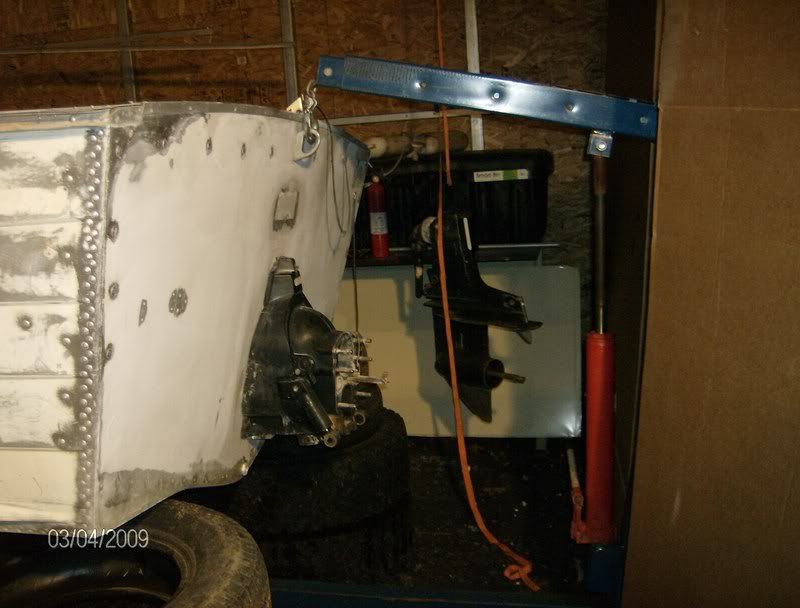
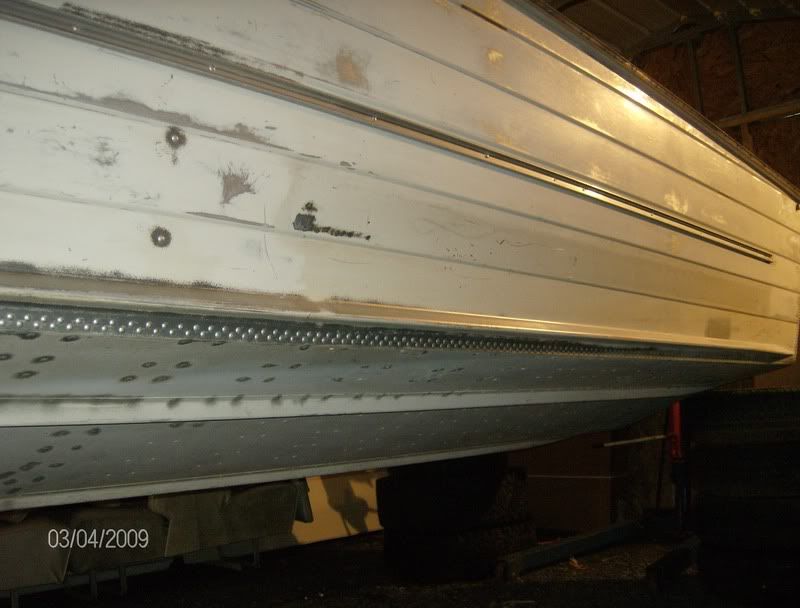
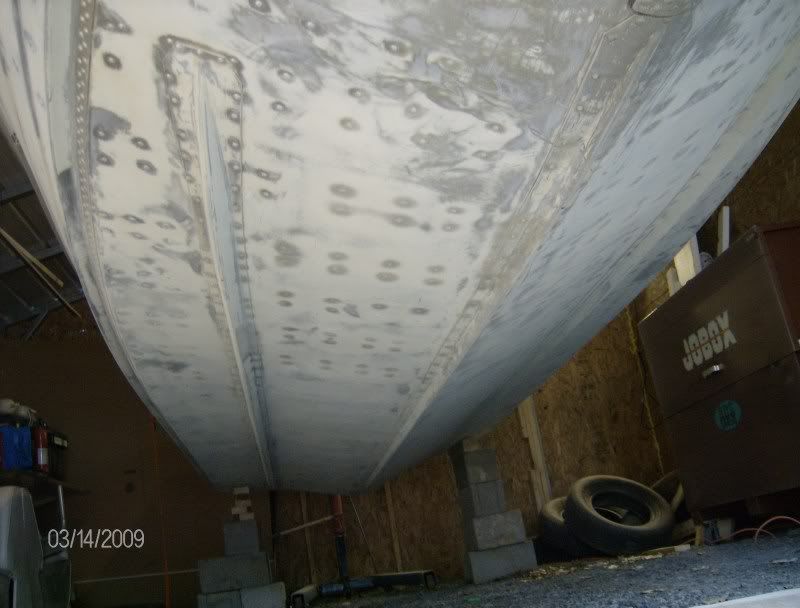
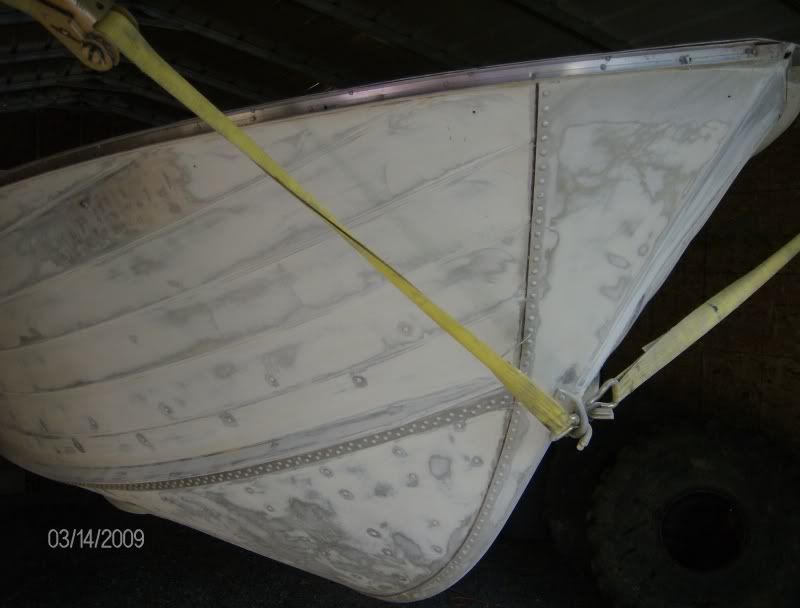
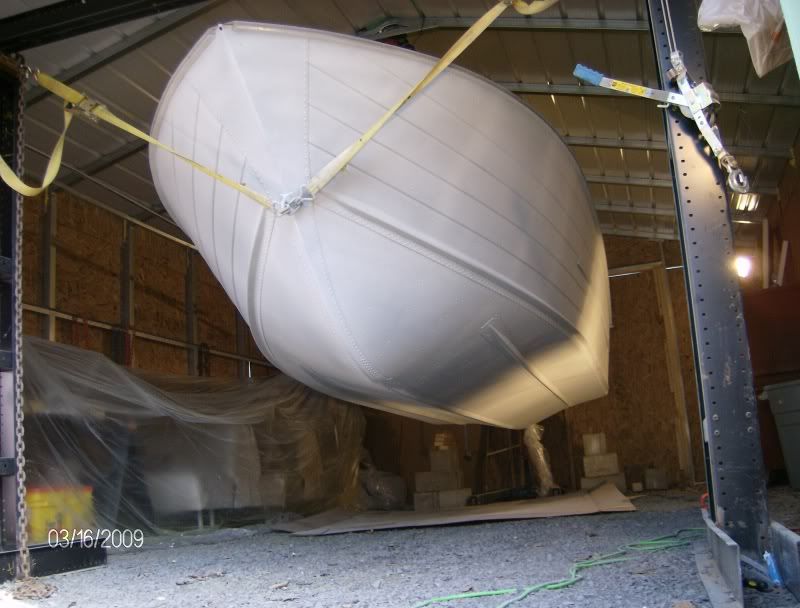
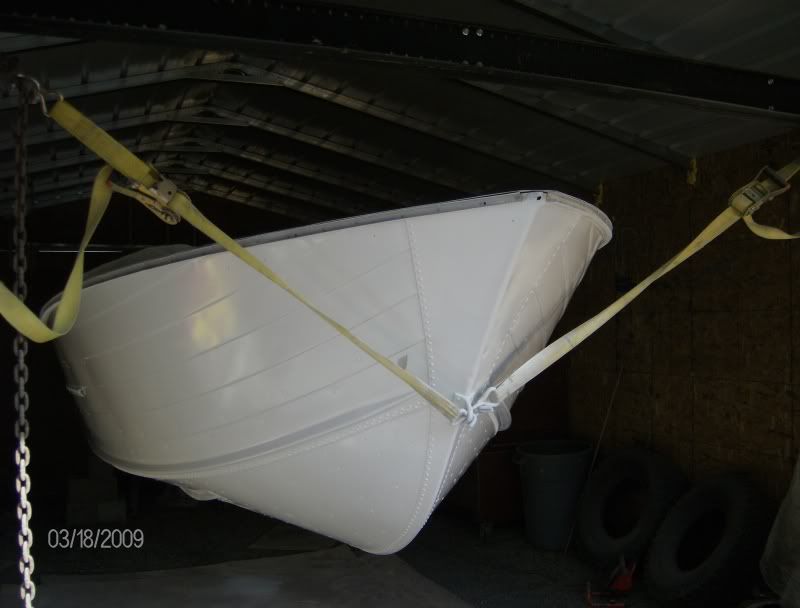
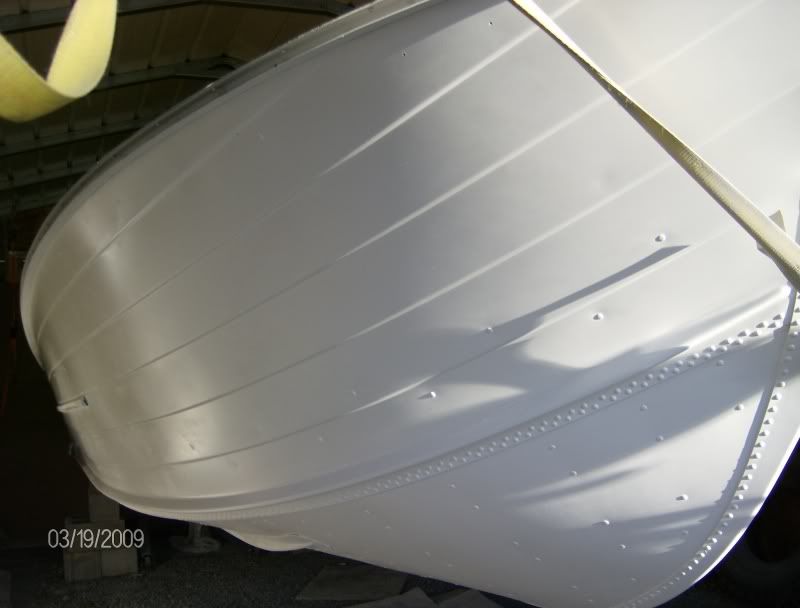
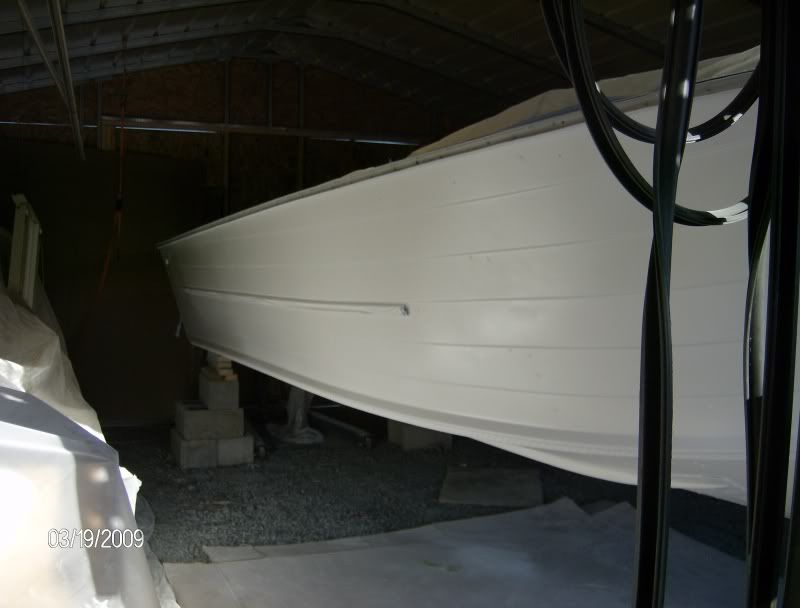
Here?s a shot of the resin and catalyst. This is a 5 to one mix so the boat is 22 feet, with one seam down each side and about 1.5 million rivets in the hull. I decided to basically attack the stern and everything below the waterline. Remember, this was a bone dry boat to begin with and the decision was made to go with the Gluvit as a precautionary measure. So I mixed up 8 oz of catalyst and 40 oz of resin and had about ? coffee cup left over at the end so a gallon of this stuff is enough to accomplish just about whatever anyone would want to do.
Gluvit1.jpg


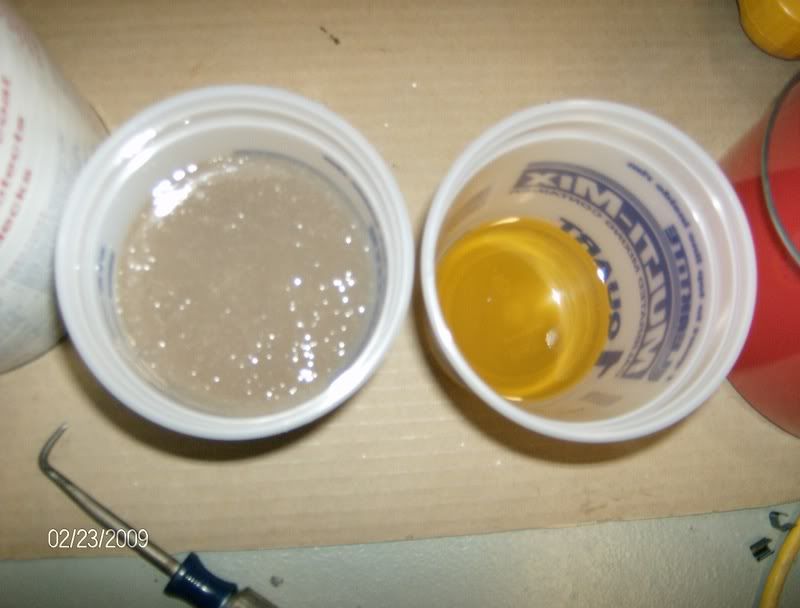
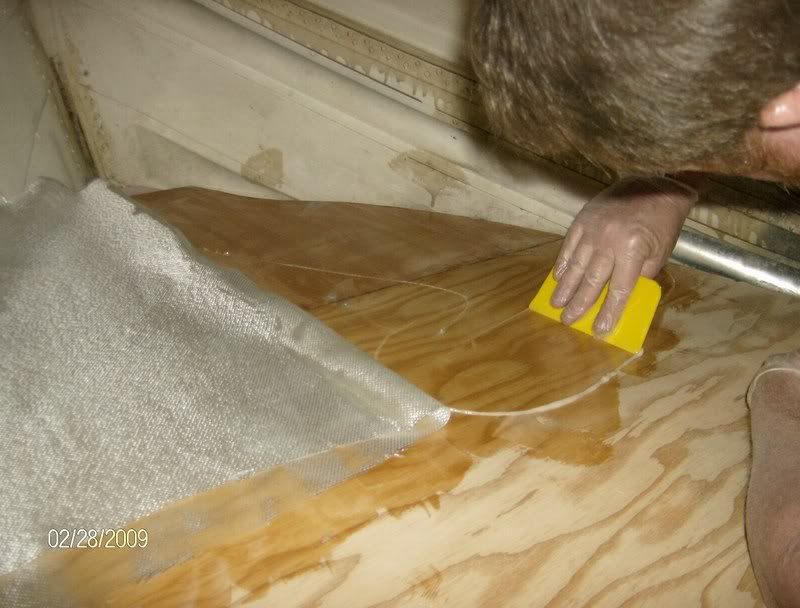
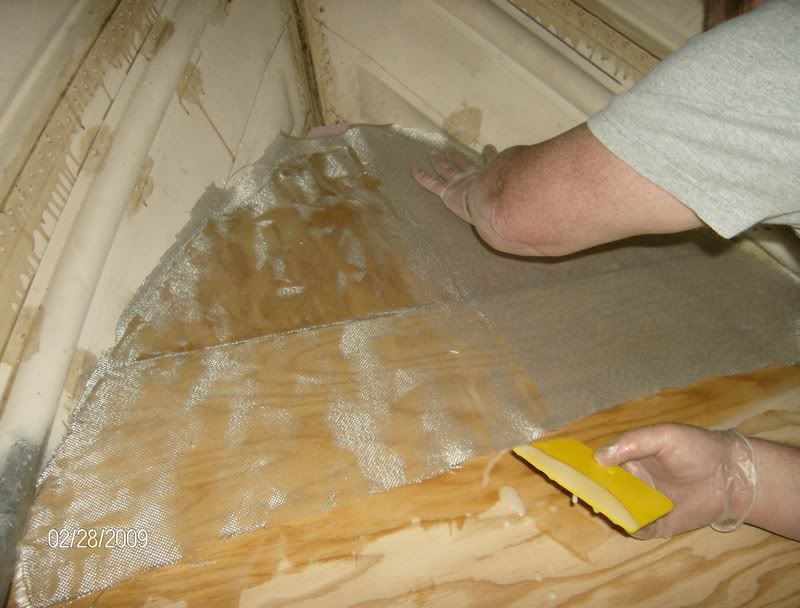
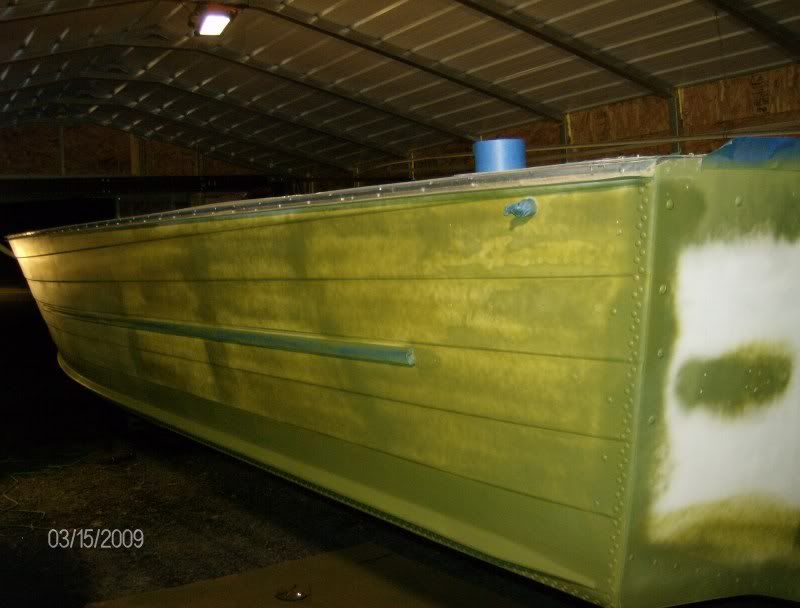
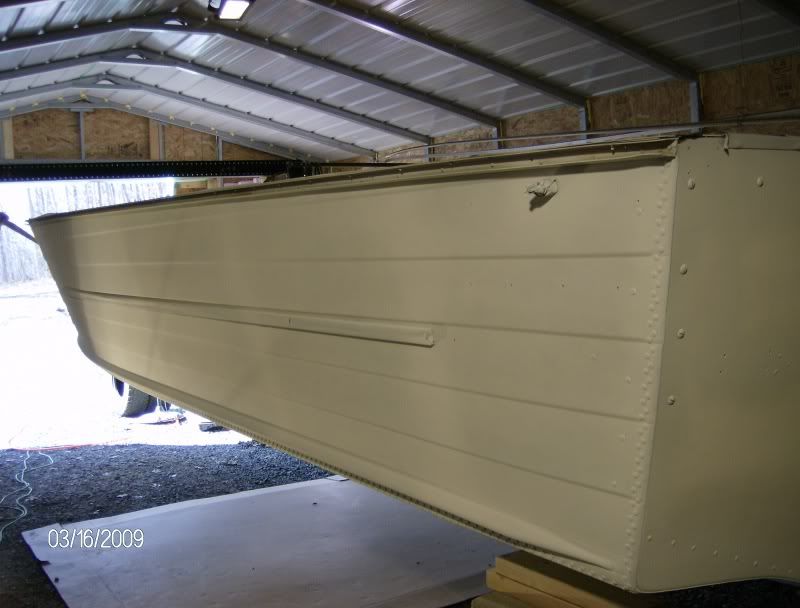
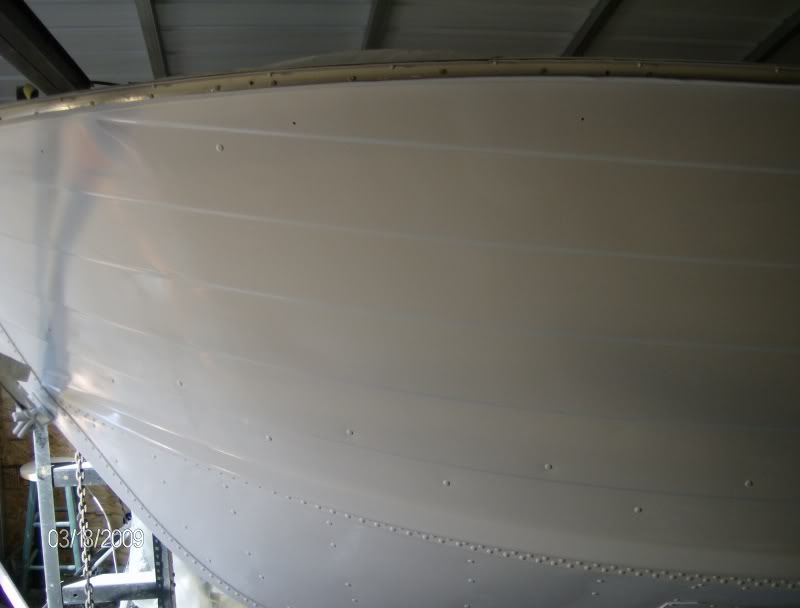
The material looks sort of grey in the bucket but goes on like a milky clear. Looks just like the resin we applied to the plywood. The can says it dries clear and you can paint over it.

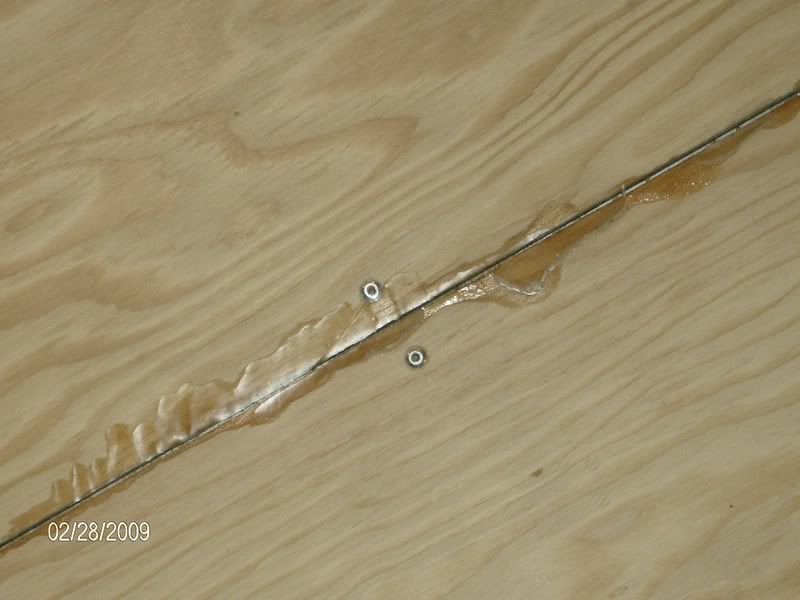
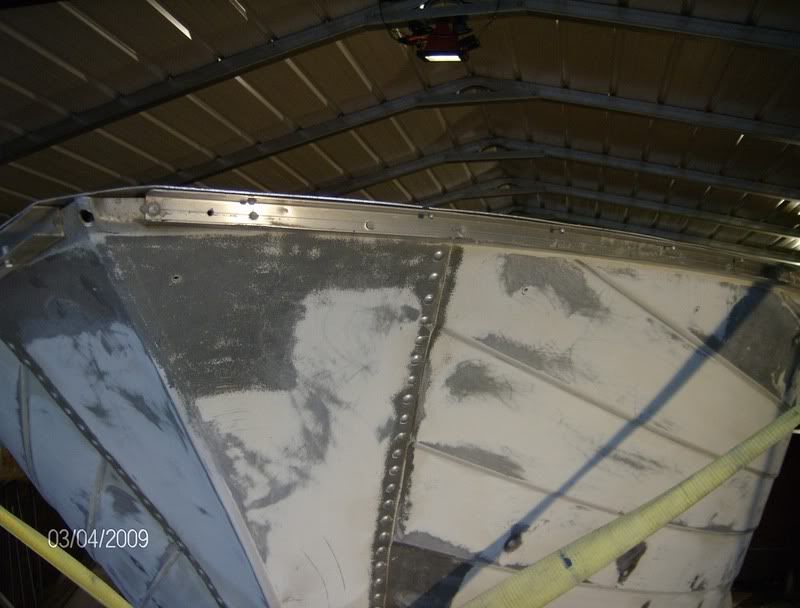
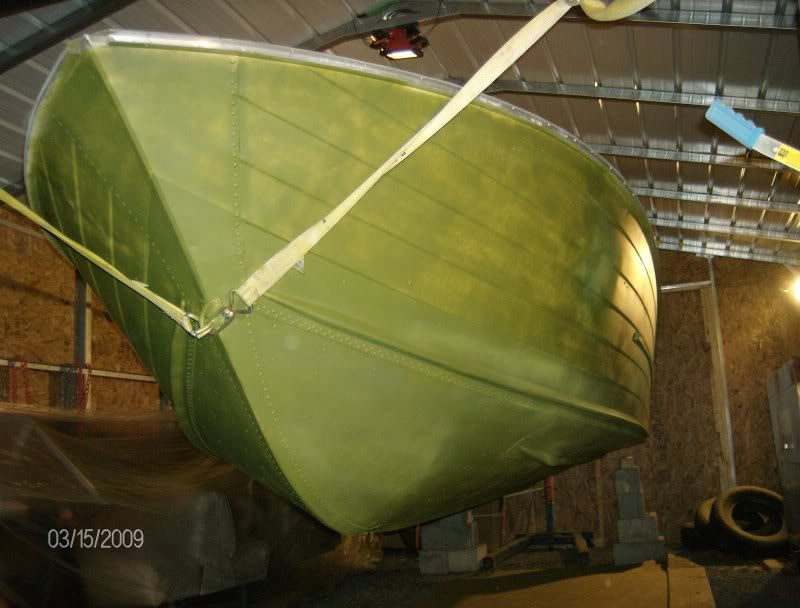
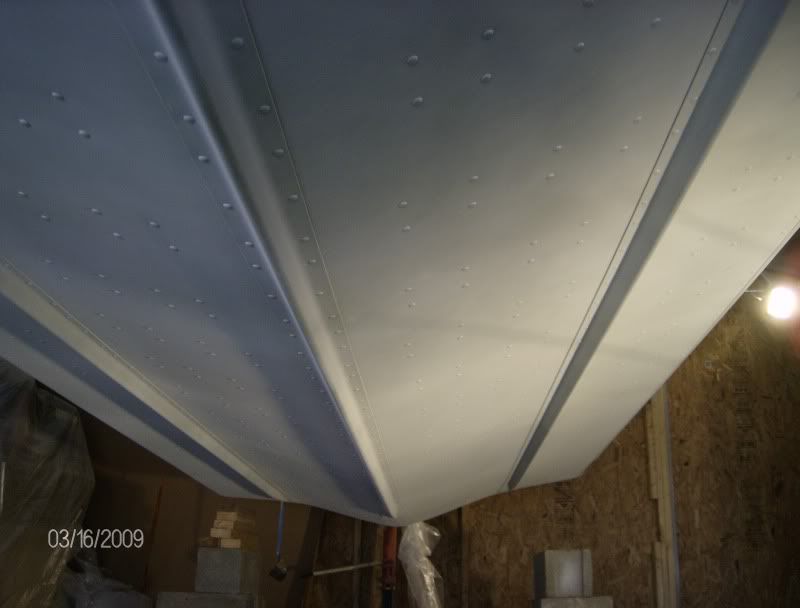
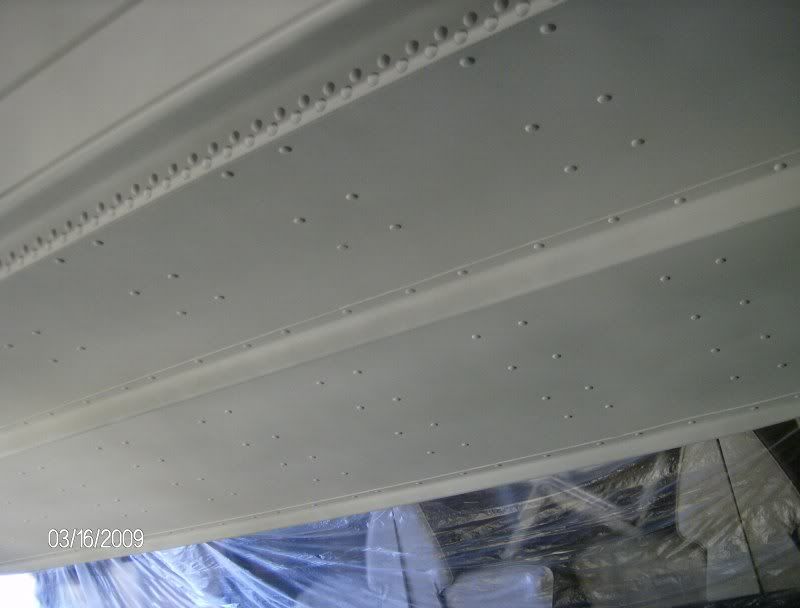
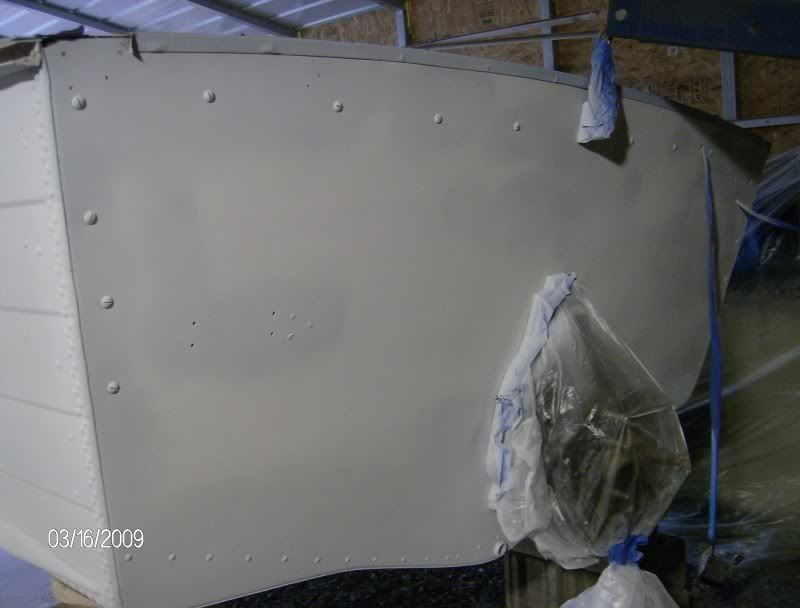
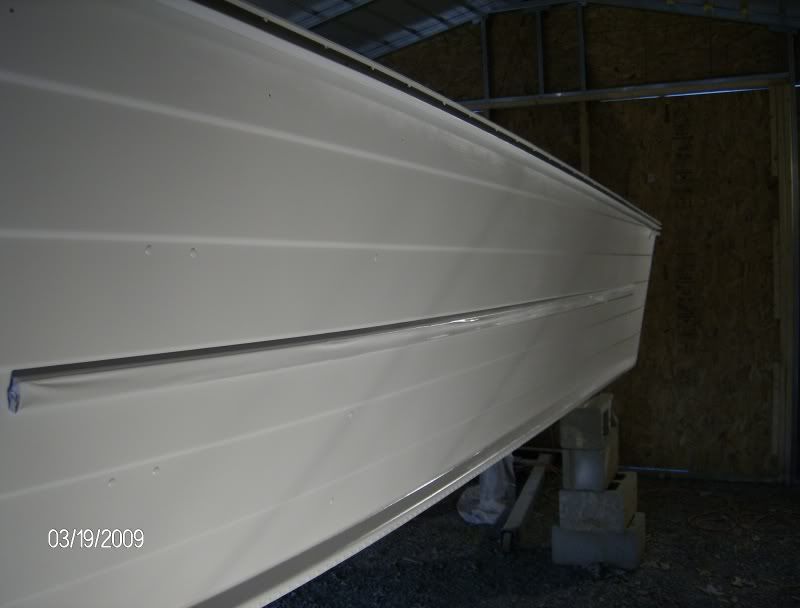
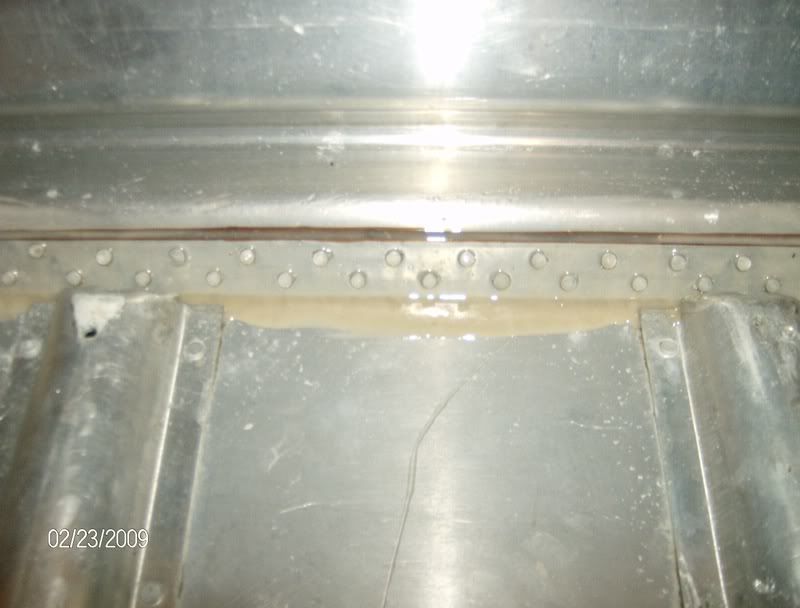
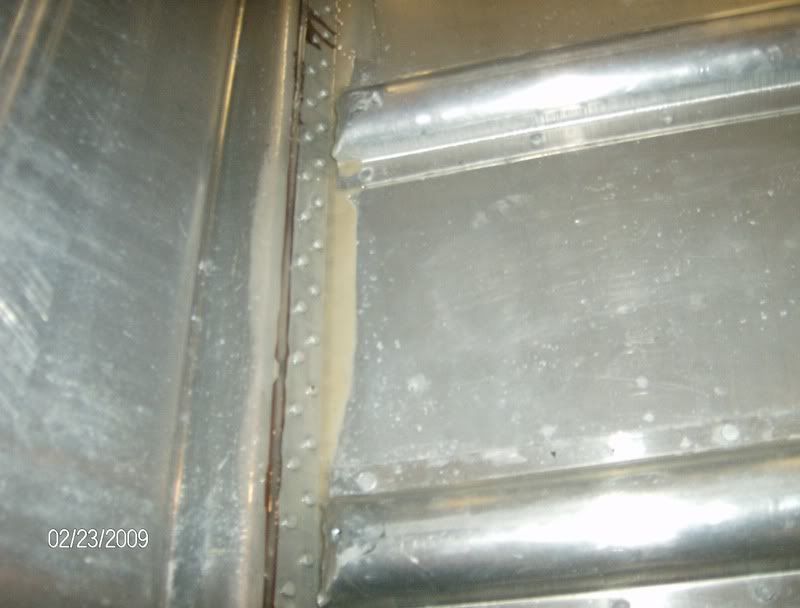
Basically I just slathered it on with a small brush and it self levels. The brownish stuff you see there is called Goodyear Pliobond, a liquid rubber installed when the boat was seamed originally (at least that?s what the brochure says).
Gluvit2.jpg


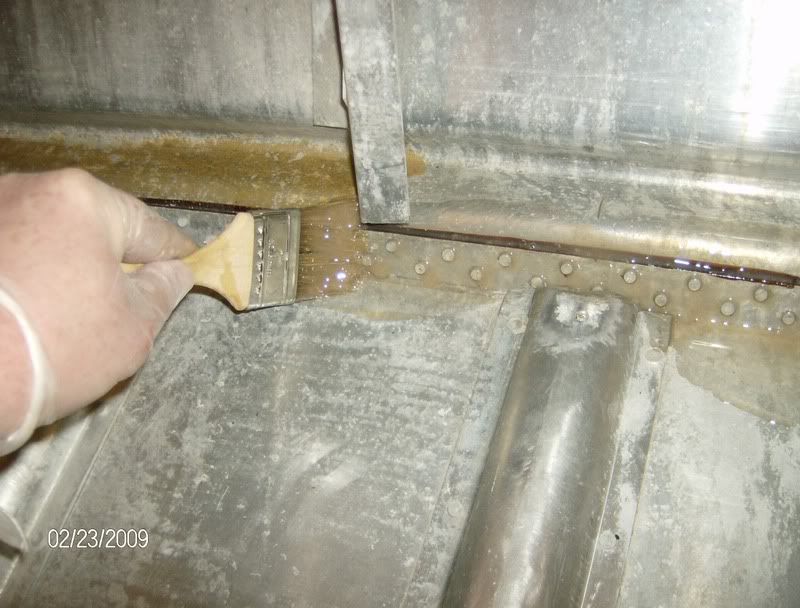
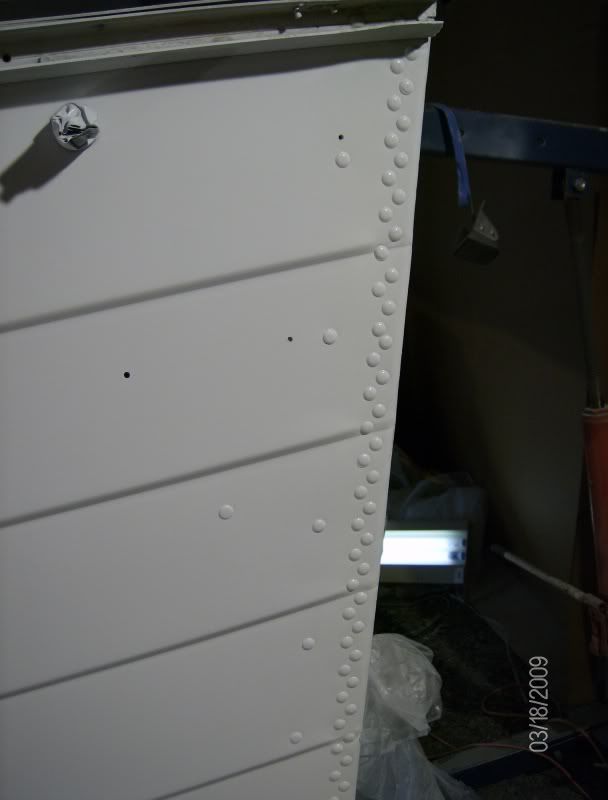
After it sets for a few moments you can go back and brush the pools of material over the area again and you?re basically done.
Gluvit3.jpg

Gluvit4.jpg

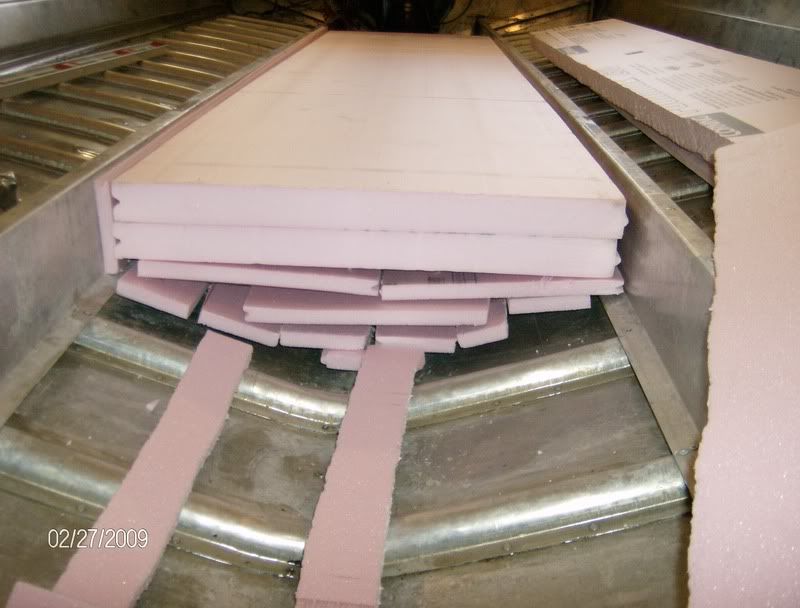
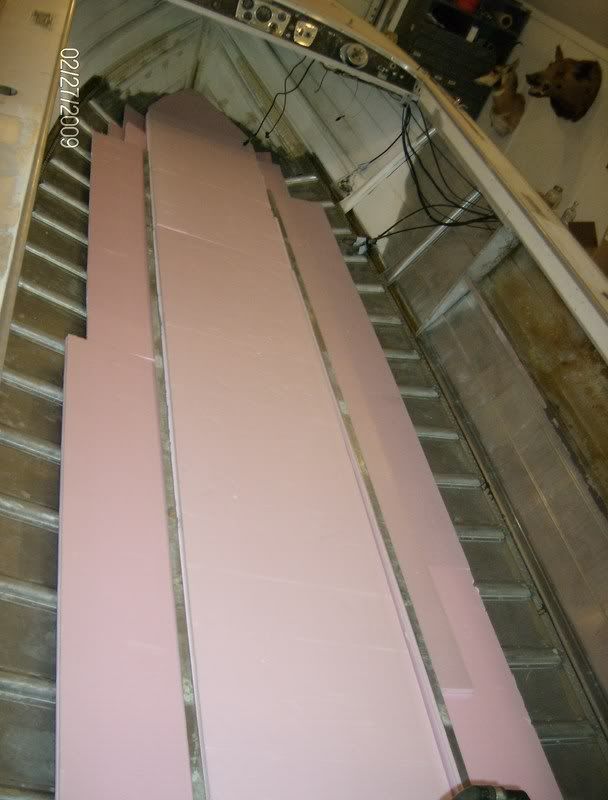
The can says optimum temperature is 72 degrees. It?s about 65 in the shop so we?ll give it a few days to totally cure and it?s time for new flotation and back in with the decking!!!!

Now I feel like I?m accomplishing something!
 

North Beach

Commander
Joined
Sep 29, 2008
Messages
2,022
Re: 66 Starcraft Sunchief re-Build

OK just to the East of us got a nasty snow storm yesterday and things at work got pretty much shut down. With a high around 25 and some nasty winds, I decided it was time for a trip to Home Depot to pick up the flotation and get started. I finally got my sleeves rolled up around 12:30.

The Gluvit is all set up so I can?t really put this off any longer. Here?s a shot of how I started.
Beginfloatation.jpg


This is alternating between ??, 1", and 2" Dow Foamular 250. Basically what HD stocks on the shelf. With the concave V hull, the angle was fairly steep so I needed a lot more of the 1? and ?? than the 2. So around 3:30 it was back to HD for more of the smaller stuff. When I arrived I realized I?d forgotton my wallet and the folks at the store weren?t having any of me coming back later to pay, So My wife, who thinks I?m off my knot for not buying a new boat had to drive to town with my credit cards. (more on what that will cost me later).

Here?s a shot of the finished product.
Finishedfloatation.jpg


Pretty much just building the stuff up to level at the top. Note should be made that the 1 and ? cuts really well with a razor knife. The 2 takes a keyhole saw resulting in a lot of pink beads everywhere. I did all the cutting outside and blew everything off with the hose reversed in my little shop vac. I also vacced out the boat about 50 times in an effort to keep the beads out of the bilge. The only down side to the operation was all the climbing in and out of the boat and cutting outside!

Once the flotation was finished, I got creative and lured my nephew and one of his friends over with a six pack of Bud Light. My wonderful wife went and picked that up also. (this will end up being a very expensive day) We had the bottom side double coated with resin from last week so we basically just went at it. We fastened the plywood with 3/16 aluminum rivets with a 1/2'? to 5/8? grip range. Went very smoothly.

Here?s a shot of my nephew installing the rivets and his friend supervising:D
Nefew.jpg

The rivets fasten along the edges directly into the aluminum ribs, down the center into the two aluminum stiffeners you can see in the earlier pics and at the joints into the flat 3? aluminum strips that are oriented side to side over the insulation. The 3? strips also fasten into the two center stiffiners. Once all this is fastened down the deck basically stiffens right up resulting in one heckova more sturdy deck than the 43 year old worn out deck we removed a couple of months ago.

Here?s a couple pics of the finished product.
FinishedDeck1.jpg


FinishedDeck2.jpg


We finished up right at 10 PM. If I?m not too worn out tomorrow, it?s glassin time!!!!!!
 

North Beach

Commander
Joined
Sep 29, 2008
Messages
2,022
Re: 66 Starcraft Sunchief re-Build

On the emblems it became evident very quickly there were not going to be any of those vinyl emblems that made the 40 some year journey in salvageable condition so I went mcguyver on the problem :D

Ofcourse I was tryin to get by with the Home Cheapo version on the stainless steel screws and the heads kept breaking off! Shoulda known better and I already had the rivets so I just went with em.

OK this was kind of a tough day on the ole man?s back! I started around 12:30again. After an hour or so of tightening up some rivets from yesterday?s operation, I began sanding the plywood and the excess resin from the seams. When I brushed on the first coat of resin for the bottom side I laid the plywood on a sheet of poly. The excess resin pooled under the edges and this needed to be removed before we glassed the deck. First I tried using the little corner sander with 120 grit and it didn?t go too well.
sanding1.jpg


After a few minutes, I broke out the random orbital sander and some 100 grit and things sped up considerably. Here?s what we?re trying to get the seams to look like.
Sanding2.jpg

More on my next post (too many pictures :D)
 

North Beach

Commander
Joined
Sep 29, 2008
Messages
2,022
Re: 66 Starcraft Sunchief re-Build

My nephew didn?t have anything else to do so he came over to run the camera and hetch & fetch. We mixed up some resin and hardener after we pre cut a couple pieces of cloth and started at the bow to work towards the stern. We?re using the same medium hardener and resin we treated the bottom of the deck with. The reinforcement is 10 ounce cloth in a 38? width. I bought 40 lineal feet.

Here?s a shot of the first piece going in.
Glassin1.jpg


I?m not experienced with glassing but what I?ve read here is ?thin is better?. With this in mind, I applied the resin with a squeegee as thin as I could and set about imbedding the cloth in the resin. After the first piece it became apparent I was applying the resin too sparingly since there was a large area of the cloth that wasn?t turning translucent. This was corrected by top loading the cloth with more resin. Here?s what the sheet looked before we added more resin to the top.
Glassin2.jpg


The next piece went much better after adjusting the amount of resin applied directly to the plywood. I can?t really say how much-you just have to experiment a little and figure it out as you go. Here?s a couple more shots of the stuff going in.
Glassin5.jpg

Glassin6.jpg


And finally here?s a pic of the finished product. After it cures I?ll trim the excess cloth.
Glassin7.jpg


We finally finished around 7 PM. I used one gallon of resin and ? gallon of hardener total between two coats on the underside and today?s operation.

Now I have a couple of questions and general statements for all the glass experts here.
? I basically squeegeed the resin as thin as I could while thoroughly wetting the cloth. Do I need to apply another thin coat over this once it cures?
? If yes, do I sand first?
? Will my jeans be waterproof for the next hundred years?
? Will my wife kill me if I put them in the laundry?
? My transome/gunwale height is 29? from the top of the deck. When were you gonna tell me about hanging upside down over the gunwale while I installed the last piece of cloth and squeegeed on the resin????
 

North Beach

Commander
Joined
Sep 29, 2008
Messages
2,022
Re: 66 Starcraft Sunchief re-Build

Thanks for all the input folks! I have to work this evening so I shot out to the garage to check on things. The epoxy is pretty much cured but the surface was still just a tad tacky. I could walk on it without leaving marks. So I mixed up another batch of 24 oz of resin and 12 oz of hardener and rolled on another thin coat with a medium roller. We'll see what that looks like when I get back around midnight.
 

North Beach

Commander
Joined
Sep 29, 2008
Messages
2,022
Re: 66 Starcraft Sunchief re-Build

I've never used the poly but this stuff didn't even have an odor. No fumes to deal with so I figured I didn't need one. Thanks just the same. I had an issue a couple of years ago with my jointer and some pacific yew in the wood shop. That was a bad one :(

Just checked on the rollover coat and everything looks good, I'm just gonna let it set in the warm garage for a couple of days. The weather is supposed to be really nice this weekend, so we're thinking about lifting it off the trailer and completing the sanding in preparation for bottom and topside paint. Now things are really gonna get interesting!!!!
 

North Beach

Commander
Joined
Sep 29, 2008
Messages
2,022
Re: 66 Starcraft Sunchief re-Build

Well we got that upper 70's weather today so I drug the boat out of the garage and did some little stuff. We removed the homemade jack plate, the stern handles and the rubrails and inserts. Then I got all fired up and broke out the orbital sander and hit all the topside stuff and the stern in preparation for paint. I also gave the new fiberglass deck a pass with the sander to knock down the high spots from me spillin stuff when coating and the areas where the hairs stuck up at the seams. Also managed to trim all the excess fabric from the edges and blew it all off with the leaf blower and I got the outdrive hung in the Boatel to start preppin it for paint.

I'm running out of excuses not to hang this thing and buy some paint. We do still need to remove the dash and all the gauges, etc. but that's about it.

Man, it took a couple hours just to collect up all the trash and tools from the last couple of days :D:D

I'll have to post a couple new photos tomorrow.
 

North Beach

Commander
Joined
Sep 29, 2008
Messages
2,022
Re: 66 Starcraft Sunchief re-Build

More really good weather today so I decided it?s off the trailer time. So I drug her out of the garage and backed her into the Boatel. I lifted the front with some of those huge Home Depot straps we use on the car trailer. Has anyone noticed how much crap I have from HD?? I practically live there it seems. I just hooked them to the bow eye and ran one to each side of the Hillbilly Gantry.
Off1.jpg

For the stern I broke out the engine hoist we used to use for pulling motors from my son?s race car. I knew that thing would come in handy again!
Off2.jpg

The hoist is rated for 4100 pounds and each of the straps are rated for 5000. The 66 brochure lists my boat fully rigged at 1750 pounds so I think we?re good. I stacked up the old tires just in case:eek:
Off3.jpg


Now I can finish sanding the bottom and get some paint on!!!! This photo also shows what things look like after you remove the rub rail and rubber insert. The rub rail was just thru bolted with a lock nut on the inside.
Rub.jpg


Here?s a shot of the 72 Cox trailer. I bought a newer (80ish) trailer but this one is really starting to grow on me. I wonder if I could swap out the bigger axles and wheels to this unit?
Off4.jpg
 

North Beach

Commander
Joined
Sep 29, 2008
Messages
2,022
Re: 66 Starcraft Sunchief re-Build

So I had to work today and didn't accomplish much on the project. I have to do a site visit on a project that will put me near the chromer's place so I gathered everything up that I want to make shiney and I'll drop it off tomorrow. Wonder what this pile is gonna set me back? And I'm hoping their prep will take care of the pitting:D

Chrome.jpg
 

North Beach

Commander
Joined
Sep 29, 2008
Messages
2,022
Re: 66 Starcraft Sunchief re-Build

Most of my stuff was chromed pot metal:( So I took a few peices in to have them re-done. I couldn't stand to part with the huge bow light and I peiced together one of those awesome Jetson stern lights so I'm gonna have to bite the bullet on a small chroming job. I'm also gonna keep the cleats so I don't hve to punch new holes in the top. As far as the horn, I can get a new one cheaper than re-chroming.

Now if someone could tell me how to get that humongus spotlight apart, I'd be set :D
 

North Beach

Commander
Joined
Sep 29, 2008
Messages
2,022
Re: 66 Starcraft Sunchief re-Build

OK, a little more progress!
After last weeks realization that the sterndrive was gonna need some work I've been trying to get some time to begin dealing with it.

I set up a small Hillbilly Paint Booth in the heated garage and went at the sterndrive last night. Glad I had that Baker scaffold out in the shop. I hung the sterndrive in it and went to sanding with the 220 grit.
Sterndrive5.jpg

Sterndrive3.jpg

Sterndrive4.jpg

I used the air dremel and a ton of small brushes and polishing pads to remove as much of the stuff that looked like calcium build up on the internal parts that I could reach. Overall, it cleaned up pretty well.

Here?s shot of it all taped up and ready.
Sterndrive6.jpg


This morning I did some final sanding, wiped it down with a damp rag and after it dried, shot a good coat of zinc chromate on it and I?ll let it dry till later tonight and get a coat of the Mercruiser Phantom Black on it last thing.
Sterndrive7.jpg


I ran into some problems with the allen wrench bolt that holds the trim tab on being froze up but we?re gonna separate the upper and lower unit next week when the parts for the sterndrive re-build come in and we?ll deal with that then. Thanks to the folks who answered my late night questions in the Fri night paint ???s thread!!!

I know someone is gonna ask why I?m painting before the re-build so here?s the answer. I?m getting help with the outdrive re-build and firing the motor up for the first time in four years. I don?t want my boat setting out at this guy?s shop in the weather and his bay isn?t long enough for my boat and trailer. With this in mind, while the outdrive is off, I?m doing the grunt work and I?ll touch it up if need be once we?re done.
 

North Beach

Commander
Joined
Sep 29, 2008
Messages
2,022
Re: 66 Starcraft Sunchief re-Build

Went back out this morning to check on last night?s paint job. WOW! Lots of holidays in the first coat. I guess that?s what I get for tryin to paint in low light. That, or I suck with the paint can :D
Sterndrive9.jpg

Sterndrive8.jpg

Sooo? this morning I hit it lightly with some 500 grit and I?m breakin out all the portable lights I have. I have two big windows in the shop but as luck would have it, clouds and rain have moved in so I?m not getting much natural light in there.

I was tryin to just lay down a lite first coat and I guess I went way too lite. So I?ll correct on this coat and probably end up with runs everywhere. Either way, I?m still havin fun!
 

North Beach

Commander
Joined
Sep 29, 2008
Messages
2,022
Re: 66 Starcraft Sunchief re-Build

OK after this morning?s second coat we?re starting to look much better. I?ll let this coat dry overnight, sand it again with the 500 grit, wipe it down and shoot another coat in the morning.
Sterndrive10.jpg

While we?re playin with the paint, I hit the Mercontrol parts with some degreaser, lightly sanded, and shot them with some Rustoleum Antique White.
Mercontrol1.jpg

Mercontrol2.jpg

Here?s hoping that Mercontrol sticker holds up under the tape. That color is real close to what was there to begin with. I don?t know what they looked like 43 years ago. We?ll give these overnight to dry, sand, wipe and shoot them again.
 

North Beach

Commander
Joined
Sep 29, 2008
Messages
2,022
Re: 66 Starcraft Sunchief re-Build

OK we got the paint ordered and it should be arriving any day now so it?s time to get it ready. This is what my world looked like all afternoon!
Finalsand1.jpg

Thought I?d throw up a couple shots of what it looks like after final sanding. I hit the whole boat with the orbital sander with 100 grit and 220 grit. Then I hand sanded and worked all the lapstrake edges with 220 and then the entire boat again with 500.
Finalsand2.jpg

Finalsand3.jpg

Then I hosed it down with cold water, wiped it with a rough hand towel and hosed it again. After that I spent some time drying with the electric leaf blower and let it set for a while with the big rotating shop fan moving the air. The next step was taping some plastic over the top to keep the Zinc Chromate from settling on the inside of the boat,
Cover.jpg

I began shooting the bottom first since the bottom had the most bare aluminum and I figured I?d just cover the entire bottom with ZC. I shot the waterline and up onto the bow just to show my wife what the finish paint scheme will look like.
ZC1.jpg

Tomorrow I?ll pick up some more ZC and hopefully finish it off.
 

North Beach

Commander
Joined
Sep 29, 2008
Messages
2,022
Re: 66 Starcraft Sunchief re-Build

I just got back from DC. They called and told me my paint was in. 180 mile round trip and when I get there they inform me SOME of it is in! The rest will be there in the morning:eek:

So, I'm back in GREENVILLE tonight tryin to finish off the ZC. Maybe with luck I'll at least get a couple coats of primer on it over the weekend. Sposed to be 34 degrees tonight but Sat/Sun is sposed to be nice so we'll see.
 

North Beach

Commander
Joined
Sep 29, 2008
Messages
2,022
Re: 66 Starcraft Sunchief re-Build

OK, got all the Zinc Chromate done tonight so I thought I'd post up a couple more pics. Since it's just the etching primer, I didn't go as heavy above the water line. There were so many bare spots, I just shot the entire boat except the stern. Tomorrow night I'll start on the primer. I've decided to paint the bottom and sides with Pettit's Easypoxy. The boat is gonna be trailered so there's no need for an ablative bottom paint. Once that's all done, we'll match the top to the below the waterline color and shoot a few coats of PPG automotive with a couple of clear coats. Should be fun:D
ZC2.jpg

ZC3.jpg
 

North Beach

Commander
Joined
Sep 29, 2008
Messages
2,022
Re: 66 Starcraft Sunchief re-Build

My wife picked the colors. We were looking for something old skool so we're gonna do the waterline down and turn up the bow with a sort of sea green. Looks kinda like this
TinCan3.jpg

The side will be white and the top will be the same green. I had to buy green and white from Pettit and I'll just have to wing it on mixing the color. We'll se how that goes. Once I have the final mix, I'll spray a 6"x6" peice of metal and take it in and the automotive folks will match it for me.

So I fired up the heater in the shop overnight to ward off the overnight chill. Went out and shut it down around noon. Threw open the big door, hit a few rough spots with some 5oo grit (very lightly) and wiped the entire boat down with a damp cloth.

Next step was rigging all the danged air lines to get to the boatel. Once that was accomplished, I broke out my Home Depot Husky brand gravity feed HVLP spray kit. I bought it a couple of years ago and have never used it. Man that setup is simple! One dial for air and one for material.

The directions on the primer said 15 to 20 % spraying thinner so I mixed up 16 ounces of primer and 2.5 ounces of thinner and hit it with the paddle. Poured it thru the strainers that came with the gun and went at it. That initial mixture did one entire side, half the bottom, and half of the stern. Started sputtering right at mid point on the stern.

I did have a little trouble with the gravity feed right at the back on the bottom where it gets real flat, but had no problems with the deep V hull.

Mixed another batch and shot the other side. Here's a few pics.
1sand1.jpg

1sand2.jpg

1sand3.jpg

1sand4.jpg

1sand5.jpg

I think it turned out good for a spray challenged boat owner. I plan on hitting it with a tack rag in the morning and shooting another coat of the primer. Then I'll sand it with the 500 grit on Sunday and try to paint the first coat on Monday. You folks tell me what you think of that approach?????

BTW, the plan was to start low and work up.
 

North Beach

Commander
Joined
Sep 29, 2008
Messages
2,022
Re: 66 Starcraft Sunchief re-Build

Got the entire boat sanded with 500 grit and shot the second coat of primer on today. Tomorrow it's paint time!!!!!!!:eek::eek::eek:
 

North Beach

Commander
Joined
Sep 29, 2008
Messages
2,022
Re: 66 Starcraft Sunchief re-Build

OK the paint part of the project continues. This morning I broke out the 500 grit and did a slow, methodical, light sand on the second coat of primer. This coat required way less sanding than the first. The next step was blowing off all the dust and wiping the entire boat again with the tack cloth. Between sanding and wiping I hauled every plug in light that I own into the Boatel to try and lighten things up some for the first coat of white paint.

I mixed up the same formula with the Pettit Easypoxy High Gloss White as I did the primer. 16 ounces of paint and 2.5 ounces of spraying primer. Still holding at 70 degrees in the shop.

I?m amazed at how well this paint went on. No runs and fairly easy to see the laps as you go. I thought the white on white in my dark boat shop was gonna give me trouble but that was not the case.
1paint3.jpg

1paint2.jpg

1paint5.jpg

I thought everything was perfect till the paint started flashing off. Looks like I have some holidays on the starboard side.
1paint4.jpg

I?ll deal with that during tomorrow?s sanding and the second coat. I decided to go ahead and shoot a coat of the white on the bow since I had enough thinned out for spraying. All in all I?m pumped about the results and I?m ready to shoot another coat tomorrow.

Yeehhaaa!
 

North Beach

Commander
Joined
Sep 29, 2008
Messages
2,022
Re: 66 Starcraft Sunchief re-Build

OK got another afternoon in on the paint. This was the second coat of Easypoxy on the sides, bow, and stern.

I spent some time working on the holidays from yesterday?s first coat. They turned out to be rough spots in the aluminum and I believe I?m stuck with them at this point. I sanded them lightly with 500 grit and after shooting the second coat I think they look about as good as they?re going to. Another coat or two should finish smoothing them out.

This is a shot of me painting in case some of you wonder what I look like :)
2paint2.jpg


Here?s the results from today. Same mixture and another thin coat. I did find a couple of runs from yesterday (I knew I would) and worked on them with the 500 grit also. I don?t really like sanding this Easypoxy because it looks like the sanding marks are going to telegraph thru the next coat. Maybe some of you folks with more paint experience know what I?m doing wrong. Anyhow, it is what it is and I can live with it.
2paint6.jpg

2paint8.jpg

2paint4.jpg

I know the pictures are a tad hard to see. The space in the boatel is kinda limited forcing the weird angle shots. I'll probably break down in tears when I get this boat back out in the sunlight:eek:

Tomorrow will be the final coat of white. I?ll be picking up the rest of the paint tomorrow, and after the white cures, I?ll tape it off and begin working on the light green bottom. Anyone have any idea how long I should wait to apply the masking tape?
 
Status
Not open for further replies.
Top