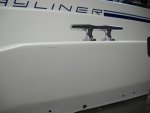
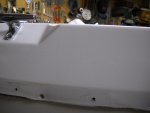
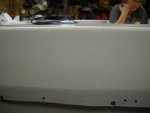
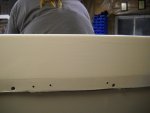
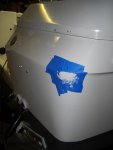
1991 Bayliner Trophy 2002 Transom Repair

Status
Not open for further replies.
Joined
Aug 17, 2009
Messages
941
Re: 1991 Bayliner Trophy 2002 Transom Repair

JK,

Looks like a normal teleflex rack system with the threaded connection end. The newer ones have a quick connect end instead. It also looks like a single cable system. Any reason for going with a dual cable system as the replacement? You can just replace the cable if you like. Typically the gears in the rack part go bad before the cable does unless you know the cable is seizing in its jacket.
 

j_k_bisson

Lieutenant Junior Grade
Joined
Oct 6, 2010
Messages
1,082
Re: 1991 Bayliner Trophy 2002 Transom Repair

JK,

Looks like a normal teleflex rack system with the threaded connection end. The newer ones have a quick connect end instead. It also looks like a single cable system. Any reason for going with a dual cable system as the replacement? You can just replace the cable if you like. Typically the gears in the rack part go bad before the cable does unless you know the cable is seizing in its jacket.

Seeing I am increasing the HP on the boat I need to revamp the steering from single cable to dual cable. There is nothing wrong with the current cable. Just under rated for the new motor.
 

proshadetree

Lieutenant Commander
Joined
Jul 19, 2008
Messages
1,887
Re: 1991 Bayliner Trophy 2002 Transom Repair

I have to much horsepower for my steering is a heck of a problem to have. Hope to see more pics soon
 

j_k_bisson

Lieutenant Junior Grade
Joined
Oct 6, 2010
Messages
1,082
Re: 1991 Bayliner Trophy 2002 Transom Repair

I have to much horsepower for my steering is a heck of a problem to have. Hope to see more pics soon

The problem I want, is too much HP than what's good for me. In safe way!!!!!!!:D
 

j_k_bisson

Lieutenant Junior Grade
Joined
Oct 6, 2010
Messages
1,082
Update 12-03-2010 Gel coat impact cracks

Update 12-03-2010 Gel coat impact cracks

Today thereis going to be a ton of posts as I spent along of time last night working on the boat and trying to figure out how far I'm going to go on the gel coat repairs.

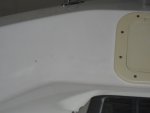
This post will address and ask the questions to Yatch Dr, the proffesional and any other pros out there, on their opinion on repairing these spots. I have frive spots on the outside vertical wall of the cap that have impact cracks. They are not stress cracks that open everytime the boat hits a wave. These are where the boat might of hit a dock/other boat and stress cracked the gell coat. Here are the pics and locations.

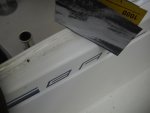
This one is on the drivers side of the boat up by the mid cleat. It appears were a past owner tied the boat to something and flexed the side and made the cracks. They do not appear to be deep but there is alot of them.

DSCN0975-1.jpg

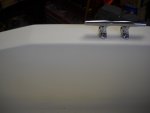
This one is same side but the rear cleat. Same thing where it is not deep, and not many of them.

DSCN0981-1.jpg

This one is the same side as well, right between the two rear cleats. This is starting to blister. Only three stress lines on it. But two blisters.

DSCN0982-1.jpg

Here is the passenger side Mid way between the two rear cleats. It probably has fiberglass damage. It has a ton of cracks though.

DSCN0978-1.jpg

Last one on the pass side up in front of the mid cleat. More impact cracks.

DSCN0979-1.jpg

My question to Yatch Dr. is can these be fixed in your opinion with simple gel coat repair, or do I need to hawg out the fiberglass and do epoxy/fiberglass repair then gel coat repair? If not all of them which ones in your opinion can I get way with just gel coat repair? I have reviewed your pics reguarding this kind of repair but I was hoping for a more in depth process to help me do it.

Any info would be greatly apperciated.

The next posts are where I am fixing more spots on my cap where I have gel coat chips. Not fun work, but not hard work either. Check them out.
 

j_k_bisson

Lieutenant Junior Grade
Joined
Oct 6, 2010
Messages
1,082
12-03-2010 Gel Coat Repair chips

12-03-2010 Gel Coat Repair chips

Here is the post on how I go about repairing the gel coat chipped spots. I am no expert and learning as I go. So please be kind. I am currently fixing around ten spots total on the cap this time around. I will focalize on one spot for this post and then post the other spots in the next one.

First I start by Idenifying the spot that needs to be repair. Not hard on my boat just look around!:D Then I wipe/scrub the chip and area around it with acetone. Here is a pic when finish this step

DSCN0928-1.jpg

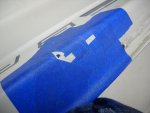
Second step I tape the area off around the chip with blue masking tape. I find this tape stick alot better than the rest. I guess that is why it cost more. Then I take my dremel with a 1/8" carbide burr in it and grind out all the loose fiberglass and gel coat. Not deep, but to clean area to be filled. This also helps clean out any old wax. Then I again wipe the area again with acetone, right over the tape. Heres a pic of the area after grinding.

DSCN0948-1.jpg

Next I mix up a very small amount of gel coat. I measure out using a cheap $10 digital scale from Harbour freight the gel. Usually .05oz and then combine three drops of hardener. I mix it up really good and then apply it to the area. I find that gel coat shrinks when drying. So I tend to dome it over the area quite a bit. Any pro's out there may say I'm wasting and adding more work for myself. But I find that a bit more sanding is better than having to do it over again because I have a voids. Also make sure you work it in. Trying to get any air voids out. Here a pic after gel was applied.

DSCN0951-1.jpg

Then I let is set over night if I keep the garage heated nice and warm 70'F, or a couple of days if lower 50-60'F temps in the garage. Next the true work begins. Sanding. I'll post that process this weekend. Here is a pic of the area I am working on this repair.

DSCN0957-1.jpg

Next post is a quick pics of the other areas. Before gel.
 

Attachments

  • DSCN0970-1.jpg
    DSCN0970-1.jpg
    142.9 KB · Views: 7

j_k_bisson

Lieutenant Junior Grade
Joined
Oct 6, 2010
Messages
1,082
Re: 1991 Bayliner Trophy 2002 Transom Repair

Sorry mixed up the pics on that last one. The one pic is of the tools I use mixing the gel. Here is the pics of the areas I am working on. Down and dirty.

DSCN0945-1.jpg

This pic shows where I had a snap for the tunnel canvas come out. So I first used a q-tip and put some resin in each hole a couple of days ago. So now I could gel-coat fix the crack around the holes. I will eventually put the snap back in. Might move it a 1/4" though. Also you will see where I am attempting to repair a spot in the floor threads. We will see how this goes. Never done it before. Had a hole right thru the gel and needed to seal it before it got bad.

DSCN0944-1.jpg

This is a pic is on the pass side mid cleat. Something chiped the corner.

DSCN0949-1.jpg

This is where the windsheild attaches to the cap on the drivers side rear corner. I had a construction light hanging from my ceiling and it fell and chipped the cap. I have to say that gel coat is very durable. This is the only damage from a 20 lb light fixture hitting it.

DSCN0930-1.jpg

This is the only pic I got from up front. There is 5-6 spots up front by the anchor well that are getting fixed. I'll get pics this weekend if you want. Nothing but chips up there. Probably from poor anhor handling.

Next post is more questions reguarding trim tab switch location on dash, window hatch repair/resealing, and steering cabel identification. So stay tuned......
 

j_k_bisson

Lieutenant Junior Grade
Joined
Oct 6, 2010
Messages
1,082
12-03-2010 Window/Hatch resealing

12-03-2010 Window/Hatch resealing

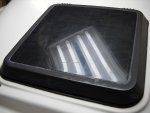
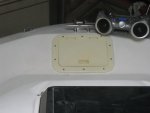
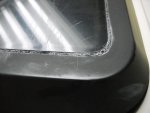
This post is to ask if anyone has ever tried to cut the caulking out that holds the window pain in the front hatch and reseal it using 3M 5200/4200? I thought maybe I could get a knife in there and cut the sealing coumpound and reseal it useing 3m product. Here is a pic of the window.

DSCN0942-1.jpg

This a close up of the exsisting sealing compound. I have a leak i this corner.

DSCN0943-1.jpg

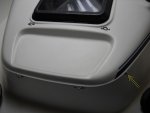
Also does anyone know what this deck fitting is for? Is it to clip the attena down?

DSCN0941-1.jpg
 

j_k_bisson

Lieutenant Junior Grade
Joined
Oct 6, 2010
Messages
1,082
12-03-2010 Trim Tab switch placement on dash.

12-03-2010 Trim Tab switch placement on dash.

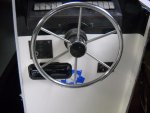
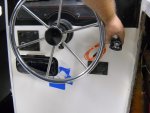
This one should be good for everyones opinions. Where should I put the switch for optimal usage. Here is a pic of the dash with the switch.

DSCN0972-1.jpg
 

j_k_bisson

Lieutenant Junior Grade
Joined
Oct 6, 2010
Messages
1,082
12-03-2010 Steering cable identification

12-03-2010 Steering cable identification

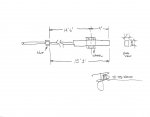
This is the last post for today. I need some help reguarding the identification of my steering cable. Here is a drawing of the cable.

steering cable.jpg

There was no identifiction on the cable as to the length. The column had teleflex on it and that is it No modle number. It was a rack and pinion type.

What I need help with is on determining which dual cable will replace this single cable on the existing hub. Also what length do I order.

Any help would be appericated.
 

proshadetree

Lieutenant Commander
Joined
Jul 19, 2008
Messages
1,887
Re: 1991 Bayliner Trophy 2002 Transom Repair

You might want to send YD a private message. I wish I could help but have no experience in these maters. I could say give up and bring it to Mee:D maybe someone will chime in.
 

j_k_bisson

Lieutenant Junior Grade
Joined
Oct 6, 2010
Messages
1,082
Re: 1991 Bayliner Trophy 2002 Transom Repair

You might want to send YD a private message. I wish I could help but have no experience in these maters. I could say give up and bring it to Mee:D maybe someone will chime in.

YD did respond. I am gathering vast amounts of YD experience and reccomendations to tackle that part of this project. When I come to that part of the project I will post his recommendation with his consent of coaurse. and the how to's.

Its staying in my garage for now. Nice and warm and cozy!.....:D
 

j_k_bisson

Lieutenant Junior Grade
Joined
Oct 6, 2010
Messages
1,082
Update 12-04-2010

Update 12-04-2010

Well not much done last night. Had car repairs that had to be done and have been on the back burner for quite some time. This is what I got done on the cars.

Front and rear brakes on the focus
Oil change on the focus
Front upper ball joints on the F-150 (My Moms)
Clean my wife's explorer (Vaccum and wash interior)

I don't think she has cleaned it since the last time I did it 3 years ago. Boy can kids get some things dirty!!!!!:eek:

After I was done I pushed the boat back into the garage and layed out all the materials I would need to finish the gel coat repair chips. Then I decided that I would share with everyone what I use and how. Over a couple of drinks of coarse! Isn't that what this is all about? Helping out everyone else with their projects. I am not an expert or even trained in this sort of thing. I just keep on trying until I get what I think is right. If anyone has anything to add, please help by adding your comments here. Especially if it saves me a ton of time!:eek:

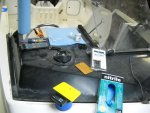
Here is a pic of the materials I have used so far for the gel coat repair.
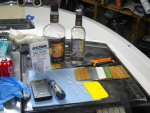
DSCN0989-1.jpg

You will see the following in the pic.

Digital scale Plastic scrappers
Q-tips Rubber gloves
Garage scissors Spectrum Gel Coat paste

Don't know why the screw driver is there. I use pre coloured Spectrum gel coat paste. My hull is faded/stained but its close enough for me. I'm colour blind anyways! So it does not matter that much to me. I explained how I use these items in my last post so I will not get into them here. I should mentioned though I only use the Q-tips to mix the paste and hardener on the Plastic scappers. I cut off the tips so I do not contaminate the paste with cotton fibers.

Here is the sanding supplies I use.
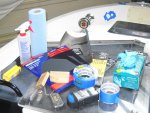
DSCN0988-1.jpg

You should see in this pic the following.

Sand paper (wet dry) 120, 180, 220, 320, 400, 800, 1000 grit
My two sanding blocks (One flat and one rounded)
Blue tape
Water spray bottle
Straight razor and blades
Rubber goves
Cottong rags/blue shop towels.

That is all the sanding supplies I use. I will get into how I use them tomorrow with pics.

You will notice that I included the Richardson sanding block. Do not use this. It will give you a bump on you patch work. It has a soft bottom and tends to sand only the edges of the repair leaving the center high. I wanted to talk about this, that is why I left it in the pic. I learn't this lesson by trial and error, the hard way. I have to go back and fix a couple of spots I used this on.

This is the pic of the buffing supplies I use. I have tried other stuff, but this is what works for me. My opinion only. I have tried the extensive meguires stuff and had very little sucess with them I use their wax though. I love it. I will list that stuff when I get to it.
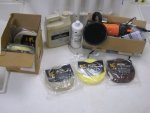
DSCN0985-1.jpg

WHat you should see in the pic.

Meguires 8" buffing pads (W9000, W8000, W7000)
Meguires heavy rubbing compound
3M Finness It finishing compound
My Harbour Feight 7" Buffer

The things I missed to put into the picks is my straight razor and blades. These are a must. But I go through a ton of blades. Also a bucket of water. I'll show how I use these when I get to that part of the project as well.

I hope this will help some one. I'll deffinately post step by step on how I use these things.

Tonight I hope to finish sanding and hope to get into buffing some of the cap. I have located 7-8 more spots that need chip repairs. These will get the prep work done before the buffing is started.

I will probably get to the sides impact cracks after I am done buffing the cap. I'll just through on some blankets on it.
 

j_k_bisson

Lieutenant Junior Grade
Joined
Oct 6, 2010
Messages
1,082
Update 12-04-2010 Sanding gel coat repair spots.

Update 12-04-2010 Sanding gel coat repair spots.

Here is the process I use when I sand the gel coat repair spots. It may not be the proper way, but it works for me. Also I am no expert, I have only learn't from trial and error. This is what I have come up with by the hard way. By trying.......:D

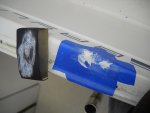
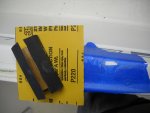
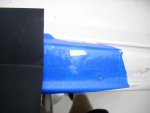
I start by leaving the old existing blue tape and I sand it with 120-180 grit wet dery sandpaper on my curved block. The curved block gives me fresh sandpaper always. This step the paper tends to clog up alot. The curve lets me rotate to a clean flat edge to work with. I sand until I start sanding blue tape around the repair spot. At this point I stop. Here is a pic.

DSCN0992-1.jpg

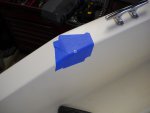
Next I remove all the old tape and replace with new tape. The tape protects the surrounding gel coat from getting sanded. I normally place the new tape 1/32" from edge of the gel coat repair. This gives the "dust" a place to go when sanding instead of load up the paper. Also it gives you a way to see how much more you got to sand until you hit old gel coat. Then I start sanding with the flat block and 220 grit sand paper. I keep sanding untill I am almost thru the gel coat repair patch/blue tape on the edges. (Thru the gel means where there was no "hole" to fill.) Then I stop. Here is a pic of that finished.

DSCN0995-1.jpg

Next I remove the tape and switch to 400 grit. First I inspect to ensure that the there is no bump in the middle of the area I repairing. If there is reapply tape and sand by hand (finger tip) with 320 until flat. Mindful that only 3-4 strokes takes off quite a bit of gel. I did have a bump and I sanded very lightly (4-6 strokes) getting the bump out. Here is a pic at the end of this step.

DSCN0996-1.jpg

Next I remove the tape. Then I started blending in the last of the gel repair spot to meet the old surface. I either use a block of finger tip. Here is a pic and the end of this step.

DSCN1000-1.jpg

Next I switch over to 800 grit. This is to remove any scratches from sand with the heavier grits earlier. Only 5-6 strokes here as well. Heres a pic at the end of this step.

DSCN1001-1.jpg

Cont'd on next post.......
 

j_k_bisson

Lieutenant Junior Grade
Joined
Oct 6, 2010
Messages
1,082
Update 12-04-2010 Sanding gel coat repair spots Cont'd

Update 12-04-2010 Sanding gel coat repair spots Cont'd

Next and finally I move to 1000 grit. I blend the area of the spot to the surrounding area by 3-5 inches around. It helps blend in the colour difference and makes buffing much easier. Heres a pic of the final step when finished.

DSCN1002-1.jpg

I ended up doing two other spots this afternoon. This one is where the snap for the canves came out. It has a slight blue hue to it if you are looking for it.
DSCN1005-1.jpg

This is the chip by the passanger side mid cleat. You will notice that below the top edge the gel is getting a bit thin. The glass is very slightly showing through. Not fixing this. But this area is giving me some possible heart burn on how I'm going to buff this area. Maybe no heavy compounds in this area. We'll see.

DSCN1009-1.jpg

To add a couple of words of advice. Don't rush. Take your time. A couple of strokes and check, then a couple more, and then recheck, etc....... Also if it does not come out the way you want it, just hawg it out and start over. But don't get to big with the repair spot.

One last thing. When you do it yourself you end up looking at it up close and personnally. If you are not happy with it step back to where you will be standing and look at it. If you can not see it from there then it is good enough!!! Nothing is perfect!:D
Hope this helps everyone. Buffing/finishing will be either tomorrow morning or next weekend. Depends on what materials I can get for the side impact stress crack areas this week. I just might try those repairs........ We'll see. Never tried it before, that big of an area or that type of repair.
 

proshadetree

Lieutenant Commander
Joined
Jul 19, 2008
Messages
1,887
Re: 1991 Bayliner Trophy 2002 Transom Repair

Looking better every day Great work man:)
 

j_k_bisson

Lieutenant Junior Grade
Joined
Oct 6, 2010
Messages
1,082
Re: 1991 Bayliner Trophy 2002 Transom Repair

Thanks for all the praise. It is appreciated. But I should warn you this type of work will drive you to drink!!!!!!!!!!!!!! It is patience driven and you must be a contorsionist! Man as big guy like me does not fit into some spots up front of this boat. :D
Anyways last night I finished the sanding for all the gel coated spots from the day before. I did learn another trick. Here it is;
When final sanding with 1000 grit you should end up with a basic shine. This shine you will see if you have any scratches from sanding with the heavier grits or bumps from the repair spot. If you do, and depending on the scratches/bump, just go back to the heavier sand paper and resand. (most can come out with 400-800 grit sanding)

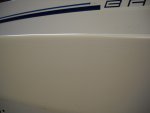
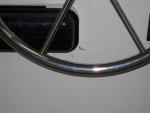
Here is the pics from the other spots that I sanded. The one from under the steering wheel came out great, other than contamination. This bring up another tip. Make sure the work area is perfect flat, before tape and after grinding, and clean of dust. This contamination will show up in the repair spot. Under my wheel I have a spot where the spot that was getting fixed had a raised edge. When I sanded flat the fiberglass showed up as a line. Check out the pic.

DSCN1011-1.jpg

Here is a pic up front after the sanding. Can't even see them any more. These ones came out perfect!!! Also where I learned the trick. While laying on my back with my legs up in the air sanding above my head! You had to be there.........

DSCN1018-1.jpg

Here is a pic of the floor. How I tackled this one with reguards to the pattern was wrong. It did not come out perfect. It's ok thought. I'll live with it for now. Here is a pic from the height of standing up. Can't see it, so good enought for now.

DSCN1017-1.jpg

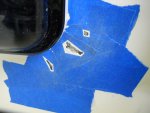
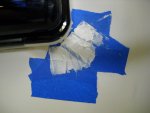
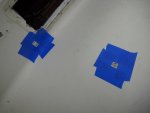
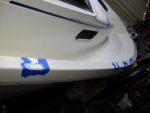
After I was done I prep'd and gel'd 9 more spots. It funny how they just start appearing when you are not looking for them. Here is two of three pics. Look for the blue tape spots.

DSCN1023-1.jpg
DSCN1024-1.jpg

Cont'd next post.......:D
 

j_k_bisson

Lieutenant Junior Grade
Joined
Oct 6, 2010
Messages
1,082
Update 12-05-2010 cont'd

Update 12-05-2010 cont'd

Here is the last spot. While pushing the boat into the garage last time I hit the brick corner of the garage. It gouged the hull down to fiberglass. Here is the pic.

DSCN1026-1.jpg

Not doing anything tonight. Was out all day with Mom and Dad shopping in the States. I'm done for the day. Again "God said the seventh day was for rest! Thats what I am going to do."

Talk to you's tomorrow...........................
 

proshadetree

Lieutenant Commander
Joined
Jul 19, 2008
Messages
1,887
Re: 1991 Bayliner Trophy 2002 Transom Repair

Man you are going to have it tot purty to use. Looks great though man. I have a few spots on two of mine I need to do this to.
 
Status
Not open for further replies.
Top