1991 Bayliner Trophy 2002 Transom Repair

Status
Not open for further replies.

j_k_bisson

Lieutenant Junior Grade
Joined
Oct 6, 2010
Messages
1,082
Update 12-12-2010 Cont'd

Update 12-12-2010 Cont'd

Here is the last posts for today. Here is the before pic of the drivers side of the dash.
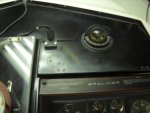
DSCN1073-1.jpg

Here is a pic of the finished pic.

DSCN1083-1.jpg

A couple of things I must say about this whole buffing process. It is very messy. If you look at the deck in the pics you will notice all the grit. Thanks god this is a dry process. I plan on vaccuming this stuff all up and then washing everything down.

Also I have been covering my finished areas. Here is a pic of my covered baby. I have been spending more time with this boat than my wife! I think she (the wife) likes that way..........

Here is pic of the covered front bubble
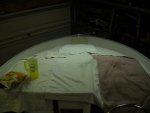
DSCN1084-1.jpg

Also I had a thought last night about the outside wall up front. Seeing that my gel coat is a bit thin in one area, I was thinking of not buffing it at all. Laziness showing up again. But I plan on using deck traction wax on this wall and the deck. That stuff does not get polished. Its kind of semi gloss after applications. So it would be counter productive in my mind. Anyone have any thoughts on this. My thinking was that I some times lean on the wall, especially up front, and do not want to slip when I do. The oxidation and traction wax would solve this problem by giving me more traction.

Also did not get the whole bubble done last night. Still need to finish the pass side cockpit walll. That is tonights job. I hope to finish the bubble tonight.

Wish me luck.
 

mcgyver

Petty Officer 2nd Class
Joined
Oct 3, 2009
Messages
123
Re: 1991 Bayliner Trophy 2002 Transom Repair

Jeff, fantastic work....I'm in the midst of winter here on Vancouver Island but early spring I have to undertake exactley what you have just done (same boat)....... thanks for the play by play. I'm also wrestling with painting the deck a contrasting tan ( all of the non-slip areas that will then be baorded by the original off-white gelcoat) I think it will look sharp. I'm thinking of prepping and painting with interlux, do you have any thoughts or concerns? I'm thinking that the durabilty "might" be an issue...I'm not sure if the interlux would "fill in" the non-skid aspect of the gelcoat....hmmmm just thinking... Better get out the Maui Jims for when that sun comes out with the shine your putt'n on her............
 

j_k_bisson

Lieutenant Junior Grade
Joined
Oct 6, 2010
Messages
1,082
Re: 1991 Bayliner Trophy 2002 Transom Repair

Jeff, fantastic work....I'm in the midst of winter here on Vancouver Island but early spring I have to undertake exactley what you have just done (same boat)....... thanks for the play by play. I'm also wrestling with painting the deck a contrasting tan ( all of the non-slip areas that will then be baorded by the original off-white gelcoat) I think it will look sharp. I'm thinking of prepping and painting with interlux, do you have any thoughts or concerns? I'm thinking that the durabilty "might" be an issue...I'm not sure if the interlux would "fill in" the non-skid aspect of the gelcoat....hmmmm just thinking... Better get out the Maui Jims for when that sun comes out with the shine your putt'n on her............

Thanks, I've never used interlux products, so I can not really say anything good or bad about them or their application. I would suggest you start a thread asking this very question. I would be interested in it as well. I would be concerned about the wear thru aspect of changing the colour though. Seeing it is on the no slip treads the paint would wear off the top of the treads. IMHO.

Who can afford Maui Jims after this repair. It'll be rapalas glasses for sure!!!!!!!!
 

j_k_bisson

Lieutenant Junior Grade
Joined
Oct 6, 2010
Messages
1,082
Update 12-13-2010

Update 12-13-2010

Anyways nothing done yesterday. Played outside with the kids on the old sled. Well untill it broke again. Needs new sliders, a couple of track clips, the fuel system gone through (air leak some where) and a new ground wire to the head light. So it put away until next year. Dame! Broke the first day of the year. Unless we get a warm spell where I can push the boat out to the drive and the sled in that is.

Only 5.5 days left of work this year. After that 2 weeks of holidays. Going to love being off. More time to work on the boat! The buffing and waxing will definately go faster then. And especially when the wife takes the kids to see her family for a week. I'll be home alone!!!!!!!! The boat will deffinately be done. I had better start stocking up on booze for that week.

Tonight I'm either going to work on boat or go out. Have not decided yet. Depends on whats going on.
 

j_k_bisson

Lieutenant Junior Grade
Joined
Oct 6, 2010
Messages
1,082
Update 12-14-2010

Update 12-14-2010

Well no work done on the boat last night. But only 4.5 days including this one to go this year! Helped a buddy get his daughters snowmobile running last night. Just a hint to everyone. If you are not going to use something for a month or two. Make sure you drain the carbs of gas before putting it away. It does gum up after a couple months. Especially 2 stroke gas.

Anyways tonight is clean up the boat of all the buffing compound and the garage from the gel coat repairs. Need to organize and reset before moving forward again. Might get into the buffing. Probably not. So not pics today or tomorrow. :eek: Sorry.
 

j_k_bisson

Lieutenant Junior Grade
Joined
Oct 6, 2010
Messages
1,082
Update 12-16-2010

Update 12-16-2010

Still not work done. I'm under the weather again.

Is it just me that thinks our ublic school system is the test bed for our countrys biological weapons program? Hell My kids are bring home every bug out there. Adn since I quite smoking two years ago I caught everything at least twice. Hoping to kick this cold before I am on vacation!

Only 2.5 days of work left this year, including today!!!!!! :eek:

Then the real progress begins!
 

j_k_bisson

Lieutenant Junior Grade
Joined
Oct 6, 2010
Messages
1,082
Re: 1991 Bayliner Trophy 2002 Transom Repair

Well digging in to the engine is a post x-mas project. But with the bit of investigating that I have done it appears to be a 200hp Evinrude. The differences between the two are heads and carbs. So I'll only be 25hp over rated. But seeing that I have to repaint the hood. It'll say 175hp so no problems arise with anyone.:D
 

j_k_bisson

Lieutenant Junior Grade
Joined
Oct 6, 2010
Messages
1,082
Re: 1991 Bayliner Trophy 2002 Transom Repair

Hope you feel better boss!

Thanks Man.

Sorry about the previous post. Thought I had a question about my motor choice, must have been the wrong page that showed up when I update the screen.
 

j_k_bisson

Lieutenant Junior Grade
Joined
Oct 6, 2010
Messages
1,082
Update 12-18-2010

Update 12-18-2010

Well finally started working on the boat again last night. I`m also finally getting over my cold. Still a little stuffiness. Damn either I`m getting older and crankier with my old age of the colds are just feeling worst with age. :eek:

Anyway enough of my b*tching, on to the boat! I finished off the bubble last night. Specifically the passenger side cockpit wall. It came out pretty good. I did not wet sand it before buffing. This side was in pretty good shape so need. Here is a pic of the finished product.

DSCN1103-1.jpg

I then went over the drivers side cockpit wall as well, to even the gloss. Next I moved up to the walkway inside wall. I started up at the anchor well first. This area I did not wet sand either. It came out pretty nice. I am not going to work at it too long due to the wax I am going to use to seal it. Basically not trying to get a mirror finish, But I do want it shinny. Here is a pic of the finished area.

DSCN1104-1.jpg

I also learned a new way of really diggin in with the compound and cleanning the gel coat. I was not having any success with the heavy stains on the walls so I kept the compound and pad fairly wet (3-4 sprays with the spray bottle) untill I removed all the stains. The only problem with this is the pad really loads up quick with this method. Need to have the screw drived around to clean the pad. Here is a pic of an area where I only used the compound. The darker areas has not been touched. You will see how the wall is quite a bit whiter.

DSCN1105-1.jpg

After I had gone over the area wet, I let things dry out and finished dry like usual.

Also I know I talked about not doing this area but hell I only have a half day left of work this year then I have a ton of time to work on my boat. I did not order the gel coat repair supplies so buffing and waxing will be my main focus. This thing will be shiny as new, then I will start reassembling the cables and remaining stuff in the hull.

Tonight I hope to finish the walkway walls up to the cockpit. This will be fun bending into a pretzel but the out come will be worth it. Check back tomorrow for an update.
 

proshadetree

Lieutenant Commander
Joined
Jul 19, 2008
Messages
1,887
Re: 1991 Bayliner Trophy 2002 Transom Repair

Lookin good man I think the fish will jump in there just to be seen in it.:D
 

mcgyver

Petty Officer 2nd Class
Joined
Oct 3, 2009
Messages
123
Re: 1991 Bayliner Trophy 2002 Transom Repair

Jeff, I'm surprised you removed the rails but not the rest of the hardware before the buff ( lights/cleats ect) With the 3M pad is it soft enough to get around the hardware? From the pics it looks fantastic. I was planning on removing all hardware before the buff but may have to rethink that. I got a reply back from the Interlux rep on doing the contrast on the non-skid deck...."Perfection" 2 part will give me 6-8 years wear resistance with proper prep.......
Doug
 

j_k_bisson

Lieutenant Junior Grade
Joined
Oct 6, 2010
Messages
1,082
Re: 1991 Bayliner Trophy 2002 Transom Repair

Jeff, I'm surprised you removed the rails but not the rest of the hardware before the buff ( lights/cleats ect) With the 3M pad is it soft enough to get around the hardware? From the pics it looks fantastic. I was planning on removing all hardware before the buff but may have to rethink that. I got a reply back from the Interlux rep on doing the contrast on the non-skid deck...."Perfection" 2 part will give me 6-8 years wear resistance with proper prep.......
Doug

I did remove all the hardware when the cap was off. I buffed the top surface back then. This time around I was only touching it up where needed. Getting all the hardwear off will be difficult on the sides and and rear cleats. Can not get at the nuts.

As to the interlux, I love the comment/loop hole they throw in. "With proper prep", what does this intail. Also the thinnest spot on any paint application is the highest point. Also the first wear point is the hightest point. How do you plan on preping the valleys in the texture? Anyways interlux has you right where they want you. Purchased with out warranty to my thinking. Unless you remove all the texture. How thick do you plan on putting it on. With any substantial thickness you will wash out your grain/texture detail as well. A couple of thing to think about. IMHO sorry...
 

Bustedknuckle84

Chief Petty Officer
Joined
Sep 29, 2010
Messages
421
Re: 1991 Bayliner Trophy 2002 Transom Repair

I think you need to redo your boat title to 2011 Bayliner Trophy after this project is done. :D Its amazing looking at this project and sayin geez i wish my same boat could look like that! haha excellent work.

Hey i have that same clip on the pass side walk way i use it for my antenna to but the antenea just keeps poppin out. Pretty sure i have the stock antenna and it reaches that clip. Hope that answered your previous question about it.
 

j_k_bisson

Lieutenant Junior Grade
Joined
Oct 6, 2010
Messages
1,082
Re: 1991 Bayliner Trophy 2002 Transom Repair

I think you need to redo your boat title to 2011 Bayliner Trophy after this project is done. :D Its amazing looking at this project and sayin geez i wish my same boat could look like that! haha excellent work.

Hey i have that same clip on the pass side walk way i use it for my antenna to but the antenea just keeps poppin out. Pretty sure i have the stock antenna and it reaches that clip. Hope that answered your previous question about it.

Thanks Furyman, All this work is not hard. Only really time consuming. But for me I one of those that require a "Project". My wife often wonders what I love more the "Project" or the finished product. I lean toward the "Project".

Seeing that my clip was broken when I got the boat, I am still wondering what this mistical clip looks like. I would love to replace it with a new one. But have not clue what to replace it with. You by chance have a photo of this clip.:D
 

j_k_bisson

Lieutenant Junior Grade
Joined
Oct 6, 2010
Messages
1,082
Update 12-19-2010

Update 12-19-2010

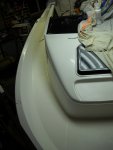
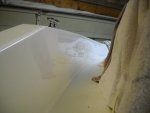
Last night worked to midnight on buffing again. Was able to complete the front end of the cap last night. Buffing the inside wall of the walk way was a bit challenging for me. Fat guy to bend in these tight places is like watching a Monkey f*cking a foot ball. Or so my wife says. Thank God I was able to get a ladder around some of the boat. Here is a few pics of the out come.

View attachment 75196

View attachment 75197

View attachment 75198

So now on to the cockpit for buffing. Not looking forward to that. Also Still need to wax all this buffed area. Thank god I picked up a 3 inch buffing wheel kit from harbour freight this week. I will attached it to a right angle drill for the tight areas. Also what you are seeing in clean un-waxed surfaces. This brings up another question. What should I use to properly seal this clean-buffed gel coat.

Well Santa Claus the movies 1-2-3 are on tonight so it is a family night. No update until Monday night. And then the progress will fly!
 
Status
Not open for further replies.
Top