1991 Bayliner Trophy 2002 Transom Repair

Status
Not open for further replies.

proshadetree

Lieutenant Commander
Joined
Jul 19, 2008
Messages
1,887
Re: 1991 Bayliner Trophy 2002 Transom Repair

Im sorry dude. If my town was to have an ordnance like that I would move or dare them to come on up and bring their friends. I have been living here for 15 years and owned my land for 25. If I am not grandfathered I sure as heck a gun owner. I have three boats outside covered. If the neighbors dont like it they dont have to look. Have I told you I love the line on that boat today? Well I do. I might have to talk mama into 4 boats in the drive.
 

j_k_bisson

Lieutenant Junior Grade
Joined
Oct 6, 2010
Messages
1,082
Re: 1991 Bayliner Trophy 2002 Transom Repair

I've lived here 10 years this year. One of the stories my neighbours say is when they where looking at purchasing their house they noticed the 87 ford ranger in the back garden and the deer archery target. So they knew a redneck lived there. I was the very first person that lived on this street so I pretty sure I grand fathered in, but this year the local storage facillity and marinas got together and complained, so its game on....
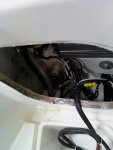
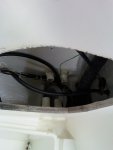
Let the fun and games begin!!!!!!
 

j_k_bisson

Lieutenant Junior Grade
Joined
Oct 6, 2010
Messages
1,082
Update 11-24-2010

Update 11-24-2010

Well things are coming together nicely for the reassembly of the cap. I have two cherry pickers (engine lifts) in pace for Fridays event, with a third one on the way. Also all materal's required are instock and ready to use. I have two jobs for tonight that need to get done before the reassemby. One is the installation of the thru hull for the live well drain.

The second is the on issue I forgot about until now is that I need to investigate and fix the leak I have coming from the anchor well up front. I believe the wood is rotten where the drain hole is. I believe Bayliner drilled the hole through everything (fiberglass and plywood) to the out side and never sealed the wood (hole) under the well. So tonight I will deffinately fix this. SO for you people out there addicted to pictures there should be some for tomorrows post!!!!

Also still need to do prep to the area where I will be putting the "puck" of thickened epoxy in the transom. Need to grind the fiberglass for a good bond. Yeh!!! my grinding fiberglass. I love being ichy!!!!!
 

proshadetree

Lieutenant Commander
Joined
Jul 19, 2008
Messages
1,887
Re: 1991 Bayliner Trophy 2002 Transom Repair

YOU CAN DO IT. You know we need updates and pics, One without the other isnt a fix. Looking forward to see what you find in the anchor well. For a time Baylinners got spotty with their work. I still say they have the most beautiful lines of any boat around.
 

j_k_bisson

Lieutenant Junior Grade
Joined
Oct 6, 2010
Messages
1,082
Update 11-25-2010

Update 11-25-2010

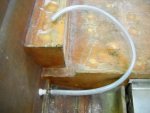
Here are the pics for all you addicts out there. Last night finished off the thru-hull fitting for the live well. Once again installed the fitting with a large amount of 3M 5200. Here are the finished pics.

DSCN0889-1.jpg
DSCN0890-1.jpg

You will notice that I installed the hose for this. I used two hose clamps because I will never be able to get to this fitting once the top is on.

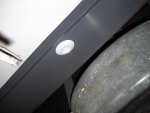
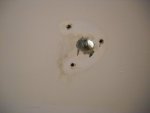
Next I moved on to the drain hole for the anchor well. This is another area all Bayliner Trophy owners need to be looked at and fixed. The hole is just drilled thru the hull. It was not even sealled. Plywood exposed to water is never a good thing. Here is a pic with the deflector removed on the out side. You can see where the wood was picked at with my trusty screw driver. The wood looks to be not rotten. Soft a bit.

DSCN0896-1.jpg

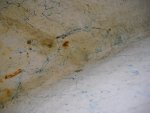
The underside is a bit stained but not rotten or soft.

DSCN0892-1.jpg

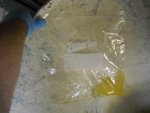
I repaired mine by pouring in regular thickness epoxy. Here is my applicator bag. I love ziplocks. Just cut the corner and the mess is solved. I taped the outside so the hole fills up. Bag on next post...

DSCN0901-1.jpg

Cont'd on next post......
 

j_k_bisson

Lieutenant Junior Grade
Joined
Oct 6, 2010
Messages
1,082
Update 11-25-2010 Cont'd

Update 11-25-2010 Cont'd

Here is the pic of the bag.

DSCN0902-1.jpg

I let the resin soak into the wood. It eventually started leaking into the cabin side. Had to clean up the excess until it stoped leaking. Then I mixed up some silica into the left over epoxy and thickened it to the consistancy of runny snot. This did not leak into the cabin. Here is a pick of the finished product.

DSCN0906-1.jpg

Today I need to redrill the hole. But one size smaller. This will deffinately seal the wood. So now all the jobs are done to the hull.

On the topic of he cap reassembly. All the booze, help, engine lifts, ropes/straps are in place. So we are full steam ahead for tomorrow night. No pics till then.

Wish me luck!!!!!
 

j_k_bisson

Lieutenant Junior Grade
Joined
Oct 6, 2010
Messages
1,082
Update 11-27-2010 It's Done!!!!!!!!!!!!!!!!!!!!!!

Update 11-27-2010 It's Done!!!!!!!!!!!!!!!!!!!!!!

Well here is the good news and bad news of what happened last night. No one got hurt, and nothing on the boat got broken. The booze got drank, and my head hurts now.

The only thing thing that went wrong, that I can figure out is the camera was broken.:mad: So for all you people out there who are addicted to the level of detail my pics provide, will have to do with my camera phone pics. At least until the good camera gets fixed. The dam camera has a lens error. The lens will not move when you press the power button. There a hundered buck down the drain.:( I hate Nikon cameras!

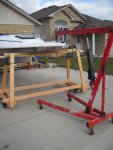
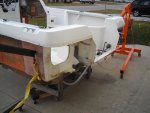
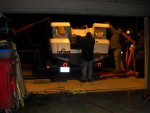
As to how the boat went. Here is some pics of the process before the camera issues started. In these pics we are lifting the top and getting ready to slide the hull under. We used three cherry pickers on all three corners. On the ***** end I slung a 10,000 lb ratch strap under the hull to get it up high enough. Here the pics.

DSCN0908-1.jpg
DSCN0907-1.jpg

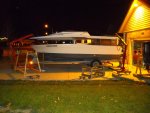
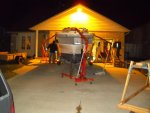
Here are some pics of the top at full height and we are tucking the hull under it. We lowered the cap in place and set it on some 6x6 I had around while we reset the cherry pickers to the rear cleats. Then we lowered it the rest of the way down. At that point we stopped. Today I need to see if everything is lined up down below. Make sure no hoses are pinched. Then I can glue the transom and rivet it together. Here are the pics.

DSCN0910-1.jpg
DSCN0911-1.jpg
DSCN0912-1.jpg

The camera broke before I could get a pic of the finished product. All the old rivet holes line up. So I think we have it right where we need it.

Today I plan on working on my hangover. And thats it!!!!!
 

proshadetree

Lieutenant Commander
Joined
Jul 19, 2008
Messages
1,887
Re: 1991 Bayliner Trophy 2002 Transom Repair

BC powder and lots of water. Before you stop drinking the night before swap to water. Looks great I almost have a mental image of her graceful lines in my head. You should be proud man you have attacked this project like a mad man. A day off for hangover relief is well earned. Have a great weekend man and i hope you feel better soon.
 

j_k_bisson

Lieutenant Junior Grade
Joined
Oct 6, 2010
Messages
1,082
Re: 1991 Bayliner Trophy 2002 Transom Repair

It was another day off yesterday, the Gray Cup was on. Had to go to a Grey Cup party. So no work, just drinking. Don?t even know who won??.!!!!!!!

I circled the boat all day Saturday but did not work on it. I did find that we did pinch one of the hose for the bait well drain. So when I lift the top the final time to epoxy, I will have to relieve the pinched hose. Not bad though for that scope of work when half in the bag! Thank god nobody got hurt. Thanks everyone for your help dropping the cap on. It was appreciated!!!!!

Here is the plan for the finishing the boat part of this project.

Things to do;

1) Hook up fish well drains
2) Connect all electrical
3) Run all motor control cables
4) Finish all fuel system hook ups
5) Finish gel coat repairs in the transom splash well
6) Rivet the hull halves together
7) Install the rub rail
9) Install splash well drains
10) Buff the rest of the top
11) Rebuild/refurbish and install the windshield
12) Clean up the handrail and install
13) Go trough the drive train & brakes on the trailer
14) Do an inspection on the whole trailer.
15) Fabricate a kicker motor bracket.

That?s all I can think of right now. I?m sure the list will grow as the days fly by.Tonight's project is the pinched hose and epoxying the transom/splash well. Maybe a rivet or two. But probablly pictures tomorrow.
 

j_k_bisson

Lieutenant Junior Grade
Joined
Oct 6, 2010
Messages
1,082
Update 11-30-2010

Update 11-30-2010

Well this post is for all those people that are addicted to posts with pics. I am stretching with some content but hey, if they make you happy then whats the harm.

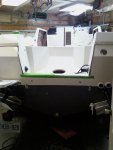
Last night lifted the cap for the last time and freed my drain hose for the bait well. As well as epoxying the transom together. I still need to finish up the epoxying. I ran out of burnt silica and need to get more. I do have plenty of epoxy left. Just over 1.5 gallons. So total for the build I have use 7.5 gallons of epoxy. Here is a pic after I was fiished epoxying the transom.

View attachment 74041

I through up some tape to stop the thickened epoxy from dripping down the gelcoat. Plus it will make a nice clean edge afterwards. Here is a pic of the two areas left for epoxying. They where originally done and still need to be done inorder to close up the stern. I'll finish after I find some place in Detroit area that sells the silica.

View attachment 74042
View attachment 74043

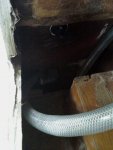
Here is a pic of the hose for the live well drain. It appears that someone from the factory orginally put/drilled the drain hole in the hull in the wrong place. They do not line up and have to be looped inorder to meet. Oh well tonights work. Just hooking them up.

View attachment 74044

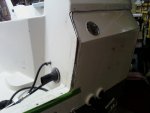
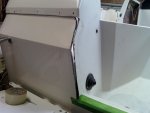
Here is a pic of the bilage throught splash well door. I know I should replace the door. But it works for now. Nice and clean bilage. I love it!

View attachment 74045

Cont-d of next post.
 

j_k_bisson

Lieutenant Junior Grade
Joined
Oct 6, 2010
Messages
1,082
Update 11-30-2010 Cont'd

Update 11-30-2010 Cont'd

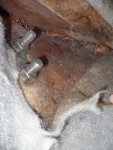
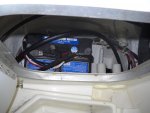
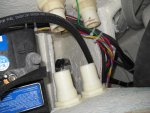
Here are some pics of the areas that need work. The pics are thru the rear access panels. I have removed the batteries and boxes to make getting in there easier. It will still be a bit tough for a 300lbs guy to get in there. But hey there ia always spots like this in every project.

View attachment 74046
View attachment 74047

Tonights agenda is the following.

1)Finish the rivets under the rub rail
2)Finish the bait well drain
3)Finish the fish well drains
4) Figure out the deck drains. (scuppers) What needs to be aquired to finish.
5) Start running the wiring in the sern.
6) Figure out about my shifting cables for the new motors. If they can be converted to Evinrude hook up.

Thats All for now. Sorry about the quality of pics. Still have not gotten the camera fixed and I am using the phone camera. More pics of progress tomorrow.
 
Joined
Aug 17, 2009
Messages
941
Re: 1991 Bayliner Trophy 2002 Transom Repair

Jeff,

Great work so far.

I can't see the latest pics though.
 

j_k_bisson

Lieutenant Junior Grade
Joined
Oct 6, 2010
Messages
1,082
Re: 1991 Bayliner Trophy 2002 Transom Repair

Sorry buyt its something with this site. My other site (BOC) it worked fine. Here is the first five pics.


1129001944a.jpg

1129001945.jpg

1129001945a.jpg

1129001945c.jpg

1129001946b.jpg
 
Joined
Aug 17, 2009
Messages
941
Re: 1991 Bayliner Trophy 2002 Transom Repair

Thanks for the pics big guy.
Looking real nice. I bet you are starting to feel like you are turning a corner now. :)
 

j_k_bisson

Lieutenant Junior Grade
Joined
Oct 6, 2010
Messages
1,082
Update 12-01-2010

Update 12-01-2010

Yes I do feel that I am on the home stretch. Last night finished off a bunch of little jobs.

Here is two pics of the rivets completed. Still need to install rub rail. But that will not be untill spring. Need to get it warmed up to make sure it lays properly. Seeing we are getting snow today, I doubt I can get it warm enough. I did think of hanging it in front of the furnace, but then who knows. Might install it when I get really boarded.

DSCN0917-1.jpg
DSCN0918-1.jpg

Worked on the bait well drain. Got that all hooked up. Needed to remove what I installed and reinstall it. Hose was too short after I cut it the first time. My arms are a bit rough after that one. No long sleeves last night.:redface:

DSCN0919-1.jpg

Next I moved to the fishwell drains. They where finished. No problems there but the location. It was a bit trying at times but its done!

DSCN0922-1.jpg
DSCN0921-1.jpg

Cont'd next post.
 

j_k_bisson

Lieutenant Junior Grade
Joined
Oct 6, 2010
Messages
1,082
Update 12-01-2010 Cont'd

Update 12-01-2010 Cont'd

I figured out what I need to do with my deck drains. I need to find out where I can get the hose like what was used originally. The wire type hose. It needs to be 1.25" ID hose. If anyone knows where I can get this please let me know

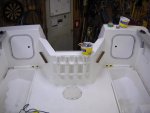
I also install the doors for the stern opening. Heres a pic. I was tired of moving them around the garage. Runing out of space. I was afraid I'd drop them and break/damage them.

DSCN0920-1.jpg

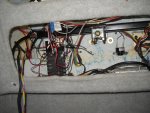
After all this I started in on installing the wiring in the helm. I did get all of it run in its orginal locations. and some of it hooked up. Now I need to splice it in where I cut it when removing it. I will be using crimps then sodering and then marine heat srink. Only have 9-10 hook ups to go. Also need to take the face plate of the helm to get at the vacum for the speedo. Will probably clean up the contacts and conections under there as well. thats tonights project.

DSCN0926-1.jpg

After this I have shift cables and transducer to run, gel coat repair, fiberglass construction (previously disscussed), and finally buffing the rest of the cap. Also lots of stuff to buy.

Things to buy

1) Bennett tri pump
2) Hydralic steering kit
3) Tackle storage box (replace/fill old hole)
4) Possible shift cables Evinrude
5) Silica thickening agent
6) White Star board for cabin door
7) Dark smoke acrylic for cab door top (needs 90' bend)
ETC

So I'll do what I can with what I got, (buffing) and go from there.

I can say X-mas gifts for everyone is done. Finished that off last weekend. Just a few minor things.
 

j_k_bisson

Lieutenant Junior Grade
Joined
Oct 6, 2010
Messages
1,082
Update 12-2-2010

Update 12-2-2010

Not much done last night. Finished off connecting the wiring under the dash. Still need to install the Bennett trim switch and the vacum line to the speedo. Then the dash stuff is done.

Tonight is a work night, will deffinately finish off the dash and start in to the gell coat repair. I have two spots by the radio where the jig saw chiped the gel coat. So those will be preped and coated. Then there is two spots up by the anchor well that need to be done. From previos owners. Also might start vaccuming and wasking the rest of the cap. Getting ready for buffing. We'll see.

No pics today, nothing done to show last night. Deffinately some tomorrow.
 

bear_69cuda

Commander
Joined
Oct 10, 2008
Messages
2,109
Re: 1991 Bayliner Trophy 2002 Transom Repair

Looks great Jeff!

You da man!

I can't wait to see her buffed out!
 

j_k_bisson

Lieutenant Junior Grade
Joined
Oct 6, 2010
Messages
1,082
Update 12-20-2010 Rev2

Update 12-20-2010 Rev2

After having to investigate the steering stuation I find myself in, I have decided to go with a dual cable "rack" system. The brand I have picked is teleflex, don't know of anyothers. After more research I have learned that it will not only be the cost of the steering system but there is a mounting kit as well. This mounting kits cost an additional 100 bucks over the price of the cable kit of $450.

So now I get to remove my old system tonight. Wish I would hav known about this issue before I put the boat back together! :mad: It would have been soo much easier to remove and install. Thanks guys....... For now I am only going to remove the rack/cable.

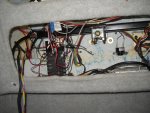
Question: Can I only replace the cable for less cost. Can anyone Identify the rack I currently have? Here is a pic of the helm inside.

DSCN0926-1.jpg
 
Status
Not open for further replies.
Top