1991 Bayliner Trophy 2002 Transom Repair

Status
Not open for further replies.

j_k_bisson

Lieutenant Junior Grade
Joined
Oct 6, 2010
Messages
1,082
Update 11-17-2010

Update 11-17-2010

Thanks again. I love the lines of this boat as well I guess it is what kept bayliner in buisness through the rough years.....

Yes I did clean the teak before oiling. But not with any kind of cleaner. I did it the old fashion way. I sanded it. It was moldy on the bottom side. So I sanded it on my trusty belt sander. Here is a pic of one of them installed. Reusd the bolts, they where a bit marked from dissassmbly and assembly. Maybe replace late, maybe not.....
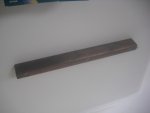
DSCN0850-1.jpg

For those of you that have been following this thread, I use this type of fasteners to bolt them as a nut. A three lug-prong/T nut. Its stainless and I put a dab of 3M 5200 on it so If I ever take the teak off again it will stay in place on the inside of the boat. Here is a pick of the fastener.
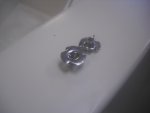
DSCN0845-1.jpg

The update continue on the next post.........
 

j_k_bisson

Lieutenant Junior Grade
Joined
Oct 6, 2010
Messages
1,082
Update 11-17-2010 cont'd

Update 11-17-2010 cont'd

I also finished off all the little jobs I had left to do to the cap before reassembly.

Here is a few pics of the fish well drains. I used an attwood double nut 90' fitting for the fish well drains. I know this fitting is not for/rated below the water line but hey, they do not make a fitting for this application that I could find in my price range. Also its the same fitting that was there from the factory. I used 3M 5200 for sealant on both sides of the fiberglass. I will be checking to see how they hold water when I push the cap outside again. I plan of putting a couple gallons of water in the fish wells while I work on the hull side finishing it up. We'll see how they hold up. If not I can rework before it goes together.

DSCN0846-1.jpg
DSCN0847-1.jpg

I also had the wife help me reinstall the modified rod holders. The pic below you can barely see the two holes per side that I added for hooking my bungee cord to. This bungee cord holds the fish cooler in place.

DSCN0858-1.jpg

Also there is two pics of the windshield grooves that held it together. I realized that I talked before about siding the these pieces together but did not provide detailed pics. With these I hope that they will help someone at a later date with their windsield.

DSCN0856-1.jpg
DSCN0857-1.jpg

Also was able to clean the garage last night. Did not swap the hull for the cap as it was raining quite heavily. Tonight is supost ot be clear so the hull comes back in for the trim tab installation and the wiring finishing.
 

Renny_D

Petty Officer 3rd Class
Joined
Jun 29, 2008
Messages
79
Re: Update 11-17-2010 cont'd

Re: Update 11-17-2010 cont'd

Great work, I've read this whole thread. I have a 16ft capri cuddy with much the same transom arrangement. I asked in another thread but since yours is so close in construction to mine I was wondering what you thought about the advantages or disadvantages of extending the transom all the way out to the sides of the hull instead of just to the knees for the stingers. I'm seriously considering adding a pod like this to mount my outboard on and give me a little more room to both mount a permenant tank and a bench seat across the back. I'd love to hear yours or anyone elses feedback on this. Again great work


thanks
Renny
 

j_k_bisson

Lieutenant Junior Grade
Joined
Oct 6, 2010
Messages
1,082
Re: Update 11-17-2010 cont'd

Re: Update 11-17-2010 cont'd

Great work, I've read this whole thread. I have a 16ft capri cuddy with much the same transom arrangement. I asked in another thread but since yours is so close in construction to mine I was wondering what you thought about the advantages or disadvantages of extending the transom all the way out to the sides of the hull instead of just to the knees for the stingers. I'm seriously considering adding a pod like this to mount my outboard on and give me a little more room to both mount a permenant tank and a bench seat across the back. I'd love to hear yours or anyone elses feedback on this. Again great work


thanks
Renny

I don't know if I would do that type of retro fit to these boats. I am assuming you where referenceing the box thing the individual made at the bottom of the linked page. The problem with this typ of set up on my boat is the transom is not flat across the back it is curved after the stringers. So there would be fit issues first off. Second the weight of making that and mounting it in the rear of the boat needs to be throughly thought out. Last thing about it. The attached strings in our boats transfer the troque/load the motor generates from hitting waves through out the hull. What you propose would only transfer the forces to the hull for the length of the box thingy.

I'd replace what was there. If you want a kicker motor mount, laminate a 3/4" plywood to the transom off to the side uswing epoxy and then cover it with 1708 for a layer or two. IMake sure the wood is larger enought to support the weight of the kicker. My boats' ply is almost 2' square.

Those are my ideas and opinions. I'm not saying they are right, they are just mine....... Hope I was some help.
 

Renny_D

Petty Officer 3rd Class
Joined
Jun 29, 2008
Messages
79
Re: Update 11-17-2010 cont'd

Re: Update 11-17-2010 cont'd

I don't know if I would do that type of retro fit to these boats. I am assuming you where referenceing the box thing the individual made at the bottom of the linked page. The problem with this typ of set up on my boat is the transom is not flat across the back it is curved after the stringers. So there would be fit issues first off. Second the weight of making that and mounting it in the rear of the boat needs to be throughly thought out. Last thing about it. The attached strings in our boats transfer the troque/load the motor generates from hitting waves through out the hull. What you propose would only transfer the forces to the hull for the length of the box thingy.

I'd replace what was there. If you want a kicker motor mount, laminate a 3/4" plywood to the transom off to the side uswing epoxy and then cover it with 1708 for a layer or two. IMake sure the wood is larger enought to support the weight of the kicker. My boats' ply is almost 2' square.

Those are my ideas and opinions. I'm not saying they are right, they are just mine....... Hope I was some help.


Thanks, I was wondering about that too. That was why I considered glassing in an additional panal on either side. Mine does not have the ecapsulated panels yours does. I think it relied on the floor, foam and cap to add rigidity all the way out to the corners. On my boat I ended up with a rotted floor on the port rear quarter and you could see that the hull on that corner had a small amount of flex before it was fixed. I'm not sold completely on the pod idea but I like the additional room that would give me. Figured I'd take my time and ask lots of questions and do lots of planning before I touched anything on the boat. Thanks for getting back so quick. I'd love to hear more from other folks.

thanks
Renny
 

j_k_bisson

Lieutenant Junior Grade
Joined
Oct 6, 2010
Messages
1,082
Update 11-19-2010

Update 11-19-2010

Anyways...... Two nights ago swapped the cap for the hull in the garage. Also tarped the cap in the drive for the time being. Will be finishing the hull this weekend. Picked up the supplies for the trim tabs and the wiring. So its full steam ahead.

Will post the progress as it becomes available.. the hull will be done this weekend! Next weekend reassebly.
 

j_k_bisson

Lieutenant Junior Grade
Joined
Oct 6, 2010
Messages
1,082
Update 11-20-2010

Update 11-20-2010

Another late Friday night working on the boat and lot of things done. For those of you who have not noticed the pattern, I get most of my work done on the weekends. That is because my wife works and I am home alone with the kids every Friday and Saterday night. I also still refuse to go to bed before midnight on weekends. I guess I am not that old yet where sleep is more important to me than being out in my garage...... Some day it will change. Maybe when I'm 80!:D

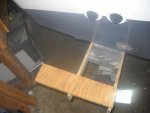
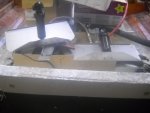
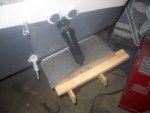
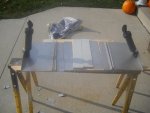
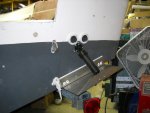
Anyways here is the progress. I started the night with the trim tab installation. I first rigged up the supports for the tabs as directed by Bennett on the installation instructions. I used my bunks and just screwed a couple of straight pieces of 1/2" plywood to both side. Then measured the "cord" as instructed and then brad nailed a cross piece of 3/4" plywood for the cord. I know the instructions say 1/2" for 9" cord. But my bunk carpet is lifting the other end up by 1/4" so I had to lift the cord by an additional 1/4" as well. Here is a pic of the out come of framing.

DSCN0861-1-1.jpg

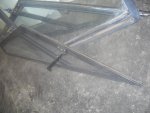
Next I preassembled the tab to see what placement issues I had. If you look at the pic you will see where the shortened actuator still interfers with the deck drains. Here is a pic of the issue with the drains.

DSCN0863-1.jpg

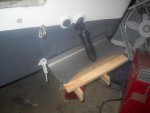
I also had the curved haul to over come. So I started making the 1/2" Starboard spacer for between the tab and hull. I will not explain how I contoured the one side because I used a table saw. I almost lost a finger or two doing it. I would not recomend this method. Use a belt sanded and sand it down slowly. Here is a pic of the completed spacer.

DSCN0865-1.jpg

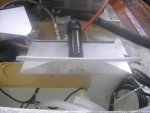
I next cut off 1.5" off both ends of the tab. This was to move the actuator over between the drains. I used a grinder with a cutoff wheel. I only did one due to the time of nigth it was. Did not want to get a visit from out local police department about noise. Will have to finish cut all the other parts down this afternoon. Here is the pic of the cut down tab. This also shows the old and the new side by side. Not much of diference, just size/width.

DSCN0864-1.jpg

Lastly I recheck the the placement of the actuator mount. It fits nicely right between the drain holes. Here is the pic.

DSCN0866-1.jpg

After this I moved on to finishing the wiring.

Cont'd next post......
 

j_k_bisson

Lieutenant Junior Grade
Joined
Oct 6, 2010
Messages
1,082
Update 11-20-2010 Cont'd

Update 11-20-2010 Cont'd

I finished the wiring. I made up my ground post from a piece of 1/8" thick aluminum. I bent it up in my vise with a hammer. It not the most cosmetic piece, but it function perfectly. Basically it does the same as a bolt on an inboard block ground does. Here is a pic of it and one of it assembled.

DSCN0867-1.jpg
DSCN0868-1-1-1.jpg

Lastly I hooked up the 90's on the fish well drains. I also hooked up the last of the wiring on the hull side.

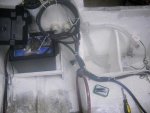
Here is a pic of the finished wiring.

DSCN0869-1-1.jpg
DSCN0870-1.jpg

This afternoon`s things to do.

1) Cut down the tabs and other tab pieces.
2) Finish the other spacer.

Tonight I have the following things to do.

1) Finish the installation of the Trim tabs.
2) Install the swim platform.
3) Replace the bait well drain thru hull
4) Pull hte fuel tank and inspect for corrosion om bottom.
5) Drink beer because finished hull side and ready for assembly.
 

j_k_bisson

Lieutenant Junior Grade
Joined
Oct 6, 2010
Messages
1,082
Update 11-20-2010 Cont'd-2

Update 11-20-2010 Cont'd-2

Here is the update from the afternoon work period. I was able to complete the reworks to the trim tabs. I cut all the pieces down 1.5" per side. I was also able to finish the 1/2" thick starboard spacers. Here is a pic of the completed reworks.

DSCN0873-1.jpg

I do have one question for anyone checking this out this afternoon. The non modified tabs had 6 screws attaching them to the boat. The two outside holes I cut off each tab was 3/4" from the edge. Of the remain four holes now, the remain hole the outside ones are 2" away from the edge. When I put the new holes (2) back in, should I put them the same distance from the edge as the old ones?

I was also able to remove, inspect, and reinstall the fuel tank. There was no corrosion on my tank. I think this is a salt water issue with aluminum tanks. Not a freshwater issue. Here are two pic of the bottom of my tank.

DSCN0875-1.jpg
DSCN0876-1.jpg

Tonight just the thru-hull and trim tabs. Need to buy the bennett pump to finish the trim tab job. Maybe this week. If not, then after x-mas.
 

proshadetree

Lieutenant Commander
Joined
Jul 19, 2008
Messages
1,887
Re: 1991 Bayliner Trophy 2002 Transom Repair

Never knew there was so much modification to install these. Lucky my century has them, I just need to make them work. 80 is to young to be coming in early when there is a beautiful Baylinner to be worked on. Looking good Im getting anxious to see the cap back on.
 

j_k_bisson

Lieutenant Junior Grade
Joined
Oct 6, 2010
Messages
1,082
Re: 1991 Bayliner Trophy 2002 Transom Repair

Never knew there was so much modification to install these. Lucky my century has them, I just need to make them work. 80 is to young to be coming in early when there is a beautiful Baylinner to be worked on. Looking good Im getting anxious to see the cap back on.

I'm sure there is normally not this much mod's to tabs. But because I was given this set for free, I'm making it work for my boat, instead of buying the right ones for my boat off the bat.

See next post of the out come and you will why I had to modify them. This transom is very busy!
 

j_k_bisson

Lieutenant Junior Grade
Joined
Oct 6, 2010
Messages
1,082
Update 11-21-2010

Update 11-21-2010

Last night was very productive. And I finished up early.

I started into the trim tab installation right off. I started by trransfering the holed from the stainless backing plate to the starboard spacer. I used a #7 (.210") drill bit. It was the closest I had to the original holes in the stainless. I also put two new holes in the stainless and starboard. They went in 1" from the ends on both ends. These replaced the originals I cut off. Now I have two screws on both ends 1" apart and from the ends.

Next I layed up and transfered the holes to the hull. First I put the two fartherest hole in the hull with a 9/64 drill.. Started the screws and transfered the rest. *NOTE* do not use the recommended 9/64 drill bit for the pilot hole. It is too small if you are screwing into 3/8" thick fiberglass or more. I had to start and remove four screws because I was afraid of breaking the screws when installing them. I broke my last screw, figures. I would use the 5/32 drill bit they recomend and not have the problems I did.

After I screwed everything together with a liberal amount of 3M 5200 (I prefer more than less) I assembled the actuators to the tab to get my final location for the mounting surface. I used a 5/8" cord for 8" wide tab. You'll figure out that statement when you come to install your tabs. I next used a forstener bit to drill the 1/2" hole for the pipe nipple. Nice and clean hole. The recomended screw pilot hole for actuator mount is correct. No issues there for screw breakage. Next I installed everything with more 3m 5200.

Question; I do not like how the 1/4" bolts in the tab actuator where it mounts to the tab are not "locked". Can I added a stainless lock nut to prevent the bolt from backing out?

I did not install any hoses as I do not have the pump and did not want to crush the hoses when installing the cap. They get installed when I get the pump. I did run the control wire.

I also noticed last night that I have a potential crash condition. If the tabs are down at all, the bunks will crush the actuators. So I need to install the auto home option for the tabs when I install the new pump. Looks like more money to spend. I know I could shorten the bunks also but I like how the bunks extend longer than the hull. This way the weight is tranfered to the vertical wall of the transom.

Next I installed my swim platform. It was installed before so just a matter of lining up the bolts & holes and installing. I also move on to the thru-hull fitting. There i hit a problem. I ordered ther wrong fitting. I wanted a 1" thru-hull fitting for a 1" ID hose. I got one for 1 1/8" id hose. SO I need to return the fitting and get the right one.

Heres the pics of the finished outcome.

DSCN0880-1.jpg
DSCN0881-1.jpg

If you look you will see where I added a piece of starboard to cover the old live well water pick up location. I will be relocating this when I figure out what I want to do reguarding the live well. I deffinately need to do some triming of the 3M 5200 today. I used a bit much.
 

j_k_bisson

Lieutenant Junior Grade
Joined
Oct 6, 2010
Messages
1,082
Re: 1991 Bayliner Trophy 2002 Transom Repair

Well took apart and inspected the tank's possible anti-siphon valve. Well my Bayliner Trophy 1991 does not have that mistery valve. Here are the pics to prove it.

DSCN0884-1.jpg

DSCN0885-1.jpg

DSCN0886-1.jpg

DSCN0887-1.jpg
 

sprintst

Commander
Joined
Apr 18, 2009
Messages
2,066
Re: 1991 Bayliner Trophy 2002 Transom Repair

I jusr pulled my gas tank fitting off the other day and it did have an anti siphon (check ball) in it. I wanted to switch to a different fitting that has more barbs on it as it grabs the fuel line better but the only ones I have don't have the anti siphon portion.
 

j_k_bisson

Lieutenant Junior Grade
Joined
Oct 6, 2010
Messages
1,082
Update 11-22-2010

Update 11-22-2010

--------------------------------------------------------------------------------

First thing to do today is find out about that thru-hull fitting. That may put the dampeners on everything else for reassembly. Will know more after luch today.

After work tonight I off to pck the trailer up and start looking to borrow two engine lifts. Thursday night is the night for reassembly. Weather permitting. Need to pick the following things up.

2 1/2 cases of beer for borrow the lifts.
1 60oz of Wisers Special Old rye wiskey for the workers on Thursday
1 Case of Blue Light for the workers on Thursday
60 Blind rivets 3/6" countersunk tri-grip .4-.75" grip range.
2 tubes of 3M clear silicone sealer.

So today the booze and fitting. Tomorrow the rest.......
 

proshadetree

Lieutenant Commander
Joined
Jul 19, 2008
Messages
1,887
Re: 1991 Bayliner Trophy 2002 Transom Repair

WOW sounds like she will float in your shop. Hope all goes well with the cap and remember this junky needs pics.
 

j_k_bisson

Lieutenant Junior Grade
Joined
Oct 6, 2010
Messages
1,082
Re: 1991 Bayliner Trophy 2002 Transom Repair

No pics untill the assembly of the cap. Sorry. Nothing to show......
 

proshadetree

Lieutenant Commander
Joined
Jul 19, 2008
Messages
1,887
Re: 1991 Bayliner Trophy 2002 Transom Repair

Great now I am jonesing. Just checked the mirror i look like a crack head looking for dope.:eek: Save a life and put the cap on now.:p Hope you have a great Thanksgiving man.
 

bear_69cuda

Commander
Joined
Oct 10, 2008
Messages
2,109
Re: 1991 Bayliner Trophy 2002 Transom Repair

Great now I am jonesing. Just checked the mirror i look like a crack head looking for dope.:eek: Save a life and put the cap on now.:p Hope you have a great Thanksgiving man.

Me too!

Hurry Up man! :D

Happy T-day brutha!
 

j_k_bisson

Lieutenant Junior Grade
Joined
Oct 6, 2010
Messages
1,082
Update 11-23-2010

Update 11-23-2010

Happy Thanks Giving to all you guys! I'm Canadian, we had our day last month. So I get to work on my boat..........
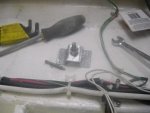
Two things happened yesterday. I was able to pick up the rivets and the thru-hull fitting. The rivet are not tri grip, just normal rivets but counter sunk.
The second thing is I heard that my towns Bylaw Officer will be coming around after Nov 30 to issue tickets and tow boats and trailers out of driveways if they are parked there. I find this practice very disturbing. I pay my taxes and my mortgauge, how can the city tell me what I can park in my drive. So the pressure is on to get this thing back together and in th garage!
 
Status
Not open for further replies.
Top