1991 Bayliner Trophy 2002 Transom Repair

Status
Not open for further replies.

j_k_bisson

Lieutenant Junior Grade
Joined
Oct 6, 2010
Messages
1,082
Update 11-01-2010

Update 11-01-2010

Well Halloween is over for only 8hrs and 15minute and I heard my first X-mas tune on the radio. God help us!!!!:eek: I hope my kids don't hear it for at least a week!

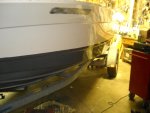
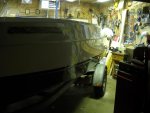
After everything died down last night. Pun intended!!!!:D I got back to work on buffing the boat. I finished buffing the one side. The transom was done last week, so it only needs a touch up. I have been using the the Meguires system buffing pads. (Maroon, yellow, and white) along with meguires buffing compound, 3M finishing compound, and Meguires wax. Although I have yet to wax anything. I have found that less is more when buffing. Meaning I only use like a half a dime size globe of compound on the pad for a 2 foot area. Then when it get a bit dry, I stick three fingers into a buck of water and wet the pad with 5-10 drops of water renewing the compound. Also I have learned to watch for the pad getting over loaded with compound. My handy screw driver takes care of that though. It is definately a trial and error process that you can not rush at all! But the out come it well worth it. Check out the one side in the picks.
DSCN0696-1.jpg

DSCN0699-1.jpg

I do have a question on the bottom of my hull. I need to know how to fix the gel coat voids I have. If you look at the pic at the chine you will notice a couple of holes/voids where the gel coat chipped off. How should I fix this? Should I just fix with gel coat repair kits? Or send i out for blasting (nut shell) and go through the whole process of resin and gel coat repair. It anyone has any thoughts, it would be greatly appreciated. I will be getting under there later this week to buff and a better look. So more to follow.

I also can tell you the gel coat repair is alot harder to do than it looks. My first couple of spots I did are not the greatest!!!!:eek: But they will do. I'll try to cover them up with graphics if I can!

Tonigt I will probably spend with a buffer in my hands for a few long hours! This is after peeling the last graphic on the other side of the boat. I want to trace it before I remove it. I might get my buddy to create a new one. He owns a sign buisness. The tracing will help with actual size verification. But we will see what happens. That is a spring time job. Right now its to get it water worthy!
 

j_k_bisson

Lieutenant Junior Grade
Joined
Oct 6, 2010
Messages
1,082
Wrong Pics!!!!!

Wrong Pics!!!!!

Sorry grabed the wrong pics!!!!!!

DSCN0730-1-1JPG.jpg

DSCN0733-1.jpg
 

j_k_bisson

Lieutenant Junior Grade
Joined
Oct 6, 2010
Messages
1,082
Update 11-02-2010

Update 11-02-2010

Nothing done last night! Took the night off and went to a buddies house to help him on his airboat project. Helped by being his sounding board on a couple of ideas/issues he was having with his project. But that is another story in its self.

While driving in to work this morning. They where saying on the radio that snow by the end of the week here. So I have a time limit now on when the top needs to come in to the garage. Tonight project is the other sides decal removal and buffing. Here is the list of things that need to be done by Thurday to get the top in.

1) Finish buffing sides and bottom.
2) Wax whole boat.
3) Dry fit Scuppers in hull. Close out the holes
4) Make frame for tarping the hull.
5) Tarp the hull.

Not much but the buffing will take a couple of nights. As hind sight now I wish I did not take last night off. Oh well.
 

j_k_bisson

Lieutenant Junior Grade
Joined
Oct 6, 2010
Messages
1,082
Update 11-03-2010 The hull is done!!!!

Update 11-03-2010 The hull is done!!!!

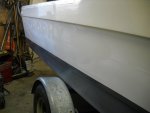
Finally finished the hull side of this project for now. I removed the last of the decals and then proceeded to buff the remainder of the hull sides. Did not do the bottom. Will get into that either after the hull is back together or in the spring. Its (the bottom) not in the best shape anyways.:eek: I gave the hull two coats of wax, Meguires "Flagship" wax and whiped off the excess. The hull came out decent for now. Still a couple of gel coat repairs on the one side. But the glass is sealed.

Tonight loose fit the scuppers (plug the holes) and make the trapping frame and trap. I hope to get the cap inside tonight. Might be a late one again. The end is in sight!!!!!:D

Heres is a pic of the last side I buffed and waxed. Better pics of the remainder of the project tomorrow.

DSCN0750-1.jpg

Anyone know where to pic up the correct factory decals for this year? I tried greatlakes skipper but they only have 1998 and newer.
 

proshadetree

Lieutenant Commander
Joined
Jul 19, 2008
Messages
1,887
Re: Update 11-03-2010 The hull is done!!!!

Re: Update 11-03-2010 The hull is done!!!!

They are never done, they are just waiting for the next step. Looking good cant wait to see the cap on.
 

j_k_bisson

Lieutenant Junior Grade
Joined
Oct 6, 2010
Messages
1,082
Update 11-04-2010 Switch-a-roo Done!!!!

Update 11-04-2010 Switch-a-roo Done!!!!

Was able to remove the hull from the garage, make tarping frame, and tarp the hull last night. I was also able to move the cap/top into the garage for it's repairs. Did not get much more than that done. Here are the pics of the cap and the repairs that it require's.

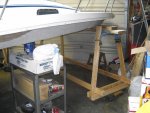
Here is how we moved it and it sitting.

DSCN0755-1.jpg

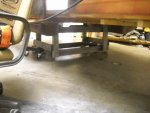
The front is being held by a scaffolding my father had sitting around. I had to reinforce it with a large piece of hickory I had lying around. Then I put a couple of 2x4's across the bottom then the dolly carts from Harbour freight under the 2x4's. It is actually pretty steady/solid. Could use some minor bracing but its only temp so it will make do.

DSCN0769-1.jpg

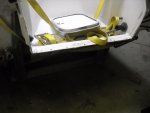
The back is being held up by a frame (from a past project) I had lying around. It's made up of 2X4's and is very unstable. It was made with nails and not screws. It will hold it there for now, but pushing the top around is a bit scary. Need to do something about this. I just might take the wheels out and leave it alone until I go to ut back together. Or add a couple of screws in it. We'll see

As to repairs here they are:

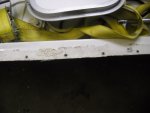
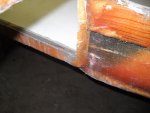
1) Remove the old transom piece from the cap where I cut it. Not a good picture but hey it's something. You probably can not see in this pic but there is a 1/4' of PB epoxy holding the old fiberglass/wood from the transom in place. Great! more fiberglass grinding. I love my Tyvek suit and mask!!!!!!

DSCN0760-1.jpg

2) It's hard to see, but there is a crack dead center on the splash well lip. This needs to be ground out from bottom and glass'd. This is a minor repair. Great even more fiberglass grinding!

DSCN0761-1.jpg

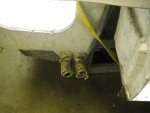
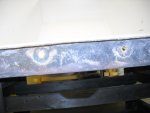
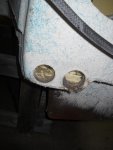
3) If you look closely you will notice the nut on the left thru hull fitting is cracked. Need to remove and check for rot. Pretty sure it is as its always has standing water here. Its the deck drains. Also notice the wood in the opening. Is staring to delaminate. Might have to remove and replace. If both spots are solid wood, I will dry out and re-seal with some epoxy/pb epoxy. Depending on what is needed.

DSCN0759-1.jpg

Continued on next post. The pic limit sucks!
 

j_k_bisson

Lieutenant Junior Grade
Joined
Oct 6, 2010
Messages
1,082
Update 11-04-2010 Con't

Update 11-04-2010 Con't

Continued from previous.

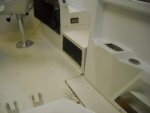
4) Need to fix where the factory tackle box was. The wood in the opening is starting to delaminate. Sorry bad pic.

DSCN0758-1.jpg

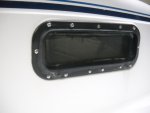
5) The windows need some attention. They leak and need new sealant. Anyone know how these go together? Or even better the sealent on them now looks like a very poor quality job. Anyone can shoot me a pic of a factory install one?

DSCN0764-1.jpg

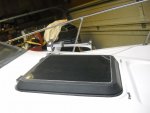
6) The hatch is leaking as well. But this one is easy the glass is held in with sealant around perimeter. Just need to re-seal.

DSCN0768-1-1.jpg

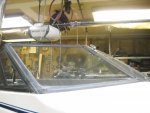
7) Need to remove the Windsheild. I want to disasemble, paint, and rebuild with new glass rubber. All the rubber has shrinked and needs to be replaced. It is leaking into my cabin. Anyone know how these are held on? Screws or bolts? Want to use bolts when puting back on.

DSCN0765-1.jpg

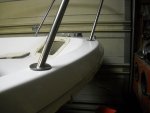
8) Need to take the rail off and fix the mountings on two locations. They are pretty bent up from previous owner. Plus the screws/bolts are loose. Need to go through this whole thing and tighten it up.

DSCN0766-1.jpg

I am hoping to get all this done in 2-3 weeks. I also want to buff the top and wax. We will see how I make out. I might start tonight or might take it off. Starting to come down with a major cold. Oh great, all I need!!!!:mad:
 

proshadetree

Lieutenant Commander
Joined
Jul 19, 2008
Messages
1,887
Re: 1991 Bayliner Trophy 2002 Transom Repair

Get waxed up pretty for me know. I went back to the start of you thread and must say i love the lines on this boat. Cant wait to see more.
 

j_k_bisson

Lieutenant Junior Grade
Joined
Oct 6, 2010
Messages
1,082
Response to proshadetree!!

Response to proshadetree!!

Well waxing is done on the hull, but the top is another monster all together! It is in rough shape gel-coat wise. No pitting but alot of oxidation. I love the lines of this boat as well. I have been researching this boat for about 5 years before buying this one.

But like I said before it's staying in my drive unless the right $$$ is met.

I got a great surprise from the tabman today when I got home. I recieved a box in the mail with the shortened bennett actuators in it. I sent out the other ones two days ago. Wow talk about service. Bennett is spot on!!!!!! Now if I could only trade in my switch to the one I like. (The one that has the indicator lights in it) That an upgrade that can come later in the spring. Will have to wait untill the top is done before getting back to the hull. I have a couple of other things that need to collected before cap assembly.

Thanks Bennett and Tabman!!!!:D

Feeling alot under the weather today. We'll see what get's done tonight. Not much probably.:(
 

proshadetree

Lieutenant Commander
Joined
Jul 19, 2008
Messages
1,887
Re: 1991 Bayliner Trophy 2002 Transom Repair

:(:( Ok you can use it Just because you bought it and built it don't make it yours Oh wait maybe it will Must rethink that, All jokes aside I hope you get to feeling better.
 

j_k_bisson

Lieutenant Junior Grade
Joined
Oct 6, 2010
Messages
1,082
Re: 1991 Bayliner Trophy 2002 Transom Repair

:mad:Feeling better, but coughing up solid chunks of flem now. This cold should be over my Monday! I love Nyquil.
Last night was a lighter work load night than usual. Only played around disassembling and figuring out what truely needs to be done. One area of concern is going to be no big deal to fix and the other two are going to be full rebuild. Here the pics and update.

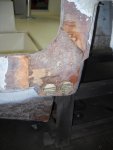
I took out the through hull fitting for the deck drains on both sides. The wood in the corners where very satrated and rotten. Both sides need to be rebuilt with new wood. I am only going to cut out the corners and replace that wood instead of the whole piece of wood (whole flat panel). That way the boat hull will not flex into a different shape. Here the pics of the rot.:mad:

DSCN0771-1.jpg
DSCN0774-1.jpg

The one side had no wood left in it. Completely rotten. That was the same side that had the broken nut. One thing for all the trophy owners out there. You may want to check yours for this. The glue/sealant did not even hold the fitings in place after the nut was removed. Very poor sealing job at the factory. No wonder the wood rotted. I also ordered 4 new fittings for this area. I had to tap the old fittings out because they here very tight fit in the pocket/depression.

I also remove all the old transom wood last night. I was also able to chisel out the fiberglass that encapsolated the old transom. I still need to grind the old PB epoxy out. While I am grinding the drains I do this area as well. Here a pic.

DSCN0776-1.jpg

Last I looked at the factory tackle locker cutout. This area was not as bad as I thought. I does not need to be repaired. I could not get a screw into the wood. So I will let dry out and seal it up with some resin. I'll do this at the same time I do the fish well drains. Here is a pic.

DSCN0777-1-1.jpg

The black in the pic is not rot. Just dirt, needs to be cleaned.

So the plan for this weekend is, tonight is demo. I will get suited up and grind out all the old fiberglass. Tomorrow night glass in the new wood. I also hope to get the inside cleaned up (washed) for waxing tonight after grinding.

Wish me luck!!!:D
 

j_k_bisson

Lieutenant Junior Grade
Joined
Oct 6, 2010
Messages
1,082
Update 11-6-2010

Update 11-6-2010

Last night worked from 8pm to 11pm. I said it before I hate fiberglass! It is the clean up that really gets to me. After every grinding session I have to do the following clean up procedure that is a real pain in the a**. Sweep, vaccum, and then blow out the garage. I eventually after all the glass is done I wash everything down in the boat with soap and water. The garage will definately get a very through cleaning after this project!
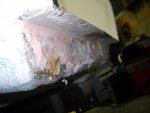
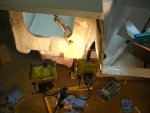
Well as to what I got done. I cut out with a sawsall the rotten area on the one side. Then proceeded to grind and feather the glass in the surrounding area. I next move to grind the old transom area to remove all the old PB epoxy. I love laying on my back and grinding over head. Thank god for the tyvek suit with hood, resporator mask, the vasoline to seal the mask to my face (helps to keep perfect seal), vinyl gloves and googles. This job would be horrible without any one of these items. Here is a pics.

DSCN0779-1.jpg
DSCN0778-1.jpg

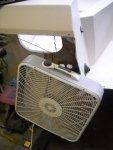
I am drying the remainder of the wood left. I cranked the heat in the garage over night and put a fan on the area.

DSCN0781-1.jpg

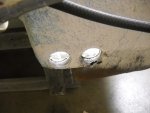
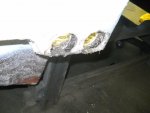
I have found another area of concern. The bolt holes have pulled through the glass. Looks like the washer actually pulled though. Oh well. I get them into proper position and laminate a layer of 1708 over the area then re-feather the new patch in with more grinding.

DSCN0783-1.jpg

The other side is not bad (rotten). I was wet before but is drying out nicely. I will not be replacing this area. I will hog out the very thin wood and put some pb epoxy in to build up the area and seal it. The wood where it looks bad was only 1/32 thick. So no wonder is came apart. I can not stick my trusty test screw driver into so it stays. I`ll leave it until last before sealing it up, to let it dry.

Tonight the wood will be replaced and glassed in. May also try to fix the bolt holes and crack as well. That way only the little sh*t will be left!!!!!!

THE END IS NEAR!!!!!!
 

proshadetree

Lieutenant Commander
Joined
Jul 19, 2008
Messages
1,887
Re: 1991 Bayliner Trophy 2002 Transom Repair

I know this work stinks but it will be well worth it when she is floating. After that first trip the for sale price will go through the roof, pride has its price and its high. You should be very proud of the efforts put into this fine looking rig.
 

j_k_bisson

Lieutenant Junior Grade
Joined
Oct 6, 2010
Messages
1,082
Re: 1991 Bayliner Trophy 2002 Transom Repair

Thanks Proshadetree. Hey was it you that had a bit of spider cracks on your hull bottom that you fixed a while ago? If so how it come out? I forgot to follow up on that one.
 

proshadetree

Lieutenant Commander
Joined
Jul 19, 2008
Messages
1,887
Re: 1991 Bayliner Trophy 2002 Transom Repair

I have some spider cracks on my dash 25 foot Century Mirada I have not dealt with them yet. My baylinner and century both have sound hulls. for a crack I would try to repair from the back first. If its just in the gell grind out and recoat
 

jonesg

Admiral
Joined
Feb 22, 2008
Messages
7,198
Re: 1991 Bayliner Trophy 2002 Transom Repair

Nice job, just a couple of points to mention.
Drying out wet areas will not prevent dry rot unless treated with an organocide to kill bacteria. Antifreeze is the best option, kills everything, especially cats in the transom.:D

Use tinned wire only for marine applications, home depot wire will turn green and get hot.
Decent prices on wire below.
http://foreandaftmarine.com/Wire.htm

Window leak repair.
http://www.yachtsurvey.com/WindowRepair.htm
 

jonesg

Admiral
Joined
Feb 22, 2008
Messages
7,198
Re: 1991 Bayliner Trophy 2002 Transom Repair

Whilst you have good access, its a good time to give consideration to the bilge pump situation.
http://www.yachtsurvey.com/bilge_pumps.htm

I went with the double pumps, one on auto , mounted a few inches above the hull bottom. So much easier to install all this now than later.
 

j_k_bisson

Lieutenant Junior Grade
Joined
Oct 6, 2010
Messages
1,082
Re: 1991 Bayliner Trophy 2002 Transom Repair

Thank's for all the info so far to everyone on this forum. You all have been very helpful in getting me this far! I did have the wrong person with the gel-coat bottom repair. I am sorry about that Proshadetree! Somewhere I was reading a forum where a guy had a bunch of spider cracks at the back corner of his boat and he went thru a process of repair. I was hoping it was you. I need to find out how large area gel coat repairs are done. After nut blasting the area to remove the bad glass. If anyone has links to a bottom refinish I would be appreciated for the it. I need to re gelcoat the whole bottom seeing that there is spider cracks and small bubles all over.

I understand killing the rot, but this one area did not have any rot. It just delaminated due to water and thin plywood condition. I have sealed it up and fill the area with pb epoxy. It will work for my intended use.

As to last nights progress. I was able to fabercate the piece of wood out of 1/2" plywood left over from the transom repair. Then coated it with thinned out epoxy to seal it. Then PB epoxyed it in, then filleted/filled all the cracks with more PB epoxy. Finally a layer of 1708 biax to fair the edges over. Today I will give it one more coat of white pigmented thickened epoxy to clean it all up. After sanding of coarse. Here is a pic of the area when I was done laswt night.

DSCN0785-1.jpg

Tried a couple of little tricks I picked up from reviewing the Yatch Dr's projects. I used a halogen work ligth to provide a bit of localized heat in the area of repair. Not too hot though. This was done to the area by a drafty door and I did not want to spend the millions heating my garage to 90'F all night for the cure to happen quickly. I did have the heat on in the garage but only to 65'F. The lamps where only used for about 1/2 hr to aid in tack up. I also used my wax paper trick to hold the resin in the wetted out 1708. Seeing I was glass'n a vertical wall. I was having the issues of the resin draining out of the fibers. This method seams to work out the best so far. But I have alot of clean up sanding for the next layer. Getting rid of the wax. Next time I am going to try seran wrap. Anyone ever try this? Here is the pic.

DSCN0784-1.jpg

Last I fixed the holes where the old boltes where. I painted resin in the area first then a layer of pre-wetted out 1708 biax on the area. It came out pertty nicely. Will have some gel-coat repair in these two spots. I also put a layer of 1708 on the crack that I showed a couple of days ago. Here is the pic.

DSCN0786-1.jpg

This afternoon/tonight I will sand up the area's worked on and coat with the white epoxy mixture I love using last stuff. It gives a finished look. I'll post the out come tomorrow.
 

mcgyver

Petty Officer 2nd Class
Joined
Oct 3, 2009
Messages
123
Re: 1991 Bayliner Trophy 2002 Transom Repair

Jeff, fantastic! I'm in the beginning stages of redoing the stringers in my 1990 Campion Fishing machine (same hull and layout as the trophy). I'm popping the top and that seems fairly straitforward....what would you estimate the cap weighs? Your aluminum fuel tank looked in great condition...any pitting corrosion on the bottom? Your boat is damn near identical to mine other than the name "Trophy" on the side. thanks for the play by play on the resto......
 

j_k_bisson

Lieutenant Junior Grade
Joined
Oct 6, 2010
Messages
1,082
Re: 1991 Bayliner Trophy 2002 Transom Repair

I understand the redunt need for safety systems with boats. But I will only have on biliage pump for now. It is brand new 1000gph rule pump with both auto and manual switched. I prefer to just replace a faulty one than try to maintain an iffy pump or add two of them for just in case. I love maintance one boats. My buddies think I am as bit over kill on this. But hey when you are 10 miles from shore and the wind kicks up, you have to be able to make it home every time.
 
Status
Not open for further replies.
Top