Re: 1988 Sea Nymph GLS - 17 Foot
Re: 1988 Sea Nymph GLS - 17 Foot
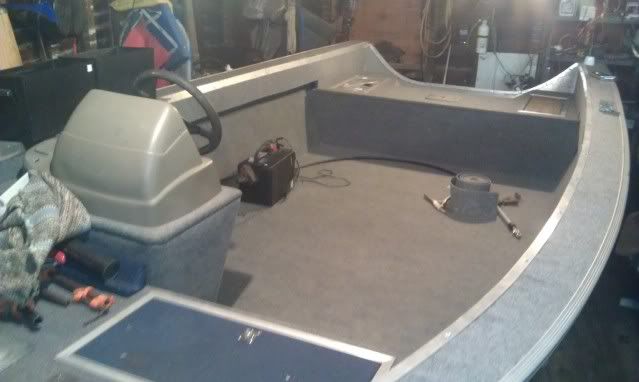
I'm on a 10,000 acre COE impoundment with 2 foot chop on the very worst days or I would not have taken the giant splashwell out. I modeled mine after the Tracker in my rebuild pics. In one summer of fishing I've not taken a wave over the back that concerned me. I agree that the decks need to stay low with lots of freeboard to keep folks (especially kids) in the boat.
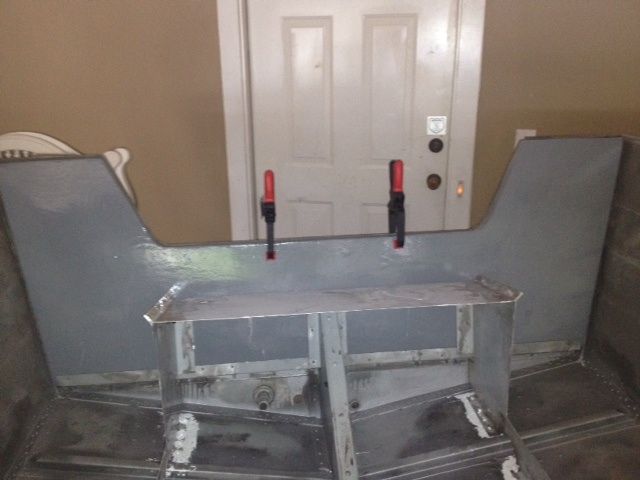
I must admit that Will did the splashwell one day while I was not there. I left with the original framework all intact and came back with the cut down version in place. I will get you all the pics and measurements you want Patrick. I'll even pull the deck back off and get you new pics if you need them. I know that we established the height we wanted based on the height of the front deck, then decided how far forward to go. (If I could do it again I'd go another foot.) We marked the sides with a sharpie to show where the framework would need to be. The first piece of framework was the port to s'board piece that replaced the big splashwell cross piece. We used some scrap wire running trays from my work to make the framework, but what we cut from them would essentially be a piece of 1 1/2 X 1 1/2 X 1/8 aluminum angle.
The gunwales were pretty straightforward, we cut an angle piece to put on the inside of the existing gunwale and extend the framework the rest of the way to the transom. We tied the framework into the transom with one of the angle pieces that supported the splashpan and cut a piece for the top and side from the old splash pan. We overlapped those the same amount the original splashpan was overlapped and pop riveted everything back in with 3/16 X 1/2 rivets. Look back through my pics and let me know what you need more detail on. I'll be happy to get some pics for you.
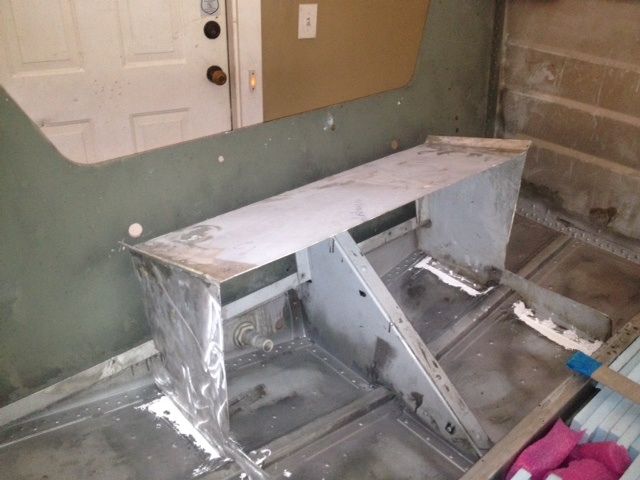
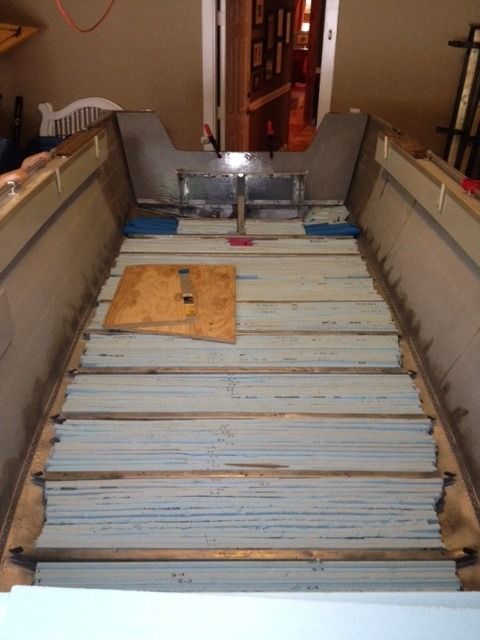
You can see a lot of what we did in this picture. We measured from the deck up to layout the height of the casting deck. My rear deck really should go about a foot or even more further forward, with the trolling bar in place it is really no more than a place for a seat. We didn't get to do a lot of artificial casting this last Spring so I didn't really need more than I had back there. We cast plugs at night, the darker the better, and the rear deck guy will have to sit or I'm afraid he will run out of casting deck and be in the drink or on the deck. The trolling bar will be out then so that may help some.
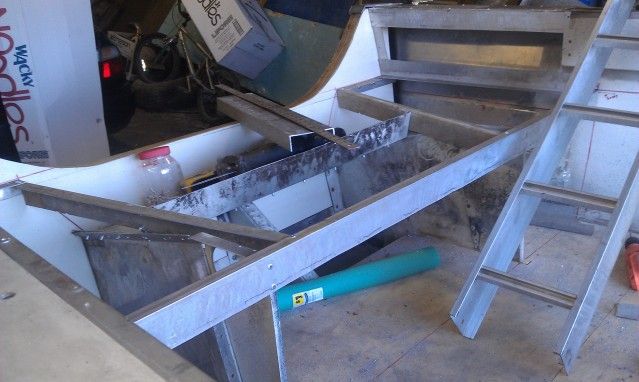
All of the old splaswell framework is still in the boat. I'm pretty sure all of it is the factory height. We may have had to lower the two pop riveted pieces on each side of the tray an inch or so. The foremost piece of angle running from port to s'board is pop riveted through the hull with two 3/16 rivets, it immediately stabilized the hull a lot. I thought we would need more support until we tied everything back together with decking and put the trim back on, that really stabilized the sides.
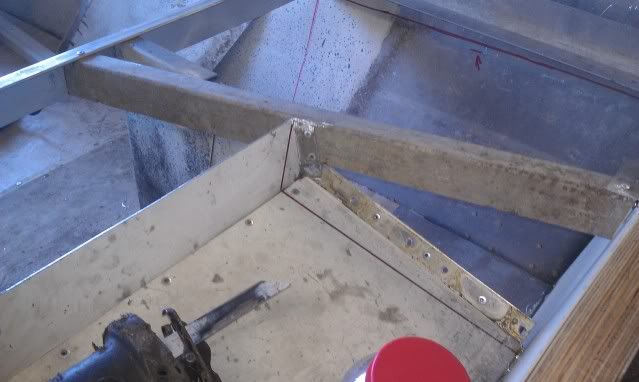
A piece of the cable tray is to the right in the pic, and you can see what we did with the gunwales. The upward angled piece across the front of the splash pan is a piece he cut out of the splashpan, flipped over and pop riveted back in, somehow using a factory angle that was on it to give him the upward tilt. Everything was cut with a sabre saw or sawzall. I'm almost sure that the bottom tray of the splashwell is still like it came from the factory. We didn't make it any smaller on the bottom, we made is lower on the sides and front.
From another angle. To close the sides in we used a piece of sealed Aurouco and the 1/8 fiberglass we used on the transom. We cut the angles on the plywood, glued them in on all sides with liquid nails and ran a few screws across the top. We waited for all that to set up then glued the fiberglass sheets on over the sealed plywood.


