1987 Starcraft Islander 220V Rebuild

scott hamilton

Petty Officer 1st Class
Joined
May 28, 2002
Messages
215
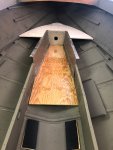
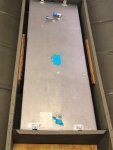
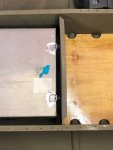
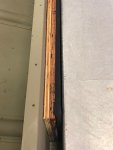
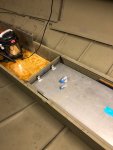
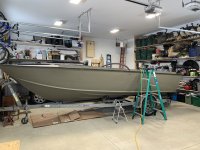
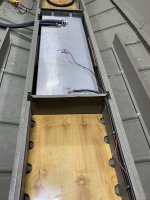
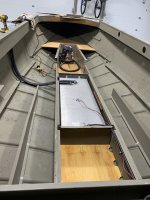
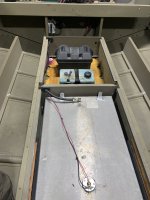
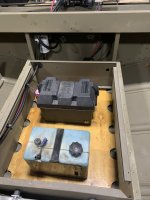
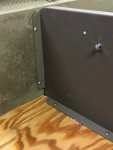
Thanks for all the continued advice waterman and SHSU . Got the pads constructed and set for the tank. 3/4 inch ACX coated in US composites thin resin and 3/4 inch closed cell neoprene. This will hold the tank about 1/4 inch above the ribs. I'm also installing a similar pad on either side of the tank to lightly hold against the stringers. Installed (dry fit) the bow pieces. I'm hoping to have the tank permanently installed this weekend and continue on cutting floor pieces. Its also time to figure out the console.
 

Attachments

  • photo338740.jpg
    photo338740.jpg
    496.2 KB · Views: 17
  • photo338741.jpg
    photo338741.jpg
    529.5 KB · Views: 16
  • photo338742.jpg
    photo338742.jpg
    590.3 KB · Views: 15
  • photo338743.jpg
    photo338743.jpg
    588.3 KB · Views: 16
  • photo338744.jpg
    photo338744.jpg
    563.2 KB · Views: 14
  • photo338745.jpg
    photo338745.jpg
    585.2 KB · Views: 86
  • photo338746.jpg
    photo338746.jpg
    632 KB · Views: 13
  • photo338747.jpg
    photo338747.jpg
    589.2 KB · Views: 13
  • photo338748.jpg
    photo338748.jpg
    632.2 KB · Views: 11
  • photo338749.jpg
    photo338749.jpg
    640.7 KB · Views: 15

SHSU

Lieutenant Junior+Starmada Splash Of The Year 2019
Joined
Mar 8, 2017
Messages
1,726
Nice work!!!

Is the tank butted against a stop as well at the bow? I couldn't tell from the picture (Assuming the picture with what looked to be a tank is the actual tank).

SHSU
 

Watermann

Starmada Splash of the Year 2014
Joined
Jan 12, 2013
Messages
13,787
Batter up! :lol:

fetch
 

Watermann

Starmada Splash of the Year 2014
Joined
Jan 12, 2013
Messages
13,787
You might consider putting 1/4" neoprene on top of the ribs too to give it that buffer just in case since gas does weigh around 6 Lbs per gallon and there is flex in the boat, just to avoid possibly having rib contact without padding. I think that's cutting it close if things settle over time and you don't want to take chances with gas at all.
 

scott hamilton

Petty Officer 1st Class
Joined
May 28, 2002
Messages
215
Nice work!!!

Is the tank butted against a stop as well at the bow? I couldn't tell from the picture (Assuming the picture with what looked to be a tank is the actual tank).

SHSU

Yes, I have the vibration isolators on each end. I’ll post more pics tomorrow
 

scott hamilton

Petty Officer 1st Class
Joined
May 28, 2002
Messages
215
You might consider putting 1/4" neoprene on top of the ribs too to give it that buffer just in case since gas does weigh around 6 Lbs per gallon and there is flex in the boat, just to avoid possibly having rib contact without padding. I think that's cutting it close if things settle over time and you don't want to take chances with gas at all.

Actually...crap...now that you say this I meant to use rubber tape on the ribs. I agree 100%. Hmm. Maybe I’ll go ahead order 1/4 neoprene instead. Def gonna need yo pad ribs.
 

scott hamilton

Petty Officer 1st Class
Joined
May 28, 2002
Messages
215
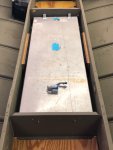
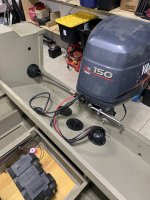
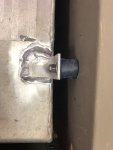
More pics of the tank install. I ordered some 1/4 inch neoprene to pad the ribs although after looking this morning with the vibration isolators and welded tabs its pretty solid. I don't think this is needed. Nonetheless, it is possible that the tank could settle and I don't want to chance the tank contacting the ribs without padding (thanks waterman). Also, solid riveted the old slip joint pieces on the stringers to be used to support the flooring. The flooring above the tank will be independent and removable for access. The compartment behind the tank is the battery compartment and will have an access door. Gonna install the other other stringers and continue cutting flooring today.
 

Attachments

  • photo338821.jpg
    photo338821.jpg
    506.8 KB · Views: 9
  • photo338822.jpg
    photo338822.jpg
    570.9 KB · Views: 8
  • photo338823.jpg
    photo338823.jpg
    551.8 KB · Views: 7
  • photo338824.jpg
    photo338824.jpg
    523.6 KB · Views: 9
  • photo338825.jpg
    photo338825.jpg
    643.1 KB · Views: 10
  • photo338826.jpg
    photo338826.jpg
    521.1 KB · Views: 10
  • photo338827.jpg
    photo338827.jpg
    573.6 KB · Views: 9
  • photo338829.jpg
    photo338829.jpg
    586.3 KB · Views: 14
  • photo338828.jpg
    photo338828.jpg
    663.6 KB · Views: 9
  • photo338830.jpg
    photo338830.jpg
    744.8 KB · Views: 10
  • photo338831.jpg
    photo338831.jpg
    660.2 KB · Views: 10

SHSU

Lieutenant Junior+Starmada Splash Of The Year 2019
Joined
Mar 8, 2017
Messages
1,726
I really like that rubber shock absorber you installed. That is really thinking ahead.

What kind of fuel gauge you going to use?

SHSU
 

Watermann

Starmada Splash of the Year 2014
Joined
Jan 12, 2013
Messages
13,787
I'm going to have to save your thread for when I go to work on my 22' Islander's fuel tank, some really nice well thought out work on tank support. Right now I have no tank for it, someone removed it before I bought the boat.
 

scott hamilton

Petty Officer 1st Class
Joined
May 28, 2002
Messages
215
I really like that rubber shock absorber you installed. That is really thinking ahead.

What kind of fuel gauge you going to use?

SHSU

I bought a new mueller sender and just a teleflex gauge. Also replacing the fuel fill and vent.
 

Attachments

  • photo339406.jpg
    photo339406.jpg
    1.1 MB · Views: 6

scott hamilton

Petty Officer 1st Class
Joined
May 28, 2002
Messages
215
I'm going to have to save your thread for when I go to work on my 22' Islander's fuel tank, some really nice well thought out work on tank support. Right now I have no tank for it, someone removed it before I bought the boat.

Thanks! I purchased my tank from Wolfs marine in Benton Harbor, MI. Used tank was $100. Also purchased the windshield from Wolfs for $100. Both are in excellent condition. Deal of the century. If you're close to MI this is place to go. Lots and lots and lots of boat parts (new and used).
 

scott hamilton

Petty Officer 1st Class
Joined
May 28, 2002
Messages
215
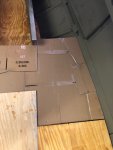
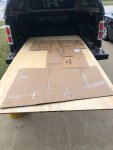
I have most of the floor cut and have started the consoles. Also, dry fit the windshield. I thought I would take some pictures and highlight the use of cardboard patterns for anyone doing this work. Some of the flooring can be measured but for the easiest and best fit use cardboard patterns. Just start with one piece and start taping pieces to make the pattern. Really effective and good fit each time. Check out the pictures. You can see the pattern created by taping pieces of cardboard together. Just carefully trace it and there you go an irregular shape perfectly fit.
 

Attachments

  • photo339407.jpg
    photo339407.jpg
    540.4 KB · Views: 12
  • photo339408.jpg
    photo339408.jpg
    601 KB · Views: 12
  • photo339409.jpg
    photo339409.jpg
    675.1 KB · Views: 14
  • photo339410.jpg
    photo339410.jpg
    793.3 KB · Views: 14
  • photo339411.jpg
    photo339411.jpg
    774.7 KB · Views: 14

scott hamilton

Petty Officer 1st Class
Joined
May 28, 2002
Messages
215
One problem I'm seeing is that I used 5/8 inch CDX plywood which I have done on my other boats. But it is spongy in a couple areas especially above the fuel tank where the stringers are farthest apart. So, I was planning to make some little aluminum I-beams to go in between the stringers in the spongy spots. But now I'm thinking it would be best to replace the 5/8 inch flooring with 3/4 inch possibly marine but ACX at a minimum. I don't know, I have $150 in the 5/8 flooring. It has to be correct and I'd also like more weight with 3/4.
 

Watermann

Starmada Splash of the Year 2014
Joined
Jan 12, 2013
Messages
13,787
I would use cross supports either way, that extra 1/8" of plywood won't make much difference is strength or weight. Some give is no big deal, it's an tin boat not a ballroom dance floor as I heard once from an old timer here aptly named Grandad.
 

scott hamilton

Petty Officer 1st Class
Joined
May 28, 2002
Messages
215
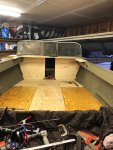
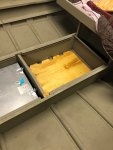
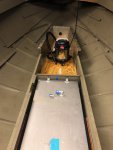
Its been a while! I had a move and have finally gotten set back up in a new shop. Time to start up again. I plan to finish this in the next month or two.
1. Removed the tank, installed 1/4 inch neoprene on the ribs, reinstalled.
2. Installed fuel fill, bonding wire and vent.
3. Installed water separator.
4. I have the the oil tank and battery temp-ed in the storage compartment.
5. Focusing on carpentry/flooring/dash/treating wood with "old timers formula" this weekend. (ran out of the US composites epoxy and just don't think it matters) I did purchase 4 sheets of marine plywood. Going to recut the floor and possibly just use the 5/8 CDX IN ADDITION to 3/4 marine. It'll add nice weight in the keel. Any opinions on this approach are welcome.

QUESTIONS:
1. Can you take a look at the pictures and see if everything looks right.
2. Is the water separator in a good location?
3. Any pro/cons to the engine cabling going through the splash well horizontal boot as opposed to the vertical boot where the steering comes in?
4. Opinions on sandwiching the 5/8 PLUS the 3/4 inch plywood for flooring?
 

Attachments

  • 66646960251__2F52C01B-2578-4311-AC60-769986F5689D.JPG
    66646960251__2F52C01B-2578-4311-AC60-769986F5689D.JPG
    2.9 MB · Views: 18
  • IMG_0033.JPG
    IMG_0033.JPG
    1.5 MB · Views: 18
  • IMG_0034.JPG
    IMG_0034.JPG
    1.4 MB · Views: 17
  • IMG_0035.JPG
    IMG_0035.JPG
    1.6 MB · Views: 16
  • IMG_0036.JPG
    IMG_0036.JPG
    1.6 MB · Views: 15
  • IMG_0041.JPG
    IMG_0041.JPG
    1.7 MB · Views: 15
  • IMG_0042.JPG
    IMG_0042.JPG
    1.5 MB · Views: 17
  • IMG_0043.JPG
    IMG_0043.JPG
    1.5 MB · Views: 16
  • IMG_0044.JPG
    IMG_0044.JPG
    1.5 MB · Views: 15
  • IMG_0045.JPG
    IMG_0045.JPG
    1.4 MB · Views: 15
  • IMG_0046.JPG
    IMG_0046.JPG
    1.7 MB · Views: 17

ShoestringMariner

Lieutenant Commander
Joined
Apr 18, 2015
Messages
1,593
Sad to see the destruction of a hard to find Islander but excited to see your build. I like 22’ bow riders or tricked out mariners too.

Edit: looks like this project is well underway. Don’t know how I missed it
Looking great!
 
Last edited:

PaulyV

Chief Petty Officer
Joined
Sep 7, 2008
Messages
525
Welcome to the Starmada Scott 👋

The Islanders here have a poor record of being restored, in fact the only one I know of finished had it's cabin removed and turned into an SS open bow so I guess technically it was no longer an Islander. :lol:

I'll be honest with you, I don't really like seeing these cabin boats turned into an open style since they haven't made them in years and every conceivable open configuration was and is still made. I think the Mariner was also discontinued.

Anyway the cabin does provide structure to the boat but it can be replaced with side braces and or consoles.

The "V" designation was brought about in the mid 80's after the V5 series, it has to do with the bow angle and deadrise of the hull. I love just looking at these oldies, keep the pics coming. :thumb:

fetch
wow I would not tear that down! Classic hard to find, in great shape. Id love that Cabin.
 

scott hamilton

Petty Officer 1st Class
Joined
May 28, 2002
Messages
215
Why 2 layers of decking?
Ya, only because I already have 5/8 cut and fitted and it turned out to be too spongy in my opinion. I should have just gone with 3/4 from the start. So, now I have 5/8 and 3/4 both fit and treated. I did dry fit both layers and kind of like the idea (since I have the material already). I need to fit the foam and do a few more things before floor is installed. I figure if there are no negatives I like the extra weight in the keel. I can't think of any reason NOT to do it.
 

Moserkr

Chief Officer + Starmada Splash Of The Year 2021
Joined
Nov 23, 2020
Messages
869
Good to see the project underway again! Will tag along and watch the progress. A 22’ islander with an OB is one big boat!
 
Top