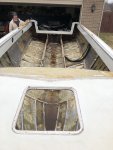
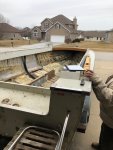
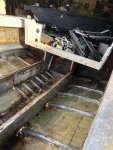
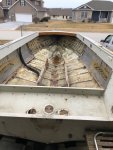
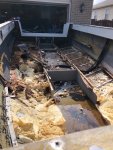
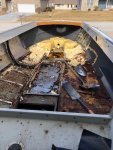
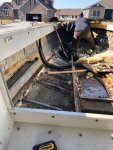
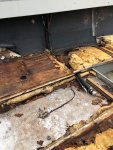
1987 Starcraft Islander 220V Rebuild

DLNorth

Chief Petty Officer
Joined
May 26, 2016
Messages
432
Keep working on it.
But, the "rule" is that once you don't need it, what you were looking for will turn up.

Dan
 

SHSU

Lieutenant Junior+Starmada Splash Of The Year 2019
Joined
Mar 8, 2017
Messages
1,741
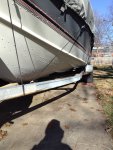
I got the top off. I'm starting to regret this. Its huge and exactly what I want but I feel like I should've started with a Supersport...Then again, when is the last time anyone saw a 22 foot supersport near NW Indiana for sale? I've never seen one. LOL.

No regrets, just realign your time table.

I told the admiral it would be 3 months/6 months tops.... Just a floor and transom redo... 2 1/2 years later and rerivting the entire boat we finally splashed her. Nothing like being able to tell people you literally know every square inch of your boat.

SHSU
 

scott hamilton

Petty Officer 1st Class
Joined
May 28, 2002
Messages
215
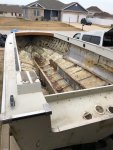
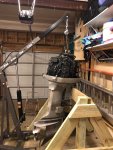
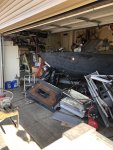
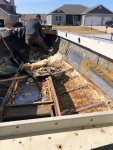
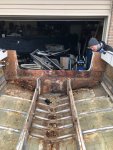
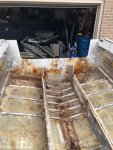
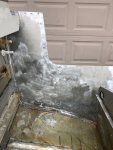
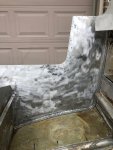
Been busy...almost fully cleaned out. Sides, floor, motor, tank all out. What a huge pain in the butt. Thank goodness for buddies willing to help. Tank was corroded and leaking like crazy and still had about 12 gallons of old gas. I cant believe a marine fuel tank corrodes. I guess I thought they had that all figured out. Oh well. The hull looks to be in great shape and I saw no leaks as I was power washing the inside. I do plan to fill her up with water for a better assessment.

Next steps are to remove splash well and transom. Do some more cleaning of the old foam. I'm going to put carb kits in and do water pump replacement too. The motor had good compression and fired after some preparation. The bottom carb was POURING gas out so it flooded immediately. I thought it was good it fired right away though. The motor will be sold after it is running. I have a 1998 yamaha 150 to put on.

I'll post more photos when I can figure out how....

1. What tank to use? 55 gallon belly moeller looks good but the filler is on the wrong side.
 

Attachments

  • photo326527.jpg
    photo326527.jpg
    2 MB · Views: 9

scott hamilton

Petty Officer 1st Class
Joined
May 28, 2002
Messages
215
heres a few more...
 

Attachments

  • photo326528.jpg
    photo326528.jpg
    91.8 KB · Views: 13
  • photo326529.jpg
    photo326529.jpg
    124.1 KB · Views: 14
  • photo326530.jpg
    photo326530.jpg
    106.5 KB · Views: 16
  • photo326531.jpg
    photo326531.jpg
    105.4 KB · Views: 13
  • photo326532.jpg
    photo326532.jpg
    778.2 KB · Views: 16

scott hamilton

Petty Officer 1st Class
Joined
May 28, 2002
Messages
215
[No message]
 

Attachments

  • photo326533.jpg
    photo326533.jpg
    111.2 KB · Views: 13
  • photo326534.jpg
    photo326534.jpg
    117.5 KB · Views: 12
  • photo326535.jpg
    photo326535.jpg
    122.2 KB · Views: 10
  • photo326536.jpg
    photo326536.jpg
    120.4 KB · Views: 11
  • photo326537.jpg
    photo326537.jpg
    119.2 KB · Views: 12
  • photo326538.jpg
    photo326538.jpg
    140.7 KB · Views: 13
  • photo326539.jpg
    photo326539.jpg
    136.3 KB · Views: 12

Watermann

Starmada Splash of the Year 2014
Joined
Jan 12, 2013
Messages
13,794
The tear down clean up and hull repairs always take longer and is the toughest part of the project. Nobody is ever excited about this part.

Yeah pics are a bit odd here but there's a couple easy ways to do them. For you since you have them in your ideabook, just have a second tab open where you can copy the image address of the pic you want in your thread and using the upload attachments button put them in the thread with upload URL.

They'll look like this rather than the thumbs.... Dang oak trees that drop leaves in spring :lol:

Click image for larger version  Name:	fetch?photoid=10835736.jpg Views:	1 Size:	1.90 MB ID:	10841113
 

Doh

Petty Officer 2nd Class
Joined
Aug 12, 2008
Messages
193
You Got To Luv them Islanders!

Sweet Boat, and an Outboard Model to Boot.

Lots of memories of 19' Holidays, 18' SS's, 21' Holiday V5, I grew up StarCraft.

Now I had to go to Hewescraft for a Big Water/No Frills Boat. Cottager's ain't looking for 20 Rod Holders, 2 Bait Wells, 3 Live Wells. We need Space, High Gunnels, and Dry Rides!
 

scott hamilton

Petty Officer 1st Class
Joined
May 28, 2002
Messages
215
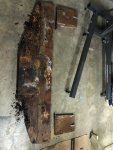
Transom is out. I have a couple questions:
1. It was made with 3 separate pieces. Is there an advantage to making the new transom 1 piece?
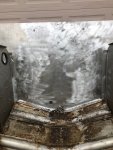
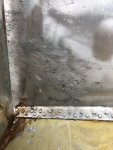
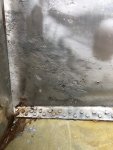
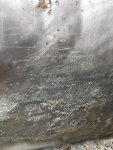
2. I see some minor corrosion around old bolt holes. I do not think this is a structural problem however it is obvious corrosion in certain spots. How do I stop further corrosion? And what is the root cause of this in an aluminum hull?
3. I have a bunch of 1/8 - 1/4 inch old bolt/screw holes. What's your preferred method to fix these? 5200 and a short SS bolt w nylon locking nut?
4. I'd like to use the best liquid nails construction adhesive to glue the plywood on new transom. Is this acceptable or do I need to spend for the 5200?
5. Should I glue the plywood and then coat with US composites thin epoxy?

Next steps are to clean up the entire project...remove all old hardware and foam, check for leaks and install new transom.

Thanks..
 

Attachments

  • photo326713.jpg
    photo326713.jpg
    98.8 KB · Views: 11
  • photo326714.jpg
    photo326714.jpg
    122.6 KB · Views: 9
  • photo326715.jpg
    photo326715.jpg
    128.4 KB · Views: 10

SHSU

Lieutenant Junior+Starmada Splash Of The Year 2019
Joined
Mar 8, 2017
Messages
1,741
Answers in Red:

1. It was made with 3 separate pieces. Is there an advantage to making the new transom 1 piece? A lot of people do it in one for strength.
2. I see some minor corrosion around old bolt holes. I do not think this is a structural problem however it is obvious corrosion in certain spots. How do I stop further corrosion? Need to clean them out with wire brush. Can use vinegar, or rustoleum stop rust products. There are some more advanced methods out there I am sure someone will come along and mention.
And what is the root cause of this in an aluminum hull? Bolts were probably Steel or SS, as Aluminum is on the lower end of the corrosion scale it would be "eaten" first

3. I have a bunch of 1/8 - 1/4 inch old bolt/screw holes. What's your preferred method to fix these? 5200 and a short SS bolt w nylon locking nut? Where are they located? On the Transom? Yes 5200 with SS and Nylon locking nuts is a good option. Another is to use aluminum rivets with 5200
4. I'd like to use the best liquid nails construction adhesive to glue the plywood on new transom. Is this acceptable or do I need to spend for the 5200? I used Titebond3. Its waterproof and designed for glueing wood together. Just make sure to use plenty and get a good squeeze out. Many of us used screws to add pressure evenly while drying. Then remove them and back fill holes with epoxy and such.
5. Should I glue the plywood and then coat with US composites thin epoxy? Up t o you on what you cover with, but some form of protective to prevent water intrusion is always recommended. I used Fasco Epoxy for my project. If you search the forum, you will see people use Epoxy, Urethane, Oil based paints...
 

scott hamilton

Petty Officer 1st Class
Joined
May 28, 2002
Messages
215
Thanks for the info. I’ve cleaned up the metal and made the new transom out of 2 3/4 inch acx plywood. I have US Composites thin epoxy on the way. Gonna coat it twice. Now before I install transom I have more questions.
  1. Corrosion is deeper than I thought. Is it best to paint to inhibit future corrosion? (I’m talking self etching primer followed by good 2 part epoxy paint)
  2. Some of the holes are in the aluminum where transom will be installed so I cannot use the bolt/locking nut/5200 method. I would have to use a Wood screw through aluminum w 5200 and into transom. I don’t really like that option with this many holes. So I was also thinking about 5200 between transom and aluminum where I have multiple holes. Another option use a heavier piece of aluminum mounted on outside. A small piece for each group of holes. I was thinking 5200 and 1 long 1/4 bolt/locking nut in the middle of the patch to hold it. So one patch per group of old holes.
  3. So, how do I avoid corrosion?
 

Attachments

  • photo326986.jpg
    photo326986.jpg
    941.1 KB · Views: 4
  • photo326987.jpg
    photo326987.jpg
    1.1 MB · Views: 5
  • photo326988.jpg
    photo326988.jpg
    865.9 KB · Views: 4
  • photo326989.jpg
    photo326989.jpg
    1,020.9 KB · Views: 4
  • photo326989.jpg
    photo326989.jpg
    1,020.9 KB · Views: 4
  • photo326990.jpg
    photo326990.jpg
    1.1 MB · Views: 5

Watermann

Starmada Splash of the Year 2014
Joined
Jan 12, 2013
Messages
13,794
Don't go laminating the transom wood to the skin with 5200, just skin over the cleaned pitting with Marine Tex, sand, prime and paint. Yeah it's a pain but at least you don't have it this bad as I did on my Chief with a full IO transom.I had lots of holes that needed to be plugged up too. JB water weld stick works well for that too.

You avoid corrosion by not allowing the surfaces to be unprotected and then wet all the time where the water becomes acrid and starts the process. Bare AL with an unsealed piece of wet wood next to it for 40 years is bad news. We've all had to deal with this issue on the inner transom skins.

y4mENsu_JKME9PsOt57jlRmA5XPGlY55dsibgftpibK_peAXIOeT04WkuvkSckYmLxOcGu5RZXSqkZCeJZAJbuYsfXo6gc6zKh4JWCLOq_ref79QSXPGImypEFWCE5h2lFkEvgh4_zYTc2ZDNfB-ktpz8-mHtykErIB7He6JWJBMpbl7WtWZRayUxpq5KGuCWMsj8yeosoDUprtOsg_BW3Lhw
 

classiccat

"Captain" + Starmada Splash Of The Year 2020
Joined
Dec 20, 2010
Messages
3,412
Thanks for the info. I’ve cleaned up the metal and made the new transom out of 2 3/4 inch acx plywood. I have US Composites thin epoxy on the way. Gonna coat it twice. Now before I install transom I have more questions.
  1. Corrosion is deeper than I thought. Is it best to paint to inhibit future corrosion? (I’m talking self etching primer followed by good 2 part epoxy paint)
  2. Some of the holes are in the aluminum where transom will be installed so I cannot use the bolt/locking nut/5200 method. I would have to use a Wood screw through aluminum w 5200 and into transom. I don’t really like that option with this many holes. So I was also thinking about 5200 between transom and aluminum where I have multiple holes. Another option use a heavier piece of aluminum mounted on outside. A small piece for each group of holes. I was thinking 5200 and 1 long 1/4 bolt/locking nut in the middle of the patch to hold it. So one patch per group of old holes.
  3. So, how do I avoid corrosion?

Are some of the pits completely through? I recommend putting a light inside then going outside (dark) to look for any pinhole constellations. I found several that I would've otherwise missed.

On the transom wood, epoxy should really be used with glass cloth esp w/ douglas fir PLY. Plywood suffers grain checking and I think its exacerbated by epoxy by itself; glass cloth prevents checking. If you're not using cloth, IMHO you're better off with Varnish or "Old Timer's formula" (use search function). I'm an epoxy/glass guy myself however the OTF definitely has my interest.

I think painting could help if it's applied correctly, doesn't bubble/delam and hold water.

Preventing future corrosion, fill in those pits with JBWELD or marine tex to stop future water pooling. I use phosphoric acid etch + chromate conversion (West Systems 860 kit) to ensure that the pit is clean & that the filler gets a good hold. Careful with this, it's a strong acid and if you don't fully neutralize / remove, it could cause further corrosion. When I did my transom, the z-brace & kneebrace were gone so there weren't any hiding places.

Provide barrier(s) between the aluminum and transom wood (epoxy/glass, varnish, paint).

Ensure good grounding; I believe the that the transom gets increasingly punky b/c of stray currents passing to the true ground at the engine.

For smaller patches, you can use solid rivets to hold an exterior patch in place buttered with 5200. To do this, you'll have to chamfer the interior hole then grind off the bucktail flush with the transom skin before you slide-in the transom wood.

A few guys have mounted an exterior aluminum cladding back-buttered with 5200. if you go this route, you need to be 100% sure that its completely sealed. Watermann had a creative way to clamp it down. The 5200 along with kneebrace + motor mounts are what hold it in place.

That was a mouthful but you asked alot and you have many options!
 

scott hamilton

Petty Officer 1st Class
Joined
May 28, 2002
Messages
215
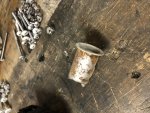
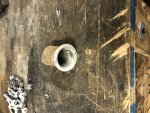
Where do find one of these? 1 inch Grommet for splashwell drain.
 

Attachments

  • photo327350.jpg
    photo327350.jpg
    134.4 KB · Views: 1
  • photo327351.jpg
    photo327351.jpg
    140.1 KB · Views: 1

SHSU

Lieutenant Junior+Starmada Splash Of The Year 2019
Joined
Mar 8, 2017
Messages
1,741
I prefer the plastic ones, much cheaper and to Watermann's point you don't need the special flairing tool you will only use once.

SHSU
 

500R

Cadet
Joined
Oct 6, 2019
Messages
18
Moving right along on it. I thought about taking a look at this boat before the Heritage I got came up. I figured that the transom would be rough too when the owners description said soft floor. I could never get ahold of he/she. Good luck with it, you should be able to get a couple bux back from that old Rude.
 
Top