1987 Starcraft Islander 220V Rebuild

scott hamilton

Petty Officer 1st Class
Joined
May 28, 2002
Messages
215
Moving right along on it. I thought about taking a look at this boat before the Heritage I got came up. I figured that the transom would be rough too when the owners description said soft floor. I could never get ahold of he/she. Good luck with it, you should be able to get a couple bux back from that old Rude.

Well, its one of the only outboard models I had seen. It should be sweet when it done but yes it is a complete rebuild including fuel tank. This condition in a I/O model would've been worth $1000. The previous owner got a good deal. lol
 

scott hamilton

Petty Officer 1st Class
Joined
May 28, 2002
Messages
215
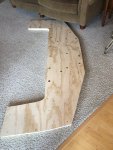
Got the new transom built. 2 layers 3/4 ACX. I used gorilla heavy duty construction adhesive. I set all 500 lbs of the motor/motor stand on it overnight and screwed it together with wood screws/fender washers. After a week or so I removed all the screws dry fit, drilled all the holes and made final cuts to clean it up. Sanded it and coated with US composites thin epoxy resin. I made sure to coat all the insides of the drilled holes and edges twice. It came out nice.

Lessons learned: Use marine grade plywood. Use a lot more glue. I'll let you know in 10 years about the epoxy coating. I used this stuff 10 years ago on a new floor in my sylvan skipper and it seems bullet proof. A lot of guys suggested "old timers formula" but I had already ordered the epoxy.
 

Attachments

  • photo328022.jpg
    photo328022.jpg
    89.3 KB · Views: 5
  • photo328023.jpg
    photo328023.jpg
    73.8 KB · Views: 4
  • photo328024.jpg
    photo328024.jpg
    131.1 KB · Views: 6

scott hamilton

Petty Officer 1st Class
Joined
May 28, 2002
Messages
215
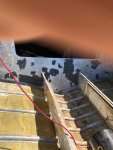
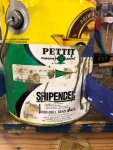
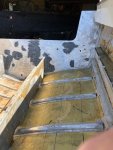
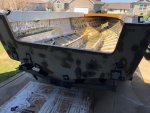
Repaired, primed and painted all the corrosion on the transom skin and hull. Luckily the hull only had a few spots of corrosion under the old tank. I used JB weld, Pettit 6455 and Pettit paint I had leftover from another project. Cleaned the bare aluminum with cleaning vinegar. The JB and paint seemed to stick really well. I've started the transom/splash well install.
 

Attachments

  • photo328025.jpg
    photo328025.jpg
    86 KB · Views: 7
  • photo328026.jpg
    photo328026.jpg
    112.5 KB · Views: 7
  • photo328027.jpg
    photo328027.jpg
    137.1 KB · Views: 8
  • photo328028.jpg
    photo328028.jpg
    96 KB · Views: 8
  • photo328033.jpg
    photo328033.jpg
    94.7 KB · Views: 10
  • photo328034.jpg
    photo328034.jpg
    101.7 KB · Views: 9
  • photo328029.jpg
    photo328029.jpg
    108.6 KB · Views: 8
  • photo328030.jpg
    photo328030.jpg
    86.9 KB · Views: 8
  • photo328031.jpg
    photo328031.jpg
    128.5 KB · Views: 8
  • photo328032.jpg
    photo328032.jpg
    102.5 KB · Views: 8
  • photo328035.jpg
    photo328035.jpg
    130.8 KB · Views: 7
  • photo328036.jpg
    photo328036.jpg
    123.4 KB · Views: 7

scott hamilton

Petty Officer 1st Class
Joined
May 28, 2002
Messages
215
Fuel tank question: If you have replaced your fuel tank on a islander what exact tank did you purchase? I'm getting ready to buy a tank and everything for install. I want to use the existing port side fill location on my boat. I want to move weight forward so I want my new tank to extend towards the bow and not towards the stern as it was originally. My stringers are 25.5 inches apart. Moeller 032552 has 24 inches wide but fill goes the wrong way. Moeller 032555 fill points the correct way (towards port when the tank extends to bow) but I've seen the width is 25.5. I think I need clearance for the plastic tank. It cannot fit snug to the stringers.

1. What exact tank did you install? I need clearance, correct?
2. What other hardware do I order to install? What hose clamps are recommended?
3. Do i use anything to pad the plastic against the aluminum?
 
Last edited:

500R

Cadet
Joined
Oct 6, 2019
Messages
18
Well, its one of the only outboard models I had seen. It should be sweet when it done but yes it is a complete rebuild including fuel tank. This condition in a I/O model would've been worth $1000. The previous owner got a good deal. lol

Yea mate I hear ya, the outboard models are as rare as hens teeth. I personally glad I get to see a boat I was interested in getting the the make over. Lexington is about a 7 hr drive for me, and the weekend that I was in the area, you were picking it up, lol. Could never get a hold of the seller, as I was also interested in the 2 6gal fuel tanks for my other project
I'd say ya done decent, they did IMO want top $$, so I'll agree the PO got a fair shake from you.
I think you're correct on your IO statement, they were asking 1k for mine, but they wanted it gone so I lucked out with the 500bux you gotta take it today deal.
Again, good luck with it Scott, and I'm glad I get to see it getting done champ

Cheers man
AJ
 

mattsteg

Petty Officer 2nd Class
Joined
Mar 25, 2019
Messages
177
Feel fortunate you don't have 23 in spaced stringers like on my SS. Fortunately my tank looks OK...Because there is much better selection with your wider stringer gap. How far are you moving it forward? Did weight distribution seem off previously? Tanks were further forward on IOs I think in order to clear the engine area.
 

scott hamilton

Petty Officer 1st Class
Joined
May 28, 2002
Messages
215
Feel fortunate you don't have 23 in spaced stringers like on my SS. Fortunately my tank looks OK...Because there is much better selection with your wider stringer gap. How far are you moving it forward? Did weight distribution seem off previously? Tanks were further forward on IOs I think in order to clear the engine area.

I am just trying to move as much weight forward as I can. I’m thinking trim tabs anyways so maybe it’s actually not a big deal. I’ll Prob order the 24 in width tank and call it good.
 

scott hamilton

Petty Officer 1st Class
Joined
May 28, 2002
Messages
215
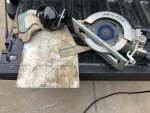
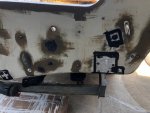
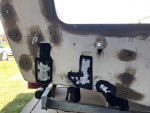
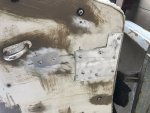
Got all the patches cut and cleaned up. Started dry fitting them. Used the old gas tank for material. Actually learned that a skill saw will cut thick aluminum very nicely. Didn’t realize that. Gonna use 5200 and try to seal the inside of the new holes in transom as best I can. And 5200 to seal the patches in. After it’s painted it shouldn’t look too bad. I can almost guarantee they won’t leak
 

Attachments

  • photo328075.jpg
    photo328075.jpg
    122.6 KB · Views: 11
  • photo328076.jpg
    photo328076.jpg
    145 KB · Views: 11
  • photo328077.jpg
    photo328077.jpg
    96.1 KB · Views: 11
  • photo328078.jpg
    photo328078.jpg
    106.4 KB · Views: 11

SHSU

Lieutenant Junior+Starmada Splash Of The Year 2019
Joined
Mar 8, 2017
Messages
1,721
Moving right along. Looking good

Just curious why you said you would use Marine Grade vs ACX again? Also, completely agree on use more glue then you think. I had the same feeling when I did mine too.

As for fuel tank, cannot comment on the pre fab ones. Moeller used to take custom orders but have since stopped. I got a local welder to fab mine for me.

SHSU
 

scott hamilton

Petty Officer 1st Class
Joined
May 28, 2002
Messages
215
Moving right along. Looking good

Just curious why you said you would use Marine Grade vs ACX again? Also, completely agree on use more glue then you think. I had the same feeling when I did mine too.

As for fuel tank, cannot comment on the pre fab ones. Moeller used to take custom orders but have since stopped. I got a local welder to fab mine for me.

SHSU

On the ACX. Just overthinking. ACX with the epoxy will be just fine. That thing was basically bulletproof after it was coated with the thin epoxy. Predrilled all the holes and used a drill bit to push epoxy into all the holes. I spoke w US Composites too who stood behind their product for this application.
 

Watermann

Starmada Splash of the Year 2014
Joined
Jan 12, 2013
Messages
13,786
Scott nothing is going to be a perfect fit for a fuel tank unless you have one built. There's a bunch of tanks out there and you may have to modify your deck supports some to accommodate the wider tank that is the best fit.

did on my Chief, I had to move the deck supports out which raised the deck about 1". I had to shim the rib ends and used sealed plywood but some guys doing this have used 1" AL tube.

I replied to your post on FB too and gave you some ideas on your other questions about the fuel tank. ;)

y4mgXzGya-v7ciFCQA3OPjNaPo9b0vLhn_veWZDoaiE5tHPQIFcfWhF5a_tLEL1as-GmfZbAhBRCFxYdNiFcJYTBCp3dlFhgzTy2RaY7lQaM4HDxUeV5SI_i2l2BdJF6X_iOAQxlxbq9_ie9KaZnZ7m0o3h0nYP7J5K4V8tLFbAAgQeSqt-4laBOQi5C3ElqAXD-gM-Y-50te-Zj3mOVysdJQ
 

classiccat

"Captain" + Starmada Splash Of The Year 2020
Joined
Dec 20, 2010
Messages
3,412
On the ACX. Just overthinking. ACX with the epoxy will be just fine. That thing was basically bulletproof after it was coated with the thin epoxy. Predrilled all the holes and used a drill bit to push epoxy into all the holes. I spoke w US Composites too who stood behind their product for this application.

you're moving along scott! :thumb:

Was glass cloth included with the epoxy? If not, you should consider adding it.

Example of grain checking: 18' 1969 Offshore V restoration - Page 11.
^^^ Obvious b/c he painted his deck rather than hide it under vinyl/carpet.
 

SHSU

Lieutenant Junior+Starmada Splash Of The Year 2019
Joined
Mar 8, 2017
Messages
1,721
Was glass cloth included with the epoxy? If not, you should consider adding it.

Example of grain checking: 18' 1969 Offshore V restoration - Page 11.
^^^ Obvious b/c he painted his deck rather than hide it under vinyl/carpet.

Interesting, I hadn't thought about putting glass down when I did mine but makes sense with the pictures shown. Definitely something to think about for future builds. I am guessing doing the transom is also suggested?

SHSU
 

classiccat

"Captain" + Starmada Splash Of The Year 2020
Joined
Dec 20, 2010
Messages
3,412
Interesting, I hadn't thought about putting glass down when I did mine but makes sense with the pictures shown. Definitely something to think about for future builds. I am guessing doing the transom is also suggested?

SHSU

Hey SHSU, yeah, I try to warn everyone mentioning epoxy...I must've been sleeping on the job if you used it in your build. :facepalm:

Glass not only helps with checking, it also adds strength.

Gougeon Brothers (from West Systems) have alot of great reading material out there. One example, "The Gougeon Brothers on Boat Construction"; see Pages 76 & 368 for grain checking in Douglas Fir.
 

SHSU

Lieutenant Junior+Starmada Splash Of The Year 2019
Joined
Mar 8, 2017
Messages
1,721
Hey SHSU, yeah, I try to warn everyone mentioning epoxy...I must've been sleeping on the job if you used it in your build. :facepalm:

To be fair, it was probably about 2 years ago when I did mine. Plus I used Fasco Epoxy, so something a little different then the normal Total Boat/West Systems. Either way, still good info for the future. Will see how my project holds up over time.

Worst case, I will need to pick up a new boat to do a project on!!!

LOL

SHSU
​​​​​​​
 

scott hamilton

Petty Officer 1st Class
Joined
May 28, 2002
Messages
215
you're moving along scott! :thumb:

Was glass cloth included with the epoxy? If not, you should consider adding it.

Example of grain checking: 18' 1969 Offshore V restoration - Page 11.
^^^ Obvious b/c he painted his deck rather than hide it under vinyl/carpet.

No cloth... I read that and I guess just decided not to do it. thanks for the info! Much appreciated.
 

500R

Cadet
Joined
Oct 6, 2019
Messages
18
Transom may not be an issue as it doesnt get direct sunlight, but in the reading I've done lately doug fir ply is one that is prone to the checking. I reckon time wi tell now it's sealed. Im going with hydrotek for the toon and my Heritage. I know, big $$, but I only wanna do it once. I think a couple good coats of durabak over the sealed HT will probably keep any checking issues at bay..
 

scott hamilton

Petty Officer 1st Class
Joined
May 28, 2002
Messages
215
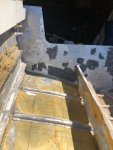
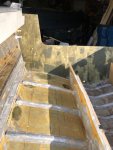
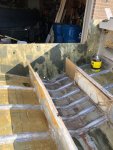
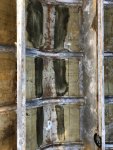
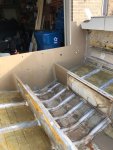
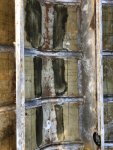
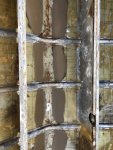
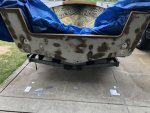
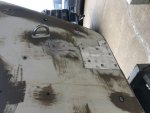
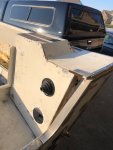
Transom and patches are mostly installed. I'm not thrilled about how its coming out. For 1, made a mess with the 5200 which is probably a good sign that i used enough. It'll all be painted so no big deal. Secondly, the splashwell is not going back together as easy as I thought. I think I made a couple mistakes. One being I removed the 2 ends from the main splashwell to clean up and reseal that joint. And two, I'm trying to install those parts separately.

Who else has done this type of splashwell? I think I made another critical mistake. I built from the stringers up since it was easier to access. In other words, I riveted the supports to the stringers and then installed the bolts between the supports and the transom. then installed and bolted the transom splashwell cap. I think I needed to place the transom cap and align it first but not permanently fasten anything until everything was fitted. I actually may need to take it apart and redo. I'm not certain I can wrestle all the pieces in place without removing the structural pieces We'll see....I got help coming this morning with some bar camps. If its too much I'll probably just disassemble and do it the easy way.
 

Attachments

  • photo328421.jpg
    photo328421.jpg
    103.1 KB · Views: 10
  • photo328422.jpg
    photo328422.jpg
    90.6 KB · Views: 8
  • photo328423.jpg
    photo328423.jpg
    80.8 KB · Views: 43
  • photo328424.jpg
    photo328424.jpg
    83.1 KB · Views: 10

Watermann

Starmada Splash of the Year 2014
Joined
Jan 12, 2013
Messages
13,786
It sure looks to me like something has the SW jacked up out of shape. Only other option to taking stuff apart is to mark and cut the AL back. Sometimes you know what happens.

fetch
 

SHSU

Lieutenant Junior+Starmada Splash Of The Year 2019
Joined
Mar 8, 2017
Messages
1,721
You can clean up 5200 with Acetone when you first apply. If dried, I found a wire brush on a grinder did wonders to clean up any excess.

SHSU
 
Top