1987 Searay Seville Cuddy Restoration - stringer and engine mounts

kcassells

Fleet Admiral
Joined
Oct 16, 2012
Messages
8,715
ok separate post for further questions:

- when tabbing the stringer do you cut the glass from the roll width (approx 1,25m / 50 inches ) and do some overlaps or do you use a single piece of the entire stringer length?

- we plan on tabbing the stringer before installing the bulkheads with 2 objectives, make the job more easy and create a water barrier between parts if water ever gets in. odes it make sense?

- 2 tabs of 1708 on each side is it enough ?

- what technique do you use for caping them? I saw some guys using clothes pins to maintain the CSM on the stringer while curing but hen how do you prevent it from sticking to the poly once cured?

- do you put the cleats after full encapsulation to the stringer or do you install before caping and glass them in?

well that's all for this time :)

Tried to reply but keeps not alowwing me to answer some of your questions.
ok separate post for further questions:

- when tabbing the stringer do you cut the glass from the roll width (approx 1,25m / 50 inches ) and do some overlaps or do you use a single piece of the entire stringer length?

--You can go full height of the stringer 1st coat glass w/3" lap onto deck and then follow with the next glass 3: wider. This becomes the tabbing.

- we plan on tabbing the stringer before installing the bulkheads with 2 objectives, make the job more easy and create a water barrier between parts if water ever gets in. odes it make sense?

--Do as much flat work as you can prior to setting stringer.If the wood does ever get wet in any application decribed above then the water will always find a path of least resistant.

- 2 tabs of 1708 on each side is it enough ?

--Yup

- what technique do you use for caping them? I saw some guys using clothes pins to maintain the CSM on the stringer while curing but hen how do you prevent it from sticking to the poly once cured?

--cut and prep for any glass to top the stringers etc. wet out and simply trim off the excess.

- do you put the cleats after full encapsulation to the stringer or do you install before caping and glass them in?

-- Good question! Yes they go in after. Kinda like they are sacriced for screws. You can always top off the cleats with csm or a poly mix with chopped glass strands.

Like Chevy said.

well that's all for this time :)
 

Broaters

Petty Officer 2nd Class
Joined
Jul 31, 2017
Messages
139
Heĺlo guys

some more work today it looks that everything that is boat related take longer than expected...

today we realized that our biax is not really 1708 I made a mistake converting oz/sq yd to gr/m2 . It is more like 13.2 oz biax and 4.4 csm therefore we decided to add one more layer on the transom to match the usual 2 layers of 1708. We are now above 39 oz of biax and 13 oz of csm. Does it sounds enough?

also when you guys use csm over the deck or to waterproof wood what weight do you use? I have 300gr/m2 so it is 8.9 oz/sq yd is it ok?

in addition to that we have done the fillets with PB on the stringer. Next time should be little grinding and glassing them...hopefuly
 

Broaters

Petty Officer 2nd Class
Joined
Jul 31, 2017
Messages
139
Oh one more question, when glassing with our biax it sometime looks like there are some micro bubbles under the glass and they are super hard to get rid of. Even using the fin roller does not help or even worse sometime it looks like it accentuate the problem. Any idea where it could come from?

cheers
 

JASinIL2006

Vice Admiral
Joined
Feb 10, 2012
Messages
5,673
Sometimes you get microbubbles when you glass over wood that isn’t sufficiently soaked with resin first.
 

Broaters

Petty Officer 2nd Class
Joined
Jul 31, 2017
Messages
139
Sometimes you get microbubbles when you glass over wood that isn’t sufficiently soaked with resin first.

ok thanks fo the tips. I did never had that. I use a primer over the wood and the first layers had always gone ok so far.

the micro bubbles happen when laying biax over biax mostly. Also noticed that sometimes the resin tends to go very little milky over the glass. I'll try to take a picture next time
 

Broaters

Petty Officer 2nd Class
Joined
Jul 31, 2017
Messages
139
It is a polyurethane based primer much like the g4 primer but another brand.
is is supposed to promote adhesion of polyester to the wood and also avoid the wood to suck all resin out of the first layer.
 

kcassells

Fleet Admiral
Joined
Oct 16, 2012
Messages
8,715
Good, pretty cool never heard of it. Thanks for the info just read up on it.
 

JASinIL2006

Vice Admiral
Joined
Feb 10, 2012
Messages
5,673
If you aregetting bubbles after the first layer, I’d wonder if you are working the biax enough. What are you using after you lay the glass? A stainless roller?
 

Broaters

Petty Officer 2nd Class
Joined
Jul 31, 2017
Messages
139
If you aregetting bubbles after the first layer, I’d wonder if you are working the biax enough. What are you using after you lay the glass? A stainless roller?

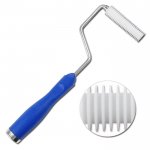
We use this tool... and/or stamping with a brush.

We usually lay some resin on the older layer then put the glass and add more resin on it so it becomes more flexible. And then we start working on flatening, adding resin, getting rid of bubbles etc...

What do you mean by working the biax "enough"?
 

Attachments

  • 930110000003_700.jpg
    930110000003_700.jpg
    42.8 KB · Views: 0
Last edited:

Broaters

Petty Officer 2nd Class
Joined
Jul 31, 2017
Messages
139
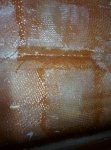
To illustrate what we speak about, here is a full res picture of the transom with the 3 layers of biax

Click image for larger version  Name:	2018-05-10 18.41.15.jpg Views:	1 Size:	1.94 MB ID:	10570389

you can see that some areas appears more "white" than others altough the picture does not render perfectly due to light reflection.

or maybe this is just due to the effect of many layers on top of each other making them less transparent?

or can it be due to some impurties on the dryed layer or on the biax fabric?

not sur that we are not overthinking this.

let me know
 
Last edited:

JASinIL2006

Vice Admiral
Joined
Feb 10, 2012
Messages
5,673
We use this tool... and/or stamping with a brush.

We usually lay some resin on the older layer then put the glass and add more resin on it so it becomes more flexible. And then we start working on flatening, adding resin, getting rid of bubbles etc...

What do you mean by working the biax "enough"?

Looks like you're doing it right... sometimes if you don't roll the cloth enough some bubble remain trapped between layers, but I don't really see that in your picks. It really doesn't look bad to me. Not sure what the whitish parts are... they aren't starved for resin, are they?

In any case, it doesn't look like anything is terribly wrong. I probably wouldn't worry about it, if it were my boat.
 
Last edited:

Broaters

Petty Officer 2nd Class
Joined
Jul 31, 2017
Messages
139
It's been a while since we havent't posted anything... unfortunately I (the younger broater) had a ACL surgery and can't work in the boat and since we do this in team... we'll have to wait for some weeks before working back in the hull !
Hopefuly, we'll be able to finish some motor painting work etc that don't need to kneel!

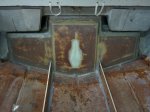
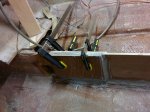
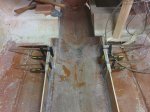
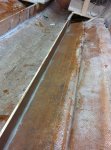
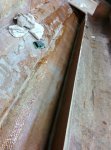
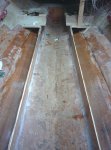
We did managed to glue the new stringer to the front part of the original stringers.
 

Attachments

  • photo291829.jpg
    photo291829.jpg
    1.7 MB · Views: 1
  • photo291830.jpg
    photo291830.jpg
    1.7 MB · Views: 1
  • photo291831.jpg
    photo291831.jpg
    1.8 MB · Views: 1

Broaters

Petty Officer 2nd Class
Joined
Jul 31, 2017
Messages
139
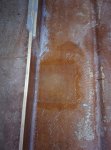
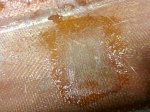
We also repaired some cut we did in the hull (while removing the original wood and foam) with resin and fibers.


Click image for larger version  Name:	image_291832.jpg Views:	1 Size:	946.9 KB ID:	10582596Click image for larger version  Name:	image_291833.jpg Views:	1 Size:	695.5 KB ID:	10582597

Click image for larger version  Name:	image_291834.jpg Views:	1 Size:	1.06 MB ID:	10582598
 
Last edited:

Broaters

Petty Officer 2nd Class
Joined
Jul 31, 2017
Messages
139
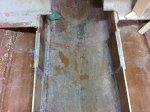
And finally we glassed the outter part of our stringers.
Again there were some bubbles that needed to be patched and some that will need to... we still haven't learned the lesson, the surface need to be as clean/flat as it can be! Preparation remains the key...


Click image for larger version  Name:	2018-05-12 13.18.47.jpg Views:	1 Size:	970.9 KB ID:	10582606


Click image for larger version  Name:	2018-05-12 13.18.59 - Copie.jpg Views:	1 Size:	1.13 MB ID:	10582602


The overall result was pretty good!

I hope, we'll be able to work again on the hull within july so we'll enjoy at least one month of boating this year :)
 

Attachments

  • 2018-05-12 13.18.47.jpg
    2018-05-12 13.18.47.jpg
    970.9 KB · Views: 0

oldrem

Commander
Joined
Nov 7, 2013
Messages
2,002
Looks like good progress. Sorry to hear about your brothers surgery.
 

Woodonglass

Supreme Mariner
Joined
Dec 29, 2009
Messages
25,927
pull and stretch the CSM and the fabric prior to wetting it out. This loosens the fibers and makes it easier to conform. Also helps get rid of the bubbles. put some resin down first and then lay the glass over it. this helps too. Don't be afraid to use your hands to smooth and tug the fabric cloth tight.
 
Joined
May 31, 2018
Messages
13
pull and stretch the CSM and the fabric prior to wetting it out. This loosens the fibers and makes it easier to conform. Also helps get rid of the bubbles. put some resin down first and then lay the glass over it. this helps too. Don't be afraid to use your hands to smooth and tug the fabric cloth tight.

I agree with WOG here, it almost looks a little dry underneath. I've never used the primer you're using, I normally just wet the area that's getting glass immediately before laying the tab over the wood.
 

Broaters

Petty Officer 2nd Class
Joined
Jul 31, 2017
Messages
139
Thank you guys for the feedbacks

Woodonglass we will definitely try the pull and stretch tips on our next glass time.

WolverineLiving what do you mean by dry underneath? not enough resin? altough we use the primer it is only on the wood, and we still wet the surface with poly resin before puting the glass.

more to come soon (we hope) :)
 

briangcc

Commander
Joined
Jul 10, 2012
Messages
2,360
Looks good!

From one ACL person to another....take it easy! Follow the rehab to the letter! And no over doing it!!!

(Complete ACL reconstruction and meniscus (sp?) cleanup).
 
Top