1987 Searay Seville Cuddy Restoration - stringer and engine mounts

Broaters

Petty Officer 2nd Class
Joined
Jul 31, 2017
Messages
139
Thanks for the info chevymaher

more readings more questions :)

i went across a paper from a resin mfg that recommend NOT to whipe with acetone before glassing. It states that grinding remove the surface grease and creates sharp edges for the poly to adhere to. Acetone tends to round the edges and create less mechanical bond between old and new layer.

unfortunately i cannot find it back now. I'll post it when found back

What do you think of that idea?
 

tpenfield

Moderator
Staff member
Joined
Jul 18, 2011
Messages
18,040
Thanks for the info chevymaher

more readings more questions :)

i went across a paper from a resin mfg that recommend NOT to whipe with acetone before glassing. It states that grinding remove the surface grease and creates sharp edges for the poly to adhere to. Acetone tends to round the edges and create less mechanical bond between old and new layer.

unfortunately i cannot find it back now. I'll post it when found back

What do you think of that idea?

Two schools of thought to consider.

1) Yes acetone is a solvent of poly resin, so applying it to an area as a preparation step will tend to round sharp edges,/ smooth a rough surface that grinding creates.

2) on the other hand the acetone slightly dissolves the resin surface making accept the new resin more readily.

Not sure which would be more right or the dominant factor :noidea:
 

chevymaher

Commander
Joined
Mar 29, 2017
Messages
2,921
When I talked to US Composits they recommended wiping it down with acetone if it has sat any length of time get the goop off. They said just wait a 1/2 hour at least to let it completely dry.
 

eggs712

Petty Officer 1st Class
Joined
May 8, 2012
Messages
342
Wiping with acetone before grinding helps avoid working impurities into the material as well.
 

Broaters

Petty Officer 2nd Class
Joined
Jul 31, 2017
Messages
139
Woodonglass : Hello Wood, I have been reading through your post about how to fabricate deck, stringer and transom. The link send us to the page 42 of your main thread which has been recently updated but I cannot find any stringer or deck glassing layout suggestion. Those can however been found on other threads.
Would it be possible that you gather all of these super usefull info at one single location? maybe on new thread or new post?
I think the whole community would be very gratefull to you :)

Hope I'm not asking too much work, best regards
 

Broaters

Petty Officer 2nd Class
Joined
Jul 31, 2017
Messages
139
Time for the weekly update, we worked last afternoon on the boat.
we were supposed to start building new pieces yesterday but it turned out that grinding and preping is more time consuming than anticipated. welcome back itches...

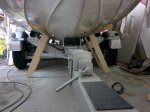
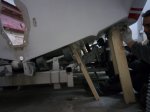
we built some wooden support for the hull as it became very flexible with all the guts out. it is far better now altough it still flexes under our weight on some spots. I hope it will not complicate / compromise the bedding and tabing of the stringer too much. what do you think?

one long support beam is under the location of the stringer, the other one is on the outer edge of the hull. on each side of course

2018-03-28 16.48.18_r.jpg

2018-03-28 17.22.34_r.jpg

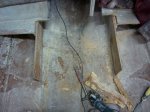
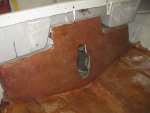
we also cleaned the existing stringer from the cleats and the previous glass to scarf the new one in and to be able to sister them on each side.

2018-03-28 18.25.05_r.jpg


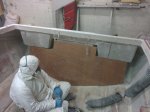
A lot of time was again spent on grinding the hull, cleaning, more grinding...

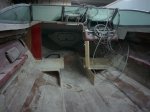
we removed the old carpets from the cabin to discover more horrors from factory, big gaps between wood panel, deficient or no tabing at all in some place and many more. we grounded everything off in order to fill everything with PB and to tab it properly before new topcoat.

2018-03-28 21.30.34_r.jpg

Before leaving the garage we managed to do a very rough precut of the transom new panel and damn it feel good to see something new in there even tough we are still far from its finl shape :)

2018-03-28 19.45.10_r.jpg

more to come soon
 

oldrem

Commander
Joined
Nov 7, 2013
Messages
2,002
Looks like some good progress. My only concern is with the wood braces. I would add some cross members attaching the legs together so there's no chance of them slipping outward at a critical moment.
 

Broaters

Petty Officer 2nd Class
Joined
Jul 31, 2017
Messages
139
yep that was my tough too. First I intend to use some V shaed wood edges to hammer in beween the brace and the floor.
Bu I like your idea to link them 2 by 2 from one side to the other.
I'll try this using some fence tensioner next time.
 

chevymaher

Commander
Joined
Mar 29, 2017
Messages
2,921
Before leaving the garage we managed to do a very rough precut of the transom new panel and damn it feel good to see something new in there even tough we are still far from its finl shape :)
Yes it is a magic moment and feels good. New going back in finally is the best feeling in the world. Congrats.
 

Broaters

Petty Officer 2nd Class
Joined
Jul 31, 2017
Messages
139
Hello I'm back from avacation week and plan to put more work on the boat on wednesday.
question on the engine mounts:

everyone seems to agree on the fact that glassing reverted U shaped motor mounts is a real pain.
what about making closed mounts so that the glass would only be on the outside of them but probably way more easy to do?

do you think it could be strong enough?
one drawback is that if water gets in there, the is very chances that it ever gets out.
 

Panoguy

Petty Officer 2nd Class
Joined
Jul 29, 2011
Messages
150
WOW, you've made some progress since I last looked, Broaters!

I made inverted U-shaped mounts for my Seville, and yep - it WAS a pain to properly glass-in, but I'm happy with the result. I thru-bolt my motor mounts (with big washers & nylon lock nuts on the underside); was able to do that because of the hollow in the "U". With a solid mount, you'd need to lag bolt the motor mounts onto your solid mounts... am I correct?

I'm not sure if lag bolts will hold over time, but I could be wrong.
 

Broaters

Petty Officer 2nd Class
Joined
Jul 31, 2017
Messages
139
Yes It make perfect sense, I looked only about the glassing job, not the engine mounts bolts.
so PITA it will be :)

I'll go to the shop for the first batch of poly and glass today.
will keep you posted on tonight progress later.

Question on the glassing do you all precoat the wood before first glass layout? slow mixed poly or thinned down poly or off the shelf primer? i heard about a product called G4?

thank you all for your interest and advices, as always it is very much appreciated.
 

Broaters

Petty Officer 2nd Class
Joined
Jul 31, 2017
Messages
139
More work on the Sea Ray yesterday but we didn't have the mojo, I guess it happens from time to time...

I went to the resin supplier and I bougt the first set of products:
- epoxy glue for assembling the wood sheets of the transom
- poly glue to put the transom on the hull and make some filets
- PU primer to saturate the wood before glassing and add some adherence between poly and wood
- poly resin
- mixed goodies

I finaly found the equivalent of 1708 biax it is 450gr/m² of biax fiber stitched to a 150gr/m² of CSM.

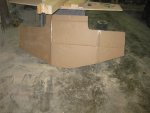
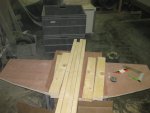
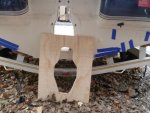
The transom wood is in its final shape I ended up using a cardboard sheet to do the template. I also precut some 4x9 cm wood to do the clamping.

IMG_1257_r.JPG

IMG_1258_r.JPG

Next move is to glue them together and to waterproof it.

we ended up putting more deconstruction in the cabin section and finishing some grinding (it's like a never ending story)
We also cleaned up the hull with water and soap to get rid of the dust.
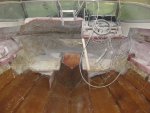
Here is how it looks like now:

IMG_1259_r.JPG

IMG_1260_r.JPG

I still have some concern with the proximity of the swim platform boxes and how clos they are from the area where we would like to tab the transom. I have very few to none acces to grind and to glass there.

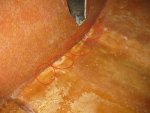
also what do you guys think about these area, the brighter spots in the existing glass close to the transom:
Do I need to grind more or leave it like that. part of i will be covered with PB anyway when fileting. I feel like I'm already very close to the base hull material .

IMG_1261_r.JPG

More questions on the transom:
when waterproofing it's recommended to put a layer of CSM on the back, is 300gr/m² enough (close to 9Oz/Yd²)
also what is the purpose of this coat? the woo on the back side is already fully encapsulated in PB. Is there a risk of water getting between the hull and the wood of the transom?

This CSM is also what I expect to use on the deck. Is it heavy enough?


thanks
 

rad1026

Chief Petty Officer
Joined
May 1, 2006
Messages
443
I had a similar situation with the swim platform boxes on my Chaparral although I had more room to layer from the swim platform over the transom. I had the same questions and concerns. Your grinding is great, don't do any more. You can encapsulate the new transom piece, I did. But you really are encapsulating it with the PB when you glue it in. Looking back I'm not sure I would have gone through the exercise. Once you get the transom glued in with PB you will be surprised at how strong the structure becomes right away. Once you lay in PB around the edges of the new transom piece to smooth out the corners and start tabbing in 1708 or some type of cloth you will understand just how strong it is. Don't over think it. Make sure you get a good bond when you adhere the transom and go from there. It will be so much better than what was done at the factory.

https://forums.iboats.com/forum/boa...repair/10117890-1989-chaparral-transom-repair
 

Panoguy

Petty Officer 2nd Class
Joined
Jul 29, 2011
Messages
150
Question on the glassing do you all precoat the wood before first glass layout? slow mixed poly or thinned down poly or off the shelf primer? i heard about a product called G4?
I pre-coated all of sides of my wood before glassing. The polyester that I used (from US Composites) was thin-enough for me to spread-on without thinning, but you an reduce polyester with acetone, if you find that it's not soaking-in.
 

JASinIL2006

Vice Admiral
Joined
Feb 10, 2012
Messages
5,674
I did slow-mixed poly and let it really soak in but not fully cure. If you don’t do good job saturating the wood, you risk getting bubbles when you start glassing.
 

Broaters

Petty Officer 2nd Class
Joined
Jul 31, 2017
Messages
139
thank you all for your answers and advices.

I'll do some trials with the PU primer I got from the supplier and with slow resin to see how they compare.

rad1026 I just went through your post, great job ! I'm looking for the same kind of finish on mine.
I also have the same questions about the transom flatness. currently the area is only the bare hull and If I put a straight edge accross the entire width of the boat on the outer face I have 5mm difference on the 2 side of the sterndrive hole. But It still flexes a lot due to the absence of wood. I wonder how it will turn out when clamped with the new wooden transom panel.
I guess the only way to know for sure is to try it :) My goal would be to not have to correct it after the new transom installation.
 

JASinIL2006

Vice Admiral
Joined
Feb 10, 2012
Messages
5,674
I think it's not a big concern to have some issue with flatness when there is no transom core installed. That can be corrected when you clamp in the transom core, since you should have some control over how much various areas get clamped down. One thing you can do to help is to check your transom core before you put it in to make sure it's flat. You also can help keep the area around the keyhole flat by making a shield that covers the outside of the keyhole. You can then use this as you clamp the transom; the shield provides a flat surface that will keep the keyhole area flat as clamping boards pull in. By 'sandwiching' the transom area between the shield and the transom core, you ought to be able to keep everything flat.

Below is a picture of the transom shield I made. (The lines on the shield show where the 2x4s in the clamp were to be placed.)

Hope this helps,
Jim
 

Attachments

  • photo288359.jpg
    photo288359.jpg
    53 KB · Views: 0

Broaters

Petty Officer 2nd Class
Joined
Jul 31, 2017
Messages
139
Little feedback on our transom work:

This weekend we glued the 2 transom woods togeher using some epoxy and the typical clamps that can be seen in many posts 40x90mm solid wood and M10 threaded rod.

2018-04-15 15.57.14_r.jpg

So we mixed some more epoxy and glued the bit back in plance, we will see how it turns out on the final cut.

2018-04-15 16.08.59_r.jpg

The good news is that looking at the removed piece we can tell than the bond looks very good.

20180415_121602_r.jpg20180415_121653_r.jpg

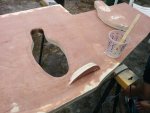
I might have too much resin on the CSM horizontal surface:

20180415_121610_r.jpg

As suggested I did some flatness test on the wooden transom and the mid section is flat altough the 2 side section are a bit out of flatness. we will do a fit test in the hull to see how it behaves during clamping prior to glue it.

for the finalcut of the keyhole how do you do it? roughen it with jigsaw and then grinding?
I'm asking myself about using a router and a copying cutting tool to follow the hull cutout. does it sound ok?

more to come soon I hope :)
 

Attachments

  • 20180415_161503_r.jpg
    20180415_161503_r.jpg
    184.7 KB · Views: 0
  • 2018-04-14 17.34.47_r.jpg
    2018-04-14 17.34.47_r.jpg
    273.6 KB · Views: 0
  • 2018-04-14 17.50.14_r.jpg
    2018-04-14 17.50.14_r.jpg
    340.3 KB · Views: 0
Top