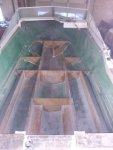
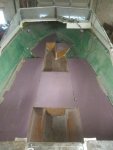
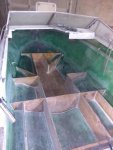
1987 Larson DC-215 restoration

sms986

Petty Officer 1st Class
Joined
Sep 18, 2017
Messages
334
Thanks x4. Haha

What I mean by tracing is how would one find the very top of the void to drill the second hole?
 

kcassells

Fleet Admiral
Joined
Oct 16, 2012
Messages
8,720
They only pop up when sanded very fine. That's when the fracture or patch shows up.
I usually find them under the gelcoat or was a gelcoat quick fix patch.
Regarding the back of the transom you maybe able to get away with just fairing.
 

sms986

Petty Officer 1st Class
Joined
Sep 18, 2017
Messages
334
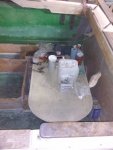
I had time this week to finish putting in all of the stringer and bulkheads. Things are starting to come together now. Next I have to wrap it all in glass and install a few small things, then it'll be ready for a deck! I cut out the deck with pink foam and will be working on it while I'm back down south. Here are some pictures.
 

Attachments

  • IMG_20191227_164152671.jpg
    IMG_20191227_164152671.jpg
    218.9 KB · Views: 11
  • IMG_20191227_163839027.jpg
    IMG_20191227_163839027.jpg
    238.5 KB · Views: 11

kcassells

Fleet Admiral
Joined
Oct 16, 2012
Messages
8,720
You can always add some cleats to pick up screws and glue when you set the deck.
And so Ha ha is the fuel cell being placed on a ply base?
 

sms986

Petty Officer 1st Class
Joined
Sep 18, 2017
Messages
334
I haven't decided how I want to do the fuel cell yet. It was obviously test fitted, but that's as far as I have gotten. The original boat had the fuel cell just sitting on thw hull with two flimsy foam strips. I'd like to suspend it but if I go any higher than 1/2", it will sit above the deck. I may just glue rubber pads to the bottom of the fuel cell, running bow to stern as to not trap any water. I'm thinking tire rubber.
 

sms986

Petty Officer 1st Class
Joined
Sep 18, 2017
Messages
334
Thanks. I honestly have not even considered the fuel tank corroding.

My fuel tank is shaped to fit in the v of the hull, so it isn't flat on the bottom. Like I said, my biggest problem is the height of the tank relative to the deck height. I'd like to do as the article said and suspend the tank, but I will have to do some fiddling to get it to fit. On the bright side, the fuel cell is extremely simple to remove from the boat. It takes probably 5 minutes to remove.

I skimmed the article you sent, but I'll have to look at it in more detail to figure out how I can adapt. Thanks again!
 

kcassells

Fleet Admiral
Joined
Oct 16, 2012
Messages
8,720
OIP.ul-RXEfqIs4uJAPfcgWUMgHaHe
 

sms986

Petty Officer 1st Class
Joined
Sep 18, 2017
Messages
334
So if someone were to ask me what the hardest part about building my boat was, I'd love to give some sort of abstract answer full of wisdom. Unfortunately, if I were to give an honest answer, it would be grinding fiberglass. I got in last night and I had plans to do some work when I got in. I had to sand and prep all of my fillets and grind off the old deck lip. When I got home I thought what a waste. I would get a few hours' head start on today's work at the expense of another long painful shower and an itchy night's sleep. So I set out this morning to get all of the above done. HAHAHAHAHAHAHAHA! I spent 8 hours today grinding the deck lip and getting about 1/4 of the fillets done. So tonight I have to scrub myself in a freezing shower with a Scotch Brite pad and toss in turn in bed, all just to get up tomorrow and do it again! I think that going in, you have to really mentally prepare for a project this big. This was supposed to be a fun project and right now it's a burden. Living a few states away from my hometown, I only get a long weekend about every month to come home. When I get home it's always "do you want to go fishing," and "let's grab dinner," but my answer is always "can't, gotta work on the boat." So not only do you have to commit to the long and painful days, but you also have to commit to sacrificing all of your free time. With grinding glass, it's not as simple as doing the task at hand and moving on. You have to prepare your gear, constantly change out disks, sandpaper, and powertools, continuously shake off dust, defog goggles, and sweep, then when you're done you have to clean everything up and spend an hour or more cleaning yourself up. It's extremely discouraging to see that no construction has taken place this entire day. No glass was laid, no wood put in, nothing. I spent 8 hours working and it looks almost the same as it did when I started. I guess that's the way it goes.

So that's my gripe. Anyway, next I will be tabbing in all of my wood. I have a few questions.

First, if I put down one layup and let it harden, do I have to sand it before adding the next layup?

Second, is there an issue with curing strength if I were to do one layup then add the next when the first just starts to tack up?

I'm hoping I can put some glass in the boat this weekend...
 

sms986

Petty Officer 1st Class
Joined
Sep 18, 2017
Messages
334
Disregard the questions. Dumb questions that I found plenty of answers to. Haha
 

kcassells

Fleet Admiral
Joined
Oct 16, 2012
Messages
8,720
On a wet note. Take hot showers. That opens up your pores then wipe in 1 direction as much as possible to pull the glass off. :D
Their are 2 kinds of glass joints;
1. Chemical......where you do what is called wet on wet, they bond together and are supposed to be the strongest. Not always feasible to do at times based on whatever.
2. Mechanical....Where you come back, light sand and wipe with acetone and apply a second or more applications of glass.
No dumb questions and yup grinding blows but an evil necessity. Once you have a deck to stand on Life just gets better.
 

sms986

Petty Officer 1st Class
Joined
Sep 18, 2017
Messages
334
Honestly, once I have this glass dust out of the boat, life will get better. I'm ok with walking on a 2x4 grid until the deck goes in...
 

JASinIL2006

Vice Admiral
Joined
Feb 10, 2012
Messages
5,674
The grinding really is the worst part. Especially if you find more to grind after you thought you were finished. That really bites.

The good news is that once you start putting it together, it gets much more interesting and fun. And having the deck in will be a true milestone. Nothing like walking on a new deck you installed! Hang in there!
 

sms986

Petty Officer 1st Class
Joined
Sep 18, 2017
Messages
334
Really, once I have the deck on I'm considering it done. Obviously I'll have more work to do, but it won't be long days. Once the deck is on, I think it's safe to put back on the roller trailer, at which point I can take it down south to my home. After that, the pressure is off. I can just kind of pick at it in my free time after work. I'm no longer looking at this as a "let's get back on the water asap" deal, but moreso a hobby that will never (in the near future) end, which I'm fine with as long as I can get the boat out of its current location and down to my house.

On a side note, to anyone else starting out fresh, I think that a lot of people on here give advice that will help you build a boat that will split icebergs. That's what you need to hear, because like me, I'm sure you want to make the best boat possible. Listen to these people. In reality, an air bubble here and a bad fillet there won't matter in the end, but the good folks of this forum are here to help you minimize and mitigate issues like these. This boat was originally constructed very, very poorly in comparison to how I'm doing it (I hope). The transom had no skin on the inside and was tabbed in with only tape. Big bubbles all over the place on stringers, voids, and there were spots where direct holes in the deck went straight to the foam fillers. Also, the wood was "tabbed" in about 4-6" up and bare the rest of the way to the deck. This boat lasted from 1989 to 2018 that way. So think of whatever you're doing (as long as you're doing it right) as an improvement.

I recently found out that one of the plant engineers at one of my accounts used to build sea ray boats in the factory. He gave me great pointers and the advice above. He also said it's likely that my stringers and bulkheads were haphazardly bedded, taped with one layer, then hit with a chop gun, like most cheaper boats of it's day. So don't be like me and have a heart attack over an air bubble.
 

sms986

Petty Officer 1st Class
Joined
Sep 18, 2017
Messages
334
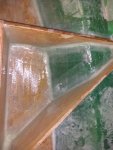
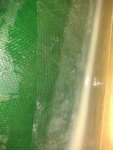
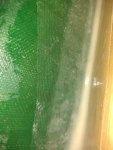
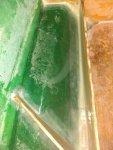
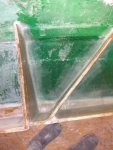
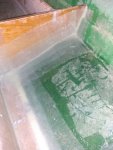
This weekend was a weekend of pain, scratching, experimenting, realization, and perspective. As a recap, the first two days were full of grinding and sanding. I found that while my fillets looked great and very workable when I did them, I realized this weekend that they weren't too great. However, after a lot of working they were acceptable. I also found that the glass lays much easier and small imperfections in the fillets were fine later on. I basically mixed up some pb and went over any rough spots, gave it 15 minutes to tack, then glassed over it. Worked fine, only minimal bubbles (size of a nail head). I did have a spot way up front that bubbled up in the middle. I had to shave it down tonight and fair over. Overall, I found that the tabbing process isn't very hard, but it takes longer than I thought. I split the compartments between stringers and bulkheads up into 14 boxes. This weekend I grinded the deck lip, sanded fillets, and tabbed in 4 out of the 13 boxes.

Regarding the tabbing, the resin on the vertical tabs did drain down the sides a bit, but I'm not worried. First, the glass didn't turn back to white, which tells me it was still fully saturated. Second, it pooled in the bottom corners of each box, obviously where water would pool. Its also not much, maybe .25-1mm thick. I don't know much about how the resin holds over time, but I have found that the epoxy resin cures ever so slightly rubbery so I don't see it becoming brittle and crumbling. I think I'll leave it there.

Let me know if you see anything I did poorly! By the way, the bleak white splotches everywhere aren't bubbles. It's some kind of blemish from working the resin too long (I think).
 

Attachments

  • IMG_20200126_013210502.jpg
    IMG_20200126_013210502.jpg
    63.7 KB · Views: 12
  • IMG_20200126_013227268.jpg
    IMG_20200126_013227268.jpg
    58.4 KB · Views: 12
  • IMG_20200126_013222759.jpg
    IMG_20200126_013222759.jpg
    66.5 KB · Views: 12
  • IMG_20200126_013233157.jpg
    IMG_20200126_013233157.jpg
    63.6 KB · Views: 12

sms986

Petty Officer 1st Class
Joined
Sep 18, 2017
Messages
334
More pictures
 

Attachments

  • IMG_20200126_013155104.jpg
    IMG_20200126_013155104.jpg
    62.1 KB · Views: 10
  • IMG_20200126_013302057.jpg
    IMG_20200126_013302057.jpg
    61.5 KB · Views: 10
  • IMG_20200126_013302057_01.jpg
    IMG_20200126_013302057_01.jpg
    61.5 KB · Views: 10
  • IMG_20200126_013239343.jpg
    IMG_20200126_013239343.jpg
    65 KB · Views: 10
  • IMG_20200126_013243027.jpg
    IMG_20200126_013243027.jpg
    67.4 KB · Views: 10

sms986

Petty Officer 1st Class
Joined
Sep 18, 2017
Messages
334
I need some help...

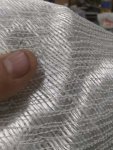
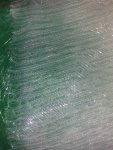
I had a very, very hard time finding +45/-45 17 oz biaxial cloth this past time I ordered. I used to get it from a few places at around $2/yd. I could not find it ANYWHERE over the past few weeks. I found a few rolls that were 50 inches wide, but they were like $8/yd. I can't find any reasonably priced 17 oz anywhere.

On a side note, I found a 30" wide roll for around $2 a yard on a cheap glass site that won't post here. The quality was horid. Hard to wet out, the strands of glass were separated so far that there were holes throughout the glass, and it was overall bad. Here are some comparison pictures between what I was using and what I just got.

Aside from that, no new news. I've just been tabbing all week.
 

Attachments

  • IMG_20200314_154012027.jpg
    IMG_20200314_154012027.jpg
    143.9 KB · Views: 9
  • IMG_20200314_154000804.jpg
    IMG_20200314_154000804.jpg
    156.6 KB · Views: 9
  • IMG_20200314_154148123.jpg
    IMG_20200314_154148123.jpg
    133.5 KB · Views: 9
  • IMG_20200314_154136210_01.jpg
    IMG_20200314_154136210_01.jpg
    198.4 KB · Views: 9

kcassells

Fleet Admiral
Joined
Oct 16, 2012
Messages
8,720
try uscomposites.kom
DB170 - 17oz Biaxial - NO MAT
[SIZE=-1]+/- 45 degree
Contains double bias(17oz) stitched at 45degrees.
Does not have a mat backing.
Thickness: 0.030"[/SIZE]
[SIZE=-1][SIZE=-1]Cat No.[/SIZE][/SIZE] [SIZE=-1][SIZE=-1]Description[/SIZE][/SIZE] [SIZE=-1][SIZE=-1]Price / Yard[/SIZE][/SIZE]
[SIZE=-1][SIZE=-1]FG-DB170-50[/SIZE][/SIZE] [SIZE=-1][SIZE=-1]50" Width[/SIZE][/SIZE]
[SIZE=-1][SIZE=-1]Same[/SIZE][/SIZE] [SIZE=-1][SIZE=-1]1 to 9 Yd[/SIZE][/SIZE] [SIZE=-1][SIZE=-1]$7.75 / yd[/SIZE][/SIZE]
[SIZE=-1][SIZE=-1]Same[/SIZE][/SIZE] [SIZE=-1][SIZE=-1]10 to 24 Yd[/SIZE][/SIZE] [SIZE=-1][SIZE=-1]$7.30 / yd[/SIZE][/SIZE]
[SIZE=-1][SIZE=-1]Same[/SIZE][/SIZE] [SIZE=-1][SIZE=-1]25 or More Yd[/SIZE][/SIZE] [SIZE=-1][SIZE=-1]$6.95 / yd[/SIZE][/SIZE]
[SIZE=-1][SIZE=-1]FG-DB170R[/SIZE][/SIZE] [SIZE=-1][SIZE=-1]Roll (100yd)[/SIZE][/SIZE] [SIZE=-1][SIZE=-1]$485.00[/SIZE][/SIZE]
[SIZE=-1][SIZE=-2]Full rolls are sold by weight and are approx. 150 LBS[/SIZE][/SIZE]
This has no mat backing
 
Last edited:
Top