1981 Sportcraft 270 repair underway - transom, stringers, & repower

Status
Not open for further replies.

WalleyeSniper

Petty Officer 2nd Class
Joined
May 15, 2018
Messages
108
Fhttps://forums.iboats.com/forum/boat-repair-and-restoration/boat-restoration-building-and-hull-repair/8464424-rehab-sportcraft-222-1983-deep-v-hull-cuddy-walkaround..inzee

the studs they have minimal structural value compared to ply. Alot easier but whatever you choose it's your boat.

Oh, yeah, I'm definitely using marine ply for all the stringers (unless sourcing, wait times, or some other unseen issue gets in the way. But that's unlikely, as we already have a few sheets of 3/4" and 1/2" already now).

When I was saying "debating using a 2x4" I was just saying that the current dimensions are around 2" wide by 4" tall, like an actual 2x4 was used, for at least 4 out of my 6 stringers. So, I'm not sure if I should still follow that schematic and keep them at the same dimensions 2"wide and 4" tall (using marine ply of course)... Or, if I should just make them as tall as I can all the way up to the sole/deck in every position possible, except for the fish boxes?

(My fish boxes are on each side of the deck and directly above the two outside stringers. Those are 2 of the 6 stringers that are 2x4 size, and then the two inner stringers with engine beds on top of them are also 2x4 size).

It's weird because only TWO of the stringers are actually up to deck height. Looking at a cross section of my boat, the 6 stringers are setup like this:
| |
| |
| | | | | |

I just wasn't sure if there was some unknown design reason for this being setup that way by the factory? Or, it was just done to save time and costs while still being "boat-able" for the average user and I am just overthinking it/second guessing the design importance for no reason, lol.
 

kcassells

Fleet Admiral
Joined
Oct 16, 2012
Messages
8,696
Your boat is 5' bigger than mine and in addition you have an inboard. All said and done I would have every stringer regardless of factory production to deck height. Build better as it usually the case. Hope this helps.
I actually did and replaced a 2x4 partial keel that runs from front to the end of my gas tank.

1625503647498.png

1625504067082.png


1625503677245.png


1625503724685.png


Keel under coffin of tank 80 gal tank.
1625504302241.png
 

WalleyeSniper

Petty Officer 2nd Class
Joined
May 15, 2018
Messages
108
Your boat is 5' bigger than mine and in addition you have an inboard. All said and done I would have every stringer regardless of factory production to deck height. Build better as it usually the case. Hope this helps.
I actually did and replaced a 2x4 partial keel that runs from front to the end of my gas tank

Ahh, ok. I see now what your saying. Yeah, definitely going to go bigger then and just deck height all of it except for directly underneath the fish boxes where I won't have the room.

I think I'm going to do our bulkheads and stringer setup much like yours under the tank. We have a 120gal tank that spans the width of our transom, so I like the idea of super reinforcing it. Lol

What are you going to space the bottom of your fuel tank with to keep it off the deck? I was thinking about using a few strips of that dense plastic/HDPE stuff, and gluing them to the underside of the tank (so moisture doesn't get trapped up under the tank like the old design did).
 

kcassells

Fleet Admiral
Joined
Oct 16, 2012
Messages
8,696
For the tank I built up some ply the length of the box like almost a 2x4 and ply pads in corners. They were all glassed. Ply floor sat on that and creates a flow area under tank back to the bilge.
That is the correct rubber to use under the tank.
 

WalleyeSniper

Petty Officer 2nd Class
Joined
May 15, 2018
Messages
108
For the tank I built up some ply the length of the box like almost a 2x4 and ply pads in corners. They were all glassed. Ply floor sat on that and creates a flow area under tank back to the bilge.
That is the correct rubber to use under the tank.

The HDPE is the correct rubber, or plywood glassed as pads if the correct way to gap the tank from the floor? Or, both?

I'm trying to do it right and avoid any moisture issues from coming about of course. :)
 

kcassells

Fleet Admiral
Joined
Oct 16, 2012
Messages
8,696
The HDPE is the correct rubber, or plywood glassed as pads if the correct way to gap the tank from the floor? Or, both?

I'm trying to do it right and avoid any moisture issues from coming about of course. :)
The glassed plywood pads are what I set my tank floor on. Then the rubber can attach to the underside of the tank or the deck the tank sits on.

1625587340222.png1625587003119.png

1625586859765.png


1625587003119.png


WalleyeSniper

Petty Officer 2nd Class
Joined
May 15, 2018
Messages
108
The glassed plywood pads are what I set my tank floor on. Then the rubber can attach to the underside of the tank or the deck the tank sits on.

View attachment 344742View attachment 344741

View attachment 344740


View attachment 344741


Ohhhh, ok. That makes total sense. That looks stellar!!! What paint did you use for that tank/bilge area? It looks great, so smooth and vibrant looking!
 

kcassells

Fleet Admiral
Joined
Oct 16, 2012
Messages
8,696
Here's a good read.
 

WalleyeSniper

Petty Officer 2nd Class
Joined
May 15, 2018
Messages
108
Here's a good read.
That's EXACTLY how I plan to do my tank and setup. HDPE strips 5200 to the bottom of the tank, and barely 5200'd to the floor. Thanks for that site, tons of great info on there!
 

WalleyeSniper

Petty Officer 2nd Class
Joined
May 15, 2018
Messages
108
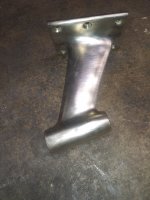
We ordered a 55gal drum of resin and hardener, all new hardware for the entire boat including all LED electronics, and a full roll of 1.5oz CSM and a full roll of 1708 Biaxial.... So, while waiting on all that to arrive, I spent most of today just cleaning old parts/pieces and stripping 40yrs of paint off all the metal.

I removed the cutless bearing from the skeg and proceeded to take it to my bench top wire wheel. I think it came out pretty good considering what it looked like originally.

20210709_010407.jpg

I thought I had some before pictures, but I guess not.

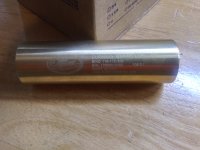
20210709_012441_HDR.jpg
This is the cutless bearing we decided to go with, Duramax Marine's "Bind" cutless.
 

WalleyeSniper

Petty Officer 2nd Class
Joined
May 15, 2018
Messages
108
Since the 55gal of resin has arrived (Holy hell that's a lot of resin) and the hardeners and etc, we went ahead and started full steam ahead on tearing the rest of the front out.

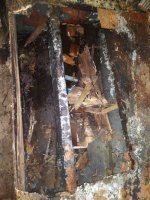
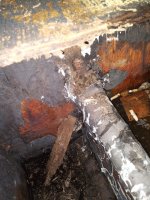
The front stringers were TRASHED and barely any intact wood left. All just rotted away flakes, wayyyy past the mush phase in most of the front.

20210724_202523.jpg
Probably hard to even recognize what's going on here. But, this is pretty much the standard the entire front of the hull looked like inside.

20210724_202303.jpg
The wood is entirely gone from every portion, nook, and cranny in the front cuddy area of the boat. All that's left is straight up remnants of glass barely holding everything together.

This is the exact reason I tell everyone I check boats out for, "DO NOT trust just the outer appearance of everything. Many people put on new carpet, new paint, and call it good to go. But, a nightmare of danger can lurk beneath it all, that can easily cost you or your family your lives..."

20210724_233022_HDR.jpg
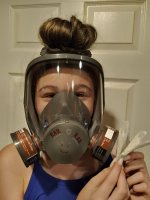
Daddy's little helper, showing off her new mask and how she can't even smell her fingernail acetone wipe through it lol. (My little 13yr old girl is EXTREMELY rugged and ever bit like any other farm girl. But, she's also super girly like most other little girls. But, being our only child, she steps up and tries helping with everything we do.)

20210724_202514.jpg
Just a closeup of the super shitty front port most stringer where it is coming from the bow and meeting the bulkhead on the backside of the main helm/seating area from the cuddy side's perspective... Isn't that supposed to be the strongest and most beefy part of the hull layup - because of the pounding it takes cresting over waves? I know the underside and front center of the keel leading up to the bow needs to be built tough, but just aft of that is where the pounding usually occurs when skipping over waves, right?

Next up: the entire deck should be cut up from midship and we'll be ready to knock out the transom, and then hit stringers one by one. 💪🏻
 

WalleyeSniper

Petty Officer 2nd Class
Joined
May 15, 2018
Messages
108
PS: 55gals of freshly made ISO Polyester wax-free laminating resin, and 2gals of MEKP- cost $950.

Everywhere else wanted $1450 to $2200 for the same thing, and around $950 to $1400 for just normal GP grade laminating resin... So, we got off GREAT, thanks to our buddy that plugged us in with the owner of a large chemical company nearby.
 

WalleyeSniper

Petty Officer 2nd Class
Joined
May 15, 2018
Messages
108
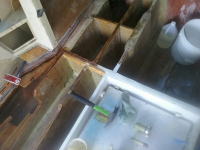
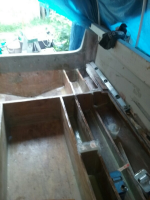
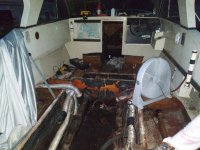
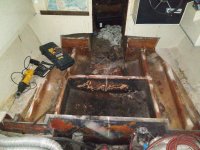
Cut and pulled up the entire midship area and have the grid exposed. WOW, what a horrible job the factory did. I sure am glad I went into this assuming it was going to be a full rehab from the start, otherwise I would've been in for a rude awakening 😆.

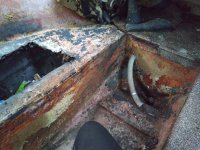
20210725_212417.jpg
The midship area underneath the hardtop. Aka - the helm area.

20210725_211731.jpg
A little closer look at the midship.

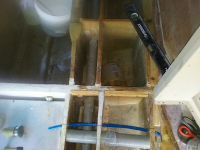
It absolutely BAFFLES me why on earth would they design these stringers and compartments without ANYWHERE for water to go. Nearly the entire front half of the boat has every single stringer, bulkhead, and other area compartmentalized without ANY type of drain ability whatsoever. No wonder the front stringers on these are typically delammed, rotted, and shoddy. Not to mention the open wood on the rear lowest part of the hull floor where water naturally will collect via the bilge. These boats start the rot process from the front and back both, right from the jump coming straight out of the factory!

I can't wait to see it finished. Envisioning it is giving me goosebumps, lol.
 

WalleyeSniper

Petty Officer 2nd Class
Joined
May 15, 2018
Messages
108
Oh if it was me. I would make my engine stringers taller to do away with blocks. All marine plywood. A full 2" wide.
Unfortunately, I don't have the means to pull the cap off. So that's going to be next year's project for sure. I figure I'll attack the lower half of the full first, and build everything to new, and then do the top half from the cap up next year.

But, definitely doing a full 2" wide stringers and really beefing it up. Can't stand how chinsy and halfassed the factory sent this thing out as.

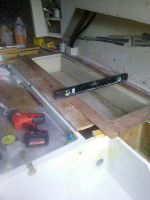
For the transom, I cut off the rear 1/3 of the cap, and going to reinstall it extra beefy on the underside when putting it back on later.
 

WalleyeSniper

Petty Officer 2nd Class
Joined
May 15, 2018
Messages
108
Update:

Pulled out a bunch more wood and glass from the bow area and have it virtually stripped of everything but the stringers now.

Plan of attack, is to do section by section after getting all debris out of the boat. Transom will be done first and foremost. After a new transom we will be onto the stringers. I'm thinking of cutting out, doing all prep work, and installing stringers one at a time, but not sure of the order I'm going to go with. Maybe start on the outside port stringer first and work my way across. Then bulkheads and ribs as the final. Not really sure of the best approach because I'm concerned about hull warpage, even with the cribbing any etc in place underneath her.
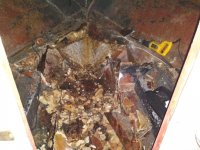
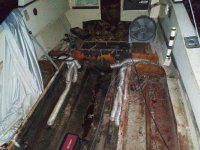
Anyways, here's some pics of our progress as of today when we ran out of daylight:

20210728_211647.jpg
Entire cuddy is now cut out, and pulled the black waste holding tank out. Foam, foam, and more foam was encased around that thing. An absolute nightmare trying to free up all the foam!

However, even with all wood and etc completely soaked and disintegrated all around it, the 40yr old foam was still in dry and solid shape! Makes me not so fearful to use flotation foam as I previously was.

20210728_211914.jpg
Only thing left is to get the intake/exhaust vents out, remove all the old spaghetti, clean up the debris, and get to removing all the stringers and bulkheads.
 

kcassells

Fleet Admiral
Joined
Oct 16, 2012
Messages
8,696
Update:

Pulled out a bunch more wood and glass from the bow area and have it virtually stripped of everything but the stringers now.

Plan of attack, is to do section by section after getting all debris out of the boat. Transom will be done first and foremost. After a new transom we will be onto the stringers. I'm thinking of cutting out, doing all prep work, and installing stringers one at a time, but not sure of the order I'm going to go with. Maybe start on the outside port stringer first and work my way across. Then bulkheads and ribs as the final. Not really sure of the best approach because I'm concerned about hull warpage, even with the cribbing any etc in place underneath her.

Anyways, here's some pics of our progress as of today when we ran out of daylight:

View attachment 346557
Entire cuddy is now cut out, and pulled the black waste holding tank out. Foam, foam, and more foam was encased around that thing. An absolute nightmare trying to free up all the foam!

However, even with all wood and etc completely soaked and disintegrated all around it, the 40yr old foam was still in dry and solid shape! Makes me not so fearful to use flotation foam as I previously was.

View attachment 346558
Only thing left is to get the intake/exhaust vents out, remove all the old spaghetti, clean up the debris, and get to removing all the stringers and bulkheads.
Foam is a must when you get to that point. Looking great!
 
Status
Not open for further replies.
Top