1981 Sportcraft 270 repair underway - transom, stringers, & repower

Status
Not open for further replies.

JASinIL2006

Vice Admiral
Joined
Feb 10, 2012
Messages
5,674
If using Titebond III, do you still put CSM between the layers of plywood like when they're going to be resin'd together? Or do you skip the CSM inbetween and just clamp with Titebond III in the middle like you're making a giant piece of plywood?
TiteBond III only. I clamped mine down, then screwed it together with drywall screws. After a day or so, I pulled the screws and filled the holes with peanut butter, then glassed the whole thing before installing it.
 

WalleyeSniper

Petty Officer 2nd Class
Joined
May 15, 2018
Messages
108
TiteBond III only. I clamped mine down, then screwed it together with drywall screws. After a day or so, I pulled the screws and filled the holes with peanut butter, then glassed the whole thing before installing it.
Well then, that's how I'm going to do it too. 😊

When installing the glassed core, do I use 1 or 2 layers of CSM between the fiberglassed core and rear skin? Or do I just bond the already glassed wood to the skin without CSM since I'll have an external layer of CSM on the back of the core?
 

WalleyeSniper

Petty Officer 2nd Class
Joined
May 15, 2018
Messages
108
I find that alot of pro repair shops, and oem builders will usually precut their cloth and wet it on a flat board, then lay full size equal length tabs for stringers and bulkheads, meaning a 12" high stringer will have 24" strips cut and wetted, then laid into place wet on wet. Then they will wet out the full size cap pieces and drape them over. That way, you get a full mill thickness throughout the lamination. Its even more common with epoxy users, given the longer working time. You can readjust the lam by lifting the edges to release and air pockets, especially on the capping. With foam or cardboard filled stringers, this is almost mandatory, given that the strength comes entirely from the glass and not the core.

I do this from time to time myself, but I mainly use epoxy.

I think that too is what I'm going to do. Use a flatboard laid on the hull somewhere, and use it to wet out my precut pieces. I'll wet the area I'm going to glass, then put the pre-wet layers down one at a time.

I've seen that process and it seems like the best approach to not waste any of my kick time messing around with laying, positioning, or going in and out the boat mixing and matching etc.
 

todhunter

Canoeist
Joined
Sep 15, 2020
Messages
1,311
Any time it's feasible, I pre-wet the mat-side of my 1708 on a sheet of plastic laid on a flat area, then after wetting, transfer the cloth to the area where it will be laid. The only time I do not use this method is for large areas like the top surface of the deck, where transferring a large wet out piece of glass would be difficult. I find that by pre-wetting the mat-side of the cloth, I have less of a chance of getting air pockets and I'm able to work faster. Don't forget that even when using this method, you should be still be rolling out some resin where the tabbing will go before sticking the cloth down.

For attaching the transom core to the hull, you don't need any more CSM if you've already encapsulated the core with CSM. Just trowel PB to the back surface of the transom and the transom skin, stick it in place, and clamp.
 

kcassells

Fleet Admiral
Joined
Oct 16, 2012
Messages
8,720
I think that too is what I'm going to do. Use a flatboard laid on the hull somewhere, and use it to wet out my precut pieces. I'll wet the area I'm going to glass, then put the pre-wet layers down one at a time.

I've seen that process and it seems like the best approach to not waste any of my kick time messing around with laying, positioning, or going in and out the boat mixing and matching etc.
On another note you can place your mixes in a pan of ice to slow down the chem process and gain some time.
 

JASinIL2006

Vice Admiral
Joined
Feb 10, 2012
Messages
5,674
For attaching the transom core to the hull, you don't need any more CSM if you've already encapsulated the core with CSM. Just trowel PB to the back surface of the transom and the transom skin, stick it in place, and clamp.

^This!

When I installed mine, I drilled some 3/8" relief holes in the transom core to allow any excess PB to splooge out and to better adhere the transom core (not everyone does this). I also did several dry runs to practice clamping the core to the boat before the clock was running with catalyzed PB.
 

kcassells

Fleet Admiral
Joined
Oct 16, 2012
Messages
8,720
Transom install is a 2 person job simply because of the prefabricated weight on this size boat.
I installed 2 kitchen cabinet handles on the transom in order to lift and position. Practice it a couple of times like Jas says.
Also if you are using tightbond etc. do NOT tab for @72 hours the gases need to release. You will have nightmares not to heed this warning. lol! Gassing off depends on temps and humidity. Thats why most use their own mix of pb. cause no down time.
 

JASinIL2006

Vice Admiral
Joined
Feb 10, 2012
Messages
5,674
Transom install is a 2 person job simply because of the prefabricated weight on this size boat.
I installed 2 kitchen cabinet handles on the transom in order to lift and position. Practice it a couple of times like Jas says.
Also if you are using tightbond etc. do NOT tab for @72 hours the gases need to release. You will have nightmares not to heed this warning. lol! Gassing off depends on temps and humidity. Thats why most use their own mix of pb. cause no down time.

Not an issue with Titebond III. I believe you are thinking of PL Premium construction adhesive.
 

WalleyeSniper

Petty Officer 2nd Class
Joined
May 15, 2018
Messages
108
TONS of great info guys! You have no idea how much I appreciate to guys teaching this young man some tricks and handing out knowledge like it's candy. So, thank you guys so much for helping me in this rebuild thus far.

I love the idea of putting two cabinet handles on the transom core. That's really smart to aid in handling it with my little girl and wife. So, I'll have at least 2 and a half people working in this with me (my wife and not so little "little girl" that's a lanky 13yr old string bean almost as tall as my wife at 5'7"!!!).

So, what schedule should I use for the outside of the transom core that faces inside the boat/forward?

My revised plan is as follows, but I'm not sure what to put on after getting the core in:

- Glue two 1/2" layers of plywood together, for 1" total thickness, with weights to bond it all. (original was a single 3/4" sheet).
- After bonding together, let sit for an hour or two if resin, or let sit for 5 days if TB3.
- Cut out transom template.
- Cut out a crescent shape of the bottom center where the drain plug is going to install. Crescent will be 4" wide and about 2" tall.
- Pre-wet the plywood core's aft facing side, and add a layer of CSM and wet out and roll.
- Let it kick off and cool.
- Pre-wet the plywood core's front facing side, and add a layer of 1708 and wet out.
- Let it kick off and cool.
- Wet out edges thoroughly to soak up resin, and add small strips of CSM overlapping onto the faces of the core by about 2". (Don't get SUPER finicky about edges, because they're going to be completely surrounded by peanut butter on install and filleted).
- Core is now encapsulated.


Transom install:
- Thoroughly clean transom skin and core with acetone, once core is inside boat area and ready to proceed with install.
- Mix up hairy resin, then catalyze thoroughly. (Per amount of resin used, NOT overall amount of PB)
- Trowel PB onto the transom skin, and add thick caulking strip amount of PB where bottom of transom will bed into (to fill all possible areas and space).
- Simultaneously, wife will be troweling PB on the aft side of core.
- Wife and I will install core to transom and add clamps. (Going to have 2x4' horizontally across the outside and inside of boat at the mid point and lowest point horizontally, screwed to each other using Ledger Lok 6" screws. I will use wood shims jammed inbetween the 2x4's and core on both sides to get even pressure throughout. Top will be clamped with typical woodworking clamps).
- Immediately shape excess PB at bottom of transom and hull floor by fillet'ing.
- Caulk PB into the edges on the sides and fillet them.
- Let it all sit overnight.
- Next day, take clamps off and tab to hull.
- Tabbing will be 6" tape of 1708, going 3" onto core and 3" onto hull, next layer of 1708 will be 6" onto hull and 6" on core, all the way around.
- Let it all kick off and cool.
- Apply PVA to all surfaces to lock out air and get it all to cure.


WOW... I wrote a book, sorry!!! I'm just trying to be as thorough as possible on this and make sure I'm doing right by myself and my family that's going to be miles out in the water with me. 😊 Does anyone have any suggestions, comments, advice, or anything that should be changed?
 

WalleyeSniper

Petty Officer 2nd Class
Joined
May 15, 2018
Messages
108
Just bonded the core together and used TB3 since I had 3gals of it available.

I cut the marine ply to 36" x 108", because my actual transom cavity is 35" x 105".

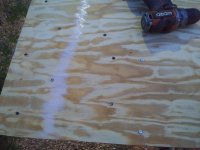
I used screws every 6" or so, in grids and along the edges, to hold the two sheets together since I didn't have any large enough flat space to weight it down.

I'll send the edges slightly round, sand the two faces, shop vac and clean up, then move onto encapsulating them tomorrow after I finalize all template adjustments and prep work for the transom skin.

20210806_210021.jpg
Screws every 6" or so.

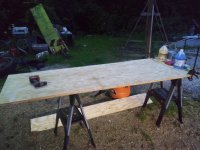
20210806_210006.jpg
My little work area with my 16 boat stands, my fuel tank, and other boat stuff on the background. Lol

Question though: Can I encapsulate the entire thing at one time? As in, do one side, wait an hour, flip it over and do the other? And do I have to spray it with PVA to lock out all the air so it'll cure 100%?
 

WalleyeSniper

Petty Officer 2nd Class
Joined
May 15, 2018
Messages
108
I alternated sides and I did not use PVA or wax or anything on the core.
Did you alternate sides at the same time, like an your or two apart? Or you mean alternate sides different days apart?

I wonder why they say it won't cure when air gets to it, so to lock it away with adding wax or a layer of PVA...? So, you didn't do any of that and it still solidified rock hard no problem? That probably would give a little better working time to come back a day later and not have to sand too I'd think. I'm petrified of messing up and it not curing. Lol
 

WalleyeSniper

Petty Officer 2nd Class
Joined
May 15, 2018
Messages
108
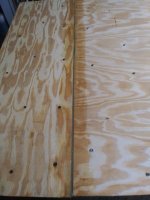
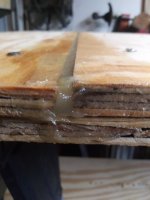
Just peanut buttered my seams because one of them was giving me crap and kept gapping like 1/32 of an inch or so at either the top or bottom. Figured I'd peanut butter it just in case and to get some fun practice in. 😆

20210807_014923.jpg
When I fill these screw holes in, should I make the peanut butter slightly thinner so it will pack down in the holes easier?

20210807_014935.jpg
Where I chipped the corner of one of the extension pieces, I just added peanut butter and packed it in.

20210807_014913.jpg
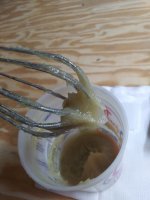
This around the consistency I'm wanting, or maybe a tad thicker? This one was more like a cake frosting or toothpaste type consistency. I just kept adding equal parts Polyfiber 2 and Cabosil to get it thicker and thicker.
 

JASinIL2006

Vice Admiral
Joined
Feb 10, 2012
Messages
5,674
Your PB looks pretty good to me. if you’re not sure, just mix up a small batch and keep record of the proportions that you add. Then if it’s too firm or too loose, you can make the next batch a little differently. after I removed the screws that were clamping the two pieces together, I was not so much worried about filling the entire hole. I just wanted to make sure I had a good plug in there to prevent any water intrusion.

When I was fiberglassing the core, I would do one side, let it kick off and then flip it over and then do the other side. I would then do that same side a second time, and then flip it over and do the first side. Getting the fiberglass to conform to the curve around the edge and lay flat was the trickiest part. If you’re glassing with CSM, one trick is to fray the edges before of the mat you try to get them to bend around the edge of the core. Then, you just have to keep fiddling with them as the resin kicks.
 

WalleyeSniper

Petty Officer 2nd Class
Joined
May 15, 2018
Messages
108
So is poly fiber like adding chopped strand for strength?
Polyfiber II is milled fibers, but it's a mix of extremely fine dust like cabosil and short strand fibers like 1/32. An old man at our marina used almost exclusively that on his restoration for Peanut Butters, and his boat is always out and about. So I figured it'd be good for strength. Lol

Its dust doesn't suspend in the air, so that's why he used it over Cabosil he was explaining. "Best of both worlds" he says. But, I'm still gonna use 1/4" strands in a lot of mine.
 

WalleyeSniper

Petty Officer 2nd Class
Joined
May 15, 2018
Messages
108
Your PB looks pretty good to me. if you’re not sure, just mix up a small batch and keep record of the proportions that you add. Then if it’s too firm or too loose, you can make the next batch a little differently. after I removed the screws that were clamping the two pieces together, I was not so much worried about filling the entire hole. I just wanted to make sure I had a good plug in there to prevent any water intrusion.

When I was fiberglassing the core, I would do one side, let it kick off and then flip it over and then do the other side. I would then do that same side a second time, and then flip it over and do the first side. Getting the fiberglass to conform to the curve around the edge and lay flat was the trickiest part. If you’re glassing with CSM, one trick is to fray the edges before of the mat you try to get them to bend around the edge of the core. Then, you just have to keep fiddling with them as the resin kicks.
Perfect, that makes total sense.
 
Status
Not open for further replies.
Top