1976 Tom Boy Boat, 1976 40 HP Johnson Outboard and who knows what Trailer

gm280

Supreme Mariner
Joined
Jun 26, 2011
Messages
14,605
Well I have been doing something every day to the boat. Some days it is something little, depending on the weather, but something is done to the boat everyday.

Today, I used my router table to cut/mill the surfaces of all the lids to fit the stainless steel hinges. I thought about how to get them level all the way across the lids. Table saw was an option, so was the radio-arm saw with dado blades setup in each. But the router table seemed to be the perfect option for this.

I took the router table out side and set everything up with a cutting bit and adjusted it for the thickness of the hinges and ran the lids across the table. Instant flat level perfect cuts. But I remembered why I always do routing cuts outside. I was amazed at the amount of wood dust it makes and how much it scattered everywhere. I cut maybe 1/8" to 3/16" across the lids and you would have thought a cut down a tree and cut it up.

So I can now mount the hinges and adjust them for fit before carpeting them. Not too many issues yet to resolve for other things on the boat. So it looks like there is promise after all. I'll get some pictures soon.
 

oldrem

Commander
Joined
Nov 7, 2013
Messages
2,002
Definitely with you on taking the router table outside. I did the same with mine on Saturday to cut some 1/2" radii on an oak board
 

Woodonglass

Supreme Mariner
Joined
Dec 29, 2009
Messages
25,928
If you use the Router Table for any amount of time, I highly recommend a Dust Collection fence system. I built this one...I used MDF and Formica for the faces. I used elevator bolts instead of carriage bolts

Click image for larger version  Name:	Router Fence.jpg Views:	1 Size:	64.0 KB ID:	10660200
 

gm280

Supreme Mariner
Joined
Jun 26, 2011
Messages
14,605
If you use the Router Table for any amount of time, I highly recommend a Dust Collection fence system. I built this one...I used MDF and Formica for the faces. I used elevator bolts instead of carriage bolts


I hear you WOG. I actually have such a setup. But I use it occasionally presently (more when I get to doing more wood projects I'm sure) and every time I wheel it outside and let the chips fall where they may. I have two vacuum outlets to use. One on the actual table fence and the other in the router section or body area to remove the dust and chips. But my regular shop vacs don't seem to do it justice. A better dedicated shop dust removal system would surely work, but I yet to get one. Can't really see either of those vac outlets on this picture. It is a rough copy of Norm Abram's New Yankee Work Shop plans.
 

Attachments

  • photo301922.jpg
    photo301922.jpg
    574.9 KB · Views: 0

gm280

Supreme Mariner
Joined
Jun 26, 2011
Messages
14,605
I hear you WOG. I actually have such a setup. But I use it occasionally presently (more when I get to doing more wood projects I'm sure) and every time I wheel it outside and let the chips fall where they may. I have two vacuum outlets to use. One on the actual table fence and the other in the router section or body area to remove the dust and chips. But my regular shop vacs don't seem to do it justice. A better dedicated shop dust removal system would surely work, but I yet to get one. Can't really see either of those vac outlets on this picture. It is a rough copy of Norm Abram's New Yankee Work Shop plans.

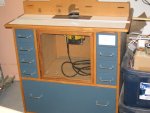
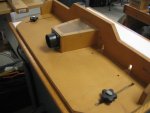
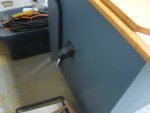
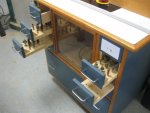
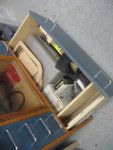
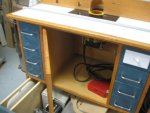
WOG, here are some new picture of my router table setup. This router table is very heavy. But that makes it very solid too and that helps when pushing material through it. And I used dual locking casters so when I lock them, it doesn't move even an inch.
 

Attachments

  • photo301925.jpg
    photo301925.jpg
    65.2 KB · Views: 0
  • photo301926.jpg
    photo301926.jpg
    51 KB · Views: 0
  • photo301927.jpg
    photo301927.jpg
    75.2 KB · Views: 0
  • photo301928.jpg
    photo301928.jpg
    74.5 KB · Views: 0
  • photo301929.jpg
    photo301929.jpg
    67.9 KB · Views: 0

sphelps

Supreme Mariner
Joined
Nov 16, 2011
Messages
11,468
I soooo envy you guys with nice tools and jigs and router table setups ... Makes me realize just how much of an amateur I am at woodworking ... :facepalm:
 

zool

Captain
Joined
Aug 19, 2012
Messages
3,432
That table look great GM, having drawers for all the bits and tools is nice!......I may need to build one of those for my setup.
 

Woodonglass

Supreme Mariner
Joined
Dec 29, 2009
Messages
25,928
Mikey Likey!!! I had my router mounted in my Tablesaw extension and then I removed it and Made a Portable table. I have 5 routers and all have a mounting plate to fit the table. All of them are Craigslist Specials except for my Two Hitachi's. I don't have to change bits very often. I just pull one out and put the other in with the bit I need. Works for me!!!
 

mickyryan

Rear Admiral
Joined
Apr 18, 2016
Messages
4,214
im with sam and my two trashcans i have that are all cut up :) cause they work just as good as a saw horse when one isnt close by :)
 

gm280

Supreme Mariner
Joined
Jun 26, 2011
Messages
14,605
Once the new shop is all done, I'm building a new Router table and it WILL be outfitted with this... and I might try to motorize the lift. I have and Idea!!!

https://www.bing.com/videos/search?...C88D0B670B35569133CCC88D0B670B35&&FORM=VRDGAR

I'm thinking about putting it back in the table saw extension table since I don't do as much mobile work as I used to.

Interesting video there WOG. I bought my Router Raizer system and I use that. It is basically a metal version of that wood setup and I use a small tool to raise and lower the router. It works great and really didn't cost much at all. Every woodworker needs a good router setup, that's for sure.
 

gm280

Supreme Mariner
Joined
Jun 26, 2011
Messages
14,605
Well once agian a little more accomplished. I finally got all the lids installed (temporarily) with their hinges and screws. While that doesn't sound like much, it actually was a fairly long ordeal.

I used stainless steel hinges and screws and since the hinges didn't have counter sink holes to allow the counter sink screws to fit flush, I had to counter drill each hole. I started that using a typical counter sink bit. But the stainless steel is some hard metal and that counter sink bit just wasn't cutting it, literally. So I used a larger quality drill bit to get them prepared.

The hinges came pre-drilled every six inches or so. And that is actually pretty good for long rod box attachments, but not so much with smaller lids. So I had to drill a few more extra holes for them and counter sink them as well. And those stainless steel material is a lot harder to drill though. But I did mange with the assistance of my drill press and a heavy hand.

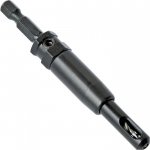
I don't know if any of you have used center drill setups. I am sure you all know about them. But for those that don't I attached a picture of them. Luckily I had the correct size for a number 6 screw. Problem is they don't drill a centered hole but about 1/2" or so deep. My screws were 1" so I had to drill the initial hole to get the proper center, then switch to a 7/64" drill bit (the same size in the center drill setup) to get the holes deep enough so the screws would thread in and not try to break. I made the lids with a 1/2" oak wood on the edges of all the lids just for that attaching reason. And you can't push a screw into that hard wood if you don't want it to break off. They have to be drilled first.

That was getting them all drilled and attached to the lids. Then I had to attack them to the boat. That was a little easier because the boat had plywood to attach to. And you can push the screws into that wood without fear of breaking.

So they are now fitted and I am really pleased with their fit. I think the next issue is the front loaf/platform carpet. Then attach the rub-rails.

I see that light again in the tunnel. Just hope it isn't a train. :applause:
 

Attachments

  • photo302061.jpg
    photo302061.jpg
    26 KB · Views: 0

Woodonglass

Supreme Mariner
Joined
Dec 29, 2009
Messages
25,928
Uhmm here's a tip for drilling hardened steel or stainless. Believe it or not use a Masonry bit. They all have Carbide tips and they will drill the harder steel really well.
 

oldrem

Commander
Joined
Nov 7, 2013
Messages
2,002
It's important to use a low RPM. I also use a product called Cool Care by Andis to keep the temps down. It's made for clipper blades but works great for many applications. Friction and the resulting high temps are your enemy.
 

gm280

Supreme Mariner
Joined
Jun 26, 2011
Messages
14,605
Ha thanks all for the suggestions. But all the stainless steel drilling is now complete. And for the most part, really wasn't as stressful as it could have been. While I did see smoke (some times from the wood backer plate)), I didn't destroy any bits. Yea, lucky is good some times. :D

Today's effort was to pre-install all the parts that needed the holes re-drilled. Parts like the front horn, navigation light holder, rear anchor light holder and things like that. I poylestered over those original holes with poly and CSM when waterproofing the boat many moons ago. So they needed re-drilled out and the assemblies fitted. Everything seems to align up right. I even polyestered (probably not a real word) in the bilge pump attachment plate and pre-fitted all the parts through the transom for fit to verify everything fits again. I was glad that none of the original holes had moved. :laugh:

I am trying to get everything pre-fitted now, so I can fit everything with the 3M 5200 at hopefully the same time period. And it looks like that is coming soon. I think once I get that first piece of carpet laid, I will move along pretty good. It is that first carpet part that makes me wonder. I used to install carpet for a living many many many decades ago, but I always wonder about such thing until I do it again. I guess if I screw up installing any of the carpet, I can always get some more... I mean it is a BOAT, Break Out Another Thousand, isn't it?

The final wiring layout is still in my head. I have one buss bar that is long enough if I have to cut it up to make then one. But I want to be pretty sure before doing any cutting of it yet. I also created a wire label document that I haven't yet printed out for the wires. I want to make sure of them as well.

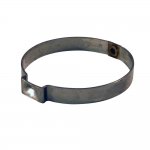
Have any of you used those crimp on hose clamps that we see on so many products these days? I can buy them to install the live well and bilge pump hose fittings. But I am not sure if I want to do that or just use stainless hose clamps. Up in the air about that. What you all say?:noidea:

Until next time, you all have the greats day yet!
 

sphelps

Supreme Mariner
Joined
Nov 16, 2011
Messages
11,468
Never used the crimp on h/c ... are they stainless ?
With the bling starting to go on it’s gotta be getting close to splash time ! ;)
 

gm280

Supreme Mariner
Joined
Jun 26, 2011
Messages
14,605
Never used the crimp on h/c ... are they stainless ?
With the bling starting to go on it’s gotta be getting close to splash time ! ;)

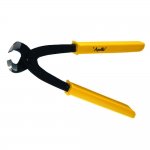
Actually I believe they are stainless steel crimp clamps. If not, I certainly would not used them. They sell them even at Lowes and such places for hose clamps on appliances. You buy them for the size hose you are using and they simply crimp in place with either a tool for that type clamp or you can use a flat front edge cutter type tool.

Just wondering if anybody has ever used them and recommended them?
 

Attachments

  • photo302131.jpg
    photo302131.jpg
    31.6 KB · Views: 0
  • photo302132.jpg
    photo302132.jpg
    26.3 KB · Views: 0
Top