1976 Tom Boy Boat, 1976 40 HP Johnson Outboard and who knows what Trailer

archbuilder

Vice Admiral
Joined
Sep 12, 2009
Messages
5,697
Looks like you have some pics that aren't working. Glad you are getting close to paint! I wouldn't sweat the sand throughs.
 

gm280

Supreme Mariner
Joined
Jun 26, 2011
Messages
14,605
Looks like you have some pics that aren't working. Glad you are getting close to paint! I wouldn't sweat the sand throughs.


That's odd. I can see then without any problem. However, that particular post gave me a lot of problems trying to get it to take. That is why the double post comment above. Oh well it is just a gray primed hull again. :noidea:
 

gm280

Supreme Mariner
Joined
Jun 26, 2011
Messages
14,605
Finally!

I never thought I would get to this point to be able to say, I am now ready to paint!

I 400 grit wet sanded the hull today and for the most part, I am ready to tape off and paint. Now it is me and the weather. Is there some sand throughs? YES, but only about three or four and for the most part, so little that I am not going to worry about them. And they are on some edges...of course. But basically the entire hull is ready. And I am now turning to color scheme and graphics.

I have the plans in my head, but now it needs to come to life. I will allow the hull to totally dry out before doing anything else. And since they are projecting some nice temps later on this week coming up, I think the paint will be applied.

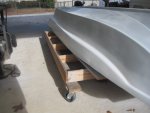
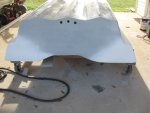
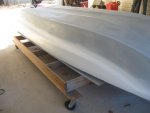
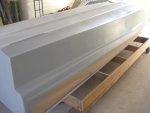
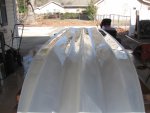
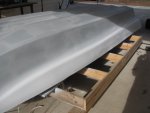
Here are the proof pictures.
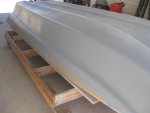
Final 400 Wet Sand (1).JPG
Yea the fake high gloss WET hull pictures. This is just after I wet sanded and rinsed off the boat. Notice no sand throughs all over the place for a change. A very light gingerly 400 wet sand was all I did.
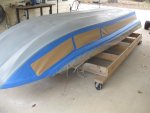
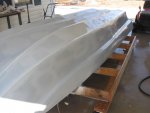
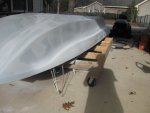
Final 400 Wet Sand (2).JPG
The side shoot. You can see a slight coloration from the previous primer to this latest primer. Both cam out of the exact same gallon. This is why you always want to paint everything at the same time and not leave anything for a later paint job. Things can change.
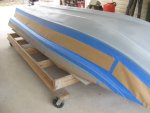
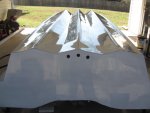
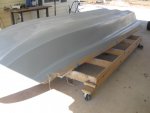
Final 400 Wet Sand (3).JPG
This transom finally came together and looks great. No questionable spots anyway.
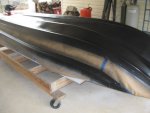
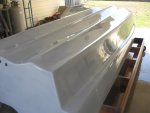
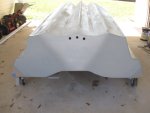
Final 400 Wet Sand (4).JPG
And the last side. Again, no sand throughs to worry about. The three of four places are so small that I am going to shoot paint over them and not worry.

So hopefully next time I post will be with some color.
 

archbuilder

Vice Admiral
Joined
Sep 12, 2009
Messages
5,697
Looks good, as long as its not a metallic, the sand throughs don't matter. Looks nice! You need to get some paint on her!
 

gm280

Supreme Mariner
Joined
Jun 26, 2011
Messages
14,605
Well the temps were really nice today. So I decided it was time to shoot some paint. And I really tried, but a couple problems cropped up. I thought I had just enough paint to shoot the first color. So I mixed it up and into the small touch up HVLP gun it went. But I didn't filter it like I know to do. And it didn't work. Seems there were a lot of flakes in the the bottom of the can (can was opened a few times with other paintings) and it managed to clog up the tip making for a very sorry fan pattern. So I stopped only after about a foot along. So painting was voided. And since I didn't have any more paint, I now have to go buy another quart and do it correct this time. :sorry:
 

Pusher

Lieutenant
Joined
Sep 2, 2014
Messages
1,273
Are you using a metal flake paint? If so how do they get through the filter? Just curious.
 

gm280

Supreme Mariner
Joined
Jun 26, 2011
Messages
14,605
Okay Arch's comments first.

Yes Arch, I am shooting a base coat clear coat cover application. That way I can paint all the color and then add the air brush graphics and clear over it all when done. I like doing that way and I know some think that creates a problem later on if touch ups are needed. But you repair those things like you usually do, lightly sand, paint and clear coat again. It works for me. IDK
I used the touch up gun (because this colored area isn't very large). So an 8.5 oz cup per side would easily work. It is a 1.0mm tip and sprays very nicely...when you filter the paint like you are supposed to do. :facepalm:

Pusher, No, no metal flake on this project. But I do have ideas about a Bass Boat project later on with metal flake. Then you have to use the proper tip opening to allow the flake to pass through. So that will be an interesting painting for sure. But they do have a lot of different size flakes to select from. So you have to use some restraints for those finishes.
 

archbuilder

Vice Admiral
Joined
Sep 12, 2009
Messages
5,697
GM, base clear makes sense for what you are doing. I did Miss Morgans colors one after another, letting them flash for 30 minutes or so. Then went right over all of it with clear. That saved me from having to sand the base coat before putting the clear on. My base only had a 24 window or you had to sand. I just have never had good luck with touch up guns.
 

gm280

Supreme Mariner
Joined
Jun 26, 2011
Messages
14,605
GM, base clear makes sense for what you are doing. I did Miss Morgans colors one after another, letting them flash for 30 minutes or so. Then went right over all of it with clear. That saved me from having to sand the base coat before putting the clear on. My base only had a 24 window or you had to sand. I just have never had good luck with touch up guns.

It is called a touch up, but only because it has such a little cup, 8.5 oz or 250 ml. But it is basically the same type gun of the typical HVLP paint gun, only a little smaller in size. I've sprayed a lot of small thing with it and actually like it for those small projects. I can't spray inside of that 24 hour window because I have some graphics to do with a true airbrush gun, and that just ins't going to happen in real time. So I will work around the time issue even if it takes a mere light 800 to 1200 grit sanding before clear coating. I did that same technique with the engine cowling paint job. And there were no problems...yet! :noidea:
 

gm280

Supreme Mariner
Joined
Jun 26, 2011
Messages
14,605
You should be fine, I just hate sanding lol! I'm excited to see what you have in mind!

Well I would tell how I plan on doing it. But if it doesn't come out right, then I don't have to retract anything. :eek:

Safer to do and if it looks okay, then post. :stupid:
 

gm280

Supreme Mariner
Joined
Jun 26, 2011
Messages
14,605
What GM's not telling us, is he's already moving on to the airbrushing 😜

No, not yet. I did buy the paint though. But with very windy weather and a little on the cool side (very low 60's) I am waiting for a nice 70 degree day. And they are forecasting some next week. So I am hopeful to shoot some paint then.
 

gm280

Supreme Mariner
Joined
Jun 26, 2011
Messages
14,605
Okay a few pictures with some paint. No, it is now finished but coming along nicely. But there is also some real goofs. I explain as we get there.

I started off at the lowest part of the hull, which just happens to be the top side of the hull when I turn it back over. I shoot the first color. No need for any tape-offs with this color.
Paint White Coat (1).JPG
Actually doesn't look like much, but it will all come together.
Paint White Coat (2).JPG
Paint White Coat (3).JPG
Paint White Coat (4).JPG
Paint White Coat (6).JPG
And that is the first color. Now comes the tape and the second color.
Paint Gray Coat (1).JPG
Again it really doesn't look like much yet.
Paint Gray Coat (2).JPG
Paint Gray Coat (3).JPG
Paint Gray Coat (4).JPG
And there is the second color. You can see where I taped off the white color for this second color. And we will proceed
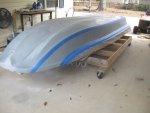
Final Paint Color (1).JPG
Here is the hull taped off for the last color. Hard to see all the find tape used during this long tape off. I used a lot of tape and paper.
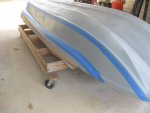
Final Paint Color (2).JPG
This gives a little more detail of the tape off for the last color. A lot of very find taping.
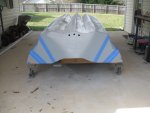
Final Paint Color (3).JPG
Final Paint Color (4).JPG
Final Paint Color (5).JPG
Now for the last color
Final Paint Color (7).JPG
Yea, it still looks iffy. But remember this is only the base colors. I still have to shoot the clear coats after the graphic are airbrushed on.
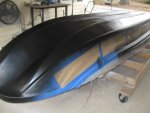
Final Paint Color (8).JPG
There is a sheen on the hull but nothing like it will look after clear coats later on.And this picture is interesting for a couple reasons.
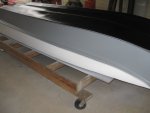
Final Paint Color (10).JPG
Here is one side with the tape removed. Again, the find pin strips are not showing up well, but they are there. There is still graphics I have to airbrush. That is for another post.

And I have to post this to show my major goof.
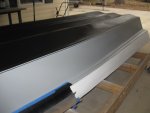
Final Paint Color (13).JPG
This is the other side. However, I forgot to shoot the black pinstripe on the lower area so I didn't remove all the tape.

Story behind this is, I was shooting the black color and was near finished. I had about 4 square feet to spray and I ran out of black paint. So off to the PPG paint store and another quart of 9700 black. But when I got home quickly to finish spraying the hull, I forgot the little side pinstripe. :doh:
So tomorrow, weather permitting, I have to re-tape up some areas and use a little airbrush to spray that pinstripe. Some times it is the little things that take the longest to complete. :rolleyes: Luckily I seen it before removing the tape for that pin stripe. It took a few hours to tape up the hull for those pinstripes. I still have some nice graphics to spray on, but once that is done, the clear coats will flow. Then some 1200-2000 grit wet sanding followed with buffing and it is finished.

I did need some 1/4" wide tape for these stripes, but since I didn't have any, I installed a wide roll of tape on my lathe and used a carpet blade to cut off a 1/4" segment. It was so easy to do and work amazingly well. Just an idea if you need different width tape and don't have any.

Thanks for looking and more to come.
 
Top