1976 Tom Boy Boat, 1976 40 HP Johnson Outboard and who knows what Trailer

archbuilder

Vice Admiral
Joined
Sep 12, 2009
Messages
5,697
GM not having a climate controlled paint booth is always frustrating. Mine works well to keep the dust out, but it still has to be warm since the fan pushes so much air through the booth. Hang in there, the right day will come!
 

gm280

Supreme Mariner
Joined
Jun 26, 2011
Messages
14,605
Arch, we used to have such a paint booth available to anybody that could legally get on the Air Force Base that is very close to me. BUT, the EPA made them close it down because they stated that the paint booth didn't have the proper air control system. So that closed down and never reopened. Seems the EPA stated that there was a slight possibility of paint fumes leaking out in to the air. Even though they didn't detect any leaks. So many hobbyist used that booth for their cars and trailers over the years. But that is long gone now. :eek:
 

gm280

Supreme Mariner
Joined
Jun 26, 2011
Messages
14,605
Well it looks like Winter 2.0 has arrived here in middle Georgia. Raining and 39 degrees at noon just isn't painting weather. So the wait is on. :eek:

I am thinking about closing off both opened ends of my breeze through to make a temporary paint booth like I did when I painted the last car. It keeps the bugs and hopefully the pollen out. But it also make the area very paint dusty while spraying as well. So maybe a fan or three to help out. :noidea:

Until better weather, I will pass the time reading about other projects on here. :thumb:
 

SkaterRace

Master Chief Petty Officer
Joined
Mar 20, 2016
Messages
802
GM you saying about that weather makes me want it some of that... we have a fresh 2 feet of snow over the past few days. Just a week ago I was down at the boat thinking about taking the winter protection off and getting ready to bring her home.
 

gm280

Supreme Mariner
Joined
Jun 26, 2011
Messages
14,605
GM you saying about that weather makes me want it some of that... we have a fresh 2 feet of snow over the past few days. Just a week ago I was down at the boat thinking about taking the winter protection off and getting ready to bring her home.

Back when I was living in northern-eastern Pennsylvania, up in the mountainous coal mining region as a kid, I remember having snow in late May. But I was used to it as well and never gave it a second thought as that time. Long time since those younger days. I live in middle Georgia now and we don't get much snow. Occasionally we get some. but usually gone in a day or so. We did get 16 inches one year, but that is the exception rather then the norm.
 

gm280

Supreme Mariner
Joined
Jun 26, 2011
Messages
14,605
Okay I haven't worked on the boat for a while, but plans are going that way again. I finally got the registration numbers and now can clean off all the pollen off the hull and continue with the air brush painting again. Since the PPG Shop Line base coat is not chemically resistant to Gas, Lacquer Thinner, Acetone or any other type chemical, I can't wipe it down with Acetone and proceed again. It would simply dissolve the paint to do that. Base coat PPG paint is not a catalyzed paint. It gets its hard fuel resistance via the clear coats, which are catalyzed with a hardener.

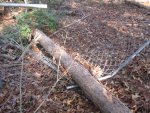
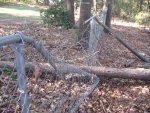
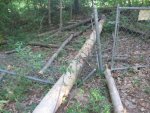
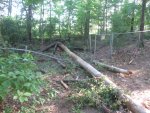
What I have been doing to fill in until weather and such was again acceptable again to continue on the boat, I had two huge trees fall across my backyard chain link fence from the golf course that backs up to my property. And these trees were very large but dead. The wind we had topped them down and crushed my fence to the ground. I had to cut them up in pieces and throw them back on the golf course side. They were merely pine and not some quality wood for the fireplace. Then I had to disassembly the fence. The top rails were bent like a pretzel. I sectioned the bend fence and took it into my shop. I could have bought new fence and top rails and replaced everything. But we didn't want new fence and old fence assembled and seeing the coloration difference. SOooooo I actually untangled every strand of fence and bend them back like the diamond pattern they originally were and restrung them back together again. Yea, it can be done. This afternoon I reassembly the fence back up with new top rail and it looks like nothing ever happened now. A job I certainly don't want to do again.

Hope to get the air brush work finished soon so I can post that.
 

archbuilder

Vice Admiral
Joined
Sep 12, 2009
Messages
5,697
Wow you are a lot more patient than me! Mine got took out (about 1,500') in 2013 by an EF-5........wasn't much saving that lol. Glad to you got your hull numbers. I'm thinking mild soap and fresh water would clean up the hull nicely. Unless you have hard water, they you might get spots. You could always do a final rinse with distilled water. I'm guessing you will give it a light color sanding to get the trash out before the clear anyway?
 

gm280

Supreme Mariner
Joined
Jun 26, 2011
Messages
14,605
Wow you are a lot more patient than me! Mine got took out (about 1,500') in 2013 by an EF-5........wasn't much saving that lol. Glad to you got your hull numbers. I'm thinking mild soap and fresh water would clean up the hull nicely. Unless you have hard water, they you might get spots. You could always do a final rinse with distilled water. I'm guessing you will give it a light color sanding to get the trash out before the clear anyway?

I was thinking basically the same thing. Never been presented with this situation before, I was thinking a nice easy wash and rinse and then airbrush the remaining paint and shoot clear coats. I only hope it works out. Usually you are supposed to shoot the clear coat in 24 hours of base coat. But that didn't happen this time around. So we will see.

As for the fence, yea, it was interesting to see how it would come apart. But once you see how it is assembled, it isn't as mysterious. Here is what I was working with. Broken Fence (8).JPG
Broken Fence (13).JPG
IMG_0178.JPG
IMG_0180.JPG

Yea they flattened the fence in two separate places, but It's all straightened out like new. But only after untangling every woven strand and bending them back straight (well to the diamond pattern) and reweaving them back together again. I would suggest you don't do this if you have anything else to do, like sorting your sock draw or counting the beans in a can of pork and beans or something important like that. :facepalm:

It can be done, but buying new fence would be a few days quicker even though the new fence would show up easily with the old. :eek:

This is the third time dead large old pine trees have fallen across our rear fence from the golf course. And the golf course owner will not even talk to me about it. But that IS a totally different story for another time. There is only one dead pine tree left standing now. But I get the gut feeling it won't be standing for long. I get that feeling it may fall from some unknown situation. It is merely about 8 inches in diameter so not a huge issue. These trees were easily 16 - 18 inches in diameter and heavy even though they were dead and rotten.

Better times head for sure. :smile:
 

gm280

Supreme Mariner
Joined
Jun 26, 2011
Messages
14,605
When I don't post any info on this project for a while, and forget the address to go straight to it, all I have to do is type in tom boy and it goes right to my thread. And that is because nobody else has a tom boy boat project presently on these forums. And why would anybody? :noidea: Makes it easy for me to get back here.

Storms once again today, but I did get some work done on the boat for a change. We are presently under another server storm watch with possible hail and tornadoes. But what else is new. Seem that is how a lot of weather change happens in middle Georgia this time of he year.

However, I did clean off the pollen on the hull sides and manage to get the first of the registration numbers airbrushed on. I was hoping to finish them up today, but with the new storms coming in, maybe not. Who knows.

I will post pictures when I have them done. That could be today or later this week. It depends on the weather. I am duplicating the registration numbers after the engine cowling HP numbers I previously did. Same colors and design. So maybe the boat will look matched to the engine.

Until next time, you all have a wonderful day and be safe. :thumb:
 

Pusher

Lieutenant
Joined
Sep 2, 2014
Messages
1,273
Keep up the good work GM!!! We're both on the home run stretch. You might have missed crappie season but there are many more fish in the lake šŸ˜
 

gm280

Supreme Mariner
Joined
Jun 26, 2011
Messages
14,605
Been a little while since I posted any updates.

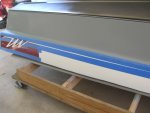
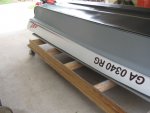
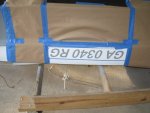
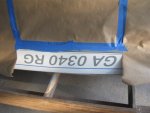
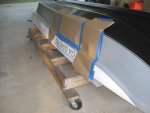
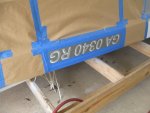
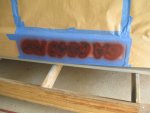
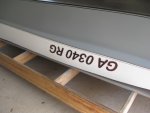
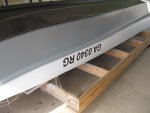
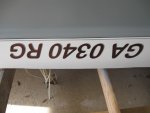
Well I got a lot of other things finished now and got back to the boat. I managed to get the registration numbers painted on the hull. I realize that doesn't sound like much accomplishment, but they are shadowed and misted with a black edge mist to match the HP rating numbers on the engine. I wanted to make them coordinate some and I finished airbrushing them this afternoon. Now I can work on the little graphics and then clear coat the entire thing. Better late then never.

IMG_0001.JPG
IMG_0002.JPG
IMG_0003.JPG
This gives a little idea how I went about painting them. Here is the shadow gray color. It has to go one first. Both sides are basically the same.
Registration Graphics (1).JPG
Here is the second color setup. It has to be a little offset to give it that shadowed effect.
Registration Graphics (5).JPG
And here is the second color and the black mist on the edges. Yea, doesn't look that good now.
Registration Graphics (7).JPG
But here is the finished numbers. You can't see the three colors or the shadowing effect so well, but the detail will show up really nice once the clear coats are applied.
Registration Graphics (8).JPG
And the other side.
Registration Graphics (9).JPG
And a little closer. You can see the shadowing detail better and the misted edges. But still doesn't look as good as it will after the clear coats. But now I have to do the little graphic details next before clear coating.

I will say, it was very interesting to get them aligned and in position upside down. It took a long time of measuring and adjusting to get to this part. And it looks like it is closer to the striped area then the top (actual bottom in this setup). But I accounted for the rub-rail as well and it should be near about centered once the rail is installed. It should also be level with the rub-rail and not the stripped area. We'll see.

Until next time, you all have a wonderful day.

Oh, and I air brushed the registration numbers on because unless this boat ever gets sold out of state, they stay with the hull.
 

sphelps

Supreme Mariner
Joined
Nov 16, 2011
Messages
11,468
That looks great gm !!! You certainly have some serious outstanding painting skills !!
 

gm280

Supreme Mariner
Joined
Jun 26, 2011
Messages
14,605
That looks great gm !!! You certainly have some serious outstanding painting skills !!

Thanks Sam, but it seriously isn't much skill as it is understand how thing have to be set up to get to that point. In about a minute or three, I could show anybody how they could duplicate it perfectly. Painting skill is all in the preparation and ability to tape off things cleverly. The actual painting is the easiest part.
 

gm280

Supreme Mariner
Joined
Jun 26, 2011
Messages
14,605
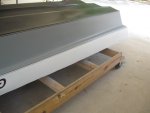
Okay I actually have some updates to the painting now. After a lot of taping and retaping and even some taping, I got it pretty much finished. It really isn't anything grand, but does offer something other then a plain white side. And that was all I was looking for.
Final Graphics (1).JPG
Started with this.
Final Graphics (3).JPG
Then laid out a stencil graphic I liked. And lots of masking tape.
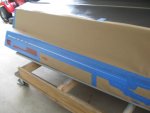
Final Graphics (5).JPG
And I added the different colors after each one was painted and taped over for the next.
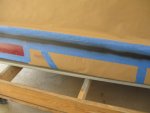
Final Graphics (7).JPG
And more colors added. I tried to stay with the four colors of the engine so the boat looked like it went with the engine.
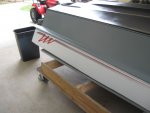
Untaped (2).JPG
And here is what it ended up like. Not much to see, but just enough to break up a plain old white side.
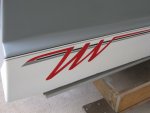
Untaped (3).JPG
A little closer shot. I still need to clean up everything in preparation for the clear coats, but it looks okay.
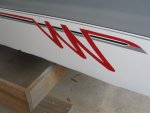
Untaped (4).JPG
Untaped (5).JPG
And this is the opposite side. If you look really close, you can see some areas that the white needs touched up yet. But that is easy and certainly not problem.

The real problem doing this is the hull sitting upside down. Everything has to be visualized right side up and then reversed. That IS a pain in the neck. I only hope when I flip the hull over it looks presentable yet. Who knows at this stage

Shooting three different colors makes for a ton of taping and thinking how everything will look at the finish. I like the red section to really set off from the white, gray, and black. I think I will clean the hull and go over it with some 2000 grit wet sanding and shoot the clear coats for final. Then flip it and start installing everything.

Again I tried to position this graphic so that once the rub rail is installed, it is basically center between that and the gray color.

Until next update, you all have a great day.
 
Top