1976 Tom Boy Boat, 1976 40 HP Johnson Outboard and who knows what Trailer

Woodonglass

Supreme Mariner
Joined
Dec 29, 2009
Messages
25,928
It's the constant abrasion from the water that I think necessitates the better adhesion properties. When I painted Truck Cabs LONG time ago, we prepped primer with 600 and I know that's pretty much the norm now too!!! Prolly won't hurt for a boat either. I just went to 320 and it seems to be working OK. Based on what I've seen of your other endeavors, I have NO doubt it will be a Masterpiece!!!
 

gm280

Supreme Mariner
Joined
Jun 26, 2011
Messages
14,605
It's the constant abrasion from the water that I think necessitates the better adhesion properties. When I painted Truck Cabs LONG time ago, we prepped primer with 600 and I know that's pretty much the norm now too!!! Prolly won't hurt for a boat either. I just went to 320 and it seems to be working OK. Based on what I've seen of your other endeavors, I have NO doubt it will be a Masterpiece!!!

Thanks WOG, but I do listen and heed every comment. Why? Because I learned a long time ago that everybody has an idea and if you listen to them, you will understand things clearer. I have painted other things and they have come out pretty nice. But this is new territory for me so we will see. But I do like all inputs.

Arch, Yes the razor blade is the way to go. I will post some interesting pictures later. Thanks for the suggestion.

Once you think you know it all, you are doomed for failure. - Me
 

gm280

Supreme Mariner
Joined
Jun 26, 2011
Messages
14,605
Here are examples of pin holes on this boat before and after I filed them using the lacquer spot putty and razor blade. These holes are pretty much on the front half of the boat. So whoever was doing the mold up that day didn't do something right, or merely didn't care. IDK.

Razor Blade Puttied (1).JPG

Yea, I know, not the best picture but the next one will show the holes a lot better. Razor Blade Puttied (2).JPG

Still a little hard to see because the auto-flash took over. But this gives an idea what I am dealing with. You can actually see the little holes after I used the spot putty and razor blade. Razor Blade Puttied (3).JPG

Some more. I can tell you, if you were to go to paint them, they certainly will show through without a doubt. That much I do know. Razor Blade Puttied (4).JPG

And still more. They are scattered all over the hull in the front. And this is after two good coats of high build primer. So obviously they are too big for primer to fill them with out other fill methods. Razor Blade Puttied (6).JPG

Looks like a serious rash, doesn't it. :eek: But the red spot putty does show them up very well. If I use 400 wet, they seem to fill and level. Razor Blade Puttied (7).JPG

And some larger ones that I should have caught when doing the regular fillers. So that is now my main goal. Then on to tape off and paint.

I don't think any body would ignore them and paint over them. But then again I honestly don't know either. Some folks wouldn't mind, and maybe I shouldn't either, but I do. OCD maybe? :noidea:
 

sphelps

Supreme Mariner
Joined
Nov 16, 2011
Messages
11,468
Yep I prolly would have filled them also ... Just because they are there ... Like the man climbing the mountain ...
 

archbuilder

Vice Admiral
Joined
Sep 12, 2009
Messages
5,697
I would get hives thinking about them if I didn't fill them. Especially when I put that expensive paint on her.......shiny......holes :eek: I' think I should shut up now.....nice work :D
 

gm280

Supreme Mariner
Joined
Jun 26, 2011
Messages
14,605
Yea Sam and Arch, I have to fill them. I was talking about these pin holes for quite a while and this is the first time I could post them where others can see what I am dealing with. The red lacquer spot putty brings them out easily against the gray primer coat. But using the razor blade to apply that spot putty seems to be the difference this time.

I read a lot about auto-body shop techniques recently, and how they deal with pin holes. I was actually working against myself when I filled them and then sanded everything back out again. I was getting nowhere. In fiberglass, when you sand out pinholes, you can easily open new ones up that were in the resin. So the more you fill and sand, the more problems can develop. So I think the secret, for this project anyways, is to fill and wet sand with 400 and stop. Don't use 180, 220 and such. It literally just sands the filler off and there they are again. And I think I was doing that over and over and over again. When you fill the pin holes, I don't think you ever get the holes totally filled all the way to the bottom. So any aggressive sanding just opens them open again. Just my warped thinking :noidea:
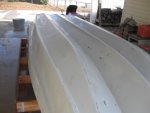
Obviously this boat was never a top quality built hull from the get go. But if I want any self satisfaction of refurbishing it, I have to at least try to make it nice. It is the way I think. :facepalm:
 

SOG3

Petty Officer 3rd Class
Joined
Aug 24, 2015
Messages
78
Hey GM,I've been following your project from day 1 ,and you're doing some awesome work on the Tomboy.Just saw another Tomboy on CL a couple days ago,and thought you might want to get a mate for yours ! Keep up the good work ! Tom
 

gm280

Supreme Mariner
Joined
Jun 26, 2011
Messages
14,605
Hey GM,I've been following your project from day 1 ,and you're doing some awesome work on the Tomboy.Just saw another Tomboy on CL a couple days ago,and thought you might want to get a mate for yours ! Keep up the good work ! Tom

Thanks SOG3, but I think this one will be the only Tom Boy I will refurbish. I do have ideas about a Bass Boat for the next project. But I have to get this one finished first. However, the lessons I've learned will certain make any other project go faster and better. The learning curve is amazing.
 

Patfromny

Lieutenant Junior Grade
Joined
Dec 2, 2012
Messages
1,197
I hear ya GM. I am on year 4 or 5 with mine. I am lucky in that mine is aluminium so I worked in such a way so that I reach a stopping point and can use the boat for the season and then resume the work the following winter. If mine was fiberglass I might be in the running with you for time before splash. I didn't have to worry about structure and pin holes thankfully.
One idea that just popped in my head for the pin holes is a technique I use when spackling the first coat over screw holes in new sheet rock. The spackle always seems to not fill the holes when I scrape it off. I have learned that if you apply the spackle one way (down) and then take off the excess in another direction (up) the hole gets filled completely. It seems to spread the spackle to both sides of the hole so that the spackle will stick evenly. I have done very little body work in my time so I really don't know if this will work and for all i know you are already using this technique but I figured I'd put it out there

EDIT: whoops, just saw that you rolled over into another page and seem to have the problem solved. At least I gave you a tip for your next spackling project. Lol
 
Last edited:

gm280

Supreme Mariner
Joined
Jun 26, 2011
Messages
14,605
I hear ya GM. I am on year 4 or 5 with mine. I am lucky in that mine is aluminium so I worked in such a way so that I reach a stopping point and can use the boat for the season and then resume the work the following winter. If mine was fiberglass I might be in the running with you for time before splash. I didn't have to worry about structure and pin holes thankfully.
One idea that just popped in my head for the pin holes is a technique I use when spackling the first coat over screw holes in new sheet rock. The spackle always seems to not fill the holes when I scrape it off. I have learned that if you apply the spackle one way (down) and then take off the excess in another direction (up) the hole gets filled completely. It seems to spread the spackle to both sides of the hole so that the spackle will stick evenly. I have done very little body work in my time so I really don't know if this will work and for all i know you are already using this technique but I figured I'd put it out there

Ha thanks for the suggestion. I have done a little of that if I see the hole isn't filling right. Some holes fill instantly with the razor blade. But then some seems to pull out the spot putty as you stated with the spackle. So I try going both ways to get them filed. But I will make an effort to try that for the next application. I am sure I've missed some pin holes somewhere.
 

Patfromny

Lieutenant Junior Grade
Joined
Dec 2, 2012
Messages
1,197
Sorry, I edited my post. Take a look up above. I didn't realize you had rolled over onto another page. Another thing I do with larger holes is to push down on the spackle above the hole before taking it off in the opposite direction or go over it several times. Up, down then left, right. That works pretty well in filling the hole. Good luck
 

gm280

Supreme Mariner
Joined
Jun 26, 2011
Messages
14,605
Sorry, I edited my post. Take a look up above. I didn't realize you had rolled over onto another page. Another thing I do with larger holes is to push down on the spackle above the hole before taking it off in the opposite direction or go over it several times. Up, down then left, right. That works pretty well in filling the hole. Good luck

That's okay, I do read every comment and listen to everybody's ideas. You just never know what someone will say to fix your problem. And even if their suggestion(s) doesn't solve your immediate problem, it could make you think of something else to try. So everybody needs to post their ideas and suggestions. That is what makes these forum so great. :thumb:
 

gm280

Supreme Mariner
Joined
Jun 26, 2011
Messages
14,605
Today looks like it is going to be a fairly warm day again. So I can wet sand the red spot putty out and see what needs repeated. The day I applied the spot putty was getting cooler by the hour. And once I had gone over the entire hull, it was too cold to use running water for the wet sanding. So I waited. And the following days the temps were not where I would be able to sand and still feel my hands. But today looks like it will be near 70 degrees. So sanding is scheduled. Hope it looks good after wards. :smile:
 

gm280

Supreme Mariner
Joined
Jun 26, 2011
Messages
14,605
I hae a big stupid smile on my face today. Why? Because I wet sanded the spot putty and for the most part, it came out way better then I was expecting. I still have a very few to rework, but not anything that would take much time now. I only wish I would have used the razor blade ans 400 wet sanding methods before. I could have had this finished by now. 400 wet sand (1).JPG

The hull as it presently looks after wet sanding the spot putty. Yea there are some sand throughs, but I can deal with those. 400 wet sand (2).JPG

But here is those same pin holes after filled and sanded. Yea they are highly visible but sanded smooth to the touch now. I couldn't get just the high build primer to do this. But part of that was probably my fault too. 400 wet sand (3).JPG

More of them filled. 400 wet sand (4).JPG

And some more. They are all over the hull on the 1/3 to 1/2 of the front area. But they are now filled and smooth. 400 wet sand (6).JPG

Hard to see them in a larger hull shoot. But they are there. 400 wet sand (7).JPG

I even had a few on the transom that are mow taken care of. At this point I am wondering if I should spray the entire hull again with another coat of primer, or do spot priming. We will see.

But with good weather and whatever I decide to do, It should get ready soon for paint. :cheer2:
 

sphelps

Supreme Mariner
Joined
Nov 16, 2011
Messages
11,468
Glad the weather was cooperating for ya gm ! I'm ready to see some paint !
 

Pusher

Lieutenant
Joined
Sep 2, 2014
Messages
1,273
Yeah, I'm excited to see this baby in color!!! Keep up the good work GM! I understand that not filling those final blemishes at this point would be silly, but I am impressed with your determination nonetheless 👏

What color are you planning on? And solid or two-tone?
 

gm280

Supreme Mariner
Joined
Jun 26, 2011
Messages
14,605
Yeah, I'm excited to see this baby in color!!! Keep up the good work GM! I understand that not filling those final blemishes at this point would be silly, but I am impressed with your determination nonetheless 👏

What color are you planning on? And solid or two-tone?

Thanks, Pusher. Actually I have a pretty mixed color scheme. It will be four colors with some airbrushed graphics as well. I will use black, gray, white and of course red. But also some graphics with possible other colors used. I have the idea in my head, but not on any printable media.

I realize that even with a solidly built hull and a lot of effort to try to make it nice, it still is a basic tri-hull stick-steering simplistic boat. So even once it is finished, it isn't going to be anything but that. But I am thinking the next boat project will be a head turner and not a simple little fishing boat.

So every effort I put into this is actually a learning curve for the next one. :eek:
 

gm280

Supreme Mariner
Joined
Jun 26, 2011
Messages
14,605
Well I did shoot some more primer today. It was a little breezy but the temps were pretty good, mid 70's. So I added some more reducer so I could use my touch up gun. It has a 1.0mm tip, not the perfect tip size for spraying primer, so I added about 10% reducer to the mix and turned down the fan and got closer to shoot only the sand through areas. It seemed to work pretty well. I'll give it a day to thoroughly cure and then do a light wet 400 sanding. Then I will evaluate what will be next. I hope no more sand throughs anymore. I realize that is wishing for too much, but I will try anyways.
 

gm280

Supreme Mariner
Joined
Jun 26, 2011
Messages
14,605
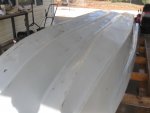
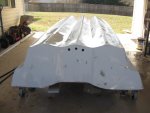
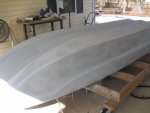
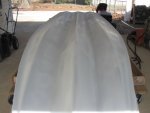
Well it has been a couple days since I re-primed the hull. But because of weather (lower temps and high wind) I haven't wet sanded anything yet. But I think this is the final for priming now...I hope. I am shooting for the next nice day to wet sand without my hands freezing. Well maybe not freezing, but cold enough that I can't feel them in the water. 1000 (1).JPG


Remember, I didn't shoot the entire hull this time. Only the sand through areas. So you can see subtle differences in shades of primer because of that. 1000 (2).JPG


I did seem to attract some insects, but I don't think any of them were attached to the primer. I know I didn't cover over any of them.


With the weather fluctuating lately, one day you can't work in the sun because of the heat, the next time you can't wait for the sun to hit the area you want to work for the heat. It has been that wishy washy lately.


And finally the transom. I do think it will wet sand with 400 pretty good if I can control the sanding without cutting through. We will see.
I have to do just a very light touch with the wet 400 grit paper this time around.
 
Last edited:
Top