1976 22' SUS O/B "Hydration Break"

SHSU

Lieutenant Junior+Starmada Splash Of The Year 2019
Joined
Mar 8, 2017
Messages
1,744
+1 for HB Engine Hoist

Cheap and effective

SHSU
 

DWbaseball

Petty Officer 2nd Class
Joined
Aug 25, 2020
Messages
127
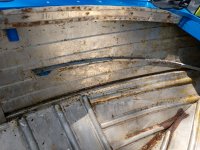
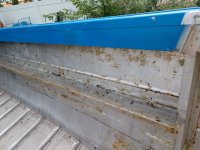
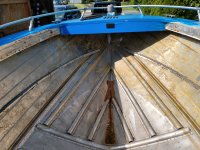
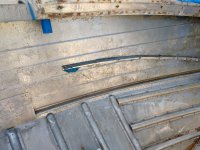
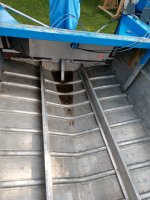
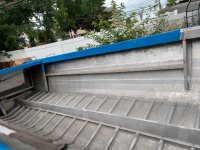
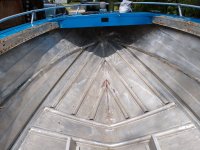
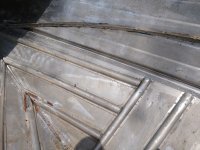
Thanks for the encouragement everyone! Got some work in on Friday with the stripper and a power wash. That damn adhesive is hard to get off I used a quart of stripper on port side and still don't have it all gone. IMG_20210709_152232934.jpgIMG_20210709_152227673.jpgIMG_20210709_170114300_HDR.jpg

After
IMG_20210709_170100523.jpg
IMG_20210709_170256219_HDR.jpg

Sediment from the power wash got shop vacced out. Found a few small steel nuts along the way and got them out of the boat which makes this a successful exercise.
Also spent some time on the ribs opening up the drain channels with a screwdriver and fulcrum, might have been where the nuts were hiding.
IMG_20210709_175338120_HDR.jpg
 

Mikesta

Petty Officer 3rd Class
Joined
Mar 15, 2018
Messages
86
Man do I wish that my hull was in that good of condition. It's funny that you mention the steel nuts may be coming from inside the ribs because I've been removing all of mine to check for corrosion underneath and the amount of steel hardware that has been under them is unbelievable. Looking forward to following along with the rest of this build
 

jdvasher

Petty Officer 1st Class
Joined
Jul 10, 2019
Messages
371
I've got the same hoist. It's just enough to clear the transom when removing and reinstalling my 140. I've done it several times now unfortunately lol. Those lifts also work really well for pulling stubborn fence post.
 

SHSU

Lieutenant Junior+Starmada Splash Of The Year 2019
Joined
Mar 8, 2017
Messages
1,744
Thanks for the encouragement everyone! Got some work in on Friday with the stripper and a power wash. That damn adhesive is hard to get off I used a quart of stripper on port side and still don't have it all gone.
Are you going to paint or cover the sides with carpet/vinyl?

If your set on removing it, best bet is to use a wire brush on an angle grinder.

SHSU
 

DWbaseball

Petty Officer 2nd Class
Joined
Aug 25, 2020
Messages
127
Yupp I forgot to mention I did hit it pretty good with the Nyalox cup brush. I was planning on spray painting these areas but now I am thinking it might not be worth the effort to do all that strip and prep. Might just hit some of the places I want to gluvit real good with the second quart I have and call it a day. Then I can go marine carpet over the old glue for these spots which might be best for comfort anyways.
 

BWR1953

Admiral
Joined
Jan 23, 2009
Messages
6,201
I used roll-on porch paint on the sides of my Kingfisher hull (deck too) and it has held up well. Easy to apply and durable. Touch-ups are easy as well. Sand/scuff a little, then repaint.
 

SHSU

Lieutenant Junior+Starmada Splash Of The Year 2019
Joined
Mar 8, 2017
Messages
1,744
Don't get me wrong, the Nyalox cup brushes are great, but this job requires something a little more aggressive. A wire cup brush on an angle grinder is on another level. You just have to keep in mind its steel so you have to do a thorough clean out after use.

Other option is to still paint over it, just add texture in different areas. Maybe even do the "splattered" fish blood look if your into that. Seems common down here on the Gulf Coast.

SHSU
 

DWbaseball

Petty Officer 2nd Class
Joined
Aug 25, 2020
Messages
127
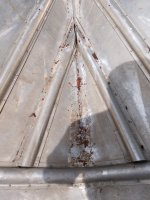
Not alot of hull progress but we are making moves to keep the Hydration Break boat build moving forward. One workday this week in about 100* heat index. Spent time picking at the red bow slime with a screwdriver and needles nose pliers but forgot to take a pic. Got a bunch of it out and I am going to hit that area hard when I psych myself up to open the next quart of stripper. They let it block up the water flow under the front rib and I want to get that opened up.
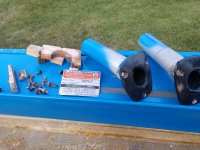
Also got the sawzall out to cut out the rusted hardware on these rod holders. Going to keep my capacity plate safe for now so I drilled that out.IMG_20210715_194009259.jpg


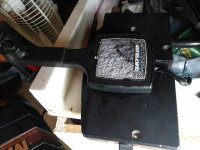
Went on another road trip today and scored a nice haul with two FB marketplace stops with all great deal$. First I picked up a like new Fariah Mercury Tach with the wiring harness and 5 plug all done up. This guy had a nice tin Grumman center console 16 in the driveway.

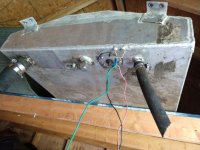
Next I headed south to MD to a guy who was selling a gas tank that's going to fit great under my floor. He thinks it's about 20-25 gallons and it had all the pickups in the back which will allow me to hook it up easily back by the splashwell. IMG_20210718_161429598.jpg
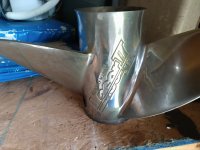
I then realized same guy had some other boat stuff for sale. So I scored a nice SS prop for my Mercury Black Max which he had posted. Then when I got there I talked him into selling me his set of Merc controls. This guy had a few graveyard boats that he is scrapping parts from but his running boat was a '62 StarCraft 16ft that he had customized a nice center console. Not sure what model it was maybe a Falcon or Jetstar? It was a curved closed bow runabout type that had the tiny hatch in the bow and the rear gunnel sloped down a bit. So I was 2for2 meeting Aluminum boat guys which feels like good karma.
IMG_20210718_161435271.jpg
IMG_20210718_161444663.jpg

So now I feel set up for my repower with the motor, prop, controls, tach. I think the only thing I might be missing is the nut to screw the prop on need to get on YouTube probably to learn how to do that. Also going to want to make sure that I wire the battery in properly need to double check how to do that right.

Lastly part of the reason for the name Hydration Break is that I am a big soccer fan. I was at the Philly Union match last night and by chance got to hoist the teams first ever trophy during a rain delay. 2020 MLS Supports Shield IMG_20210717_214136617.jpg
Take care everyone.
 

SHSU

Lieutenant Junior+Starmada Splash Of The Year 2019
Joined
Mar 8, 2017
Messages
1,744
A lot of great scores there sir!!

The steel does need to go, and good to pull it now and replace with the proper hardware.

SHSU
 

DWbaseball

Petty Officer 2nd Class
Joined
Aug 25, 2020
Messages
127
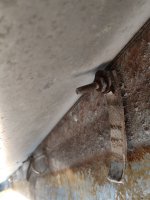
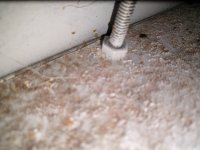
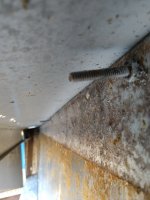
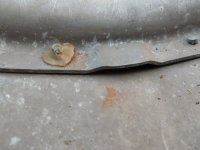
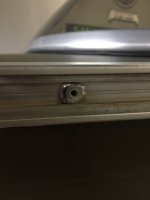
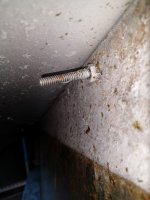
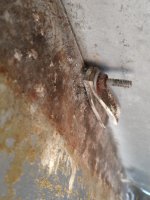
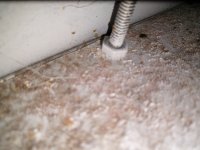
Ok I am looking for advice from the experienced StarCraft gurus on here. I was looking under the gunnels today, and I saw these bolts that seem odd to me. I am wondering if these were factory stock and are ok to leave in the aluminum boat? I am worried that they were added during the the previous rebuild and are Steel based. I see the riveting too in the same areas and would only expect to see rivers so it's a red flag. These are bolted in from the outside and the head of the bolt is behind the rub rail in the channel. I wasn't planning on removing my rubber rub rail but might need to do so now to get these out. Let me know your thoughts. ThanksIMG_20210726_184243384.jpg
IMG_20210726_182559675.jpgIMG_20210726_182734789.jpgIMG_20210726_182801148.jpgIMG_20210726_184230987.jpg
IMG_20210726_182559675.jpg
 

DWbaseball

Petty Officer 2nd Class
Joined
Aug 25, 2020
Messages
127
For good news I got some more stripping done over the weekend. I am having the internal battle of how well I need to strip this stuff since it is getting re-carpeted for the most part anyway. And I am thinking I will probably carpet the storage tray area behind the side panels too. I am going to do at least one more round of stripping before Coat-it.IMG_20210724_142108708.jpgIMG_20210724_142120372.jpg

Still picking at the red stuff. Hit it hard with stripper.IMG_20210724_143347525.jpg

Found one pop rivet in the keel on the second rib to the front.IMG_20210726_183017812.jpg

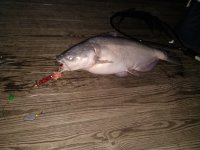
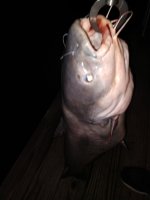
Also caught a nice catfish last week at a night on the Chester River. I recommend Whisker Seeker tackle for my fishing rigs and once I am boating I plan to focus on catching the biggest catfish in the PA-DE-MD area haha. Best Wishes everyone.IMG_20210720_005256789.jpg
 

Attachments

  • IMG_20210720_011422659.jpg
    IMG_20210720_011422659.jpg
    668.1 KB · Views: 1

Moserkr

Chief Officer + Starmada Splash Of The Year 2021
Joined
Nov 23, 2020
Messages
869
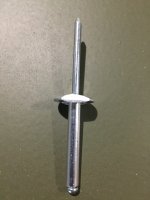
Long bolts are factory (SS i believe) and hold the rub rail on. Under the rub rail trim and inner trim should be aluminum pop rivets with a steel center - it holds the gunnel panels on. Not a bad item to replace either. I replaced all mine as well as most the solids on the gunnel too due to corrosion. Also added more blinds and solids to stiffen her up a bit.
 

MNhunter1

Lieutenant Junior Grade
Joined
May 12, 2014
Messages
1,059
Yeah, those long bolts can be a pit of a pain to remove and replace due to their length, potential corrosion, and just general access. I replaced mine with some long, large flange aluminum blinds after seeing it done first by Watermann. You need to grind down the heads a bit to get them to fit the rub rail channel, but sure made replacement a whole lot easier.

145.jpgIMG_4704.JPG
 

Watermann

Starmada Splash of the Year 2014
Joined
Jan 12, 2013
Messages
13,798
Oh man that red stuff is the factory seam sealer we affectionately call SC Smeg. It's normally just left unmolested and if needed covered over with gluvit or coat it
 

The John

Petty Officer 2nd Class
Joined
Nov 16, 2009
Messages
123
Ok I am looking for advice from the experienced StarCraft gurus on here. I was looking under the gunnels today, and I saw these bolts that seem odd to me. I am wondering if these were factory stock and are ok to leave in the aluminum boat? I am worried that they were added during the the previous rebuild and are Steel based. I see the riveting too in the same areas and would only expect to see rivers so it's a red flag. These are bolted in from the outside and the head of the bolt is behind the rub rail in the channel. I wasn't planning on removing my rubber rub rail but might need to do so now to get these out. Let me know your thoughts. ThanksView attachment 346379
View attachment 346380View attachment 346381View attachment 346382View attachment 346383
View attachment 346384
I have those on my mariner, looks like someone replaced the SS nut with a steel nut. as others have said, they are a pain to get to. Me personally I would replace the nuts if possible (I don't think they will do much damage as long as they aren't touching the hull).
 

FIGMO

Petty Officer 1st Class
Joined
Jun 18, 2017
Messages
321
Hey DW,

Looks like I am late to the party on this post, welcome to the team!

That is a great looking boat. She will look excellent when you are done.
You're making great progress for a couple of months of work under your belt. The stripping of the old paint and contact cement is the worst part of the job. Once that is done life gets better.
 

DWbaseball

Petty Officer 2nd Class
Joined
Aug 25, 2020
Messages
127
Thanks for all the tips everyone! With those bolts I pointed out being factory I will leave them as I do not plan to tear down the gunnels and rub rail for my build as they are pretty solid. I will need some Al patching on the gunnels where they meet the front sideboard supports, but that will be a different post.

Wish things were going faster here not much progress on the hull except for a few odds and ends. Little bits will add up though. Still need to get the old motor pulled so I can finish the transom teardown which I want to do before the final rounds of stripping and coat it.

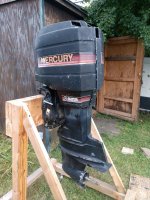
Prep for that involved wrestling my new to me Merc 150 onto this oversized stand that I picked up. I had to ratchet strap the stand up to the mounting plate once I had the motor hanging, and it didn't want to go easy. Also should not have tried to freehand the hole drilling in the stand it wasn't quite straight which made for another adventure. IMG_20210816_183251845.jpg
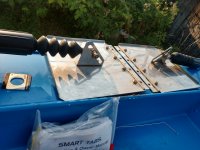
Picked up these trim tabs real real cheap and close by from fb again. Might spring for new actuators before they get installed but def couldn't pass up at the price.IMG_20210727_184314013_HDR.jpg
Now that I just decided to go ahead working the cherry picker by myself (intially was going wait and work it with a friend) hopefully I can get moving on this transom. Not alot or no good work days ahead with a busy weekend and vacation here in August though. So next update might be September.
 
Top