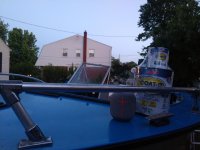
1976 22' SUS O/B "Hydration Break"

SHSU

Lieutenant Junior+Starmada Splash Of The Year 2019
Joined
Mar 8, 2017
Messages
1,720
Funny you would say that because I'm always looking for another one 🤔
I might have a problem
lol, I am too. I just don't have the space for the next one I want...

SHSU
 

DWbaseball

Petty Officer 2nd Class
Joined
Aug 25, 2020
Messages
123
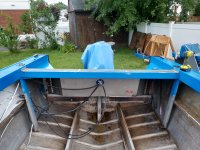
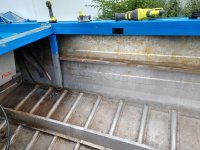
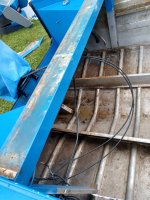
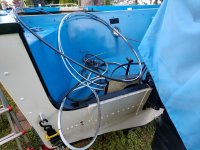
Progress today. Steering pulled off. Not sure if any of the existing is going to go back on, thinking probably all new steering column and NFB cable.IMG_20210615_200915293.jpgIMG_20210615_200929560.jpgIMG_20210615_200939080.jpg
 

SHSU

Lieutenant Junior+Starmada Splash Of The Year 2019
Joined
Mar 8, 2017
Messages
1,720
Steering was the only thing I thought twice about on reusing. The control cables were cheap enough that it didn't make sense to try and reuse. That being said, in the end I went with all new steering and control cables.

SHSU
 

BWR1953

Admiral
Joined
Jan 23, 2009
Messages
6,173
Steering was the only thing I thought twice about on reusing. The control cables were cheap enough that it didn't make sense to try and reuse. That being said, in the end I went with all new steering and control cables.

SHSU
Same here.
 

DWbaseball

Petty Officer 2nd Class
Joined
Aug 25, 2020
Messages
123
Was reading threads last night, and I think I saw Waterman say that he used only Helmsman Spar on the transom and floors? Will that truly seal the wood?

I was planning on getting some of the Raka epoxy resin for that job, but I think that going Spar-only would be easier and would be some cost savings for me.

Not quite ready to be buying my plywood sheets yet but I know the prices are way high.

Thoughts?

Thanks as always
-DW
 

Watermann

Starmada Splash of the Year 2014
Joined
Jan 12, 2013
Messages
13,785
Was reading threads last night, and I think I saw Waterman say that he used only Helmsman Spar on the transom and floors? Will that truly seal the wood?

I was planning on getting some of the Raka epoxy resin for that job, but I think that going Spar-only would be easier and would be some cost savings for me.

Not quite ready to be buying my plywood sheets yet but I know the prices are way high.

Thoughts?

Thanks as always
-DW
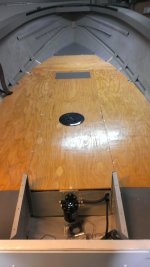
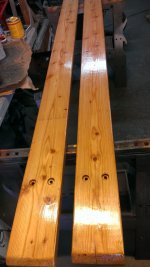
Yes I have used just the Helmsman spar alone, 3 coats is almost overkill and I've used it on my trailer bunks. I also put it on some plywood I used to put under the Chief's trailer jack so the wheel wouldn't sink in the yard over winter. The spar held up just fine under snow and rain against the wet lawn for 8 months. Not to say I would treat my boats interior like that but it does hold up well.

IMAG2199.jpg

IMAG2562 (1).jpg
 

DWbaseball

Petty Officer 2nd Class
Joined
Aug 25, 2020
Messages
123
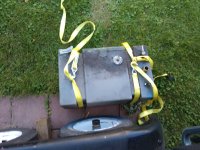
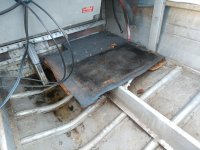
Oh yeah we got back to back tear down updates coming your way. Sending Thanks to my neighbor who has a 13 bass boat with a 40 in his garage who donated two unused 5 gal fuel cans which unused to siphon out out my full gas tank. That allowed me to remove the fuel tank and vacuum out the rest of the floor. IMG_20210616_194002714.jpgIMG_20210616_194516044.jpg
Even the top piece was pretty rotten. the original deck underneath was mulch
IMG_20210616_194520350.jpg

Found this little Gem wedged in thereIMG_20210616_202706188.jpg

Coat it arrived.IMG_20210616_204826003.jpg
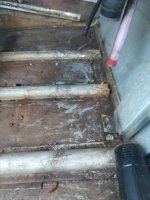
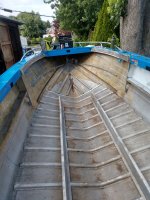
Should have gotten a better pic of the rear of the boat after I vacuumed up. All floor and foam is now out of the boat, so that's a milestone. Gonna have to do some non-boat stuff before father's day in the next few days but I have my eye on some projects.
 

SHSU

Lieutenant Junior+Starmada Splash Of The Year 2019
Joined
Mar 8, 2017
Messages
1,720
I am guessing you are pulling the transom. Looks like it has some water damage from the little I can see in the pic.

SHSU
 

DWbaseball

Petty Officer 2nd Class
Joined
Aug 25, 2020
Messages
123
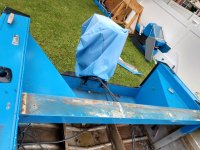
Of course a new Transom is the #1 item on the Do - Right list. I am thinking my plan is to close up the sides with wider wings and a regular outboard shaped cutout. I will probably 5200 butter and rivet on a new sheet of Aluminum to fit the new shape, and give me a clean slate for drilling holes. I think I also would raise the mounting height a few inches so it fits a 25 shaft. Lastly i would like to raise the drain tubes up out of the water a few inches, but that would also mean a modify of the splash well.
 

SHSU

Lieutenant Junior+Starmada Splash Of The Year 2019
Joined
Mar 8, 2017
Messages
1,720
I did the same on our SS16 with extending the wings on the transom. Didn't like how open it was. It was a waste of space in my opinion, but how we use the boat would not be considered its intended purpose.

Any particular reason you are going with a 25" inch shaft?

SHSU
 

DWbaseball

Petty Officer 2nd Class
Joined
Aug 25, 2020
Messages
123
Trying to keep getting little bits of work done at a time in the boat, and if I keep it up than eventually it will be done. Been drilling out old rivets on the ribs and keep cutting stuff off. There is definitely a bit of rusting steel hardware in the boat that I am happy to be rid of. Heres some various pics since the last update.

Pic of the stern cleared out
IMG_20210621_190029714_HDR.jpg
IMG_20210621_190055660_HDR.jpgIMG_20210621_190235271_HDR.jpg

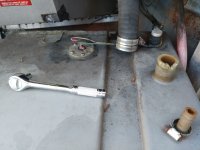
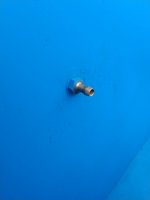
Is this gas fitting in the splashwell a metal corrosion issue? Looks brassIMG_20210624_201747075.jpg

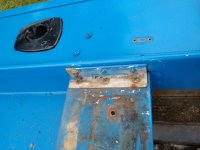
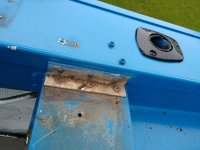
Cut a pad off this splashwell top and it had some rusty hardware
IMG_20210621_190246720_HDR.jpg

Are these splashwell corners original?

I was planning on keeping these rod holders but they have rusty hardware and rotten mdf wood backers so they are coming out too

IMG_20210621_190855436.jpgIMG_20210621_190900098.jpg


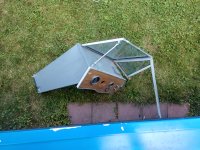
I worked for a few hours today and clipped a bunch of the aux and gauge wiring in the driver's console. Eventually got the console out although it wasn't easy. Left behind a riveted angle piece and the side part of the window came slid apart


IMG_20210626_162936044_HDR.jpgIMG_20210626_162950795_HDR.jpg
IMG_20210626_165128637_HDR.jpg


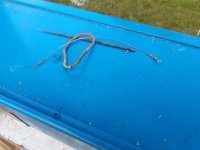
Heres some oddities I found in the nooks and crannies. I found some type of barrel swivel fishing rig, so I know I have a seasoned fishing boat on my hands. Also found a hair tie, which means the boat isn't a virgin with the Ladies. Like I said, positive progress going on here. IMG_20210626_162959095.jpg

Can't wait to get Hydration Break back on the water. Got a name decal waiting that was a gift from the Bosun (wife).
.
 

Attachments

  • IMG_20210621_190333428_HDR.jpg
    IMG_20210621_190333428_HDR.jpg
    1.5 MB · Views: 6

SHSU

Lieutenant Junior+Starmada Splash Of The Year 2019
Joined
Mar 8, 2017
Messages
1,720
If you got brass in the boat you need to get it out. It will eat the aluminum around it over time. That being said, I don't know if that fitting is brass since there doesn't seem to be any reaction, but better safe then sorry.

SHSU
 

DWbaseball

Petty Officer 2nd Class
Joined
Aug 25, 2020
Messages
123
Went and picked up new power today. Black Max 150. The guy had some work done on it and was running it, but got a buddy deal on a repower. So I get the Black Max which will need a prop and controls since he reused his. Fingers Crossed that it will be reliable for me.

IMG_20210627_184459984.jpgIMG_20210627_184523126.jpg
 

Watermann

Starmada Splash of the Year 2014
Joined
Jan 12, 2013
Messages
13,785
My SS had the same brass fitting through the SW, I painted the SW and used a plastic washer on each side to isolate it. So using like that will be fine. Mine had no corrosion since 1979.

Man I really do like how those chine braces are done in your 22'r!

Those Merc Max's are great motors and the sweet Merc God decal of the era too. :D Looks like the oiler has been done away with too, probably a good thing for those V6's. The main concern after the oiler are the wiring harnesses being rotten and people splicing in stuff to repair it. Heavily scrutinize all the wiring and connections, especially to the stator. I would also consider doing away with the rectifier and go to a voltage regulator as well.
 

DWbaseball

Petty Officer 2nd Class
Joined
Aug 25, 2020
Messages
123
Thanks Waterman, I appreciate you following along with my project! I trust the knowledge that you have and I wouldn't be doing this project if not for this forum....

I was also thinking to take out and reinstall the fitting with plastic washers. It actually looks like there are already some washers in mine that might already be keeping the metals separate.

And yes, my Chine Braces were the best surprise from the tear down. It seems like everything pre-76 doesn't have bracing, and after 1976 all the big boats have them, but of the style where there is one on each rib end. So, I am thinking mine is one of the first boats to have gotten them from the factory. I bet they realized they could save on materials by doing the individual braces rather than a full length bracing like mine is. Also, the negative I see on mine is that I have no access to that seam and row of rivets behind the bracing when I am doing the Coat-It treatment. And, I hope that there's no
steel rusty hardware that bounced in that gap over the years and is forever stuck in that channel void.

On the Black Max, yes it already had the oil injection removed in favor of premixing fuel. Honestly, that is more desirable for me anyway from a piece of mind standpoint. It is a 25 shaft, so I am now committed to raising the transom height. I like the idea of getting the power head up higher from the waterline, and it will be better in any kind of rough seas. I plan to have this in the Delaware River and Bay primarily, and also the Chesapeake, so there is definitely some chance of choppy days ahead.
 

DWbaseball

Petty Officer 2nd Class
Joined
Aug 25, 2020
Messages
123
Heat Wave in the 90s here in PA but still getting a little done at a time. Been drilling out all the snaps and assorted things on the gunnels. I want to make sure I get all the steel out of this boat, and some of this is definitely a culprit. I am wondering if this white I am seeing is the aluminum corrosion or could have been an adhesive? Thoughts?

Also, I think i have read to grey marine Tex these holes in the gunnels but are some/ most of these too big at 3/16 and bigger? Any trick for doing this?

 

Attachments

  • IMG_20210630_181924861_HDR.jpg
    IMG_20210630_181924861_HDR.jpg
    1.5 MB · Views: 11
  • IMG_20210630_181934699_HDR.jpg
    IMG_20210630_181934699_HDR.jpg
    1.3 MB · Views: 13
  • IMG_20210630_183600171.jpg
    IMG_20210630_183600171.jpg
    1.4 MB · Views: 13
  • IMG_20210630_183610124.jpg
    IMG_20210630_183610124.jpg
    3.5 MB · Views: 13
  • IMG_20210630_181949957_HDR.jpg
    IMG_20210630_181949957_HDR.jpg
    1.2 MB · Views: 11

SHSU

Lieutenant Junior+Starmada Splash Of The Year 2019
Joined
Mar 8, 2017
Messages
1,720
I am wondering if this white I am seeing is the aluminum corrosion or could have been an adhesive? Thoughts?
If I am looking at the right picture, looks like some type of old adhesive. If its corrosion should be powdery and not lumpy.

Also, I think i have read to grey marine Tex these holes in the gunnels but are some/ most of these too big at 3/16 and bigger? Any trick for doing this?
JB Water Weld has been a favorite of many for this type of application. As for the bigger holes, you can use a patch. Or if you are looking for a "prettier" look you can try gluing a patch under the spot for support and then cover with JB WW to sand smooth/level. Not the recommended way, but something that can be tried if you really want to.

SHSU
 

DWbaseball

Petty Officer 2nd Class
Joined
Aug 25, 2020
Messages
123
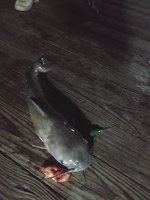
Celebrated the 4th with a night of fishing so not too much boat work done but I am still keeping up with little bits of progress. Only caught one catfish which was disappointing. My philosophy is big hook and a big bait will catch me the big fish I want, though I might miss some smaller bites. Hope everyone was able to enjoy the holiday.IMG_20210704_202237730_HDR.jpgIMG_20210705_011137060.jpg

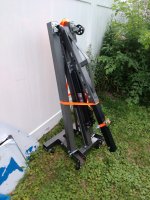
Picked up this "used once" harbor freight cherry picker from FB marketplace. Thinking I might mount the Merc 150 that I want to use on the stand I have, in prep for doing some cleanup on it and also I think I want to have it run on the stand before I mount it on the boat.

Then I can drop the 120 Chrysler on the hand cart that the Merc is on now. Haven't decided to try and sell or to keep the Chrysler and try to get it running again some day after the boat project is done.

IMG_20210708_194010603.jpg

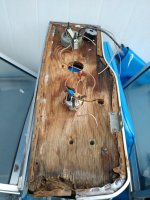
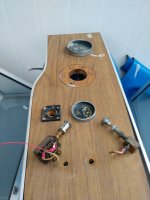
Also thought I would show off my console rot. Have a new 6 switch panel on the way and I want to make sure I put a tach on the new console. Planning to reuse the original Starcraft gas gauge which worked. Probably not going to reinstall the manual speedo because I wont splash without a gps fishfinder setup. I figure that once I get to the plywood stage I can start to plan out the consoles as a side job. IMG_20210708_194052276.jpg
IMG_20210708_194026184.jpg

Trying to get some work done over the weekend either with the cherry picker or doing hull glue stripping, power washing, and I want to spend time bending up the drainage channels at the center of each rib. All my work is being done outside and parked under a maple tree so I am going to have to start breaking out the cover again once I get the hull cleaned up.

Appreciate any tips you guys have for me at this stage. iboats has given me a vision for this boat and I plan to work my ass off until I have it on the water. Thanks.
 

BWR1953

Admiral
Joined
Jan 23, 2009
Messages
6,173
Nice chub! :cool:

I have one of those HF shop cranes and it worked very well moving motors around and getting the 50HP Merc mounted on the Kingfisher. (y)

As for the plywood, yeahhh... we've all BTDT. On my KF, I replaced the rotted plywood console with 1/4" aluminum. :sneaky:

Keep after it, you're doing great! :)
 
Top