1973 Starcraft SuperSport 16ft. restoration questions

piperjoe

Chief Petty Officer
Joined
Jul 11, 2013
Messages
563
Hope all of you Fathers had a great Fathers Day...I sure did!

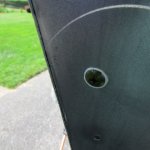
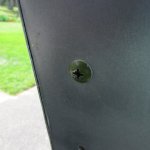
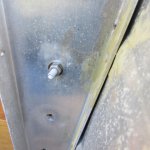
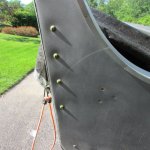
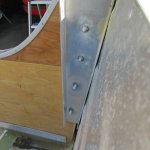
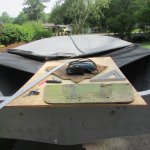
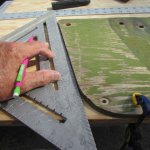
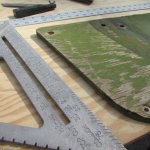
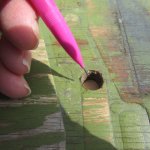
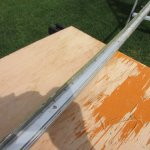
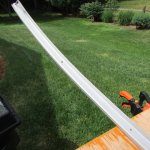
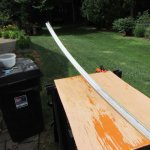
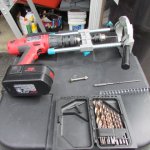
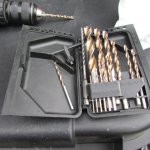
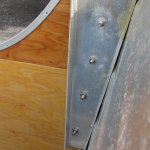
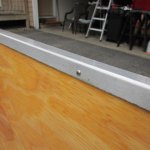
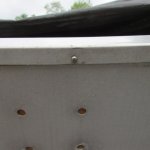
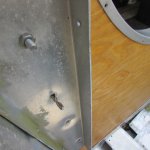
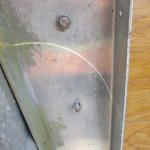
Decided not to strip paint today because I just didn't want the mess (and I was feeling a bit lazy). So this afternoon I thought I would give the new drill guide a tryout on those transom bolt holes that run vertically on the port and starboard sides of the aft aluminum transom sheet. Truth be told...I'm not really sure if I like the drill guide or not. Of the four drilled holes, two drilled out "wonky" using the drill guide and two drilled out nicely using a different drill bit and eyeballing the procedure. The drill chuck on the drill guide wobbles in place and allows for considerable run out at the tip of the drill bit. You can see the aluminum hole rip out in one of the photos with this post. I'll need to use the 3M 5200 in the bolt holes and perhaps some stainless washers between the transom plate and bolt nuts to seal the bolt hole exit point. Instead of continuing with the drill guide for the other two bolt locations I switched to my workshop set of Bullit drill bits by Black and Decker; these are great drill bits and very sharp. I did not use the drill guide, instead, eyeballed the drill bit entry from both sides of the wood transom using a small pilot hole sized drill (3/32" dia.) and then used a 1/4" diameter drill to drill out the final bolt hole through the wood transom. Worked out very nicely and the bolt actually threads easily through the bolt holes. Some 3M 5200 will work great to waterproof the bolt hole locations. Will see how it goes with the starboard side transom bolt holes tomorrow. Also, I found the 16 transom cap nails and they were in nice condition. Nailed four in place to hold the aluminum transom cap to the new wood transom. They must be stainless because they went into the oak transom without bending. So, after I get the starboard transom bolt holes drilled out and ready I'll wipe some 3M 5200 on the inside of the bolt holes with one of those small diameter wooden bamboo skewers, place some under the bolt head flange and where the bolt threads exit the drilled holes, place the washer (if used) and nut on the bolt and tighten them down and into place.

Safe boating,
Joe
 

Attachments

  • 001.JPG
    001.JPG
    105.6 KB · Views: 8
  • 003.JPG
    003.JPG
    104.4 KB · Views: 8
  • 002.JPG
    002.JPG
    73.4 KB · Views: 10
  • 007.JPG
    007.JPG
    81.8 KB · Views: 9
  • 008.JPG
    008.JPG
    81.7 KB · Views: 9
  • 009.JPG
    009.JPG
    84.8 KB · Views: 9
  • 010.JPG
    010.JPG
    75.6 KB · Views: 9
  • 011.JPG
    011.JPG
    60.6 KB · Views: 8

piperjoe

Chief Petty Officer
Joined
Jul 11, 2013
Messages
563
Edit: in the above post "They must be stainless because they went into the oak transom without bending."

This should have read: "They must be stainless because they went into the wood transom without bending." Just noticed my typo while reading the post...took a few hits with the hammer to set the nails into the wood and I guess I was thinking the new plywood transom was "hard as Oak", or so it seemed. 😊 And I now return you to your regular program...

Safe boating,
Joe
 

piperjoe

Chief Petty Officer
Joined
Jul 11, 2013
Messages
563
Today I took the drill guide back to the store where I had purchased it and returned it. It says a lot that two other packages of the same drill guide, that were hanging on the store wall rack, had been previously opened and may also have been returned. The two 1/4" diameter bolt holes I drilled with the guide were off the mark and into the surrounding aluminum; the six 1/4" diameter holes that I drilled through the wood transom sans the drill guide came out right on the mark without tear out of the aluminum. While I was at it, and after giving it some thought, I decided the Milwaukee 12M rivet gun and battery pack that I had previously bought was way too much money to spend for the task of putting the rivets back into the boat. Most likely at my age the tool wouldn't get a whole lot of use after the boat gets restored. I'll keep looking for a pneumatic rivet gun and use the Porter Cable compressor that I already have.

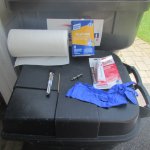
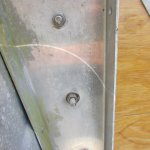
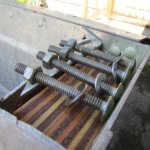
After returning home I decided to put the eight 1/4" diameter transom bolts, four each installed vertically, on the port and starboard transom sides. I picked up some stainless steel washers for the 1/4" transom bolts while in town...two because I needed them and six extra to make the transom installation look nice. Took the plunge and used the 3M 5200 for the first time today and, working carefully, the job turned out fine. Using a small wood bamboo skewer, I placed some of the 3M 5200 along the skewer and inserted the skewer through the bolt hole. I rotated the 3M 5200 covered skewer inside the bolt hole to apply the caulk/adhesive to the inside wood surface. Then, using an acid brush, I applied the 3M 5200 to the 1/4" diameter bolt being sure to get it under the bolt head and into the threads. Didn't take a lot to cover the bolt. Put the bolt through the hole (it actually threaded through the wood) and when the bolt came out on the inside of the hull I slipped the washer and nut onto the bolt and tightened it all down using a screwdriver to hold the bolt head steady and a ratchet wrench on the nut. Wiped off the excess 3M 5200 from around the bolt head with Acetone and it left a nice 3M 5200 surround between the bolt head and the aluminum transom sheet. Worked out nicely on all eight bolts. One little tip I learned: I had gotten a small amount of the 3M 5200 on the camera body and hadn't noticed it until I started to clean my tools. I didn't want to use Acetone on the camera body so I went downstairs to my model workshop and got the liquid Goo Gone. It removed the 3M 5200 in short order and didn't damage the camera body. Then I used some of the Goo Gone to clean the tools that were used and it worked like a charm.

Safe boating,
Joe
 

Attachments

  • 001.JPG
    001.JPG
    85.6 KB · Views: 10
  • 002.JPG
    002.JPG
    82.6 KB · Views: 9
  • 003.JPG
    003.JPG
    85.7 KB · Views: 9
  • 004.JPG
    004.JPG
    86.1 KB · Views: 9
  • 007.JPG
    007.JPG
    95.8 KB · Views: 10
  • 008.JPG
    008.JPG
    86.9 KB · Views: 10
  • 009.JPG
    009.JPG
    79.9 KB · Views: 10
  • 010.JPG
    010.JPG
    75.5 KB · Views: 10
  • 011.JPG
    011.JPG
    66.8 KB · Views: 10
  • 012.JPG
    012.JPG
    88.3 KB · Views: 10
  • 013.JPG
    013.JPG
    108.3 KB · Views: 11
  • 014.JPG
    014.JPG
    78 KB · Views: 11

piperjoe

Chief Petty Officer
Joined
Jul 11, 2013
Messages
563
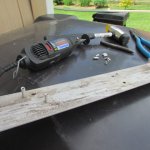
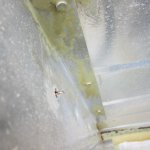
Went outside this morning and started stripping paint off the last gunwale piece. Wow...it got hot and humid in a hurry! While the Citristrip was doing its thing on the gunwale paint I removed the rivets that were still in the aluminum floor strips that had been removed earlier. Used a Dremel Tool with one of those fiber disk cutoff wheels to cut through one side of the rivet, broke the cut rivet end off and pulled the rivet out with pliers from the other side of the aluminum floor strip; had to use a punch and hammer on a few of them to free the rivet enough to pull it out. Lots of old rivet halves but they are all out now. Now I can get the floor strips cleaned for reuse. Going out in the garage to look for the plywood piece that fits on to the middle of the aluminum transom sheet. Need it for a template to make a new piece so I hope I can find it.

Safe boating,
Joe
 

renns

Petty Officer 1st Class
Joined
Dec 20, 2017
Messages
316
Sorry to hear the drill guide didn't work out. That's disappointing for sure. Sounds like the job got done just fine without it though.
I've enjoyed using the pneumatic rivet gun I bought for this task. It is very satisfying to push the rivet into place, and while maintaining nice even pressure, just pulling the trigger. Aluminum even in 3/16" sets fine with the manual riveter as well, but it does get a bit fiddly trying to hold the tool perpendicular to the workpiece while squeezing. First world problems, I suppose!
 

piperjoe

Chief Petty Officer
Joined
Jul 11, 2013
Messages
563
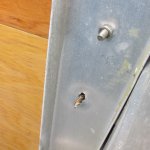
Actually, the drill guide was a great idea. However, from what I have been able to find out from reviews and such, it's hard to find a guide design like the one I used that will consistently drill straight holes. The chuck on the drill guide wants to allow the drill bit to wander if not assembled precisely at the factory. Mine had quite a bit of free play in the guide chuck. Nevertheless, the job turned out fine for the first time I have attempted such a restoration step even though finished without a drill guide. If someone could design a drill guide that actually held the guide chuck true to the desired drill angle so that the drill bit drilled straight they could most likely make a lot of money. I would gladly pay for a drill guide that worked, even at twice the price of the one I returned. As for the pneumatic rivet gun I believe I made the correct decision regarding the Milwaukee tool; it's a great tool in and of itself but would be overkill for me for what I am doing. If I was a younger man I would have kept it without a doubt and would have been glad to have the tool. As it is now the pneumatic riveter should be fine for the restoration job at hand.

Safe boating,
Joe
 
Last edited:

piperjoe

Chief Petty Officer
Joined
Jul 11, 2013
Messages
563
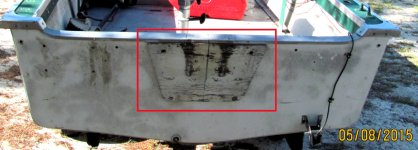
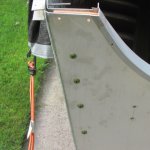
Finishing the paint removal work on the remaining gunwale part. Found the plywood piece that bolts (lots of bolts!) onto the aluminum transom sheet for the motor and it is in nice condition for template use; I will make a new one from marine plywood and coat it with West Systems epoxy just as I did the transom wood. Only thing is that it looks like I have to cut the remaining plywood flooring pieces first to get the most out of the sheets. But that is okay 👌 'cause I can use a break from paint stripping ! Time for lunch and then back at it...

Safe boating,
Joe
 

piperjoe

Chief Petty Officer
Joined
Jul 11, 2013
Messages
563
Paint removal task finished on the various gunwale pieces. Big step for me. Lots of naked aluminum showing up around here! Next up for paint removal is either the splash pan/cover (BIG) or the inside bow area...that's big too.

Question regarding the plywood piece that goes on the aft side of the aluminum transom sheet. I plan on putting West Systems epoxy on the marine plywood surface that goes against the aluminum transom sheet to waterproof the plywood surface. Should I coat the rest of this piece with spar varnish (3 coats) as the plywood edges and outside surface can be subject to the Sun's rays? I know that radiation from the Sun can adversely affect the epoxy coating over time and have read that spar varnish can be the best choice in a situation like this. Thoughts?

Safe boating,
Joe
 

BOYS & TOYS

Petty Officer 2nd Class
Joined
Mar 1, 2008
Messages
146
Paint removal task finished on the various gunwale pieces. Big step for me. Lots of naked aluminum showing up around here! Next up for paint removal is either the splash pan/cover (BIG) or the inside bow area...that's big too.

Question regarding the plywood piece that goes on the aft side of the aluminum transom sheet. I plan on putting West Systems epoxy on the marine plywood surface that goes against the aluminum transom sheet to waterproof the plywood surface. Should I coat the rest of this piece with spar varnish (3 coats) as the plywood edges and outside surface can be subject to the Sun's rays? I know that radiation from the Sun can adversely affect the epoxy coating over time and have read that spar varnish can be the best choice in a situation like this. Thoughts?

Safe boating,
Joe
If you're asking about the wood between the motor to transom I prefer to replace it with 3/16" or thicker 5052 aluminum plate. Butter with 3M 5200 before installing.
No reason to use wood
 

piperjoe

Chief Petty Officer
Joined
Jul 11, 2013
Messages
563
If you're asking about the wood between the motor to transom I prefer to replace it with 3/16" or thicker 5052 aluminum plate. Butter with 3M 5200 before installing.
No reason to use wood
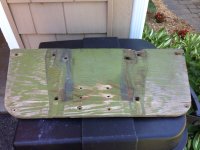
I probably need to take a picture of the plywood piece that has been removed from the Starcraft I am working on and post it. Charging my camera now. The wood piece has lots of drilled holes through it so I don't know if we are thinking of the same item. This plywood piece is the same thickness as the flooring wood and has those six vertical holes (3 on a side) toward the lower center area (a photo would REALLY help here). If I used metal sheet that would be a chore for me to cut to shape and drill all those holes through it...especially those six holes mentioned above that have to line up with the "knee" piece on the inside of the transom by the drain. I will get a photo posted in the morning and apologize for not having done that for clarity.

Safe boating,
Joe
 

BWR1953

Admiral
Joined
Jan 23, 2009
Messages
6,178
If you mean this piece of wood, I deleted the one on my Kingfisher and am doing the same for my Chieftain. I just filled the holes with JB WaterWeld.

Some guys have replaced that piece with sheet aluminum.


motor pad.JPG
 

piperjoe

Chief Petty Officer
Joined
Jul 11, 2013
Messages
563
That is the plywood piece I am referring to. Not sure I would want to eliminate it because I think it acts as a big "washer" and can help to spread the motor mounting/running load across the middle transom area. I am not an engineer and know just enough about my boat to be dangerous, however, that's my thought about the plywood transom piece. As the marine plywood is already on hand in the garage I will just cut a new piece for the boat and drill the various holes in the plywood...don't ask about my experience with drilling engine mounting holes in aluminum motor mounts for the RC model aircraft I built over the years; thank goodness for the fiberglass mounts that were available!

Safe boating,
Joe
 

BOYS & TOYS

Petty Officer 2nd Class
Joined
Mar 1, 2008
Messages
146
Wood rots and isn't used in modern boats in that application. Aluminum also makes a nice washer. Aluminum can be cut/drilled with most wood working tools. It's your boat so you can do as you wish.
 

BWR1953

Admiral
Joined
Jan 23, 2009
Messages
6,178
Wellsir, I'm a retired NASA Space Systems engineer and I can say right now that the plywood "motor pad" doesn't provide any structural strength, which is why I was confident in deleting mine. All it does is add to the workload and expense, then attract moisture and shed paint and whatnot later on.

As Boys & Toys said, it's your boat and you can do what you wish and we'll continue to help as you go along. That's what we do. Just trying to save you time, money and effort. ;)

And I started flying RC in 1972 using Pulse Proportional escapements. (Man, I'm old.) o_O

I flew for 20+ years, then switched over to fishing. Got back into RC again and flew for another dozen years but finally had to stop due to health issues. It was a great hobby and I had a ton of fun, right up until I stopped. Getting old suuuucks...

But, we press on, right? 😏
 

piperjoe

Chief Petty Officer
Joined
Jul 11, 2013
Messages
563
I appreciate your comments B&T, but if that transom wood piece rots while I'm alive with the coating that will be put on it then I'd say there's some serious workmanship problems coming out of my restoration effort. Like I said, however, I am no engineer though I was a senior mechanical designer working with piping systems, equipment design/layout, hanger and support design along with other fossil fuel and nuclear power plant applications. Here is a photo of the rascal piece off the boat. As an aside: just got back from Menards and purchased another 1/2" x4' 8' sheet of marine plywood for the boat flooring and such. $99.99 + tax. 😕

Safe boating,
Joe
 

Attachments

  • IMG_1429.JPG
    IMG_1429.JPG
    2.8 MB · Views: 8

piperjoe

Chief Petty Officer
Joined
Jul 11, 2013
Messages
563
I started RC flying in 1972 also, BWR. Did a lot of instructor time with new pilots over the years, dabbled at writing some articles for the hobby magazines back when and built many of my model aircraft from plans. I truly loved the hobby, however, vertigo problems that come on from time to time put a stop to the fun for me a few years ago. Thankfully I have the boat restoration to work on and the static and wood models downstairs to enjoy.

I am removing the rivets that are still in the two floor supports that attach to the hull ribs, and then those items will be cleaned prior to riveting the aluminum parts to the boat. Need those in place so that I can lay the new marine plywood flooring in place to check the fit.

Safe boating,
Joe
 

piperjoe

Chief Petty Officer
Joined
Jul 11, 2013
Messages
563
Today I finished cutting off some rivets from the aluminum deck straps and the aluminum decking supports with the Dremel Tool and a fiber cutting wheel. Pulled them out with pliers. It's very warm outside this afternoon so I didn't spray the cleaner or water on the four items now, however, I'll most likely do some cleanup work on the aluminum pieces this evening after it cools down a bit and I can work in the shade. I did use my orbital sander with 320 grit, and what was left of the 3M cleaning wheel in my drill, to go over a part of the aluminum decking support and the support sure cleaned up nicely; removed some corrosion and the aluminum "burrs" around rivet holes, too. Didn't do all of the cleanup now 'cause like I said it's Hot out there and feels much better down here in the workshop with the air conditioning on. Going into town to purchase another 3M cleanup wheel or two because I really like using them on the aluminum...makes a huge difference on the metal surface...and I like clean when I'm putting something back together. Even tried the 3M wheel on the aluminum transom cap (where the engine mounts) and that area is clean and shiny now.

Safe boating,
Joe
 

Attachments

  • 003.JPG
    003.JPG
    87.4 KB · Views: 9
  • 004.JPG
    004.JPG
    105.5 KB · Views: 9
  • 007.JPG
    007.JPG
    110 KB · Views: 9
  • 009.JPG
    009.JPG
    82 KB · Views: 10
  • 008.JPG
    008.JPG
    91 KB · Views: 10
  • 011.JPG
    011.JPG
    85.2 KB · Views: 10
  • 012.JPG
    012.JPG
    86.8 KB · Views: 9

piperjoe

Chief Petty Officer
Joined
Jul 11, 2013
Messages
563
I'll start removing paint off the splash cover today; that thing is big and most likely will take awhile for me to do the job. Have not decided whether to use the metal structure that goes under the bow seats or replace that with marine plywood and a fishing platform with pedestal seat. Thinking of a plywood structure under the actual seating area with storage options. This would be covered with the same vinyl flooring that will go on the decking and top of the gunwale. Riders could sit on personal cushions and a pedestal mount can be located on the bow decking. I'd like to mount a trolling motor on the bow and fish from that position and also be able to just hose the bow area down to keep it clean. Back rest cushions would be permanently mounted to the inside of the bow area for rider comfort and looks but anything flat that I can step on would be vinyl flooring covered. Anyway, I am doing a bit of out loud dreaming here and that's fun in and of itself...and keeps me motivated. 😀

Safe boating,
Joe
 

piperjoe

Chief Petty Officer
Joined
Jul 11, 2013
Messages
563
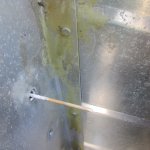
So...what did I accomplish since the last post? Nothing...not a thing. After three days I am finally free of the Migraine headache 🤕 that took up residence in the "upstairs" space so that is good. Man, I am really tired this evening. Tomorrow looks like a good day weather wise so will see what develops. Oh, the Admiral decided on White with Blue trim as the boat colors. I can do that for her! Later...

Safe boating,
Joe
 

piperjoe

Chief Petty Officer
Joined
Jul 11, 2013
Messages
563
The Admiral and I hope you all have a great and safe 4th of July holiday!

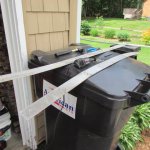
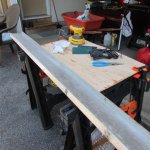
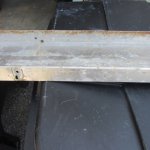
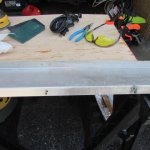
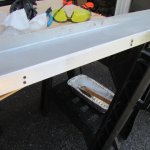
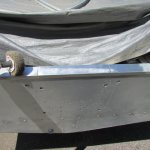
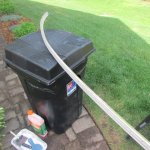
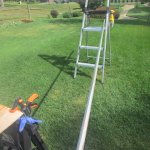
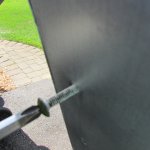
Today I removed paint from the top rub rail channels, or at least I started the process. The po must have touched up the paint (or at least someone did) around the aluminum channels and didn't bother to tape the channels off. Putting Citristrip on those narrow edges wasn't the best idea either. I ended up using a rough grit Scotchbrite pad (purple color) dipped in water with added lemon juice (didn't have any white vinegar in the house). The Citristrip loosened the paint enough to scrape most of it off and the wet Scotch pad took off the rest of the paint so the channel cleaned up nicely. While waiting for the Citristrip to work I marked off the engine mount marine plywood piece so I can cut that out. And then it got hot and humid outside...real hot and humid! Came indoors, took a shower and had an adult beverage down in the model workshop. Much nicer atmosphere! Back at it tomorrow and I'll make an effort to get outdoors earlier to take advantage of the shade before the Sun gets overhead. Thinking about getting one of those pop up shade tents to work under; had one some time ago but gave it to the RC club to use 'cause I wasn't using it at home...might be a good idea to get another one for this boat restoration work.

Safe boating,
Joe
 

Attachments

  • 001.JPG
    001.JPG
    124.2 KB · Views: 6
  • 002.JPG
    002.JPG
    136.9 KB · Views: 6
  • 003.JPG
    003.JPG
    103.9 KB · Views: 6
  • 004.JPG
    004.JPG
    102 KB · Views: 6
  • 005.JPG
    005.JPG
    103.9 KB · Views: 6
  • 006.JPG
    006.JPG
    96.6 KB · Views: 6
  • 009.JPG
    009.JPG
    105.2 KB · Views: 6
  • 008.JPG
    008.JPG
    122.3 KB · Views: 6
  • 007.JPG
    007.JPG
    100.9 KB · Views: 6
Top