1973 Starcraft SuperSport 16ft. restoration questions

MNhunter1

Lieutenant Junior Grade
Joined
May 12, 2014
Messages
1,058
I went back into my photos and sure enough those eight locations that run vertical (4 on port end and 4 on starboard end) are bolts. I had looked at the photos earlier and saw the Phillips style slots in the bolt heads and thought they were screw heads. No wonder I couldn't find the screws! Thanks again for setting me straight. Now I get to see if I can drill the hole straight from the outside aluminum transom through the plywood and make the hole match the aluminum piece that the bolt goes into at the corner; will probably use a smaller diameter drill to make an initial drill path through everything and make sure the three points line up. And do this eight times! This could be interesting!! LOL 😂 I best try this when the Admiral is away and there are no children around...😁

Safe boating,
Joe
The holes should be perpendicular to the transom, but I always like to stick a punch into the holes on the old transom to confirm. I took the transom out and drilled them with a bench top drill press the first time I did it. The last two I made a template/guide from the left over/cut out 1-1/2" transom material, drilled the holes on the drill press, and used the template to hold flat against the transom while drilling the holes. Starting with an undersized bit as you noted is recommended. Slow and steady:)
 

BWR1953

Admiral
Joined
Jan 23, 2009
Messages
6,195
Yup. I o ly
...Now I get to see if I can drill the hole straight from the outside aluminum transom through the plywood and make the hole match the aluminum piece that the bolt goes into at the corner...
I used this mini-drill press and it worked well on my Kingfisher. Gonna use it again on my Chieftain. :cool:


piperjoe

Chief Petty Officer
Joined
Jul 11, 2013
Messages
563
After my lapse of memory regarding the screws versus bolts through the new transom wood, as posted above, I went back and looked at my initial posts and photos...man, do I feel like Shultz...the tear down was easy and the "put it all back together" is going to be quite interesting. Was looking at all those parts still in the garage and the large box of miscellaneous hardware...GEEZOOOW! Glad I took lots of photos 'cause I am certainly going to need them. Wondering if I can put all those parts and plywood into the stripped out hull, go grab the Johnson and haul it all down to the boat dealer so that I can trade it for a ready to launch Lund? Naaaaaaw! It's Starcraft or fish 🐟 from the bank of the lake. Well, I have to go work on the boat so see y'all later...

Safe boating,
Joe
 

piperjoe

Chief Petty Officer
Joined
Jul 11, 2013
Messages
563
The original wood transom was in real nasty shape when it was removed from the boat last year so I basically used it for its outside shape as a template. The various bolt holes were a mess and very soft with dry rot; wood around the hole edges just fell away. The drill guide shown in the above post is a great idea (didn't know there was such a tool available) and I will definitely get it or a similar tool. Should help a lot especially if I use a smaller drill size for the initial drill path check. Thanks again guys for sticking with me on the restoration and offering your helpful comments and tips. Greatly appreciated!

Safe boating,
Joe
 

piperjoe

Chief Petty Officer
Joined
Jul 11, 2013
Messages
563
No work on the boat restoration today but I did give the old gal a hug when I moved her out of the way to mow the grass. Spent a few hours in town with the Admiral looking for one of those drill guides, or similar, like the one noted above. Went to six different stores including Harbor Freight and couldn't find one. I did get the Milwaukee 12M rivet tool and charger with extra battery though and the Admiral was standing right there. What a lady! Oh, looked for 3M 5200 also and didn't locate any of that either. Guess I'll be ordering a few items soon.

Safe boating,
Joe
 

piperjoe

Chief Petty Officer
Joined
Jul 11, 2013
Messages
563
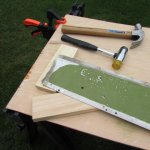
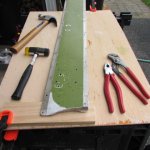
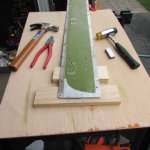
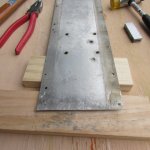
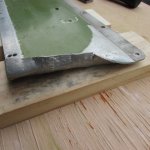
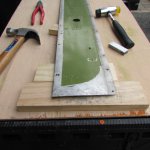
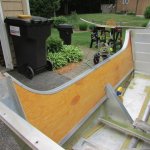
Finished mowing the yard today and then decided to strip some more paint off of the aluminum parts. And as I got everything ready to go it clouded up and started to rain...just enough to put a halt on that idea for the time being. Walked to the boat to pull the tarp over the transom and I noticed the two top gunwale pieces with the turned up ends. I had bent the aft ends upward and out of the way to get the original wood transom out of the boat. So, the sawhorses were pulled over to the front of the garage and placed under the eave overhang and I got a few tools out, placed one of the gunwale pieces on the table, thought about it for a moment and picked up the pliers. Taking my time I was able to walk the pliers across the bent up aluminum edge and gradually bend that turned up metal back down without creasing or putting a new rip in the aluminum. The hammers and a small metal block helped get the aft gunwale edge back into shape. The second gunwale piece had a small rip in the edge and I was able to get the metal back into form without lengthening that rip. I'll drill a small stop hole at the end of the rip and fill the area with JB Marine Weld, smooth it over, and the spot will be good to go. Another new experience for me that turned out better than I expected.

Safe boating,
Joe
 

Attachments

  • 001.JPG
    001.JPG
    91.8 KB · Views: 8
  • 002.JPG
    002.JPG
    92.4 KB · Views: 9
  • 003.JPG
    003.JPG
    92.1 KB · Views: 8
  • 004.JPG
    004.JPG
    87.3 KB · Views: 8
  • 005.JPG
    005.JPG
    87.8 KB · Views: 8
  • 008.JPG
    008.JPG
    85 KB · Views: 9

piperjoe

Chief Petty Officer
Joined
Jul 11, 2013
Messages
563
Well... I thought the idea 💡 was pretty good but the Admiral was not so impressed. I mentioned that I might buy a set of oars and oar locks, a couple of nice boat cushions, and using two plastic milk carrying containers to place the cushions on we could put the boat in the lake and go fishing 🎣!
All I got in response from the Admiral was "Oooooookaaaay." And I was going to let her row the boat too!😁

Safe boating,
Joe
 

Alecapone

Seaman Apprentice
Joined
May 8, 2021
Messages
42
Lol. I mentioned putting the15 horse on and using the boat as is. My idea got the same reception. I probably will for a dunk test. Its funny many of the posts on this forum read like I could have written them. Even cut the grass on the same day!
 

piperjoe

Chief Petty Officer
Joined
Jul 11, 2013
Messages
563
Ha! We probably tend to get into the same kind of trouble with the Admiral too! I have an old Johnson 5.5 that I considered strapping on to the boat, in case the Admiral ran out of "steam" while rowing and the fish were biting, but wasn't sure if the shaft was long enough to keep the prop in the water. Lots of possibilities though...

Safe boating,
Joe
 

piperjoe

Chief Petty Officer
Joined
Jul 11, 2013
Messages
563
...one has to consider it an "oxymoron" situation...started to go outside to strip paint off the boat and noticed it getting darker and looking like rain coming real soon so I stopped. The boat parts might get wet...🙄

Safe boating,
Joe
 

piperjoe

Chief Petty Officer
Joined
Jul 11, 2013
Messages
563
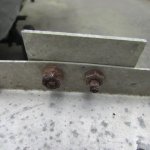
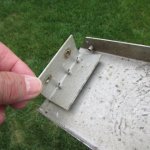
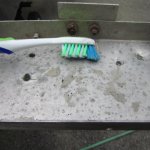
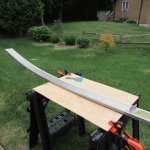
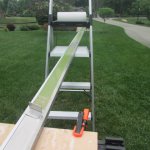
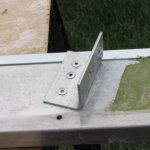
It was a nice day to be outside and I took advantage of the good weather. Used the Citristrip to remove paint off of more gunwale items. While the paint removal process was in the works I got the long curved gunwale pieces out and had a look at them. Removed some rivet shanks and noticed a lot of silicone caulk inside the gunwale port and starboard piece. What a mess because it was dry and flaking off when I ran my hand over the metal. Spent about 45 minutes per gunwale run removing the silicone with a dry toothbrush and a small whisk brush so that the items would be ready for the paint removal process. Did come across an attachment angle piece, held on with three loose rivets, and another attachment angle piece held on by regular steel bolts and nuts...very corroded and rusty. I will reattach those angle items after the paint removal process. Making progress and I enjoyed the time with the boat.

Safe boating,
Joe
 

piperjoe

Chief Petty Officer
Joined
Jul 11, 2013
Messages
563
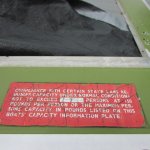
Does anyone know where I can purchase StarCraft type replacement stickers, etc. such as this capacity sticker that is on the gunwale. It's in poor condition and is sure to come off with the paint removal process.

Safe boating,
Joe
 

Attachments

  • 001.JPG
    001.JPG
    88.6 KB · Views: 7

piperjoe

Chief Petty Officer
Joined
Jul 11, 2013
Messages
563
It was a nice day to be outside and I took advantage of the good weather. Used the Citristrip to remove paint off of more gunwale items. While the paint removal process was in the works I got the long curved gunwale pieces out and had a look at them. Removed some rivet shanks and noticed a lot of silicone caulk inside the gunwale port and starboard piece. What a mess because it was dry and flaking off when I ran my hand over the metal. Spent about 45 minutes per gunwale run removing the silicone with a dry toothbrush and a small whisk brush so that the items would be ready for the paint removal process. Did come across an attachment angle piece, held on with three loose rivets, and another attachment angle piece held on by regular steel bolts and nuts...very corroded and rusty. I will reattach those angle items after the paint removal process. Making progress and I enjoyed the time with the boat.

Safe boating,
Joe
Forgot to post the photos with this. You can clearly see the rust and corrosion on the bolts and nuts. Not something I want to ignore. That angle was just rocking in place and quite loose. Here is one area of the gunwale with the silicone that needed removal. Don't want the silicone flakes to eventually fall off and work down to the center drainage area and bilge pumps. It's all cleaned off now. Here you go with the pictures...

Safe boating,
Joe
 

Attachments

  • 006.JPG
    006.JPG
    82.2 KB · Views: 6
  • 007.JPG
    007.JPG
    97.3 KB · Views: 6
  • 008.JPG
    008.JPG
    85.9 KB · Views: 6

MNhunter1

Lieutenant Junior Grade
Joined
May 12, 2014
Messages
1,058
Does anyone know where I can purchase StarCraft type replacement stickers, etc. such as this capacity sticker that is on the gunwale. It's in poor condition and is sure to come off with the paint removal process.

Safe boating,
Joe
Check out Garzon Studios for vinyl decal replacements
 

piperjoe

Chief Petty Officer
Joined
Jul 11, 2013
Messages
563
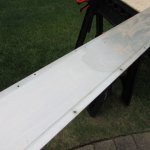
Stripping paint off gunwale items...still. Now I'm taking paint off those long curved port and starboard gunwale parts and I have to say that the Citristrip gel is really making what could be a real smelly and messy chore something that I actually enjoy doing (and no, I don't work for, get paid by or receive compensation from the Citristrip makers). It's nice not having paint removal chemical smells floating around and the Admiral appreciates it too. I did locate the aluminum transom cap and did a fit check to make sure there would be no problem later and the part fit over the wood and aft aluminum sheet nicely. Those tiny screw holes even lined up! Dug out two thin aluminum straps so I can pull the remaining rivet shanks prior to cleaning the straps. That was about it for the boat work today because it got real hot outdoors. Not as young as I used to be as we say from time to time. And...I did experience one of those "duh" moments while looking at and working on the boat parts. For some reason I thought the rivets in my boat were all 3/16" dia. but I'm finding that there are 5/32" dia., 3/16" dia. and even some 1/4" dia. rivet holes and there are some various size shanks to observe still stuck in some parts. I'll need to do a rivet count to get enough of the correct replacement sizes I guess.

Safe boating,
Joe
 

Attachments

  • 003.JPG
    003.JPG
    78.6 KB · Views: 15
  • 005.JPG
    005.JPG
    107.6 KB · Views: 13
  • 013.JPG
    013.JPG
    111.3 KB · Views: 13
  • 015.JPG
    015.JPG
    108.9 KB · Views: 12
  • 016.JPG
    016.JPG
    71.6 KB · Views: 13
  • 017.JPG
    017.JPG
    111.7 KB · Views: 15
  • 019.JPG
    019.JPG
    107.5 KB · Views: 16

BWR1953

Admiral
Joined
Jan 23, 2009
Messages
6,195
Nice work!

I noticed the different size rivets on my Chieftain as well. I decided to upgrade all the 5/32" rivets to 3/16" both for increased strength and to reduce the need for a variety of sizes.
 

Alecapone

Seaman Apprentice
Joined
May 8, 2021
Messages
42
I like that cover. I don't have indoor space right now. Regular tarp don't cut it. Does it shed puddles when it rains hard?
 

piperjoe

Chief Petty Officer
Joined
Jul 11, 2013
Messages
563
Nice work!

I noticed the different size rivets on my Chieftain as well. I decided to upgrade all the 5/32" rivets to 3/16" both for increased strength and to reduce the need for a variety of sizes.
That is what I was considering today. Would not be much more work to drill out those 5/32" rivet locations to 3/16"diameter and get the benefit from the 3/16" rivets. Fresh hole sizing, fresh metal edging around the hole and a bigger rivet (without going overboard on size) sounds like a strong restoration process.

Safe boating,
Joe
 

piperjoe

Chief Petty Officer
Joined
Jul 11, 2013
Messages
563
I like that cover. I don't have indoor space right now. Regular tarp don't cut it. Does it shed puddles when it rains hard?
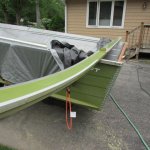
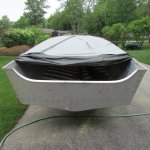
The boat covering in the photos is a tarp I purchased at Menards last Fall to cover the boat for Winter. I use a number of bungee cords to tie the tarp down to the trailer. It didn't cost much money but it did the job by way of keeping the snow out of the boat hull. And yes, it leaks a bit but I just use a large sponge to remove the water that collects below the drain plug outlet. Does the job for now and I plan on having a custom boat cover sewn for the boat once the windows, motor and other items are mounted back onto the boat. Haven't decided on the color(s) for the boat yet so I would not know the cover color to order. Still plenty to keep me busy on the restoration for some time before the color choice has to be confirmed. Especially at my speed...or lack of it! 😂

Safe boating,
Joe
 
Top