Turned out better and easier than expected.
So progressed to next level of madness.
So progressed to next level of madness.


Interesting concept. I did that a little differently when I was confronted with the variable angles everywhere in my hull. But like I said a lot of times before, there is no one way only to do most anything. And I see you are like most of us. And that is we all wanted to do the absolute best effort rebuilding our boat projects to make them last and last. I went as far as dado-ing joints together for the added strength. Nothing wrong with building over board. So if you like it, go for it... But remember, you have to post pictures on here or it never happened. Thumbs Up!
Yes gm280.Interesting concept. I did that a little differently when I was confronted with the variable angles everywhere in my hull. But like I said a lot of times before, there is no one way only to do most anything. And I see you are like most of us. And that is we all wanted to do the absolute best effort rebuilding our boat projects to make them last and last. I went as far as dado-ing joints together for the added strength. Nothing wrong with building over board. So if you like it, go for it... But remember, you have to post pictures on here or it never happened. Thumbs Up!
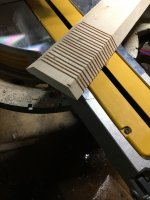
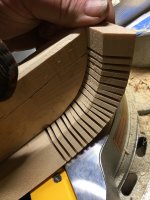
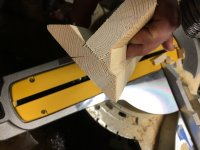
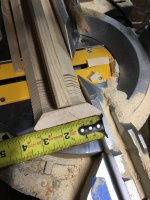
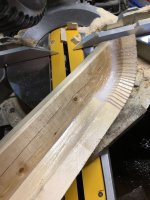
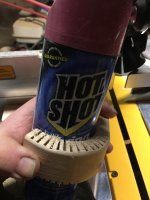
Since we turned the page.So my cut and gut thread has wood shop class too..Lol.
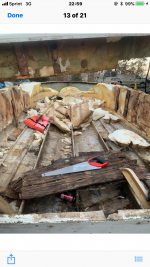
I was somewhat concerned the thin layers of wood being weak to break under load in the radius. In a pounding situation.
Anyone see a potential problem with this.?
I figure the epoxy and by time it gets glass over it, things should be ok.
Thanks everyone for your help and replies.
So my cut and gut thread has wood shop class too..Lol.
I was somewhat concerned the thin layers of wood being weak to break under load in the radius. In a pounding situation.
Anyone see a potential problem with this.?
I figure the epoxy and by time it gets glass over it, things should be ok.
Thanks everyone for your help and replies.
Do you mind if I PM you.if i recall your mako hull has foam on sides and the back is bonded to the bottom at transom

I'm certainly not doubting that it's possible this can happen, but does anyone have a link to a thread or some first-hand story of someone actually rebuilding a boat with no cradle and the cap not being able to be put back on?One thing you really need to do NOW! You need to support the sides so when you do try to recap it back, the actual cap will fit on. It is so easy to do all that work and the sides splay out enough to never allow the cap to fit back on.
I don’t have a link or a 1st hand story.I'm certainly not doubting that it's possible this can happen, but does anyone have a link to a thread or some first-hand story of someone actually rebuilding a boat with no cradle and the cap not being able to be put back on?
last 2 builds i had no cradle but i did make sure that the bottom was well supported and not flexed by bunks i can see a hull getting out of shape by a roller and then you glassing inside and that keeping the out of shape shape , same with bunks if not on a chineI'm certainly not doubting that it's possible this can happen, but does anyone have a link to a thread or some first-hand story of someone actually rebuilding a boat with no cradle and the cap not being able to be put back on?
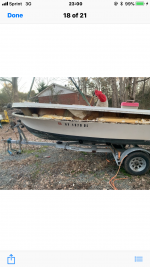
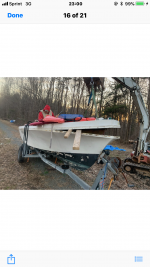
I have many pics to upload, But that will be later, prob tomorrow..grats on the cap removal i figured it was transom holding you together the most